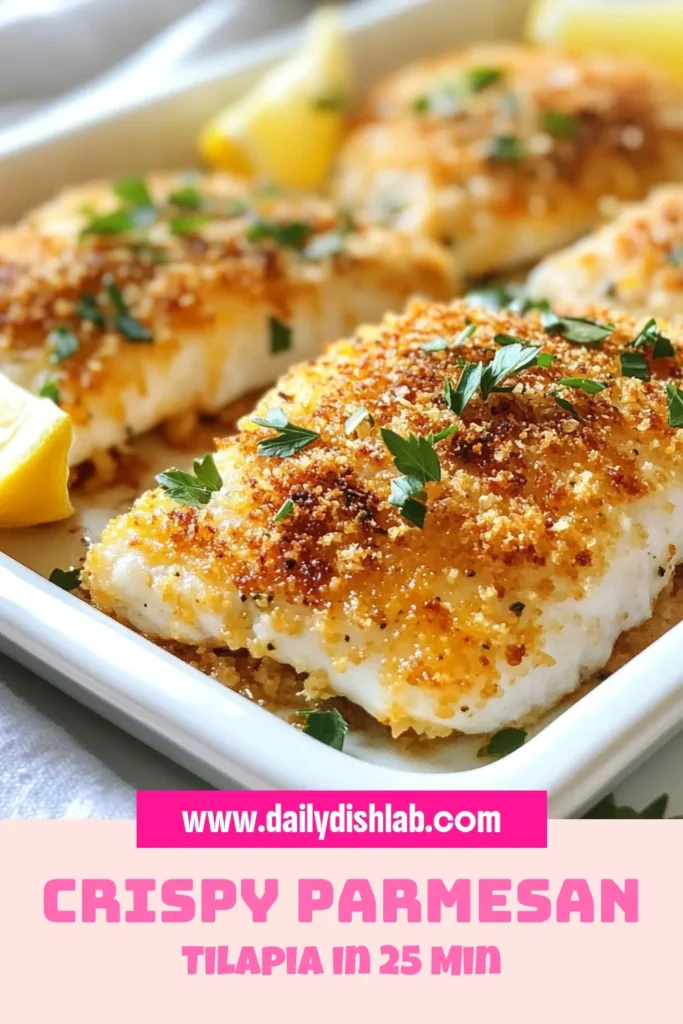
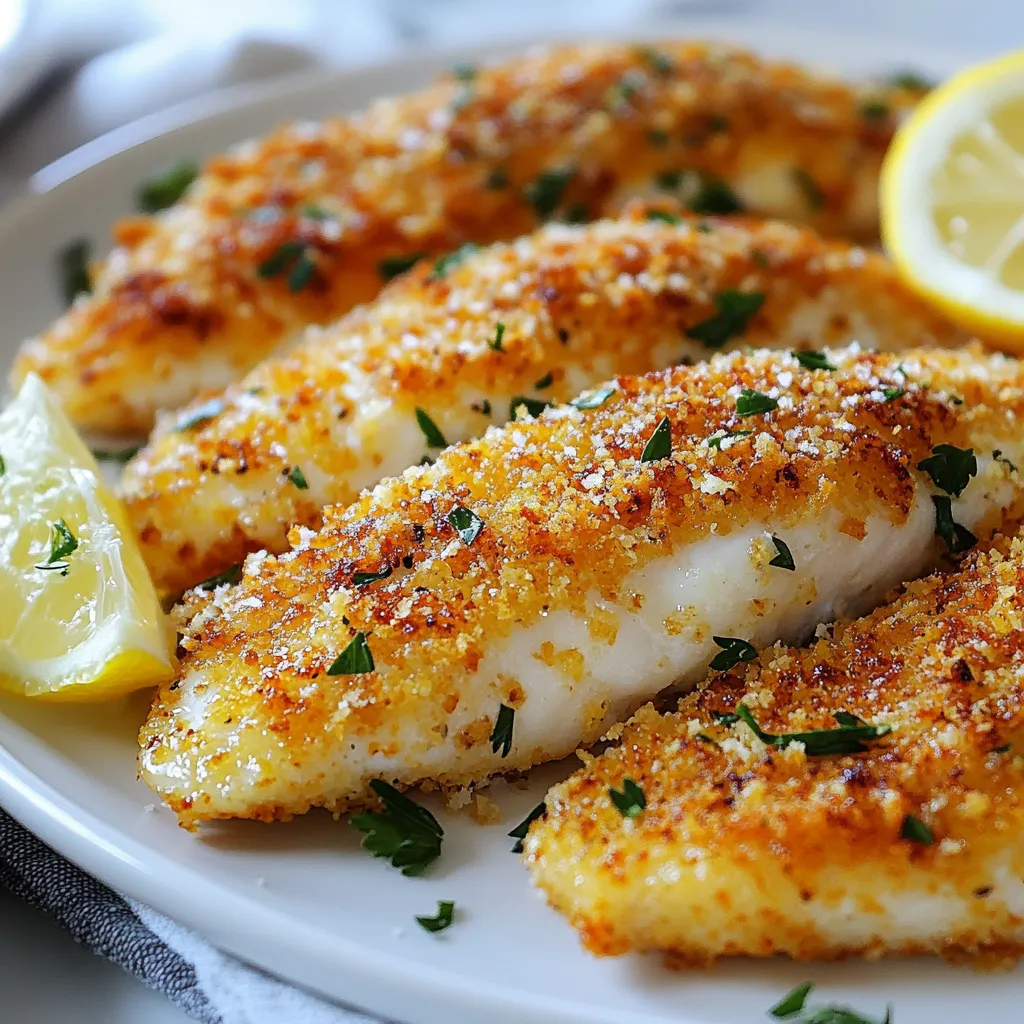
Parmesan Crusted Tilapia Tasty and Easy Dinner Recipe
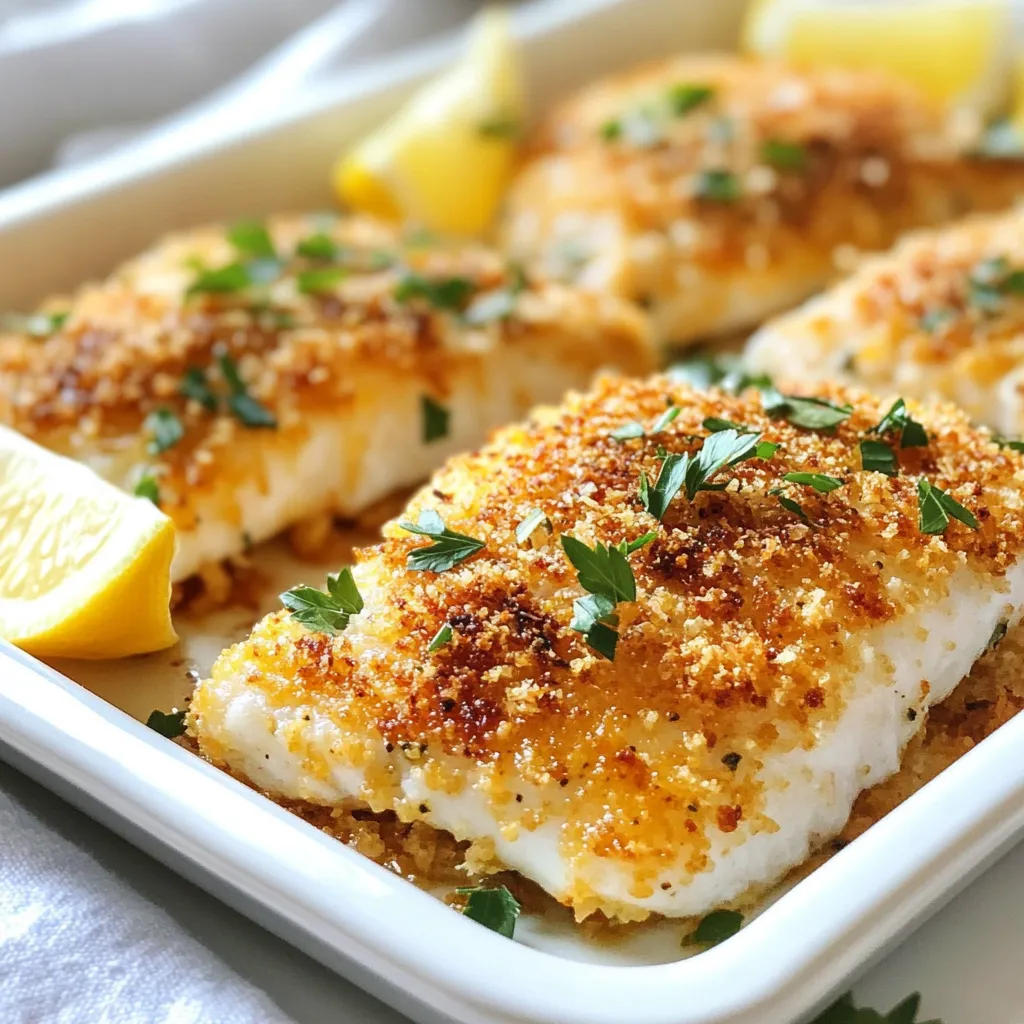
Looking for a simple yet delicious dinner? I have just the recipe for you: Parmesan Crusted Tilapia. This tasty dish is quick to make and filled with flavor. With just a few ingredients, you can impress your family or guests. In this post, I’ll share the steps to create a perfect crust, tips for flaky fish, and fun variations to try. Let’s dive in and make dinner a breeze!
Why I Love This Recipe
- Quick and Easy: This recipe is perfect for busy weeknights, taking only 25 minutes from start to finish.
- Crispy and Flavorful: The Parmesan crust provides a delightful crunch and a burst of flavor with every bite.
- Healthy Choice: Tilapia is a lean source of protein, making this dish a nutritious option for any meal.
- Versatile Presentation: This dish pairs beautifully with various sides, allowing for endless meal combinations.
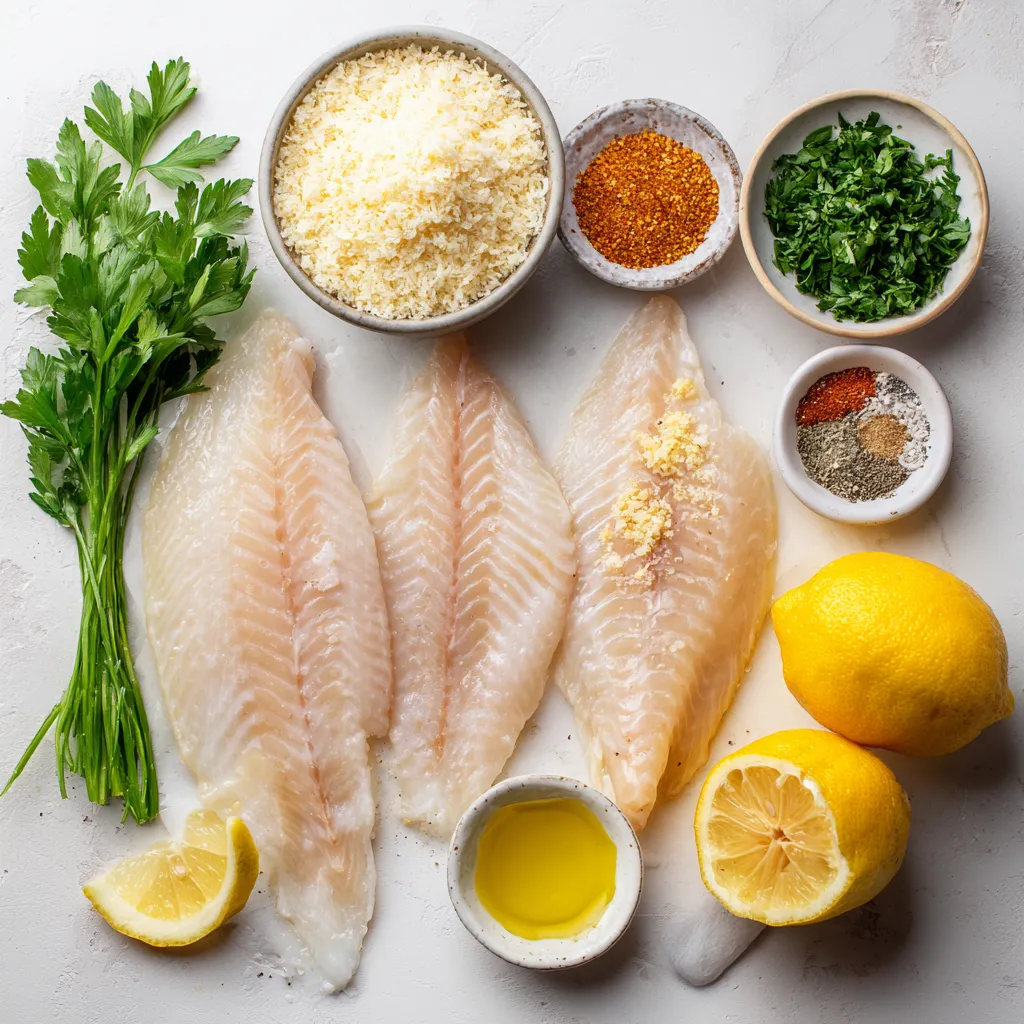
Ingredients
List of Ingredients
- 4 tilapia fillets
- 1 cup grated Parmesan cheese
- 1/2 cup breadcrumbs (preferably panko for extra crunch)
- 2 tablespoons fresh parsley, chopped
- 1 teaspoon garlic powder
- 1 teaspoon onion powder
- 1/2 teaspoon paprika
- Salt and pepper to taste
- 2 tablespoons olive oil
- 1 lemon, for garnish
Nutritional Information per Serving
Each serving of Parmesan Crusted Tilapia contains approximately:
- Calories: 300
- Protein: 30g
- Carbohydrates: 15g
- Fat: 15g
- Fiber: 1g
This dish is a great source of protein and makes a balanced meal.
Ingredient Substitutions
You can switch out a few ingredients if needed:
- Use cheddar instead of Parmesan for a different taste.
- Substitute whole wheat breadcrumbs for panko for added fiber.
- Try garlic salt instead of garlic powder for more flavor.
- Use vegetable oil instead of olive oil for frying.
- Fresh herbs can replace dried parsley for a fresher taste.
These swaps keep the dish tasty while fitting your needs.
Step-by-Step Instructions
Preparation of Ingredients
Gather all your ingredients before starting. This makes cooking easier. You will need:
- 4 tilapia fillets
- 1 cup grated Parmesan cheese
- 1/2 cup breadcrumbs (panko works best)
- 2 tablespoons fresh parsley, chopped
- 1 teaspoon garlic powder
- 1 teaspoon onion powder
- 1/2 teaspoon paprika
- Salt and pepper to taste
- 2 tablespoons olive oil
- 1 lemon for garnish
First, preheat your oven to 400°F (200°C). This step is key for a crispy crust. Line a baking sheet with parchment paper to prevent sticking.
In a mixing bowl, combine the Parmesan cheese, breadcrumbs, parsley, garlic powder, onion powder, paprika, salt, and pepper. Stir until everything mixes well. This mixture gives the fish a great flavor and crunch.
Cooking Process
Now it is time to prepare the tilapia. Pat the fillets dry with a paper towel. Dry fillets help the crust stick better. Place the tilapia on the prepared baking sheet.
Drizzle olive oil over each fillet. Make sure each piece gets a good coat. Next, take your Parmesan mixture and press it firmly onto the top of each fillet. This creates a nice crust when baked.
Put the baking sheet in the preheated oven. Bake for 12 to 15 minutes. The fish is done when it flakes easily with a fork and the crust is golden brown.
Final Steps for Serving
Once cooked, remove the baking sheet from the oven. Let the tilapia cool for about a minute. This short wait helps the crust set.
For a bright touch, garnish with lemon wedges. Squeezing lemon juice over the fish adds a fresh flavor. Serve the tilapia on a platter with veggies or a salad. Enjoy your tasty dinner!
Tips & Tricks
Best Practices for Perfect Crust
To make the crust just right, use panko breadcrumbs. They give a crunchy bite. Press the Parmesan mix firmly onto the fish. This helps it stick. Bake at 400°F for a golden finish. Keep an eye on the fish. It will be done when it flakes easily.
How to Achieve Flaky Fish
To get flaky tilapia, pat the fillets dry first. This removes extra moisture. When you cook, don’t overdo it. Fish cooks fast. Bake for 12 to 15 minutes. Check for doneness with a fork. If it flakes, it’s ready to eat.
Serving Suggestions and Pairings
Serve your tilapia on a bright platter. Add steamed veggies or a fresh salad. Lemon wedges add a nice touch. Squeeze some juice over the fish before serving. This brightens the dish. For drinks, pair it with white wine or sparkling water. Enjoy!
Pro Tips
- Use Panko Breadcrumbs: For an extra crunchy and delightful texture, opt for panko breadcrumbs instead of regular ones.
- Pat Fish Dry: Ensure the tilapia fillets are patted dry with a paper towel to achieve a crispier crust.
- Don’t Overbake: Keep an eye on the fish while baking; remove it from the oven as soon as it flakes easily to prevent dryness.
- Herb Variations: Experiment with different fresh herbs like basil or dill for a unique flavor twist in the crust.
Variations
Alternate Cheese Options
You can switch up the cheese for different flavors. Try using Pecorino Romano for a sharper taste. Feta cheese can add a tangy twist. If you want a creamy touch, go for a blend of mozzarella and Parmesan. Each cheese brings its own unique flavor to the dish.
Adding Vegetables or Herbs
Mixing in veggies or fresh herbs can enhance the dish. Try adding chopped spinach or kale for extra nutrients. You can also sprinkle some sun-dried tomatoes for a burst of taste. Fresh herbs like basil or dill can brighten the dish. Just add them to the cheese mix or as a garnish.
Cooking Methods: Baking vs. Air Frying
You can bake or air fry your tilapia. Baking gives a lovely golden crust and is easy to do. Air frying cooks the fish faster and keeps it crispy. If you choose to air fry, set it to 375°F for about 8-10 minutes. Both methods yield delicious results, so pick what you prefer!
Storage Info
Best Practices for Refrigeration
To keep your Parmesan crusted tilapia fresh, store it in an airtight container. Make sure it cools to room temperature before sealing. Place it in the fridge for up to three days. This helps maintain the taste and texture.
Freezing for Later Use
You can freeze the tilapia if you want to save it for later. Wrap each fillet tightly in plastic wrap. Then, put them in a freezer-safe bag. It can last for up to two months in the freezer. Label the bag with the date for easy tracking.
Reheating Instructions
When you’re ready to eat, preheat your oven to 350°F (175°C). Place the tilapia on a baking sheet. Cover it with foil to keep it moist. Heat for about 10-15 minutes, or until warmed through. You can also reheat it in the microwave for about 1-2 minutes. Just be careful not to overcook it!
FAQs
Can I use a different type of fish?
Yes, you can use other fish. Good options are cod, haddock, or flounder. All these fish have mild flavors. They also cook well with a crispy topping. Adjust the cooking time based on the thickness of the fillets. Thicker fish may need a bit more time in the oven.
How can I make it gluten-free?
To make this dish gluten-free, swap breadcrumbs with gluten-free options. You can use gluten-free panko or crushed gluten-free crackers. Look for brands that clearly label their products as gluten-free. This change keeps the crunch while making it safe for gluten-sensitive eaters.
What sides go well with Parmesan Crusted Tilapia?
Several sides pair nicely with Parmesan crusted tilapia. Try steamed vegetables like broccoli or green beans. A fresh green salad also works great. You might serve it with rice or quinoa for a filling meal. A squeeze of lemon over the top adds a nice touch, too.
This article covered the essential ingredients for making Parmesan Crusted Tilapia. We discussed the nutritional value, ingredient swaps, and preparation steps. I shared tips for achieving a perfect crust and ideas for different variations. We also looked at how to store and reheat your dish. In closing, this meal is simple yet delicious, and it can fit any taste. Try it out and enjoy a tasty dish that you made yoursel

Parmesan Crusted Tilapia
Ingredients
- 4 fillets tilapia
- 1 cup grated Parmesan cheese
- 0.5 cup breadcrumbs
- 2 tablespoons fresh parsley, chopped
- 1 teaspoon garlic powder
- 1 teaspoon onion powder
- 0.5 teaspoon paprika
- to taste salt and pepper
- 2 tablespoons olive oil
- 1 lemon, for garnish
Instructions
- Preheat your oven to 400°F (200°C) and line a baking sheet with parchment paper.
- In a mixing bowl, combine the grated Parmesan cheese, breadcrumbs, chopped parsley, garlic powder, onion powder, paprika, salt, and pepper. Mix well until combined evenly.
- Pat the tilapia fillets dry with a paper towel and place them on the prepared baking sheet.
- Drizzle the olive oil over each tilapia fillet, ensuring they are evenly coated.
- Press the Parmesan breadcrumb mixture firmly onto the top of each fillet, coating them evenly.
- Bake in the preheated oven for 12-15 minutes, or until the fish flakes easily with a fork and the crust is golden brown.
- Remove from the oven and let cool for a minute before serving.
- Garnish with lemon wedges for a fresh zest while serving.


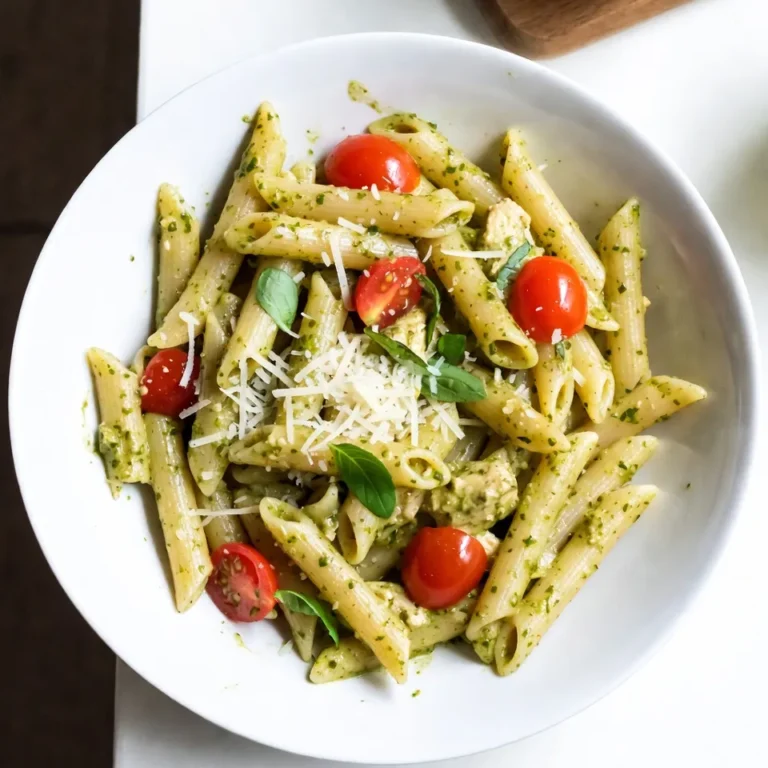
![- 2 cups cooked rice (white or brown) - 1 lb boneless, skinless chicken breasts, diced - 2 cups broccoli florets (fresh or frozen) - 1 cup heavy cream - 1 cup chicken broth - 1 cup grated Parmesan cheese - 2 cups shredded mozzarella cheese - 2 tablespoons olive oil - 3 cloves garlic, minced - 1 teaspoon Italian seasoning - Salt and pepper to taste - Fresh parsley, chopped (for garnish) When creating my Chicken and Rice Skillet Alfredo Bake, I focus on fresh and simple ingredients. The rice serves as the base, and you can use either white or brown rice. Both options bring a nice texture. I always use boneless, skinless chicken breasts because they are lean and cook quickly. Adding broccoli is a great way to boost nutrition. You can use fresh florets or frozen ones, whichever you have on hand. The heavy cream and chicken broth create a rich sauce that binds everything together. I love using both Parmesan and mozzarella cheese. Parmesan adds a sharp flavor, while mozzarella gives a creamy melt. Olive oil is my go-to for sautéing the chicken. Garlic brings a wonderful aroma and taste to the dish. Italian seasoning adds depth to the flavor. Finally, I season with salt and pepper to enhance all the ingredients. A sprinkle of fresh parsley adds a pop of color and freshness to finish the dish. This recipe is perfect for families or a cozy dinner with friends. You can find the full recipe [here]. - Preheat your oven to 375°F (190°C). Getting the oven hot is key to a great bake. This helps the cheese melt perfectly and gives a nice color to the top. - Heat olive oil over medium heat. - Season and cook diced chicken until no longer pink (5-7 mins). In a large skillet, add olive oil. Let it heat for a minute. Then, toss in your seasoned chicken. You want to cook it until it’s no longer pink. This usually takes about 5 to 7 minutes. Stir often to make sure it cooks evenly. - Add garlic, rice, and broccoli to the skillet. - Combine the cream mixture and cheese before baking. Once the chicken is cooked, add minced garlic. Cook it for just a minute until fragrant. Then, stir in the cooked rice and broccoli. Mix well. In a bowl, whisk together heavy cream, chicken broth, and half the Parmesan cheese. Pour this over the chicken and rice. Stir until everything is combined. This step is crucial because it brings all the flavors together. It’s the heart of the dish. After mixing, sprinkle the top with mozzarella and the rest of the Parmesan. Now, your dish is ready for the oven! For the full recipe, refer to the above ingredients and steps. - Make sure the chicken is cooked through but not dry. - To check, cut into a piece. It should be white, not pink. If it is still pink, keep cooking it for a bit longer. - Choose the right type of rice for the perfect texture. - I suggest using long-grain rice. It holds up well when mixed with sauce. Brown rice gives a nutty taste, while white rice is softer. - Garnish with freshly chopped parsley for color. - Just a sprinkle adds bright green and freshness to your dish. It makes it look fancy! - Serve with a side salad for a balanced meal. - A simple green salad with a light dressing can complement the creamy dish well. It adds crunch and freshness. These tips can help you create a tasty Chicken and Rice Skillet Alfredo Bake that looks great on the table. For the full recipe, check the above section. {{image_2}} You can easily change this recipe to fit your needs. Here are some quick ideas: - Use cauliflower rice for a low-carb version. This swap keeps the dish tasty and light. - Substitute chicken with shrimp or tofu for different proteins. Both options add unique flavors and textures. Want to spice things up? Here are some flavor additions: - Add spicy seasonings for heat. A pinch of cayenne or red pepper flakes can make it pop. - Incorporate different vegetables like bell peppers or spinach. These veggies not only add color but also boost nutrition. Feel free to mix and match these ideas to create your perfect Chicken and Rice Skillet Alfredo Bake. Your taste buds will thank you! For the full recipe, check out the details above. Store your Chicken and Rice Skillet Alfredo Bake in an airtight container. It keeps well in the fridge for up to three days. If you have extra portions, freezing them is a great option. For freezing, use freezer-safe bags or containers. Remove as much air as possible to prevent freezer burn. Label the container with the date before placing it in the freezer. You can reheat your dish in the microwave or oven. For the microwave, place a portion in a bowl and cover it with a damp paper towel. Heat for one to two minutes, stirring halfway. For the oven, preheat it to 350°F (175°C). Place the dish in an oven-safe container, cover it with foil, and heat for about 20 minutes. This method helps keep the cheese nice and melty. To maintain texture, add a splash of cream or broth before reheating. This helps prevent it from drying out. Enjoy your comforting meal again! - Can I make this dish ahead of time? Yes, you can. Prepare the dish up to the baking step, then store it in the fridge. When ready, bake it for about 25 minutes at 375°F (190°C). This makes it easy for busy days. - How do I know when the chicken is cooked through? The chicken should be white and no longer pink in the center. You can also use a meat thermometer. It should read 165°F (74°C) to ensure it's safe to eat. - What can I serve with Chicken and Rice Skillet Alfredo Bake? This dish pairs well with a fresh side salad or steamed vegetables. You can also serve garlic bread for added comfort. - Is it possible to make this dish gluten-free? Yes, you can make it gluten-free. Just use gluten-free pasta or rice. Check that your chicken broth does not contain gluten. This way, everyone can enjoy the meal! For the full recipe, check out the detailed instructions above and enjoy a hearty comfort meal! This Chicken and Rice Skillet Alfredo Bake is simple and tasty. We covered every step, from selecting fresh ingredients to storing leftovers. Remember, you can customize the recipe with different proteins and spices. This dish is perfect for a quick dinner. Keep experimenting with flavors and textures. Enjoy the cooking process and have fun with your food. Your family will love this meal!](https://dailydishlab.com/wp-content/uploads/2025/06/4392da79-0369-4862-8466-e1a2d5a9e46b-768x768.webp)