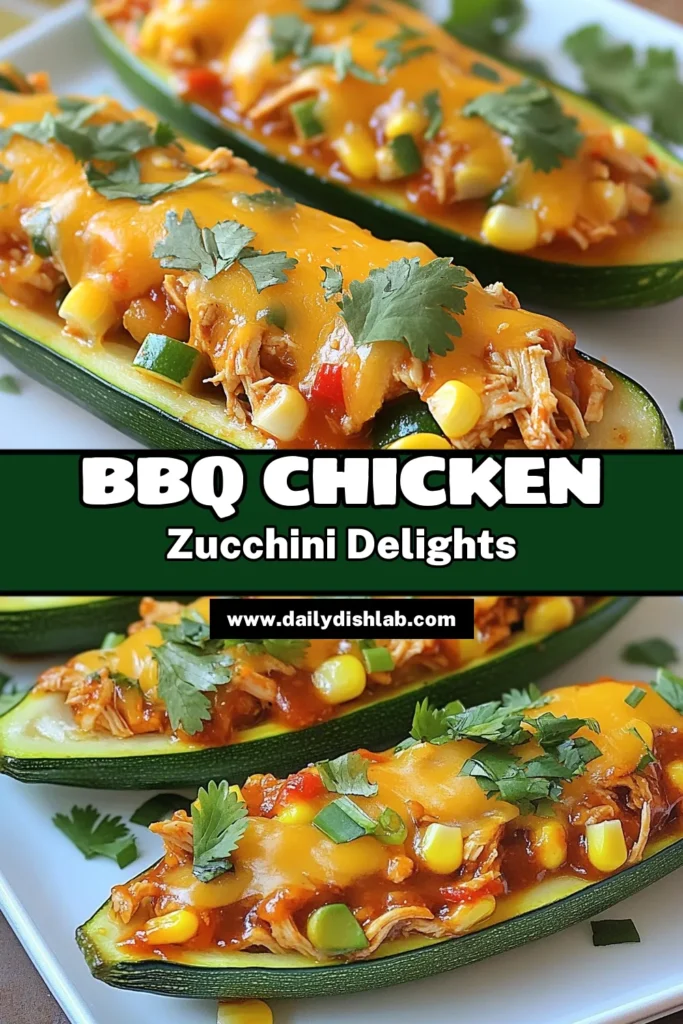
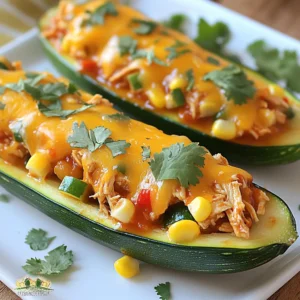
BBQ Chicken Zucchini Boats Flavorful and Filling Dish

Are you ready to discover a delicious way to enjoy BBQ flavors? These BBQ Chicken Zucchini Boats are not only flavorful but also filling. Packed with goodness, they make a great meal for any night. In this post, I’ll guide you through the ingredients and steps to create this tasty dish. Let’s dive in and turn your kitchen into a BBQ haven!
Why I Love This Recipe
- Healthy and Delicious: These BBQ chicken zucchini boats are a guilt-free option that is both nutritious and full of flavor.
- Easy to Prepare: With just a few simple steps, you can have a tasty meal ready in under an hour, making it perfect for busy weeknights.
- Customizable: You can easily substitute different proteins or add extra veggies, allowing you to make this dish your own!
- Kid-Friendly: The fun presentation of zucchini boats makes this dish appealing to children, encouraging them to eat healthy.
Ingredients
List of Ingredients
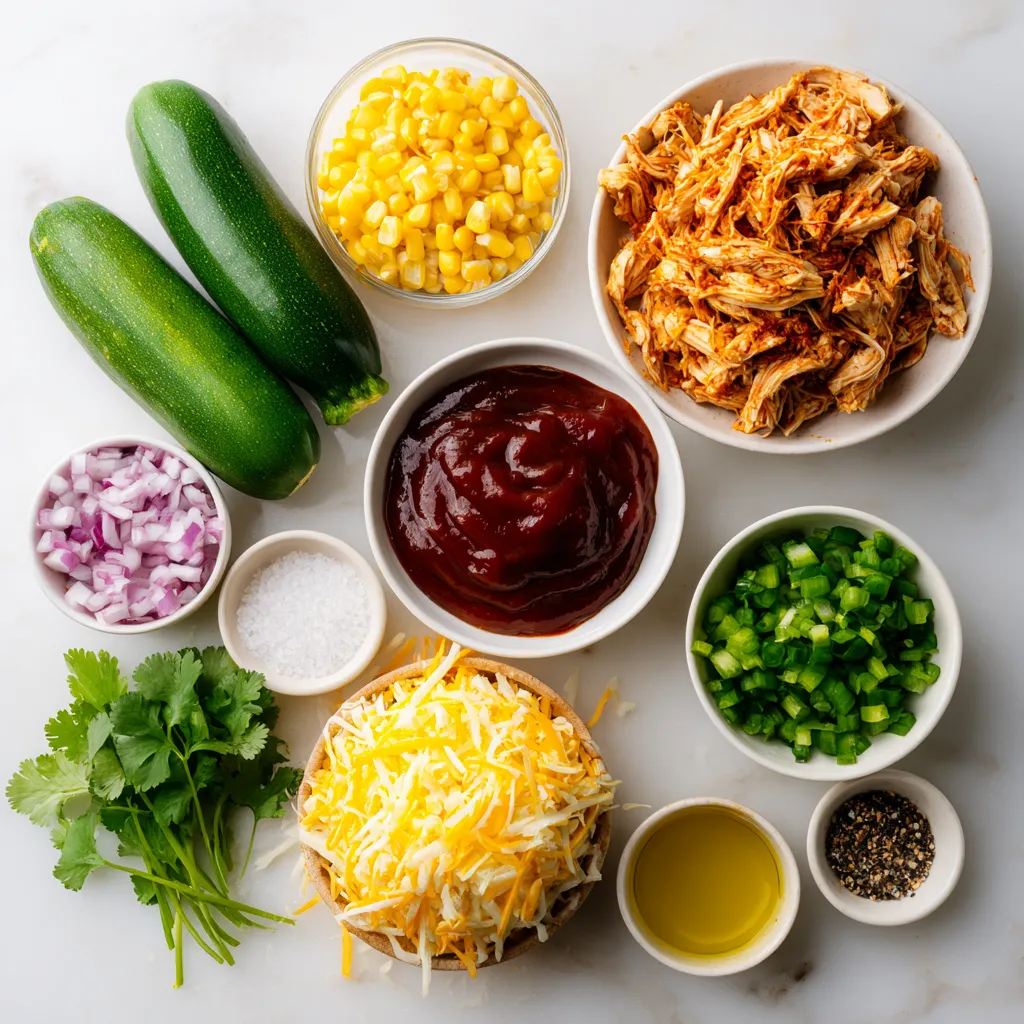
- 4 medium zucchinis
- 2 cups cooked chicken, shredded
- 1 cup BBQ sauce (your choice)
- 1 red bell pepper, finely diced
- 1/2 cup red onion, finely chopped
- 1 cup corn kernels (canned or frozen)
- 1 cup shredded cheddar cheese
- 2 tablespoons olive oil
- Salt and pepper to taste
- Fresh cilantro, for garnish
Optional Ingredients for Added Flavor
You can add more flavors with these options:
- Chopped jalapeños for heat
- Black beans for extra protein
- Sliced green onions for crunch
- A squeeze of lime juice for zest
Nutritional Information per Serving
One serving offers:
- Calories: 360
- Protein: 30g
- Carbohydrates: 28g
- Dietary Fiber: 4g
- Total Fat: 16g
- Saturated Fat: 7g
- Sugars: 10g
Knowing what goes into your food helps you make better choices. Each ingredient plays its part in taste and nutrients. Zucchini is low in calories and high in vitamins. The chicken adds protein, while the BBQ sauce brings a sweet and tangy kick. Adding corn gives a nice texture, and cheese melts beautifully on top. These facts make this dish both tasty and good for you.
Step-by-Step Instructions
Preparing the Zucchini Boats
To start, preheat your oven to 375°F (190°C). Next, take 4 medium zucchinis and slice them in half lengthwise. Use a spoon to scoop out the seeds and some flesh, making a boat shape. This step is key for holding the filling. Lightly sprinkle salt and pepper inside each zucchini half to add flavor.
Cooking the BBQ Chicken Filling
In a large skillet, heat 2 tablespoons of olive oil over medium heat. Add 1 finely diced red bell pepper and 1/2 cup of finely chopped red onion. Sauté these for about 3 to 4 minutes until they soften. Then, mix in 2 cups of shredded cooked chicken and 1 cup of corn kernels. Stir well to combine. Pour in 1 cup of your favorite BBQ sauce and mix again. Cook for another 2 to 3 minutes until everything is heated.
Assembling and Baking the Zucchini Boats
Now it’s time to fill the zucchini boats! Generously spoon the BBQ chicken mixture into each half. Make sure to pack it well. Next, sprinkle 1 cup of shredded cheddar cheese on top of each filled boat for that delicious cheesy goodness. Place the filled zucchini boats on a baking sheet and bake them in the oven for 20 to 25 minutes. You want the zucchinis to be tender and the cheese bubbly. When done, take them out and let them cool for a couple of minutes. Garnish with fresh cilantro before serving. Enjoy your tasty BBQ chicken zucchini boats!
Tips & Tricks
How to Cut and Scoop Zucchini Effectively
To cut zucchini, start by washing it well. Place the zucchini on a cutting board. Hold it steady and cut it in half lengthwise. Use a spoon to scoop out the seeds and some flesh. This creates a nice boat shape. Be careful not to scoop too much. You want enough zucchini left to hold the filling.
Best BBQ Sauce Recommendations
The BBQ sauce you choose can change the whole dish. I love using a tangy sauce that has a bit of sweetness. Brands like Sweet Baby Ray’s or Stubb’s are great options. If you like heat, try a spicy BBQ sauce. You can also make your own sauce using ketchup, vinegar, and honey. Mix in some spices for extra flavor.
Cheese Substitutions and Additions
Cheddar cheese is a classic choice for these zucchini boats. It melts nicely and tastes great. If you want to switch things up, consider using mozzarella or pepper jack cheese. Goat cheese adds a creamy touch. You can mix different cheeses too. Just sprinkle it on top before baking for a tasty finish.
Pro Tips
- Choose the Right Zucchini: Opt for medium-sized zucchinis for a perfect balance between tenderness and holding shape when baked.
- Customize the BBQ Sauce: Feel free to experiment with different BBQ sauces, such as sweet, smoky, or spicy, to enhance the flavor profile.
- Add Some Crunch: For extra texture, consider adding chopped nuts or breadcrumbs to the filling before baking.
- Make it a Meal: Serve these zucchini boats with a side salad or some roasted vegetables for a complete and satisfying meal.

Variations
Vegetarian Alternatives
You can make BBQ chicken zucchini boats vegetarian. Swap the chicken with black beans or chickpeas. Both add great protein and texture. Use your favorite BBQ sauce for flavor. Add diced mushrooms for a meaty bite. You can also mix in some spinach or kale for extra greens. These swaps keep the dish filling and tasty.
Spicy BBQ Chicken Zucchini Boats
Love some heat? Turn up the spice in your BBQ chicken zucchini boats. Add diced jalapeños to the chicken mix. You can also use a spicy BBQ sauce. Hot sauce is another option. Just stir it into the BBQ sauce before mixing it with the chicken. Remember to taste as you go. You want a nice kick but not too much.
Additional Toppings and Garnishes
Toppings can really make your zucchini boats shine. Try adding diced avocado or a dollop of sour cream after baking. Fresh herbs like parsley or mint add a fresh touch. You can also sprinkle some crispy fried onions on top for crunch. These toppings give your dish extra flavor and fun textures.
Storage Info
How to Store Leftovers
To store your BBQ chicken zucchini boats, let them cool first. Place them in an airtight container. If you want to keep them fresh, use a container that fits well. You can keep them in the fridge for up to three days. If you plan to eat them later, it’s best to store them without the cheese to avoid sogginess.
Reheating Instructions
To reheat your BBQ chicken zucchini boats, preheat your oven to 350°F (175°C). Place the boats on a baking sheet. Cover them with foil to keep them moist. Heat them for about 15-20 minutes. You can also microwave them for a quick option. Just add a splash of water and cover them. Heat for 2-3 minutes or until warm.
Freezing BBQ Chicken Zucchini Boats
You can freeze BBQ chicken zucchini boats for later use. After they cool, wrap each boat in plastic wrap. Then, place them in a freezer-safe bag. They can stay in the freezer for up to two months. To enjoy, thaw them overnight in the fridge before reheating. This way, you can savor the flavors even later!
FAQs
Can I use raw chicken instead of cooked chicken?
No, using raw chicken is not safe. Cooked chicken is ready to eat. It keeps the dish safe and tasty. You can use leftover chicken or rotisserie chicken. Both options work well and save time.
How do I know when the zucchini boats are done cooking?
Zucchini boats are done when they are soft. Check the cheese, too. It should be bubbly and golden. A fork can easily pierce the zucchini. If it feels tender, your boats are ready.
What can I serve with BBQ chicken zucchini boats?
These boats pair nicely with many sides. Try a fresh salad for a light option. Cornbread adds a nice touch, too. You can also serve rice or quinoa for a filling meal. Enjoy your delicious BBQ chicken zucchini boats!
Zucchini boats are a tasty and fun dish. We covered ingredients, preparation, and cooking tips. You can customize them with flavors, sauces, and toppings. Also, the storage info helps you keep leftovers fresh.
Enjoy trying different variations or serving options. Whether spicy or vegetarian, there’s a zucchini boat for everyone. Now, you can make these tasty meals with confidence. Happy cookin
BBQ Chicken Zucchini Boats
Ingredients
- 4 medium zucchinis
- 2 cups cooked chicken, shredded
- 1 cup BBQ sauce
- 1 unit red bell pepper, finely diced
- 0.5 cup red onion, finely chopped
- 1 cup corn kernels
- 1 cup shredded cheddar cheese
- 2 tablespoons olive oil
- to taste salt and pepper
- for garnish fresh cilantro
Instructions
- Preheat the oven to 375°F (190°C).
- Slice the zucchinis in half lengthwise and scoop out the seeds and some flesh to create a boat shape. Sprinkle lightly with salt and pepper.
- In a large skillet, heat olive oil over medium heat. Add the red bell pepper and red onion and sauté for about 3-4 minutes, until softened.
- Stir in the shredded chicken and corn, mixing everything thoroughly. Pour in the BBQ sauce and stir until well combined. Let cook for another 2-3 minutes to heat through.
- Fill each zucchini boat generously with the BBQ chicken mixture.
- Sprinkle shredded cheddar cheese on top of each filled zucchini boat.
- Place the filled zucchini boats on a baking sheet and bake in the preheated oven for 20-25 minutes, or until the zucchinis are tender and the cheese is bubbly.
- Once done, remove from the oven and let cool for a couple of minutes. Garnish with fresh cilantro before serving.
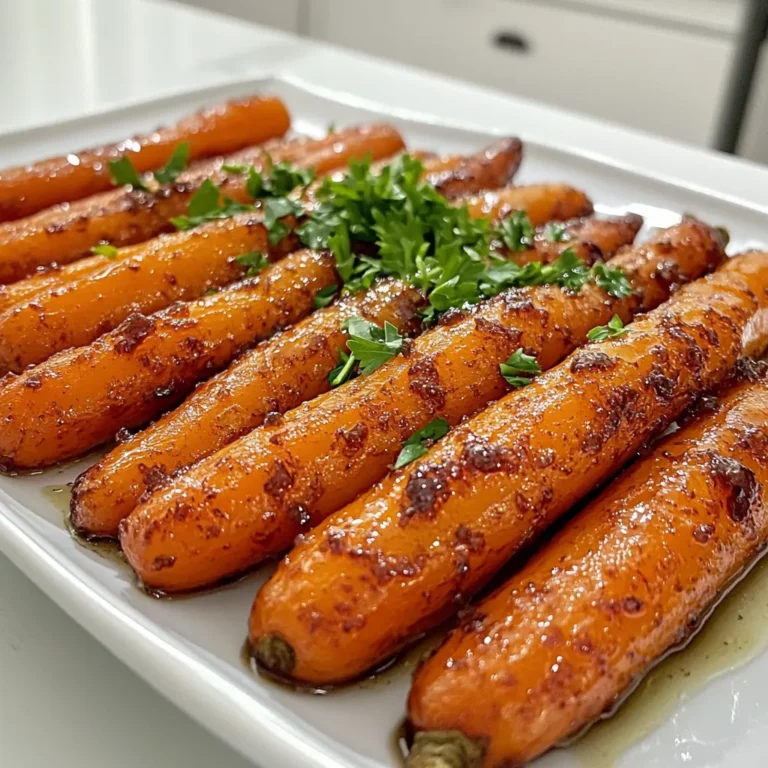
![- 1 pound rainbow carrots, peeled and cut into even-sized pieces - 3 tablespoons olive oil - 3 cloves garlic, minced - 1 teaspoon fresh rosemary, chopped - 1 teaspoon fresh thyme, chopped - 1 teaspoon fresh parsley, chopped - 1 tablespoon honey or maple syrup - Zest of 1 lemon - Salt and pepper to taste This dish shines with the bright colors of rainbow carrots. Using fresh herbs adds a wonderful touch. The garlic gives it a robust flavor, while honey or maple syrup adds sweetness. Don't forget the lemon zest; it gives a great citrus kick! Each ingredient plays a role in making this dish special. You can find the full recipe for Garlic Herb Roasted Rainbow Carrots to create this vibrant side dish. - Preheat the oven to 425°F (220°C). - Prepare the baking sheet with parchment paper. First, I love to start by preheating the oven. This step ensures that the carrots roast evenly. Parchment paper helps the carrots not stick to the baking sheet. It also makes cleanup easier. - Combine olive oil, garlic, herbs, honey, lemon zest, salt, and pepper in a bowl. - Toss rainbow carrots in the herb mixture until coated. Next, I mix my ingredients. In a bowl, I combine olive oil, minced garlic, fresh herbs, honey, lemon zest, salt, and pepper. The mix adds great flavor to the carrots. After mixing, I add the rainbow carrots to the bowl. I toss them until they're evenly coated. Each carrot gets a nice layer of the herb mix. - Arrange carrots on the baking sheet in a single layer. - Roasting time and temperature: 20-25 minutes at 425°F (220°C). Now, I arrange the carrots on the baking sheet. I place them in a single layer for even roasting. I roast them for 20 to 25 minutes at 425°F (220°C). Halfway through, I turn the carrots to help them caramelize. They will be tender and slightly sweet when done. This simple dish is a true delight! If you want the full recipe, check it out here. To ensure even roasting, cut your rainbow carrots into similar sizes. This way, they cook at the same rate. Spread them out on the baking sheet, leaving space between each piece. This helps warm air circulate, making them cook nicely. Turn the carrots halfway through roasting. This step adds flavor and helps them caramelize. When you flip them, use a spatula to avoid breaking them. You want each piece to stay whole for a great look. Want a tangy kick? Add balsamic vinegar or a touch of mustard to your mix. This gives depth and a nice contrast to the sweetness of the carrots. You can also try different herbs like dill or oregano for a fun twist. The key is to explore flavors you enjoy. Serving your roasted carrots on a nice platter makes a big difference. Arrange them in a circle or a line for an eye-catching display. Drizzle any glaze left on the baking sheet over the top for extra shine. To make your dish pop, garnish with fresh herbs. A sprinkle of parsley or thyme adds color and freshness. You can even add a squeeze of lemon for brightness. This simple touch makes your dish look gourmet. Check out the [Full Recipe] for more details on making these tasty carrots! {{image_2}} You can switch up the recipe using other root veggies. Try adding parsnips or beets for a colorful twist. These vegetables offer unique tastes and textures. You can also use baby carrots. They make for a cute presentation and cook quickly. Want to change the flavor? Add spices like cumin or paprika. These spices give the dish warmth and depth. You can also add citrus. A bit of orange zest brings a bright touch to the carrots. This zest pairs well with the garlic and herbs. If you want a vegan dish, simply skip the honey and use maple syrup. This keeps the sweetness while keeping it plant-based. For gluten-free diets, this recipe is already safe. Just ensure all your ingredients are gluten-free. Enjoy the dish without worry! For the full details on making Garlic Herb Roasted Rainbow Carrots, check the [Full Recipe]. To keep your garlic herb roasted rainbow carrots fresh, store them in the fridge. Place the cooled carrots in an airtight container. This keeps out moisture and air, which can spoil them. Use them within three to five days for the best taste. If you have leftovers, you can freeze them, but note that the texture may change. To freeze, spread the cooled carrots on a baking sheet. Freeze them for about an hour, then transfer them to a freezer bag. This method prevents them from sticking together. When it’s time to enjoy your carrots again, reheating is key. The best way is to use the oven. Preheat it to 350°F (175°C). Spread the carrots on a baking sheet in a single layer. Heat them for about 10 to 15 minutes, or until warm. This method keeps them crisp. Avoid microwaving them if you can. Microwaving can make the carrots soggy and lose their nice texture. If you must use a microwave, place a damp paper towel over the carrots to help retain moisture without making them mushy. Can I use regular carrots instead of rainbow carrots? Yes, you can use regular carrots. However, rainbow carrots add color and fun to your dish. Their taste is sweeter and richer. You can mix and match if you like. Regular carrots work well in this recipe. How can I make the recipe ahead of time? You can prep the carrots and the herb mix a day early. Just cut the carrots and mix them with the herbs. Store them in the fridge. When you're ready to cook, just roast them as directed in the full recipe. What should I do if my carrots aren’t tender after roasting? If your carrots aren't tender, they may need more time. Check them at 5-minute intervals. Add some water to the baking sheet if they look dry. This steam can help soften them. How do I know when the carrots are done? The carrots are done when they are tender and slightly caramelized. You can test them with a fork. They should be easy to pierce. Look for a golden-brown color on the edges for that perfect finish. Are roasted carrots healthy? Yes, roasted carrots are healthy. They are low in calories and high in fiber. This makes them great for digestion. They also contain vitamins like A and C, which help your immune system. What nutritional benefits do rainbow carrots provide? Rainbow carrots have many health benefits. They provide antioxidants that fight free radicals. The different colors show various nutrients. For example, orange carrots are high in beta-carotene, while purple carrots contain anthocyanins. These nutrients help keep you healthy and strong. This blog post covered a simple and tasty roasted rainbow carrots recipe. You learned about key ingredients like olive oil, fresh herbs, and flavor enhancers. I shared step-by-step instructions to achieve perfect roasting. You also got tips for storage and reheating, along with fun variations. The beauty of this dish lies in its versatility and vibrant colors. Enjoy making it your own, and bring joy to your meals with these delicious carrots. Eating well can also be fun and easy!](https://dailydishlab.com/wp-content/uploads/2025/06/d72d9d4c-d28b-4e8c-993a-1734cc17a3d6-768x768.webp)