Pesto Tortellini Pasta Salad Fresh and Flavorful Dish

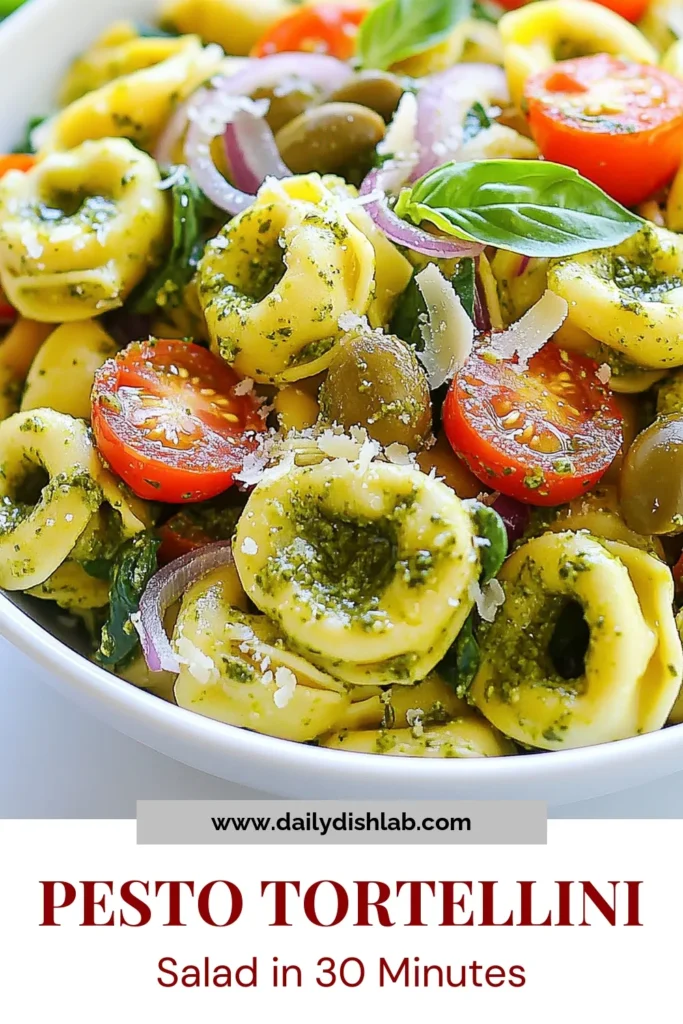
Looking for a fresh and flavorful dish? Dive into my Pesto Tortellini Pasta Salad! This tasty salad is perfect for picnics, BBQs, or weeknight dinners. With its vibrant colors and bold flavors, it’s sure to impress your friends and family. In this post, I’ll share easy steps, essential tips, and fun variations to customize your salad. Get ready to enjoy a delicious meal that’s quick, easy, and packed with flavor!
Why I Love This Recipe
- Fresh Ingredients: This pasta salad is packed with fresh vegetables like cherry tomatoes and spinach, making it a vibrant and healthy dish.
- Quick and Easy: With a total prep time of just 30 minutes, this recipe is perfect for busy weeknights or last-minute gatherings.
- Versatile: You can easily customize this salad by adding your favorite ingredients or switching up the pesto for a different flavor.
- Delicious Flavor: The combination of pesto, Parmesan, and fresh basil creates a delightful burst of flavor in every bite.
Ingredients
Complete List of Ingredients
- 12 oz cheese tortellini
- 1 cup cherry tomatoes, halved
- 1 cup spinach, roughly chopped
- 1/2 cup olives, sliced (green or black)
- 1/4 cup red onion, finely chopped
- 1/2 cup pesto sauce
- 1/4 cup grated Parmesan cheese
- 2 tablespoons olive oil
- Salt and pepper to taste
- Fresh basil leaves for garnish
Key Ingredients Explanation
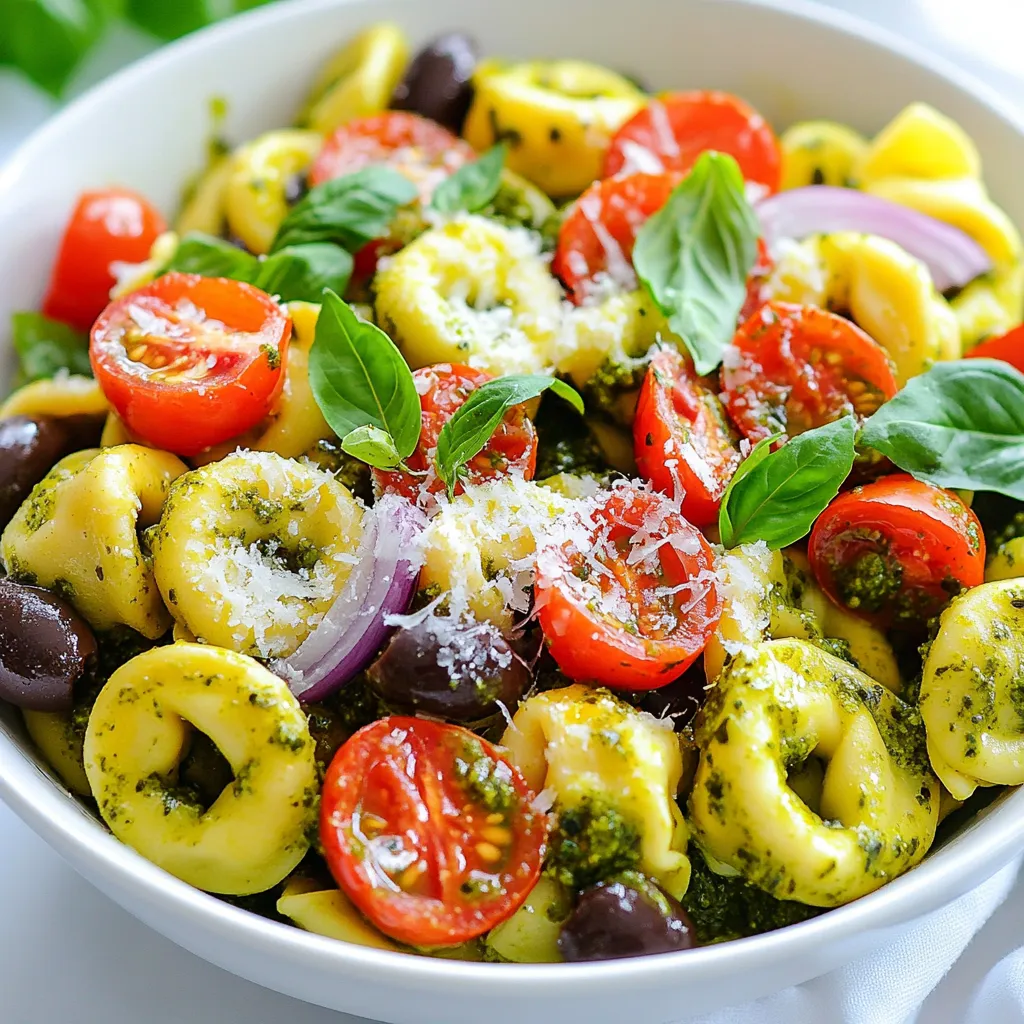
The cheese tortellini serves as the star of this dish. It brings a rich, cheesy flavor and a delightful texture. Cherry tomatoes add a sweet burst. Their bright color makes the salad pop. Spinach gives a fresh crunch and a vibrant green hue. Olives add a briny taste. They balance the flavors well. Red onion brings a sharp bite that complements the other ingredients. Pesto sauce ties everything together. It gives the salad a herby, nutty flavor. Olive oil adds richness and helps blend the ingredients. Finally, Parmesan cheese adds a savory finish.
Substitutions and Alternatives
If you can’t find cheese tortellini, try using plain pasta. Bowtie or penne work well. For a lighter touch, use zucchini noodles instead. Instead of cherry tomatoes, diced bell peppers add a nice crunch. Swap spinach for arugula or kale for a different flavor. If you dislike olives, try artichoke hearts or capers. For a nut-free option, use a dairy-free pesto or make your own. If you want a creamier salad, mix in some cream cheese or Greek yogurt.

Step-by-Step Instructions
Cooking the Tortellini
Start by boiling water in a large pot. Make sure to add a good pinch of salt. Once the water boils, add 12 oz of cheese tortellini. Cook it according to the package, usually 3-5 minutes. You want the tortellini to be al dente. After cooking, drain the tortellini and rinse it under cold water. This cools it down and stops the cooking.
Mixing the Salad Ingredients
In a large mixing bowl, combine the cooled tortellini with other fresh ingredients. Add 1 cup of halved cherry tomatoes, 1 cup of roughly chopped spinach, and 1/2 cup of sliced olives. You can use green or black olives based on your taste. Finally, add 1/4 cup of finely chopped red onion. Gently mix everything together to ensure even distribution.
Preparing the Pesto Dressing
For the dressing, grab a small bowl. Whisk together 1/2 cup of pesto sauce and 2 tablespoons of olive oil. The oil makes the dressing smooth and rich. Once mixed, pour the pesto dressing over your salad. Gently toss it to coat all the ingredients. Season with salt and pepper to taste. Top with 1/4 cup of grated Parmesan cheese. Let the salad sit for 15-20 minutes. This allows the flavors to blend and become even tastier. Before serving, add fresh basil leaves for a lovely touch.
Tips & Tricks
Best Practices for Cooking Tortellini
To cook cheese tortellini perfectly, use a large pot. Bring salted water to a boil. Add the tortellini and watch them closely. Cook for 3 to 5 minutes until they are al dente. Drain the tortellini and rinse them under cold water. This stops the cooking and keeps the pasta firm.
Enhancing Flavor in Pesto Tortellini Salad
To boost flavor, use fresh ingredients. Fresh cherry tomatoes and spinach make a big difference. Olives add a nice salty kick. Red onion gives a sweet crunch. When mixing in the pesto sauce, blend it well with olive oil. This helps coat every piece of tortellini. Taste the salad before serving. Adjust salt and pepper to your liking. A sprinkle of grated Parmesan cheese adds a rich finish. Lastly, don’t forget fresh basil leaves for a pop of flavor.
Serving Suggestions
Serve the pesto tortellini salad cold or at room temperature. It makes a great side dish for grilled meats or fish. You can also serve it as a light main course. If you want to impress guests, add a simple green salad on the side. This dish is perfect for picnics or potlucks. For extra fun, serve it in a large bowl with a ladle. This way, everyone can help themselves!
Pro Tips
- Perfectly Cook Tortellini: Ensure you cook the tortellini until al dente for the best texture. Overcooking can make them mushy.
- Customize Your Greens: Feel free to substitute spinach with arugula or kale for a different flavor profile and added nutrients.
- Add Protein: For a heartier salad, consider adding grilled chicken, shrimp, or chickpeas to make it a complete meal.
- Make It Ahead: This salad can be made a day in advance. Just add the fresh basil right before serving to keep it vibrant.
Variations
Different Veggie Additions
You can add many vegetables to your pesto tortellini pasta salad. Try bell peppers for some crunch. Zucchini adds a nice, fresh flavor. Carrots bring a bit of sweetness. You can even toss in some peas for a pop of color. Just remember to chop them small, so they mix well with the tortellini.
Protein Enhancements
Want to make your salad heartier? Consider adding protein. Grilled chicken works great with the pesto. Shrimp can add a nice touch too. For a vegetarian option, try chickpeas or white beans. These will give you a boost of energy. Just mix them in after you combine the veggies and tortellini.
Pesto Sauce Alternatives
If you want to change the flavor, try different sauces. You can use sun-dried tomato pesto for a tangy twist. A spinach or arugula pesto can add a fresh taste. You can even make a creamy version with Greek yogurt. Just blend the yogurt with herbs to create a smooth sauce. Each option gives your salad a new flair.
Storage Info
How to Store Leftovers
After enjoying your pesto tortellini pasta salad, store any leftovers in an airtight container. Make sure to cool the salad to room temperature first. This keeps the flavors fresh and prevents sogginess. Refrigerate the container for up to three days. If you want to keep it longer, consider freezing it. However, the texture may change after thawing.
Reheating Instructions
To reheat the salad, take it out of the fridge. You can eat it cold or warm it up. If you prefer warm pasta salad, place it on the stove over low heat. Stir gently until warm. Avoid high heat; it may dry out the ingredients. If you freeze the salad, thaw it in the fridge before reheating.
Shelf Life Tips
Pesto tortellini pasta salad is best eaten fresh but lasts well in the fridge. Keep an eye on the ingredients, especially the spinach and tomatoes. If they start to look wilted or slimy, it’s time to toss the salad. Always check for any off smells or changes in texture before eating.
FAQs
Can I make this salad ahead of time?
Yes, you can make this salad ahead of time. It tastes even better after sitting. The flavors mix well when you let it chill. I recommend making it a few hours before serving. Just keep it in the fridge until you are ready to eat.
How do I customize the recipe?
You can easily customize this salad to fit your taste. Add different veggies like bell peppers or cucumbers. Try using different cheeses, like feta or mozzarella. If you like more protein, add grilled chicken or chickpeas. The options are endless!
Is Pesto Tortellini Pasta Salad suitable for meal prep?
Absolutely! This salad is great for meal prep. It keeps well in the fridge for a few days. Just store it in airtight containers. Portion it out for easy lunches or dinners. You can enjoy it cold or at room temperature.
This blog post covered all you need for a great Pesto Tortellini Pasta Salad. We explored the ingredients, step-by-step cooking methods, and useful tips to enhance flavor. You learned about variations, storage tips, and answers to common questions.
Enjoy making this dish your own with different veggies or proteins. Remember, this salad is not just easy to prepare but also fun to customize. Whether for a quick lunch or a meal prep staple, it offers fresh flavors and fills you up. Enjo
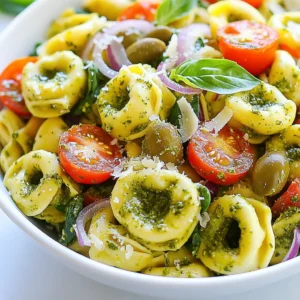
Pesto Tortellini Pasta Salad
Ingredients
- 12 oz cheese tortellini
- 1 cup cherry tomatoes, halved
- 1 cup spinach, roughly chopped
- 0.5 cup olives, sliced (green or black)
- 0.25 cup red onion, finely chopped
- 0.5 cup pesto sauce
- 0.25 cup grated Parmesan cheese
- 2 tablespoons olive oil
- to taste salt and pepper
- for garnish fresh basil leaves
Instructions
- In a large pot, bring salted water to a boil and add the cheese tortellini. Cook according to package instructions until al dente, usually about 3-5 minutes. Drain and rinse under cold water to cool.
- In a large mixing bowl, combine the cooled tortellini, cherry tomatoes, spinach, olives, and red onion.
- In a separate small bowl, whisk together the pesto sauce and olive oil until smooth.
- Pour the pesto mixture over the pasta salad and gently toss to combine everything evenly.
- Season with salt and pepper to taste and sprinkle the grated Parmesan cheese on top.
- Let the salad sit for about 15-20 minutes to allow the flavors to meld together.
- Before serving, garnish the salad with fresh basil leaves for an extra burst of flavor.
![- 1 can (15 oz) chickpeas, rinsed and drained - 2 tablespoons olive oil - Spices: smoked paprika, cayenne pepper, garlic powder, ground cumin - Garnish: Salt and fresh parsley, chopped - Substitute olive oil with avocado oil - Alternative spices and blends for different flavors Using the right ingredients is key to making these spicy roasted chickpeas. First, start with a can of chickpeas. Rinse them well and drain them. This step removes excess sodium and gets rid of any canning liquid. Next, grab some olive oil. You can also use avocado oil if you prefer a different taste. The oil helps the spices stick and makes the chickpeas crispy. Now let's talk spices! I love using smoked paprika for that deep, smoky flavor. Adjust the cayenne pepper to match your spice level. Garlic powder adds a nice kick, while ground cumin brings warmth. Finally, don't forget the salt! It enhances all the flavors. For a fresh touch, chop some parsley to sprinkle on top. This makes your dish look and taste great. If you want to mix it up, try different spices or blends. You could add curry powder for an Indian twist or taco seasoning for a Mexican flair. There are so many options! For the full recipe, check out the complete steps to make this snack. - Preheat your oven to 400°F (200°C). - Rinse and dry the chickpeas thoroughly. Start by preheating your oven. This step helps the chickpeas roast evenly. While the oven heats, grab a can of chickpeas. Rinse them well under cold water. Use a colander to drain the chickpeas. It's key to dry them with a clean kitchen towel. Removing moisture will make the chickpeas crisp. - Toss the chickpeas with olive oil. - Mix in spices for optimal flavor coating. Next, place the dried chickpeas in a mixing bowl. Pour in two tablespoons of olive oil. This oil helps the spices stick and adds flavor. Now, it’s time to add the spices. Use smoked paprika, cayenne pepper, garlic powder, ground cumin, and salt. Mix everything well, so each chickpea gets coated. This step really boosts the taste. - Spread seasoned chickpeas on a baking sheet. - Roast and shake pan halfway through for even cooking. Now, line a baking sheet with parchment paper. Spread the coated chickpeas in a single layer. This spacing helps them roast evenly. Place the baking sheet in your preheated oven. Roast them for 25-30 minutes. Halfway through, shake the pan to move the chickpeas around. This action ensures they cook well and get crispy. When they are golden brown, they are ready. Let them cool a bit before tasting. You can adjust the seasoning at this point. If you want to make them even better, garnish with fresh parsley before serving. For the full recipe, refer to the section above. To get that perfect crunch, start by drying the chickpeas thoroughly. After rinsing, drain them well. Then, pat them with a clean towel. The less moisture, the crispier they get. Also, do not overcrowd the baking sheet. Give them space to roast evenly. If they touch, they will steam instead of crisp. You can adjust the spice levels to your taste. If you like it hot, add more cayenne pepper. For a milder flavor, reduce it. You can also add extra herbs or citrus zest before serving. Fresh herbs like rosemary or thyme add a great twist. A touch of lemon zest brightens the flavors. Keep an eye on the roasting time. You want them golden brown, not burnt. Check for doneness by looking at the color. They should be crispy and firm to the touch. If they feel soft, give them a few more minutes. The right timing ensures a delightful crunch. {{image_2}} You can switch up the flavors of your spicy roasted chickpeas easily. Try using curry powder for a warm and earthy taste. Taco seasoning gives a fun, zesty kick. If you're in the mood for something sweet, mix cinnamon and sugar. This creates a tasty dessert version that is hard to resist. For a cheesy flavor, sprinkle in some nutritional yeast. This adds a delightful twist and boosts nutrients. You can also mix in seeds or nuts. This adds extra crunch and makes your snack even more satisfying. These roasted chickpeas are not just a snack. Use them as a topping for salads to add texture and taste. They also work great in wraps, giving a crunchy surprise. Pair them with dips like hummus or tzatziki for a fun flavor combo. Enjoy your crunchy treat in many ways! For the complete recipe, check out the [Full Recipe]. To keep your spicy roasted chickpeas crunchy, store them in an airtight container. This helps prevent moisture from making them soggy. They stay good for about 3 to 5 days at room temperature. Make sure to place them in a cool, dry spot away from sunlight. If you store them in the fridge, they may lose their crunch faster. If your chickpeas lose their crunch, you can easily fix them. Preheat your oven to 400°F (200°C). Spread the chickpeas on a baking sheet. Bake for about 10 minutes or until they are crispy again. Keep an eye on them so they don’t burn. If your chickpeas smell off or feel too soft, it’s best to discard them. Enjoy them fresh for the best taste! For the full recipe, check out the details above. Spicy roasted chickpeas can last about four to five days when stored properly. Keep them in an airtight container at room temperature. Avoid storing them in the fridge, as moisture can make them soggy. If you want them to stay crunchy, check the container daily. Yes, you can use dried chickpeas. First, soak them in water overnight. This helps them soften. After soaking, cook them in boiling water for about 1 to 1.5 hours until tender. Once cooked, drain and dry them well before following the full recipe for roasting. Chickpeas are packed with nutrients. They are rich in protein and fiber. This makes them great for your diet. They also help keep you full longer. Chickpeas are low in fat and have no cholesterol. They support heart health and help with digestion. Enjoying chickpeas can be a tasty way to boost your health. Spicy roasted chickpeas are easy and fun to make. We covered main and optional ingredients, step-by-step roasting instructions, and storage tips. You can also tailor flavors with various spices and add ingredients for crunch. These chickpeas make a tasty snack or a top-notch salad addition. When you try this recipe, I hope you enjoy every bite and explore your favorite flavors. Keep experimenting for the best version that suits you!](https://dailydishlab.com/wp-content/uploads/2025/06/6814540d-e3cb-4f17-9659-76d9cffed5c2-768x768.webp)
. This blog post covered how to make a refreshing cucumber melon salad. You learned about fresh ingredients like cucumbers, cantaloupe, and mint. I explained how to make a simple dressing with lemon juice and honey. I also shared tips for perfect texture and flavor. In closing, this salad is easy to make and tastes great. It’s perfect for warm days or gatherings. Experiment with different melons, nuts, or dressings. Enjoy your fresh salad today!](https://dailydishlab.com/wp-content/uploads/2025/06/ed53bf68-b888-45dc-b451-2bcae5e86f09-768x768.webp)