
Tuscan Kale White Bean Skillet Flavorful and Easy Dish
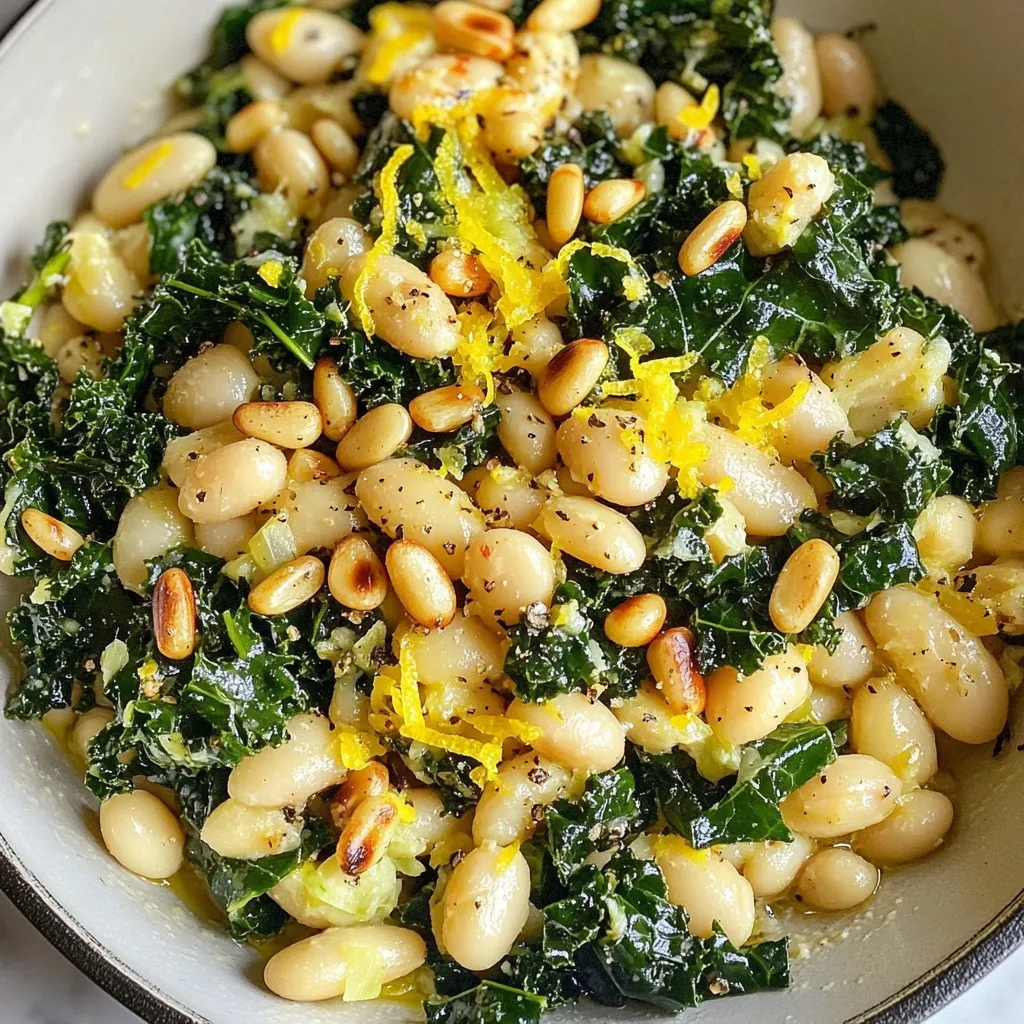
If you’re looking for a healthy, tasty meal, I have just the dish for you! My Tuscan Kale White Bean Skillet is packed with flavor and is easy to make. With just a few simple ingredients, you can whip up a delightful meal in no time. Plus, this dish is full of nutrients that your body will love. Ready to impress your taste buds? Let’s dive into the details!
Why I Love This Recipe
- Healthy and Nutritious: This dish is packed with vitamins and minerals, thanks to the Tuscan kale and white beans, making it a wholesome choice for any meal.
- Quick and Easy: With a total preparation and cooking time of just 20 minutes, this skillet meal is perfect for busy weeknights.
- Flavorful and Satisfying: The combination of garlic, lemon, and red pepper flakes gives this dish a zesty kick that is sure to please your taste buds.
- Versatile and Adaptable: This recipe can be easily modified by adding your favorite proteins or other vegetables, making it a flexible option for any dietary preference.
Ingredients
To make a tasty Tuscan kale white bean skillet, gather these simple ingredients:
- Tuscan kale (1 bunch)
- White beans (1 can, 15 oz)
- Onion (1 medium, diced)
- Garlic (3 cloves, minced)
- Red pepper flakes (1 teaspoon)
- Vegetable broth (1 cup)
- Olive oil (2 tablespoons)
- Salt and pepper to taste
- Lemon (1, zested and juiced)
- Grated Parmesan cheese (optional, for serving)
- Toasted pine nuts (for garnish)
These ingredients come together to create a dish that is not just easy to make, but also packed with flavor. The Tuscan kale adds a rich, earthy taste. The white beans provide a creamy texture and protein. The garlic and onion give a savory base, while the lemon zest adds brightness. Use fresh ingredients for the best taste. Enjoy the process of cooking with these vibrant ingredients!

Step-by-Step Instructions
Heating the Skillet
- Warm 2 tablespoons of olive oil over medium heat in a large skillet.
- Sauté 1 medium diced onion for about 5 minutes until it becomes translucent.
Adding Flavors
- Incorporate 3 minced garlic cloves and 1 teaspoon of red pepper flakes.
- Cook for another minute until you smell the fragrant mix.
Cooking the Kale
- Add 1 bunch of chopped Tuscan kale and 1 cup of vegetable broth.
- Cover the skillet and let the kale wilt for about 4-5 minutes.
Final Steps
- Stir in 1 can (15 oz) of drained white beans, along with lemon zest and juice.
- Season with salt and pepper to taste, then warm through for 3-4 minutes.
Tips & Tricks
Perfecting the Recipe
How to choose fresh Tuscan kale
When you pick Tuscan kale, look for vibrant green leaves. Avoid yellow or brown spots. The leaves should feel firm and crisp. Fresh kale has a slight sheen, showing it’s full of moisture. Choose a bunch with thick stems for the best flavor and texture.
Adjusting spice level with red pepper flakes
Red pepper flakes add a nice kick to this dish. Start with one teaspoon if you like mild heat. For more spice, feel free to add more. Mix the flakes with the garlic for a burst of flavor. Just remember, a little goes a long way, so taste as you go.
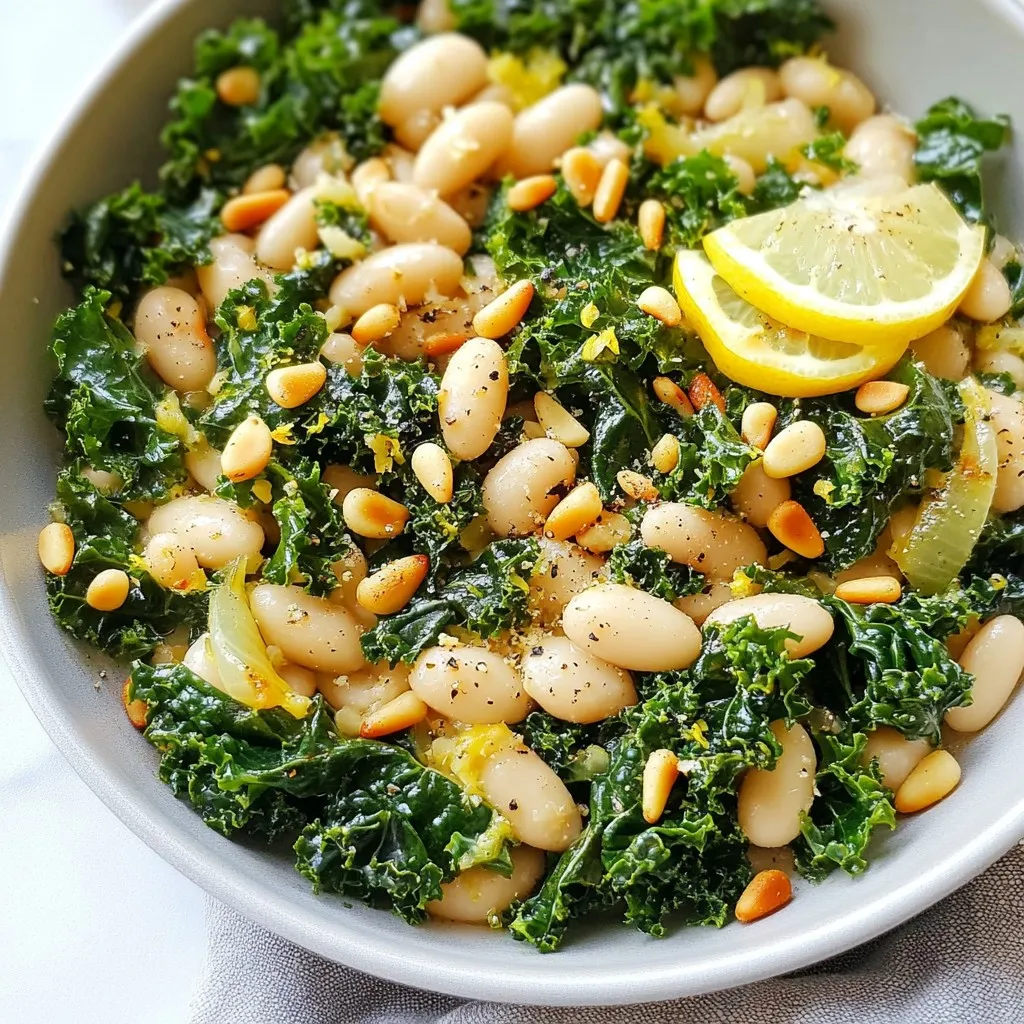
Serving Suggestions
Ideas for presenting the dish
Serving this dish can be fun and simple. You can place the skillet right on the table. This gives a warm, rustic feel. Alternatively, serve it in individual bowls for a personal touch. Drizzle some olive oil and add extra lemon zest for brightness before serving.
Optional garnishes for enhanced flavor
To make this dish even better, consider garnishing it. Toasted pine nuts add a lovely crunch. Grated Parmesan cheese brings a rich flavor. You can also sprinkle fresh herbs like parsley or basil for a fresh touch. These little extras elevate the overall taste.
Pro Tips
- Fresh Kale Matters: For the best flavor and texture, use fresh Tuscan kale. Look for vibrant, dark green leaves without any yellowing or wilting.
- Enhance the Flavor: Consider adding a splash of balsamic vinegar or a pinch of smoked paprika for an extra depth of flavor that complements the beans and kale.
- Perfectly Toasted Nuts: Toast your pine nuts in a dry skillet over low heat for a few minutes until golden brown. This brings out their natural oils and enhances their nutty flavor.
- Meal Prep Friendly: This dish stores well in the refrigerator for up to 3 days. Reheat gently to enjoy as a quick meal or side dish throughout the week.
Variations
Dietary Substitutions
To make this dish vegan, skip the Parmesan cheese. You can add nutritional yeast for a cheesy flavor. For gluten-free needs, ensure the vegetable broth is certified gluten-free. Most brands are safe.
Flavor Modifications
You can easily boost protein by adding chicken or sausage. Just cook it first in the skillet. Once it’s done, follow the main recipe steps. You can also add other veggies like bell peppers or carrots. They add color and nutrients. Mix in some cherry tomatoes for sweetness. Just toss them in with the kale for extra flavor.
Storage Info
How to Store Leftovers
To store your Tuscan kale white bean skillet, let it cool first. Place it in a sealed container. Keep it in the fridge for up to three days. If you want to keep it longer, you can freeze it. Use a freezer-safe container or bag. This way, it can last for up to three months.
Reheating Suggestions
When you are ready to eat, you can reheat it in a pan. Heat it over medium heat for about 5 to 7 minutes. Stir it often to keep it from sticking. You can also use a microwave. Heat it in short bursts of 1 to 2 minutes. Stir between bursts to ensure even warming. Aim for 165°F to keep it safe and tasty.
FAQs
How long does Tuscan kale last in the fridge?
Tuscan kale lasts about 5 to 7 days in the fridge. Keep it in a bag or container. Make sure it is dry to prevent wilting.
Can I make this dish ahead of time?
Yes, you can make this dish ahead of time. It stores well in the fridge for up to 3 days. Reheat it gently on the stove or in the microwave. This helps keep the flavors fresh.
What are the health benefits of kale and white beans?
Kale is rich in vitamins A, C, and K. It also has antioxidants that help fight disease. White beans provide protein and fiber. They help with digestion and can keep you full longer. Together, they make a healthy, balanced meal.
In this blog post, we explored how to make a nutritious dish featuring Tuscan kale and white beans. I shared ingredients, step-by-step instructions, and valuable tips to enhance your cooking. Remember, you can adapt the recipe for different diets and store leftovers properly. Enjoy this simple dish packed with flavor and health benefits. I hope you try this recipe and make it your own! Happy cookin
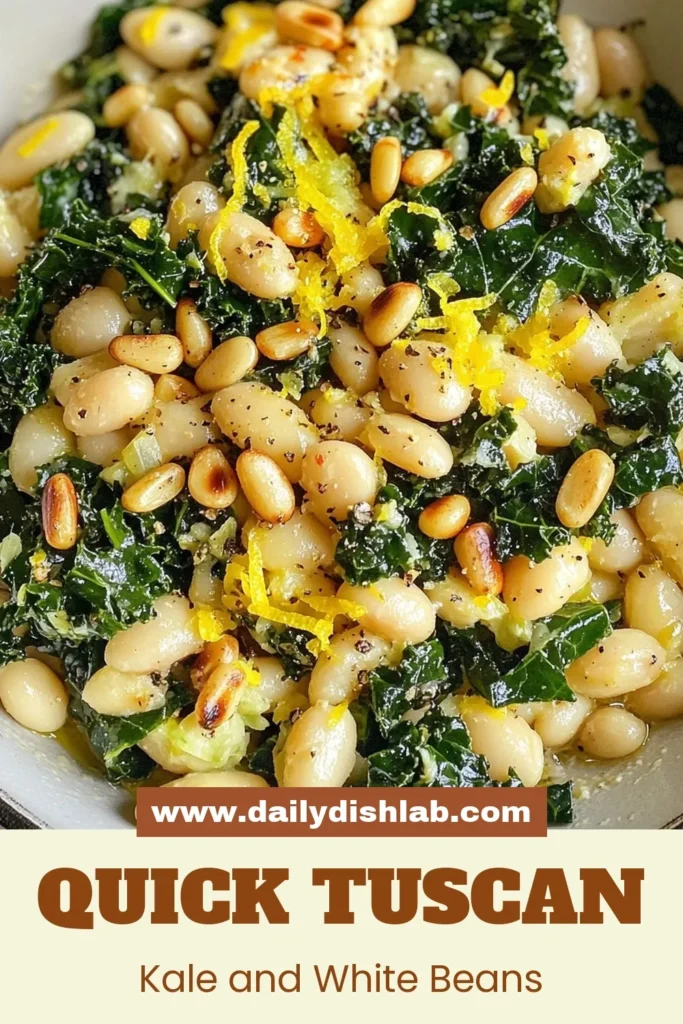
Tuscan Kale White Bean Skillet
Ingredients
- 1 bunch Tuscan kale, stems removed and leaves chopped
- 1 can white beans (cannellini or great northern), drained and rinsed
- 1 medium onion, diced
- 3 cloves garlic, minced
- 1 teaspoon red pepper flakes (adjust for spice level)
- 1 cup vegetable broth
- 2 tablespoons olive oil
- to taste Salt and pepper
- 1 lemon zested and juiced
- 1/4 cup grated Parmesan cheese (optional, for serving)
- to taste Toasted pine nuts for garnish
Instructions
- Heat the olive oil in a large skillet over medium heat.
- Add the diced onion and sauté for about 5 minutes, or until it becomes translucent.
- Stir in the minced garlic and red pepper flakes; cook for another minute until fragrant.
- Add the chopped Tuscan kale to the skillet. Pour in the vegetable broth and cover to help wilt the kale, cooking for about 4-5 minutes.
- Once the kale is tender, stir in the drained white beans, lemon zest, and lemon juice. Season with salt and pepper to taste.
- Cook for an additional 3-4 minutes, allowing the flavors to blend and the beans to warm through.
- If desired, sprinkle with grated Parmesan cheese just before serving.
- Garnish with toasted pine nuts for an extra crunch.


![For a hearty bowl of Classic Chicken Tortilla Soup, gather the following: - 1 pound boneless, skinless chicken breasts - 1 tablespoon olive oil - 1 medium onion, chopped - 2 cloves garlic, minced - 1 red bell pepper, diced - 1 can (14.5 ounces) diced tomatoes - 4 cups chicken broth - 1 can (4 ounces) diced green chilies - 1 tablespoon ground cumin - 1 teaspoon smoked paprika - Salt and pepper to taste - 1 cup corn kernels (fresh, frozen, or canned) - 1 lime, juiced - Fresh cilantro, chopped for garnish - Tortilla strips (store-bought or homemade) - Avocado, sliced for serving (optional) - Shredded cheese (Mexican blend or cheddar, optional) Using fresh ingredients can really boost the flavor. I recommend choosing chicken breasts that are plump and firm. When picking your onion, look for one that feels heavy for its size. Opt for garlic with tight, dry skins for the best taste. For spices, always check the date on the label. Fresh spices make a big difference. When it comes to tomatoes, use diced ones in juice, not the ones in sauce. The broth should be low-sodium to control the salt level. If you prefer a richer flavor, use homemade chicken broth. You can elevate your soup with a few tasty garnishes. Fresh avocado adds creaminess. A sprinkle of shredded cheese gives a nice touch. Crispy tortilla strips add crunch and fun. Lastly, do not skip the cilantro; it brightens up the dish. You can also serve it with lime wedges for an extra zing! For a twist, consider adding sliced jalapeños for heat or black beans for more depth. Each addition creates a unique take on this classic dish. To see the full recipe, check out the complete instructions. To start, heat 1 tablespoon of olive oil in a large pot over medium heat. Once it warms, add 1 chopped onion. Sauté the onion for about 5 minutes until it softens. Then, stir in 2 minced garlic cloves and 1 diced red bell pepper. Cook for another 3 minutes until you smell the garlic. Next, add 1 pound of boneless, skinless chicken breasts to the pot. Season the chicken with salt, pepper, 1 tablespoon of ground cumin, and 1 teaspoon of smoked paprika. Cook the chicken for 2-3 minutes, stirring often. After that, pour in 1 can of diced tomatoes, 4 cups of chicken broth, and 1 can of diced green chilies. Stir well, and bring the mixture to a gentle boil. Once it boils, reduce the heat and let it simmer for 20 minutes. This cooks the chicken fully. Once done, take the chicken out of the pot. Let it cool for a bit. Use two forks to shred the chicken into bite-sized pieces. Return the shredded chicken back to the soup. Now, stir in 1 cup of corn kernels and the juice of 1 lime. Taste the soup and adjust the salt and pepper as needed. Let it simmer for 5 more minutes. Start by prepping ingredients first. Chop the onion and red bell pepper before cooking. This saves time and keeps you organized. While the chicken simmers, you can clean up your workspace. This makes cooking feel less chaotic. Also, use a timer for each step, so you stay on track. Lastly, make sure you have all your ingredients ready before you start. This way, you avoid last-minute searching. Shredding chicken can feel tricky, but I have a simple way. First, let the chicken cool after you take it out of the pot. This makes it easier to handle. Use two forks to pull the chicken apart. Hold one fork in each hand. Use the first fork to hold the chicken in place. With the second fork, pull the chicken apart into strips. If you have a stand mixer, you can use it too! Just place the cooked chicken in the bowl and use the paddle attachment. Turn it on low for a few seconds, and watch the chicken shred easily. This method saves time and gives you perfect shreds for your soup! To boost the taste of your soup, try these ideas: - Add a splash of lime juice. It brightens the flavors. - Use fresh herbs like cilantro or oregano. They add depth. - Consider roasted peppers for a smoky touch. They enhance the flavor. - Top your soup with crumbled queso fresco. It adds creaminess. - Spice it up with jalapeños or hot sauce. This adds heat. Many home cooks make a few common errors. Here’s how to avoid them: - Don’t skip the sauté step. It builds flavor in the base. - Be careful not to overcook the chicken. It should be juicy and tender. - Avoid using low-quality broth. Good broth makes a big difference. - Don’t forget to taste as you cook. Adjust seasonings early on. - Skip the tortilla strips at the end. They add a nice crunch. Having the right tools makes cooking easier. Here’s what you need: - A large pot or Dutch oven for cooking. - A sharp knife for chopping. - A cutting board for prep work. - Two forks for shredding chicken. - Ladles for serving soup. For more details, check the [Full Recipe]. {{image_2}} You can make a great vegetarian or vegan tortilla soup. Swap the chicken with hearty beans like black or pinto beans. Use vegetable broth instead of chicken broth for the base. Add more veggies, like zucchini or carrots, to boost flavor and texture. You can use tofu or tempeh for protein. Top your soup with avocado and tortilla strips for crunch. This version remains rich and satisfying. If you love heat, try my spicy version. Add sliced jalapeños or serrano peppers to the pot when you cook the onions. Use a spicier salsa instead of diced tomatoes. You can also add a few dashes of hot sauce right before serving. This will give a nice kick to your soup. Adjust the spice level to your liking, but remember to taste as you go! You can switch ingredients to create a regional twist. For a Southwest flair, add roasted corn or poblano peppers. If you want a Mexican touch, try using hominy instead of corn. Swap fresh cilantro for epazote for a unique flavor. Each change gives your soup a new taste. Let yourself explore and enjoy the cooking process. For the full recipe, check out the detailed instructions above! To keep your chicken tortilla soup fresh, store it in an airtight container. This helps lock in flavor and moisture. Allow the soup to cool to room temperature before sealing the container. It keeps well in the fridge for about 3 to 4 days. Make sure to label the container with the date. This way, you know when it was made. If you want to save your soup for later, freezing is a great option. First, allow the soup to cool completely. Pour the soup into freezer-safe bags or containers. Leave some space at the top, as liquids expand when frozen. The soup stays good for about 2 to 3 months in the freezer. When you’re ready to enjoy it again, simply thaw it overnight in the fridge. When reheating, do so gently to keep the soup tasty. Pour the soup into a pot over medium heat. Stir often to help it heat evenly. If it seems thick, add a bit of chicken broth or water to loosen it up. You can also reheat individual portions in the microwave. Just remember to stir halfway through for even heating. For more details on making this delicious dish, check out the Full Recipe. To make Classic Chicken Tortilla Soup gluten-free, you need to swap out the tortilla strips. Use gluten-free tortilla chips instead. You can also make homemade strips using gluten-free tortillas. Just cut them into strips and bake until crispy. Always check your canned ingredients, like broth and tomatoes, for gluten-free labels. For storing leftover soup, let it cool first. Then, place it in an airtight container. You can store it in the fridge for up to three days. If you want to keep it longer, freeze the soup. Use freezer-safe containers and leave some space for expansion. When you’re ready to eat, just thaw and reheat. Yes, using rotisserie chicken is a great shortcut! It saves time and adds flavor. Just shred the chicken and add it after the soup simmers. This method gives you a tasty dish without much effort. You can still follow the rest of the recipe as usual. For the full recipe, check the details above. This article covered all you need for making chicken tortilla soup. We talked about essential ingredients and their quality. You learned step-by-step instructions and helpful cooking tips. I shared tricks to avoid common mistakes and suggestions for equipment. We explored tasty variations and smart storage methods. Now, you can confidently create a flavorful soup. Enjoy your cooking journey and make it your own!](https://dailydishlab.com/wp-content/uploads/2025/07/be748eb7-43aa-4443-8b13-5155a2eb28e7-768x768.webp)