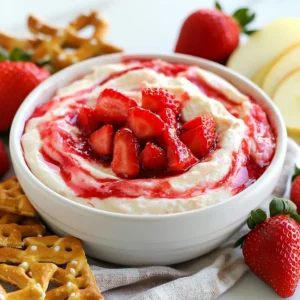
Strawberry Cheesecake Dip Simple and Tasty Recipe
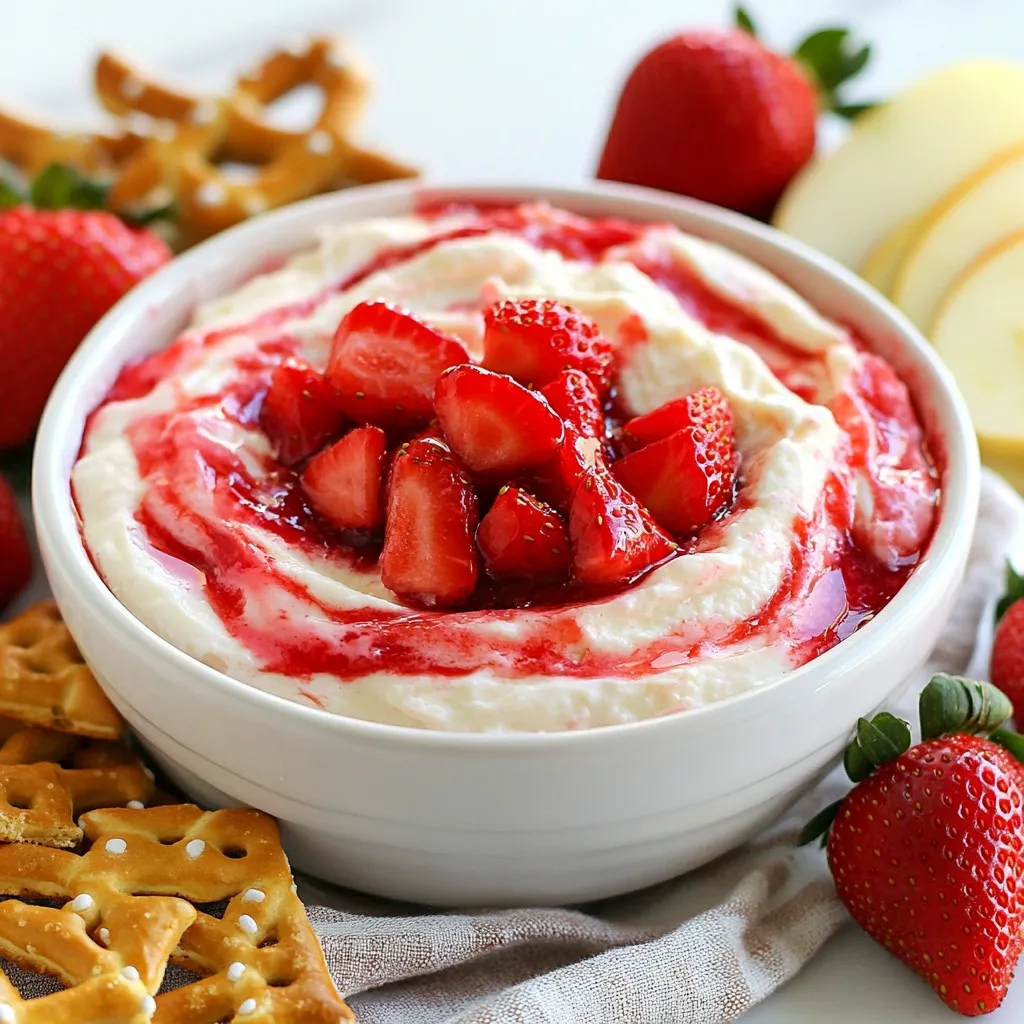
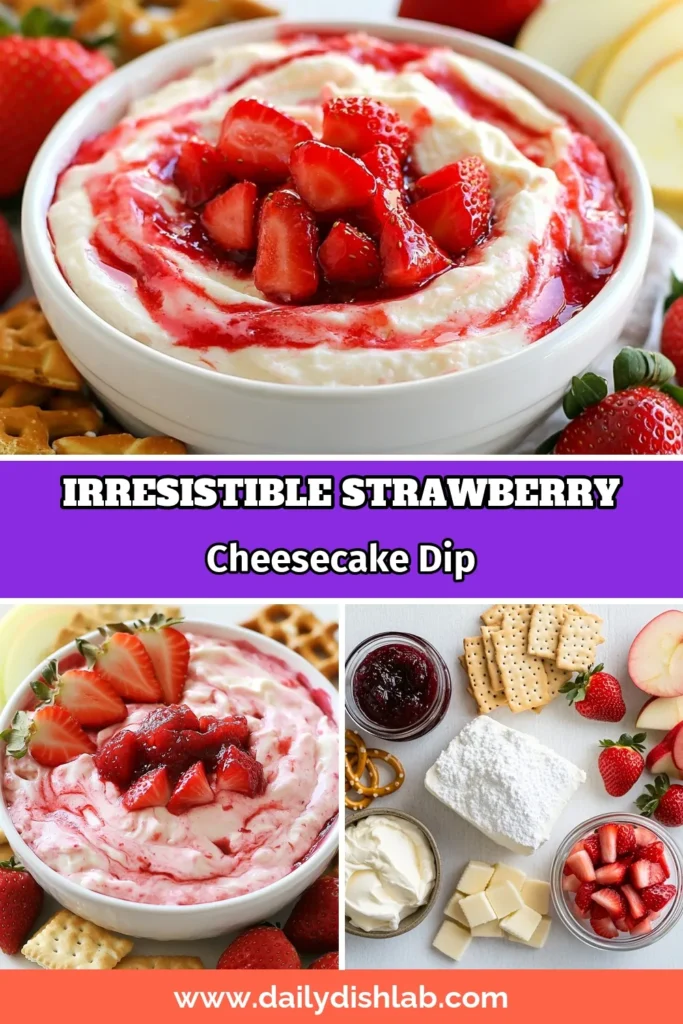
Looking for a fun and easy treat? This Strawberry Cheesecake Dip is your answer! With just a few simple ingredients, you can whip up a creamy, dreamy dip that’s perfect for any occasion. Whether it’s a party or a cozy night at home, this tasty recipe is a crowd-pleaser. Let’s dive into the ingredients and make something delicious that your taste buds will love!
Why I Love This Recipe
- Easy to Make: This recipe comes together in just 15 minutes, making it a quick and delightful treat for any occasion.
- Versatile Dipping Options: Serve with graham crackers, fresh fruit, or pretzel sticks, allowing everyone to customize their dipping experience.
- Refreshing Flavor: The combination of fresh strawberries and creamy cheesecake creates a refreshing and indulgent dessert dip.
- Perfect for Gatherings: This dip is always a hit at parties, providing a delicious and shareable dessert option that everyone loves.
Ingredients
Main Ingredients for Strawberry Cheesecake Dip
To make this dip, you need a few simple items. Here’s what you will need:
- 1 cup cream cheese, softened
- 1/2 cup powdered sugar
- 1 teaspoon vanilla extract
- 1/2 cup sour cream
- 1 cup fresh strawberries, diced
- 1/4 cup strawberry jam
Each ingredient plays a key role. The cream cheese gives it a rich base. The powdered sugar adds sweetness, while the sour cream keeps it creamy. Fresh strawberries bring a bright flavor, and strawberry jam enhances the overall taste.
Optional Toppings and Dippers
You can add fun toppings or use different dippers. Here are some ideas:
- Graham crackers
- Apple slices
- Pretzel sticks
Graham crackers add crunch. Apple slices bring freshness. Pretzel sticks offer a salty contrast. You can mix and match these to create a fun experience.
Recommended Tools and Equipment
Having the right tools makes this dip quick and easy to prepare. Here’s what I recommend:
- Medium mixing bowl
- Electric mixer
- Spatula
- Serving bowl
A medium mixing bowl helps combine everything well. An electric mixer makes it smooth and fluffy. A spatula is great for folding in the strawberries. Finally, a nice serving bowl showcases your dip beautifully.

Step-by-Step Instructions
Preparation of Cream Cheese Base
Start with 1 cup of cream cheese. Make sure it’s softened. Place it in a medium mixing bowl. Use an electric mixer to beat the cream cheese. Mix it until it’s creamy and smooth. This is key for a great dip.
Mixing and Incorporating Ingredients
Next, gradually add 1/2 cup of powdered sugar. Keep beating the mixture until it’s fluffy. Then, mix in 1 teaspoon of vanilla extract. Add 1/2 cup of sour cream, blending it well. This will add richness to the dip.
Now, gently fold in 1 cup of diced fresh strawberries and 1/4 cup of strawberry jam. Use a spatula to mix them in. Make sure the strawberries are evenly spread throughout. This adds texture and flavor.
Serving and Chilling Instructions
Once everything is well combined, transfer the dip to a serving bowl. Smooth the top with a spatula for a nice finish. Cover the bowl with plastic wrap. Chill the dip in the refrigerator for at least 30 minutes. This helps the flavors blend together.
Serve the dip chilled with graham crackers, apple slices, or pretzel sticks. This mix of dippers adds fun and variety to your serving. Enjoy your tasty strawberry cheesecake dip!
Tips & Tricks
Best Practices for Cream Cheese Dip
To make your dip creamy, start with softened cream cheese. Cold cream cheese will not mix well. Use an electric mixer for the best texture. Beat until it’s smooth and fluffy. This step is key to a great dip. Gradually add powdered sugar to avoid lumps. Mix in vanilla extract for a sweet touch.
How to Achieve the Right Consistency
The dip should be thick but smooth. If it feels too thick, add a bit of sour cream. Mixing in the sour cream helps create a lighter texture. You can also fold in more diced strawberries for added freshness. Make sure to chill the dip for 30 minutes. This allows the flavors to blend well.
Serving Suggestions for Parties
For a fun presentation, use colorful dippers. Arrange graham crackers, apple slices, and pretzel sticks around the dip. You can even garnish the top with whole strawberries. This adds a pop of color. Serve the dip chilled for the best taste. It’s perfect for parties, gatherings, or family snacks. Everyone will love it!
Pro Tips
- Use Room Temperature Ingredients: Allow your cream cheese and sour cream to come to room temperature before mixing. This will help achieve a smoother texture in the dip.
- Fresh Strawberries Matter: Always use fresh strawberries for the best flavor and texture. If strawberries are out of season, consider using frozen strawberries that have been thawed and drained.
- Chill for Flavor: Let the dip chill in the refrigerator for at least 30 minutes. This not only allows the flavors to meld but also enhances the overall taste and texture.
- Experiment with Dippers: While graham crackers are classic, don’t hesitate to try different dippers like vanilla wafers, pretzel sticks, or even chocolate-covered fruit for a fun twist.

Variations
Other Fruit Combinations for the Dip
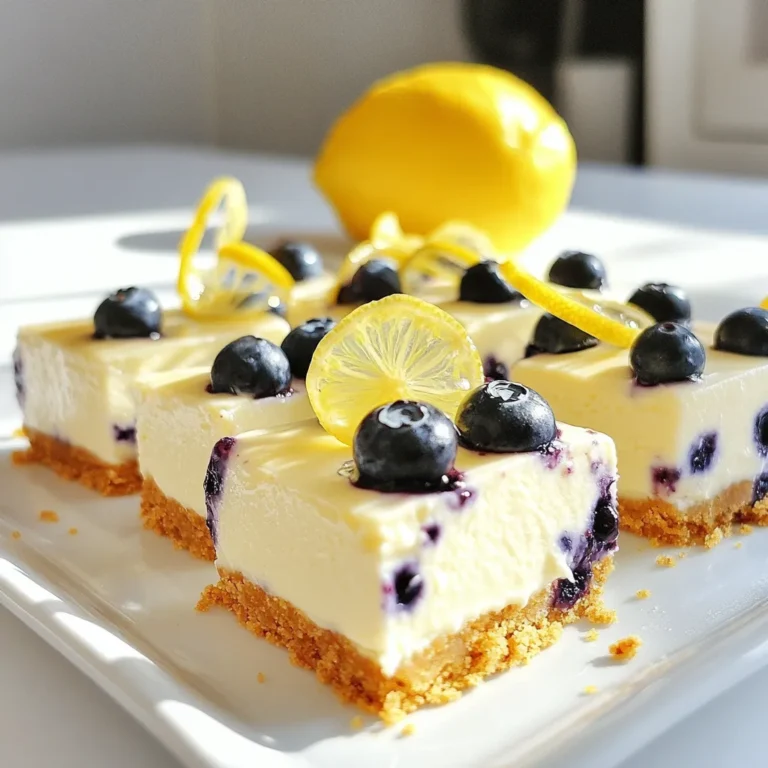
You can swap strawberries for other fruits. Try blueberries, raspberries, or peaches. Each fruit brings a new taste. Blueberries add a nice tartness. Raspberries give a sweet and tangy flavor. Peaches offer a juicy and soft texture. Mix fruits for a colorful dip. Just make sure to chop them small. This helps the flavors blend well.
Alternative Sweeteners or Flavoring
If you want a different sweetener, try honey or maple syrup. These options give a unique twist. You can also use agave nectar for a lighter sweetness. For flavoring, add a touch of lemon zest. It brightens the dip and adds freshness. You can even mix in a bit of almond extract for a nutty flavor.
Vegan-Friendly Options
To make this dip vegan, use plant-based cream cheese. There are many brands that taste great. Replace sour cream with coconut yogurt or tofu. These give a creamy texture. For sweetness, use maple syrup instead of powdered sugar. This keeps the dip sweet and tasty. Add some vanilla extract for flavor. You can still enjoy this dip while keeping it plant-based.
Storage Info
How to Store Leftover Dip
To store leftover dip, place it in an airtight container. Make sure the lid is tight. This keeps the dip fresh and safe. You can also cover it with plastic wrap. Just press the wrap against the dip. This method helps prevent air from getting in. Store the dip in the fridge. It will stay good for a few days.
Freezing Instructions for Long-term Storage
You can freeze the dip for longer storage. First, put the dip into a freezer-safe container. Leave some space at the top. The dip will expand as it freezes. Seal the container tightly to block out air. Label the container with the date. You can freeze the dip for up to three months. When you are ready to eat it, thaw the dip in the fridge overnight. Mix it well before serving.
Shelf Life of Strawberry Cheesecake Dip
Strawberry cheesecake dip lasts about three days in the fridge. If you see any change in color or smell, it’s time to toss it. The dip may last longer if stored well, but it tastes best fresh. If frozen, it can last up to three months. Always check the dip before serving. Enjoy it while it’s fresh for the best flavor!
FAQs
Can I make this dip ahead of time?
Yes, you can make this dip ahead of time. I often prepare it a few hours before serving. Just keep it in the fridge. This way, the flavors blend well. It tastes even better after chilling. I recommend covering it tightly with plastic wrap.
What can I use instead of graham crackers?
You have many options instead of graham crackers. Fresh fruit works great. Apple slices add a nice crunch. Pretzel sticks give a salty twist. You can even use cookies like vanilla wafers. Choose what you enjoy most!
Is there a way to make this dip healthier?
Yes, you can make this dip healthier. Try using low-fat cream cheese or Greek yogurt. You can also cut back on sugar. Use honey or maple syrup instead of powdered sugar. Adding more fresh fruit boosts nutrition too!
Strawberry cheesecake dip is a tasty treat made with simple ingredients. We covered key components, optional toppings, and tools you’ll need. I shared step-by-step instructions from mixing to serving. Tips helped you achieve the best texture and flavor. We explored variations for different diets and preferences. Finally, I gave storage advice to keep your dip fresh.
Enjoy making this dip at your next party. It’s easy, fun, and delicious. Your guests will love the flavo
Strawberry Cheesecake Dip
Ingredients
- 1 cup cream cheese, softened
- 0.5 cup powdered sugar
- 1 teaspoon vanilla extract
- 0.5 cup sour cream
- 1 cup fresh strawberries, diced
- 0.25 cup strawberry jam
- none Graham crackers or fruit for dipping (like apple slices and pretzel sticks)
Instructions
- In a medium mixing bowl, beat the softened cream cheese with an electric mixer until creamy and smooth.
- Gradually add the powdered sugar and continue to beat to combine until fluffy.
- Mix in the vanilla extract and sour cream, blending until the mixture is smooth and well incorporated.
- Gently fold in the diced strawberries and strawberry jam until evenly distributed throughout the cream cheese mixture.
- Transfer the dip to a serving bowl and smooth the top with a spatula for a nice finish.
- Cover the dip with plastic wrap and chill in the refrigerator for at least 30 minutes to allow the flavors to meld.
- Serve the dip chilled with an assortment of graham crackers, apple slices, and pretzel sticks for dipping.
![To make Chocolate Swirl Banana Ice Cream, you will need: - 4 ripe bananas, sliced and frozen - 1 cup coconut milk (or any milk of choice) - 2 tablespoons maple syrup (adjust for sweetness) - 1 teaspoon vanilla extract - 1/4 cup cacao powder (or unsweetened cocoa powder) - A pinch of sea salt These ingredients come together to create a creamy and rich treat. The ripe bananas give sweetness, while the cacao powder adds that lovely chocolate flavor. If you have dietary needs, there are easy swaps. For dairy-free options, use almond milk or oat milk instead of coconut milk. You can replace maple syrup with agave syrup or honey for sweetness. Those who avoid sugar may use a sugar substitute like stevia. For the cacao powder, you can use carob powder for a different taste. This ice cream is not only tasty but also has some health benefits. Each serving contains: - Calories: Around 150 - Protein: 2g - Carbohydrates: 30g - Sugar: 12g (natural sugars from bananas) - Fat: 4g This treat is a great way to enjoy dessert while getting some nutrients from the bananas. It’s a fun way to cool down and feel good about what you eat. For the complete recipe, check out the [Full Recipe]. Start by gathering all your ingredients. You will need: - 4 ripe bananas, sliced and frozen - 1 cup coconut milk (or any milk of choice) - 2 tablespoons maple syrup (adjust for sweetness) - 1 teaspoon vanilla extract - 1/4 cup cacao powder (or unsweetened cocoa powder) - A pinch of sea salt Make sure your bananas are ripe. This will make your ice cream sweet and tasty. Slice the bananas and freeze them for a few hours. Now, let's blend! Take the frozen bananas and put them in a blender. Add the coconut milk, maple syrup, vanilla extract, and sea salt. Blend until everything is smooth and creamy. You may need to stop and scrape down the sides of the blender. This helps everything mix well. Once you see a creamy texture, transfer the banana mix to a big bowl. In a different bowl, mix the cacao powder with a splash of coconut milk. Stir until you make a smooth chocolate sauce. If it is too thick, add a little more milk until it is pourable. Now, drizzle the chocolate sauce over the banana mix in the large bowl. Use a spatula to gently swirl the chocolate into the banana mixture. Create those pretty marbled patterns! Once you finish swirling, transfer the mix into an airtight container. Smooth the top with your spatula and cover it tightly. Freeze it for 2-4 hours until it is firm enough to scoop. For the best experience, let the ice cream sit out for about 5 minutes before serving. This makes it easier to scoop. Enjoy the delightful taste of your homemade Chocolate Swirl Banana Ice Cream! Check out the Full Recipe for more details. To get the right texture, freeze your bananas well. I slice them and freeze them overnight. This gives a creamy base. When blending, add coconut milk slowly. Start with a little, then add more if needed. Blend until smooth, but don’t overdo it. If it's too soft, freeze it longer. You can easily boost the flavor of your ice cream. Try adding a pinch of cinnamon. It adds warmth and depth. You can also swap maple syrup for honey or agave. Each sweetener gives a unique taste. For a nutty twist, mix in some almond extract. This brings a fun twist to the classic flavor. Serve your ice cream in chilled bowls. This keeps it cold longer. Scoop it out after letting it sit for five minutes. This makes scooping easier. Top with fresh banana slices and a drizzle of chocolate sauce. For extra crunch, sprinkle cacao nibs on top. This adds texture and looks pretty too. For the full recipe, check the main article. {{image_2}} If you want a dairy-free treat, use coconut milk. It adds creaminess and a light flavor. You can also try almond milk or oat milk. Both work well in this recipe. Just make sure to pick a milk that you enjoy. You can make your ice cream even better with mix-ins. Try adding chopped nuts or shredded coconut. Chocolate chips are also a fun choice. For toppings, fresh fruit, crushed cookies, or granola add texture and flavor. Drizzle extra chocolate sauce on top for a sweet touch. Feel free to get creative with flavors. Add peanut butter for a rich taste. You might also try adding berries like strawberries or raspberries for a fruity twist. A pinch of cinnamon gives a warm note. Each of these options makes your chocolate swirl banana ice cream unique! Remember, you can find the full recipe above. Enjoy making your ice cream! To keep your chocolate swirl banana ice cream fresh, you need to store it right. Here are some tips to help you. First, always let your ice cream cool to room temperature. This helps to avoid ice crystals. After mixing, transfer it to a container. Make sure it’s airtight. This keeps the air out and prevents freezer burn. If you want to enjoy it later, freeze it for up to a month. Use a sturdy container for your ice cream. Glass and plastic containers work well. Make sure the lid fits tightly. This keeps the ice cream safe from other smells in the freezer. If you want to scoop easily, choose a shallow container. It makes it simple to reach every part of the ice cream. Chocolate swirl banana ice cream stays fresh for about two weeks. After that, it can lose flavor and texture. It’s best to eat it within this time frame for the best taste. If it sits too long, it might become icy. Now, you can enjoy your delightful chocolate swirl banana ice cream, knowing how to store it right! For the full recipe, check out the earlier section. To make chocolate swirl banana ice cream, start by blending frozen bananas, coconut milk, maple syrup, vanilla extract, and sea salt. Blend until smooth. Next, mix cacao powder with some coconut milk to create a chocolate sauce. After blending, transfer the banana mix to a bowl. Drizzle the chocolate sauce over it and gently swirl it in. Finally, put the mixture in an airtight container and freeze it for 2-4 hours. For the full recipe, check out the details above. Yes, you can use any milk you like. Almond milk, soy milk, or oat milk work well too. Each type will give a slightly different taste and texture. Choose the milk that fits your diet or taste. Store homemade ice cream in an airtight container. This keeps it fresh and prevents ice crystals. Make sure to smooth the top before sealing to avoid air pockets. It stays fresh in the freezer for about 1-2 weeks. This blog post covered how to make chocolate swirl banana ice cream. We talked about the right ingredients, step-by-step instructions, and helpful tips. You learned how to customize the recipe with different flavors and toppings. I shared storage advice to keep your ice cream fresh. Now you can enjoy a tasty treat that fits your diet. Get ready to impress your friends and family with your new skills!](https://dailydishlab.com/wp-content/uploads/2025/07/482899ed-90ac-4dc0-8cba-52d6130bf4d8-768x768.webp)
![To make no-bake chocolate oat bars, you need simple and wholesome ingredients. Here’s what you will need: - 2 cups rolled oats - 1 cup natural peanut butter (or almond butter) - 1/2 cup honey or maple syrup - 1/2 cup unsweetened cocoa powder - 1/4 teaspoon salt - 1 teaspoon vanilla extract - 1/2 cup mini chocolate chips (plus more for topping) - Optional: 1/4 cup chopped nuts (e.g., walnuts or almonds) These ingredients create a rich and tasty treat. The oats provide fiber and good nutrients. Peanut butter adds protein and healthy fats. Honey or maple syrup gives sweetness, while cocoa powder delivers that chocolate flavor we all love. Salt enhances the taste, making it all balanced. I love how easy it is to mix these ingredients together. You can customize it, too! Add nuts for crunch or swap the nut butter based on your taste. This recipe is perfect for snacks or dessert. You can find the full recipe with instructions to create these bars. Making no-bake chocolate oat bars is simple and fun. You only need a few basic steps. First, gather your ingredients. This recipe makes 16 bars, perfect for snacks or dessert. Start with a large bowl. Add 2 cups of rolled oats, 1/2 cup of cocoa powder, and 1/4 teaspoon of salt. Mix these dry ingredients well. This mixture gives the bars structure and rich flavor. In a small saucepan, add 1 cup of peanut butter and 1/2 cup of honey. Heat over low heat. Stir until smooth. This step helps the two ingredients blend nicely. Once mixed, take the pan off the heat and add 1 teaspoon of vanilla extract. Stir well to combine. Pour the warm peanut butter mix over your oat mixture. Stir until all the oats get coated. Fold in 1/2 cup of mini chocolate chips and optional chopped nuts if you like. Next, line an 8-inch square baking dish with parchment paper. Leave some paper hanging over the edges. This makes it easy to lift out the bars later. Transfer the oat mixture into the dish. Press it down firmly with a spatula or your hands. Sprinkle more mini chocolate chips on top and press them lightly into the mixture. Now, place the dish in the fridge for at least 2 hours. This will help the bars set. When ready, lift them out using the parchment paper. Cut into squares or rectangles. Enjoy your no-bake chocolate oat bars! For the full recipe, check out the complete list of steps above. To get the right texture for your no-bake chocolate oat bars, focus on the oats. Use rolled oats, not instant oats. Rolled oats give you that chewy bite. Make sure to mix the wet ingredients well. A smooth peanut butter blend helps to bind everything. Press the mixture firmly into your dish. This will help the bars set better. You can make these bars your own with toppings. Add different nuts for crunch, like walnuts or almonds. You can also sprinkle coconut flakes for a tropical twist. If you love chocolate, add more mini chocolate chips on top. Feel free to get creative! Use dried fruit or seeds for added flavor and nutrients. Avoid using too much liquid. This can make your bars too soft. If they don't hold together, they won't slice well. Also, don't skip chilling them long enough. They need at least two hours in the fridge. This helps them set properly. Lastly, always line your baking dish with parchment paper. This makes removing the bars easy and mess-free. For the full recipe, check out the [Full Recipe]. {{image_2}} You can make this treat even healthier. Try using whole grain oats instead of rolled oats. They add more fiber and nutrients. You can swap honey for agave syrup or use mashed bananas for sweetness. Both options lower the glycemic index. If you want a lower-fat option, use a nut butter with less oil. This keeps the flavor while cutting some calories. Let your taste buds explore! You can add spices like cinnamon or nutmeg to the oat mixture. This gives the bars a warm, cozy flavor. Try mixing in dried fruits like raisins or cranberries for a chewy texture. You can also switch up the chocolate chips. Use white chocolate or butterscotch chips for a fun twist. Each change makes the bars unique! Making these bars vegan or nut-free is easy. To go vegan, use maple syrup instead of honey. Replace peanut butter with sunflower seed butter. This keeps the bars nut-free and still delicious. You can also use pumpkin seed butter for a different flavor. Both options are rich in protein and healthy fats. Enjoy your tasty treat without worry! Check out the Full Recipe to see how easy these variations are to make. To keep your no-bake chocolate oat bars fresh, store them in an airtight container. Use parchment paper between layers to prevent sticking. This way, they stay nice and tasty for longer. If you have a big batch, you can also wrap them individually in plastic wrap. This makes it easy to grab one on the go. When stored properly, these bars last about one week at room temperature. You can keep them in the fridge for up to two weeks. The cool air helps keep them firm and tasty. Just make sure they stay in a sealed container to avoid moisture. You can freeze these bars for even longer storage. They freeze well for up to three months. To do this, wrap each bar in plastic wrap. Then, place them in a freezer-safe bag. When you want one, take it out and let it thaw in the fridge. This way, you’ll always have a treat ready to enjoy! For the full recipe, check out the detailed steps above. Yes, you can use other nut butters. Almond butter works well and has a nice flavor. Cashew butter is another tasty choice. Just make sure it is natural and creamy. Each nut butter may change the taste a little. Feel free to experiment with your favorite! To make this recipe gluten-free, choose certified gluten-free oats. Most rolled oats contain gluten. So, look for oats labeled as gluten-free. This small step ensures your tasty bars are safe for gluten-free diets. You can enjoy these bars without worry! If you want to substitute honey or maple syrup, try agave syrup or brown rice syrup. Both options add sweetness and keep the bars moist. You can also use date syrup for a fruity flavor. Just remember, these swaps may slightly change the taste. In this blog post, we covered a delicious recipe for oat bars. You learned about key ingredients like oats, nut butter, and cocoa powder. I shared step-by-step instructions to guide your cooking process. Tips for perfect texture and common mistakes were also discussed. Variations let you customize flavors and ensure everyone can enjoy these bars. Remember to follow storage tips for freshness. Baking these oat bars is fun and rewarding. They make a great snack for everyone. Enjoy your tasty creation!](https://dailydishlab.com/wp-content/uploads/2025/07/967f7db3-ab0b-4ab4-b9dd-ccfa3a2c04e2-768x768.webp)