Caprese Stuffed Portobellos Flavorful and Easy Recipe

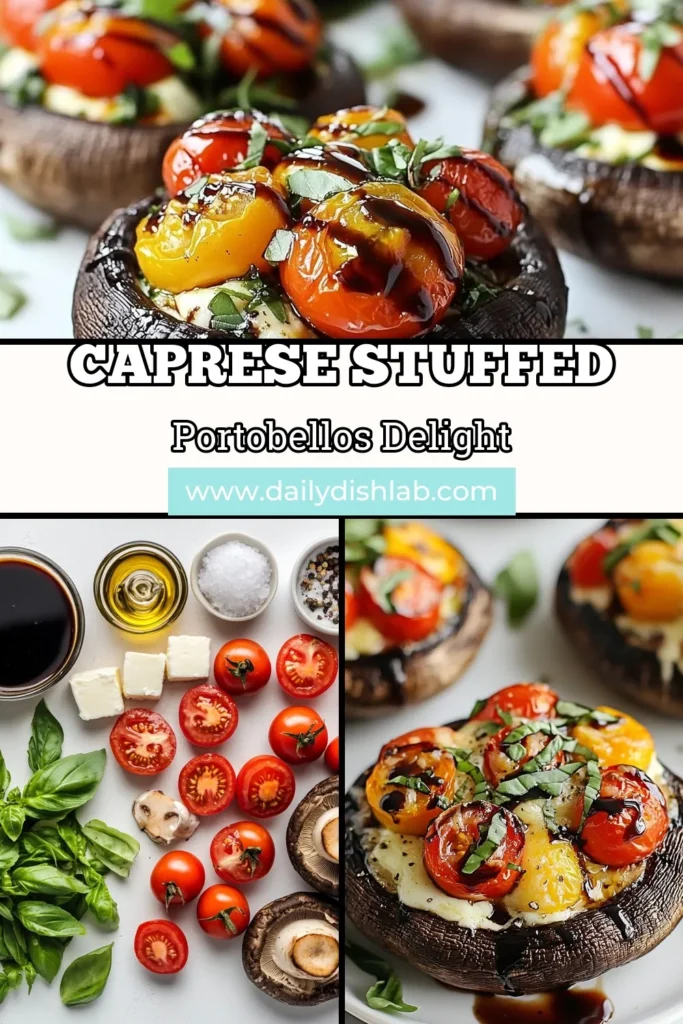
If you’re craving a dish that’s bursting with flavor and easy to make, you’re in the right place! Caprese Stuffed Portobellos combine juicy mushrooms with fresh tomatoes, basil, and mozzarella. This recipe is perfect for quick dinners or special occasions. Join me as I share my step-by-step guide to creating this mouthwatering dish that everyone will love. Let’s dive into the ingredients and make your kitchen sizzle!
Why I Love This Recipe
- Fresh and Flavorful: The combination of juicy cherry tomatoes, creamy mozzarella, and aromatic basil creates a burst of fresh flavors in every bite.
- Simple Preparation: With just a few ingredients and easy steps, this dish is perfect for both novice cooks and seasoned chefs looking for a quick meal.
- Healthy and Satisfying: Portobello mushrooms are a low-calorie, nutritious alternative to meat, making this dish a wholesome option for any meal.
- Perfect for Entertaining: These stuffed mushrooms are visually appealing and make for an impressive appetizer or side dish at any gathering.
Ingredients
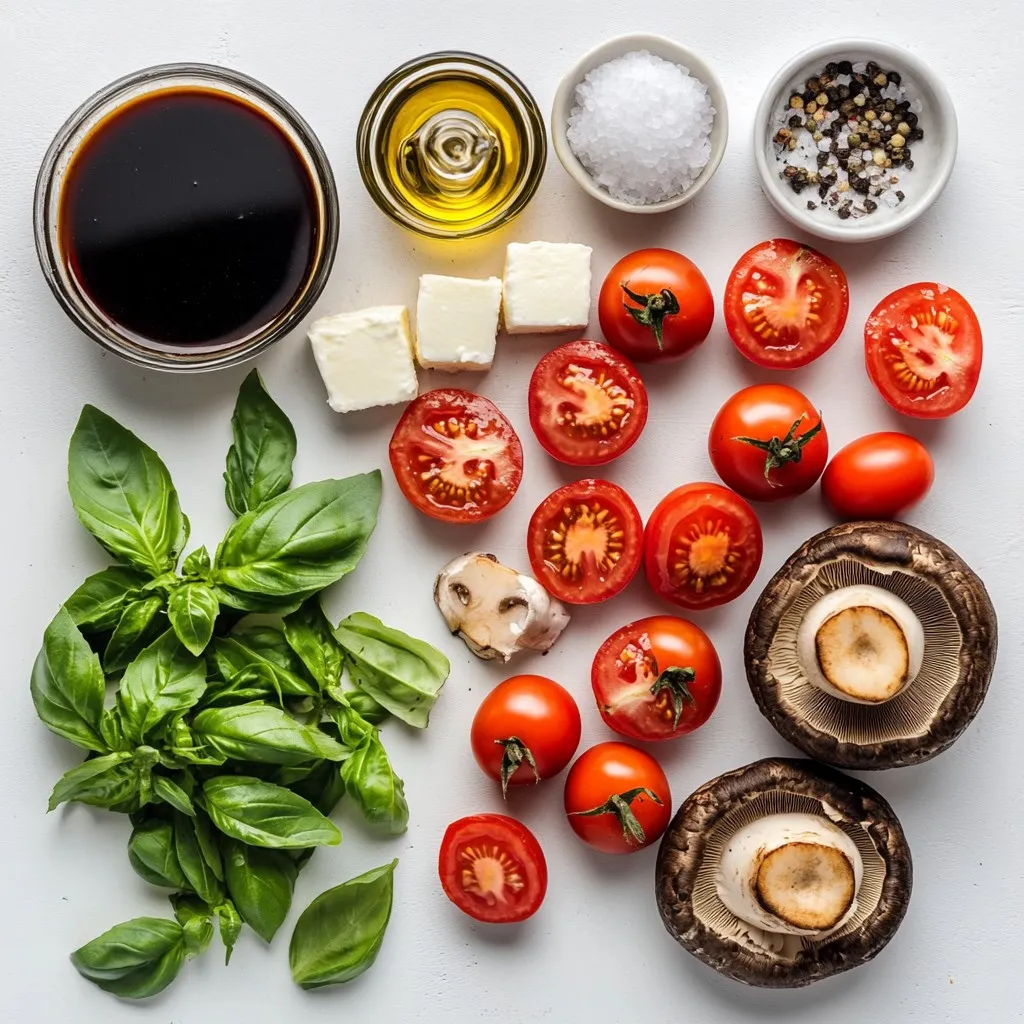
List of Ingredients
- 4 large portobello mushrooms, stems removed
- 2 cups cherry tomatoes, halved
- 8 ounces fresh mozzarella cheese, diced
- 1/4 cup fresh basil leaves, chopped
- 2 tablespoons balsamic glaze
- 2 tablespoons olive oil
- 1 teaspoon garlic powder
- Salt and pepper to taste
- 1/4 teaspoon red pepper flakes (optional)
Measurements and Options for Freshness
When choosing portobello mushrooms, look for ones that are firm and smooth. They should feel heavy for their size. Fresh cherry tomatoes should be bright and firm. Soft spots can mean they are past their best. For mozzarella, use fresh cheese for a creamy texture. If you can’t find fresh basil, dried basil can work, but fresh gives better flavor.
Nutritional Information Overview
One serving of Caprese stuffed portobellos has about 230 calories. They are low in carbs and high in protein. Mushrooms are a good source of vitamins and minerals. Mozzarella adds calcium and protein. The dish is also rich in antioxidants from tomatoes and basil. To keep it healthy, use less balsamic glaze or olive oil. This dish is perfect for a light meal or appetizer.
Step-by-Step Instructions
Prepping the Oven and Baking Sheet
Start by setting your oven to 375°F (190°C). This temperature helps the mushrooms cook perfectly. Next, line a baking sheet with parchment paper. This step makes cleanup easy and keeps the mushrooms from sticking.
Cleaning and Preparing Portobello Mushrooms
Take 4 large portobello mushrooms and clean them with a damp cloth. This helps remove dirt and keeps them fresh. After cleaning, remove the stems. Place the mushrooms on the baking sheet with the gill-side facing up. This position allows the filling to stay inside.
Mixing the Caprese Filling
In a mixing bowl, combine 2 cups of halved cherry tomatoes, 8 ounces of diced fresh mozzarella cheese, and 1/4 cup of chopped fresh basil leaves. Add 2 tablespoons of balsamic glaze, 2 tablespoons of olive oil, 1 teaspoon of garlic powder, salt, and pepper to taste. If you like a bit of spice, add 1/4 teaspoon of red pepper flakes. Stir the mixture well until everything is coated nicely.
Stuffing the Mushrooms
Now, take the Caprese mixture and spoon it generously into each portobello cap. Press down gently to pack the filling, so it holds well during baking. This step ensures each bite is full of flavor.
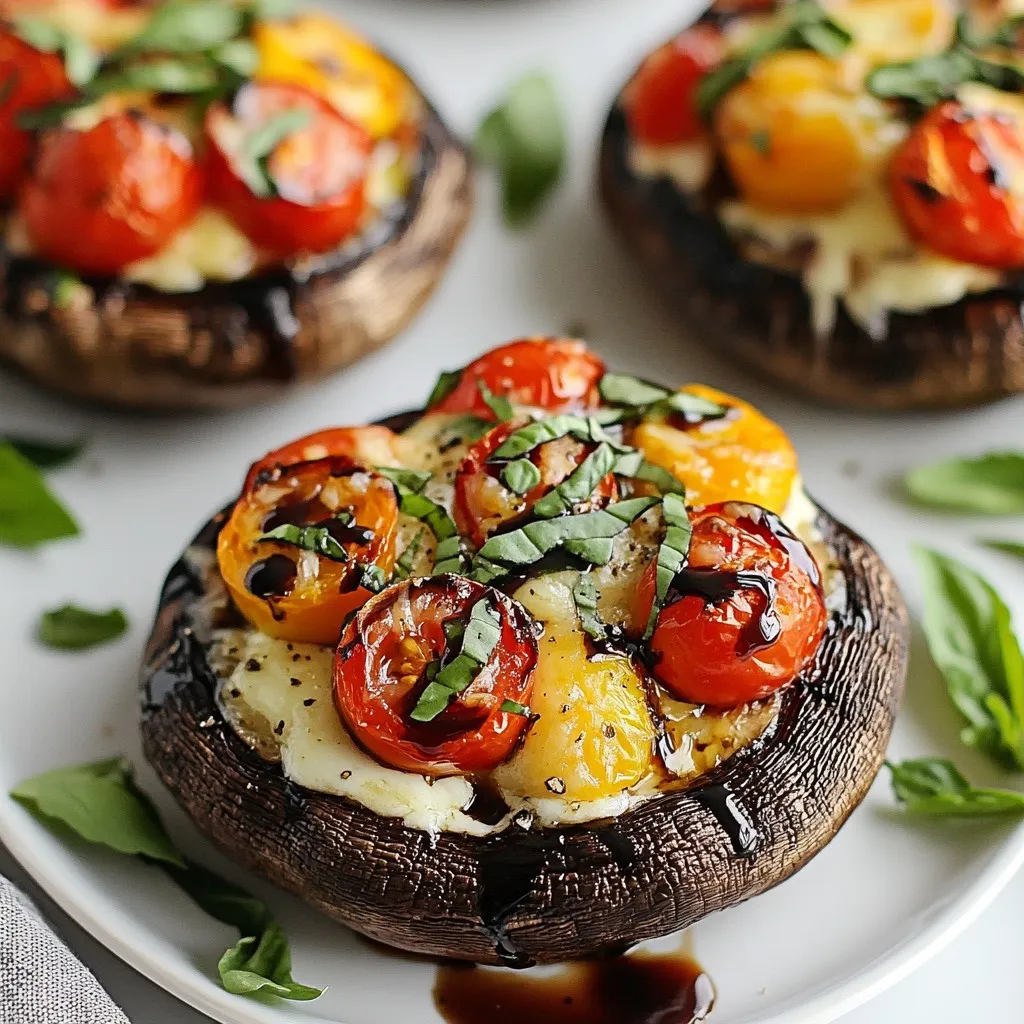
Baking Time and Temperature
Place the baking sheet in your preheated oven. Bake the stuffed mushrooms for 20-25 minutes. You want the mushrooms to be tender, and the cheese should be bubbly and slightly golden. Once out of the oven, let them cool for a few minutes before serving. For a finishing touch, drizzle with extra balsamic glaze and garnish with more basil leaves. Enjoy your tasty creation!
Tips & Tricks
How to Choose the Best Portobello Mushrooms
When picking portobello mushrooms, look for large and firm caps. The color should be dark brown and the gills should be clean. Avoid mushrooms with soft spots or wrinkles. Fresh mushrooms smell earthy, not sour. If you can, buy them from a local market.
Preventing Mushrooms from Getting Soggy
To keep your mushrooms from turning soggy, dry them well before cooking. Use a damp cloth to clean them, but don’t soak them in water. When you fill the mushrooms, pack the ingredients tightly. This helps prevent moisture from escaping during cooking. Baking them at the right temperature is key too.
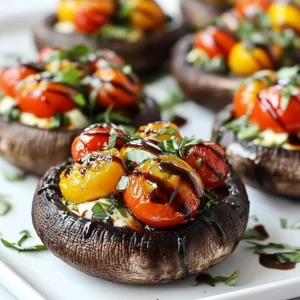
Serving Suggestions for Caprese Stuffed Portobellos
Caprese stuffed portobellos make a great main dish or a side. Serve them on a bed of fresh greens, like arugula or spinach. Drizzle extra balsamic glaze on top for added flavor. Pair these stuffed mushrooms with crusty bread or a light salad for a full meal. You can also add grilled chicken or shrimp for extra protein.
Pro Tips
- Choose Fresh Ingredients: Use the freshest mozzarella and ripe cherry tomatoes for the best flavor.
- Experiment with Cheese: Try different types of cheese like goat cheese or feta for a unique twist on the classic Caprese flavor.
- Pre-Season Mushrooms: Brush the portobello caps with olive oil and season before adding the filling for extra flavor.
- Serve Immediately: Enjoy the stuffed mushrooms right after baking for the best texture and taste.
Variations
Vegan Caprese Stuffed Portobellos
You can easily make this dish vegan. Swap the fresh mozzarella for vegan cheese. Look for brands that melt well. Use a dairy-free balsamic glaze too. This keeps the flavors bold and fresh. You won’t miss the cheese at all.
Gluten-Free Alternatives
This recipe is already gluten-free! Portobello mushrooms are naturally gluten-free. Just check your balsamic glaze. Some brands add gluten. Always read the labels to ensure your meal is safe.
Adding Extra Ingredients for Flavor
Want to kick up the taste? Add pesto to the filling. It brings a nutty, rich flavor. You can also include fresh spinach for added nutrition. Spinach wilts down nicely when baked. For a spicy twist, toss in more red pepper flakes. Each addition makes this dish even more exciting.
Storage Info
How to Store Leftover Stuffed Mushrooms
Store leftover stuffed mushrooms in an airtight container. Let them cool first. Place a paper towel in the container to absorb moisture. This keeps the mushrooms fresh and tasty. You can store them in the fridge for up to three days.
Reheating Tips for Best Flavor and Texture
To reheat, preheat your oven to 350°F (175°C). Place the mushrooms on a baking sheet. Cover them loosely with foil to prevent drying. Heat for about 10-15 minutes. This method keeps the cheese gooey and the mushrooms tender. You can also use a microwave. Heat for 1-2 minutes, but the oven gives better results.
Freezing Instructions
You can freeze stuffed mushrooms for later. Wrap each mushroom in plastic wrap tightly. Then, place them in a freezer bag. Remove as much air as possible. They can stay frozen for up to three months. When ready to eat, thaw them in the fridge overnight. Reheat them in the oven for the best texture.
FAQs
What can I serve with Caprese Stuffed Portobellos?
You can pair Caprese stuffed portobellos with a fresh salad. A simple arugula salad works well. You can also serve them with crusty bread or garlic bread. Pasta with a light sauce makes a great side too. Adding a glass of crisp white wine will enhance the meal.
How long do Caprese Stuffed Portobellos last in the fridge?
Caprese stuffed portobellos last up to three days when stored properly. Keep them in an airtight container. Make sure they cool to room temperature first. This helps preserve their flavor and texture.
Can I make Caprese Stuffed Portobellos ahead of time?
Yes, you can prepare them ahead of time. Stuff the mushrooms and store them in the fridge. They will stay fresh for a day or two. Just bake them right before serving for the best taste.
What are some common substitutions for the ingredients?
Feel free to swap ingredients based on what you have. You can use larger tomatoes instead of cherry tomatoes. Any cheese, like feta or goat, can work too. If you need a vegan option, try plant-based cheese and olive oil instead of balsamic glaze.
In this article, we explored the delicious world of Caprese Stuffed Portobellos. We discussed the ingredients, how to prepare them, and the baking steps. We also shared tips for choosing mushrooms and preventing sogginess. You can make variations to suit your taste, and we covered how to store any leftovers.
Enjoy experimenting with this recipe. With a few simple steps, you can create a healthy and tasty dish that impresses everyone. Happy cookin
Caprese Stuffed Portobellos
Ingredients
- 4 large portobello mushrooms, stems removed
- 2 cups cherry tomatoes, halved
- 8 ounces fresh mozzarella cheese, diced
- 1 4 cup fresh basil leaves, chopped
- 2 tablespoons balsamic glaze
- 2 tablespoons olive oil
- 1 teaspoon garlic powder
- to taste Salt and pepper
- 1 4 teaspoon red pepper flakes (optional)
Instructions
- Preheat your oven to 375°F (190°C) and line a baking sheet with parchment paper.
- Clean the portobello mushrooms with a damp cloth and remove the stems. Place them on the baking sheet, gill-side up.
- In a mixing bowl, combine the halved cherry tomatoes, diced mozzarella cheese, chopped basil, balsamic glaze, olive oil, garlic powder, salt, pepper, and red pepper flakes if using. Mix well until the ingredients are evenly coated.
- Spoon the Caprese mixture generously into each portobello cap, pressing down gently to pack it in.
- Bake in the preheated oven for 20-25 minutes, or until the mushrooms are tender, and the cheese is bubbly and slightly golden.
- Remove from the oven and let cool for a few minutes before serving.
- Drizzle with extra balsamic glaze if desired and garnish with additional basil leaves for a fresh touch.
![- 2 large sweet potatoes, peeled and cut into thin fries - 2 tablespoons olive oil - 1 teaspoon paprika - 1 teaspoon garlic powder - ½ teaspoon cayenne pepper (optional for heat) - Salt and pepper to taste - 1 ripe avocado - 2 tablespoons Greek yogurt - 1 tablespoon lime juice - 1 small clove garlic, minced - Fresh cilantro for garnish To make sweet potato fries, you need a few simple items. Start with large sweet potatoes. They bring a nice sweetness and vibrant color. Olive oil helps achieve a crispy texture. Spices like paprika and garlic powder add flavor. If you like heat, cayenne pepper is optional. For the avocado dip, grab a ripe avocado. It should feel soft when you press it gently. Greek yogurt makes the dip creamy and adds protein. Lime juice gives it a zesty kick. A small clove of garlic adds depth to the flavor. Finally, fresh cilantro can brighten your dish. With these ingredients, you can create a tasty snack or side dish. The flavors mix well and complement each other perfectly. If you want to see the complete recipe, check out the Full Recipe section. First, I preheat the oven to 425°F (220°C). This step is key for crispy fries. Next, I line a baking sheet with parchment paper. It helps the fries not stick. Now, I take 2 large sweet potatoes. I peel them and cut them into thin fries. Aim for about 1/4-inch thick. This size ensures even cooking. In a large bowl, I mix the fries with olive oil, paprika, garlic powder, cayenne pepper, salt, and pepper. I toss everything together until the fries are well coated. This blend adds a tasty kick. I spread the fries out in a single layer on the baking sheet. This step keeps them from steaming. I bake the fries for about 25-30 minutes. Halfway through, I flip them for even cooking. They should turn golden and crispy. To achieve optimal crispiness, I avoid overcrowding the baking sheet. If fries touch, they won’t crisp up. While the fries bake, I make the avocado dip. I grab a ripe avocado and mash it in a small bowl. I aim for a smooth texture. Next, I add Greek yogurt, lime juice, minced garlic, salt, and pepper to the mashed avocado. I stir everything until creamy. This dip adds a fresh flavor. For tips, I suggest adjusting the garlic to your liking. You want a balance of flavors that complements the fries. Once the fries are done, I serve them hot with the avocado dip. The combination is simply delightful! For the complete recipe, check out the [Full Recipe]. To get crispy sweet potato fries, you must not overcrowd the baking sheet. When fries sit on top of each other, they steam instead of bake. This makes them soggy, not crispy. Spread them out in a single layer with space in between. Cooking times can vary. Most ovens will take about 25 to 30 minutes at 425°F (220°C). Check them halfway through and flip for even cooking. If your oven runs hot or cold, adjust the time as needed. Adding spices can make your sweet potato fries pop. Try sprinkling on some cinnamon or chili powder for a tasty twist. You can also toss in some fresh herbs like rosemary or thyme. Looking for toppings? Grated parmesan cheese or crumbled feta can add great flavor. A drizzle of balsamic glaze or hot sauce can also elevate the dish. You can prep your sweet potato fries in advance. Cut and season them, then store them in the fridge for up to 24 hours. When ready, bake them straight from the fridge; just add a few extra minutes to the cooking time. For serving, consider a fun presentation. Use a large platter with the fries piled high. Place the avocado dip in a bowl in the center, garnished with fresh cilantro. It makes a great visual and invites everyone to dig in. For the full recipe, check out the link provided. {{image_2}} You can make your sweet potato fries spicy by adding heat. Use chili powder for a smoky kick. You can also try cayenne pepper for a fiery burst. If you prefer a wet heat, drizzle hot sauce on the fries before baking. This will give them a zesty flavor. Mix and match these spices to find your perfect heat level. While the avocado dip is creamy and tasty, you can explore other options. A yogurt-based dip adds a tangy twist and pairs well with fries. Try mixing Greek yogurt with herbs like dill or mint for a fresh taste. Tahini also makes a great dip. It brings a nutty flavor that complements sweet potatoes nicely. Sweet potatoes are not alone! You can mix them with other veggies for a colorful twist. Try adding carrot or zucchini fries to the mix. This not only adds flavor but also boosts nutrition. Cut them into similar sizes to ensure even cooking. This way, you get a rainbow of flavors and textures on your plate. For the full recipe, check out the details above. Enjoy your delicious and fun variations! Sweet potato fries can stay fresh in the fridge for up to three days. To store them, place the fries in an airtight container. This keeps them from getting soggy and helps maintain flavor. Always let the fries cool completely before sealing them. This prevents steam buildup, which can make them mushy. To reheat sweet potato fries and keep them crispy, use an oven or an air fryer. Preheat your oven to 400°F (200°C). Spread the fries on a baking sheet in a single layer. Bake for about 10 minutes or until heated through. If using an air fryer, set it to 350°F (175°C) and cook for about 5-7 minutes. Avoid using a microwave, as it makes fries soft and chewy. To freeze sweet potato fries, first, bake them as you would for the recipe. Allow them to cool completely. Then, spread the fries in a single layer on a baking sheet and freeze for about an hour. Once frozen, transfer the fries to a freezer bag. Seal it tightly, removing as much air as possible. When you want to enjoy them, reheat straight from the freezer. Bake at 425°F (220°C) for 25-30 minutes, flipping halfway through. This method keeps them tasty and crisp. For the full recipe, check out the link provided. Yes, you can use orange sweet potatoes. They are similar to yellow sweet potatoes but have a sweeter flavor. Orange sweet potatoes, like the Beauregard variety, are rich in beta-carotene. This gives them a vibrant color and a slightly different taste. You can use them in the same way as regular sweet potatoes. Just peel them, cut them into fries, and season as usual. To boost the flavor of your fries, try adding extra seasonings. Consider these options: - Cumin for a warm, earthy taste. - Chili powder for a spicy kick. - Dried rosemary for a savory note. - Parmesan cheese for a rich, cheesy flavor. Experiment with combinations to find your perfect mix! If you don’t have Greek yogurt, there are great substitutes for the avocado dip. You can use: - Sour cream for a tangy taste. - Plain yogurt if you want a lighter option. - Cottage cheese for added protein and creaminess. These alternatives will keep your dip creamy and delicious. For the complete recipe on how to make sweet potato fries with avocado dip, visit the [Full Recipe](#). In this post, we explored how to make crispy sweet potato fries and a tasty avocado dip. We discussed key ingredients, step-by-step instructions, helpful tips, and variations to enhance your dish. You can adapt the flavors to your taste by using different spices or dips. Making these fries at home is easy and fun. Remember, proper storage and reheating keep them crispy. Enjoy your cooking adventure with sweet potatoes and make each serving special!](https://dailydishlab.com/wp-content/uploads/2025/07/b71090ff-edcb-4680-b017-d44004cc0ae0-768x768.webp)

![To make delicious Deep-Dish Pizza Muffins, gather these simple ingredients: - 2 cups all-purpose flour - 1 tablespoon baking powder - 1 teaspoon garlic powder - ½ teaspoon salt - 1 cup shredded mozzarella cheese - ½ cup pepperoni, diced - ½ cup green bell pepper, finely chopped - ½ cup marinara sauce (plus extra for serving) - 1 cup milk - ⅓ cup olive oil - 1 large egg - Italian seasoning, for garnish These ingredients create a tasty muffin that bursts with pizza flavor. Each one is packed with cheese, pepperoni, and veggies. You can mix and match these items to fit your taste. For example, you can swap pepperoni for veggies or try different cheeses. The options are endless! When you gather your ingredients, make sure they are fresh. Fresh ingredients make the muffins taste better. You can find all these items at your local grocery store. If you want, you can even get organic or local options for a healthier choice. Don't forget to check out the Full Recipe for more details on making these muffins, including cooking times and tips! 1. Preheat your oven to 375°F (190°C). This step is key for even baking. 2. Prepare a standard muffin tin by greasing each cup with cooking spray or olive oil. This keeps the muffins from sticking. 3. In a large bowl, mix together the all-purpose flour, baking powder, garlic powder, and salt. Make sure to whisk them well. 4. Now, gently fold in the shredded mozzarella cheese, diced pepperoni, and finely chopped green bell pepper. Mix until they are evenly spread in the flour blend. 1. In another bowl, whisk together the milk, olive oil, and egg. This helps create a smooth mixture for the batter. 1. Slowly pour the wet mix into the dry ingredients. Stir gently until just combined. The batter should be slightly lumpy. 2. Spoon the batter into the prepared muffin tin. Fill each cup about three-quarters full. 3. For a fun twist, add a small dollop of marinara sauce on top of each muffin. 4. Sprinkle some Italian seasoning over the muffins to enhance the flavor. 5. Bake in the preheated oven for 20-25 minutes. The muffins will rise and turn golden brown. 6. To check if they are done, insert a toothpick in the center of a muffin. If it comes out clean, they are ready. 7. Let the muffins cool in the tin for a few minutes, then transfer them to a wire rack to cool completely. This quick process will lead you to delicious Deep-Dish Pizza Muffins! For the complete recipe, refer to the [Full Recipe]. To make the best deep-dish pizza muffins, avoid overmixing the batter. Overmixing can make the muffins tough. Mix just enough until the ingredients come together. To check for doneness, insert a toothpick into the center of a muffin. If the toothpick comes out clean, the muffins are ready. If it has wet batter, bake a few more minutes. For a great presentation, serve the muffins warm on a rustic wooden board. This adds a cozy touch. Include a small bowl of extra marinara sauce for dipping. This makes every bite even better! Garnish with fresh basil leaves for color and taste. Pair these muffins with a simple salad or garlic bread. They make a great meal or snack. You can swap ingredients for different flavors. Try using cheddar or pepper jack cheese for a twist. For a meatless option, add mushrooms or diced zucchini. Adjust the spice level by adding red pepper flakes or using spicy pepperoni. You can customize each batch to suit your taste! {{image_4}} You can change the cheese in these muffins for new tastes. Try using cheddar cheese for a sharp bite. Pepper jack cheese adds a spicy kick. Mixing mozzarella with these cheeses gives a creamy texture. Experimenting with cheese can make your muffins unique. If you want a vegetarian version, skip the pepperoni. You can use mushrooms for a hearty feel. Chopped spinach or zucchini also works well. These veggies add flavor and moisture. Using different toppings keeps the muffins fresh and fun. The dough you choose can change the whole muffin. You can use pizza dough for a chewy texture. Or, try biscuit dough for a fluffy muffin. Each option brings a new twist to the dish. Experiment with dough types to find your favorite. Don't forget to check the Full Recipe for more ideas! To keep your deep-dish pizza muffins fresh at room temperature, place them in an airtight container. This helps prevent them from drying out. If you plan to eat them within two days, they will stay tasty and soft. If you have more, consider freezing them. For best results, freeze the muffins after they cool completely. Wrap each muffin in plastic wrap. Then, place them in a freezer bag. This keeps them fresh for up to three months. To thaw, leave them in the fridge overnight or set them on the counter for a few hours. To reheat the muffins without drying them out, use the oven. Preheat it to 350°F (175°C). Place the muffins on a baking sheet and cover them with foil. Heat for about 10-15 minutes. This method keeps them moist and warm, ready for you to enjoy. For a quick option, you can microwave them for about 20-30 seconds, but they may dry out more this way. Deep-Dish Pizza Muffins come from Chicago's famous deep-dish pizza. This style of pizza started in the 1940s. It became popular for its thick crust and plenty of toppings. These muffins take that rich flavor and make it bite-sized. They are fun, easy to share, and perfect for parties. You get all the classic tastes in a new form. Yes, you can make these muffins ahead of time. After baking, let them cool completely. Store them in an airtight container at room temperature. They stay fresh for about two days. You can also freeze them. Wrap each muffin tightly and place them in a freezer bag. They can last up to three months. When ready to eat, thaw them in the fridge overnight. Warm them in the oven for the best taste. Absolutely! You can use gluten-free flour for these muffins. Just make sure to choose a good blend. A cup-for-cup gluten-free flour works well. This makes it easy to substitute without changing the recipe. The muffins may be slightly different in texture but still taste great. Enjoy your tasty treat without worry! This blog post guides you through making delicious deep-dish pizza muffins. We covered the key ingredients needed, each step, and helpful tips for the best results. Remember to avoid overmixing the batter and check for doneness to achieve perfect muffins. You can customize the recipe with different toppings and adjust flavors to suit your tastes. These muffins freeze well and reheat easily. Enjoy your baking, and watch these tasty treats impress your family and friends!](https://dailydishlab.com/wp-content/uploads/2025/06/d9a1d58c-7d1e-421a-bb26-4a1991aecf18-768x768.webp)