Gingerbread Cookie Truffles Delightful Holiday Treat
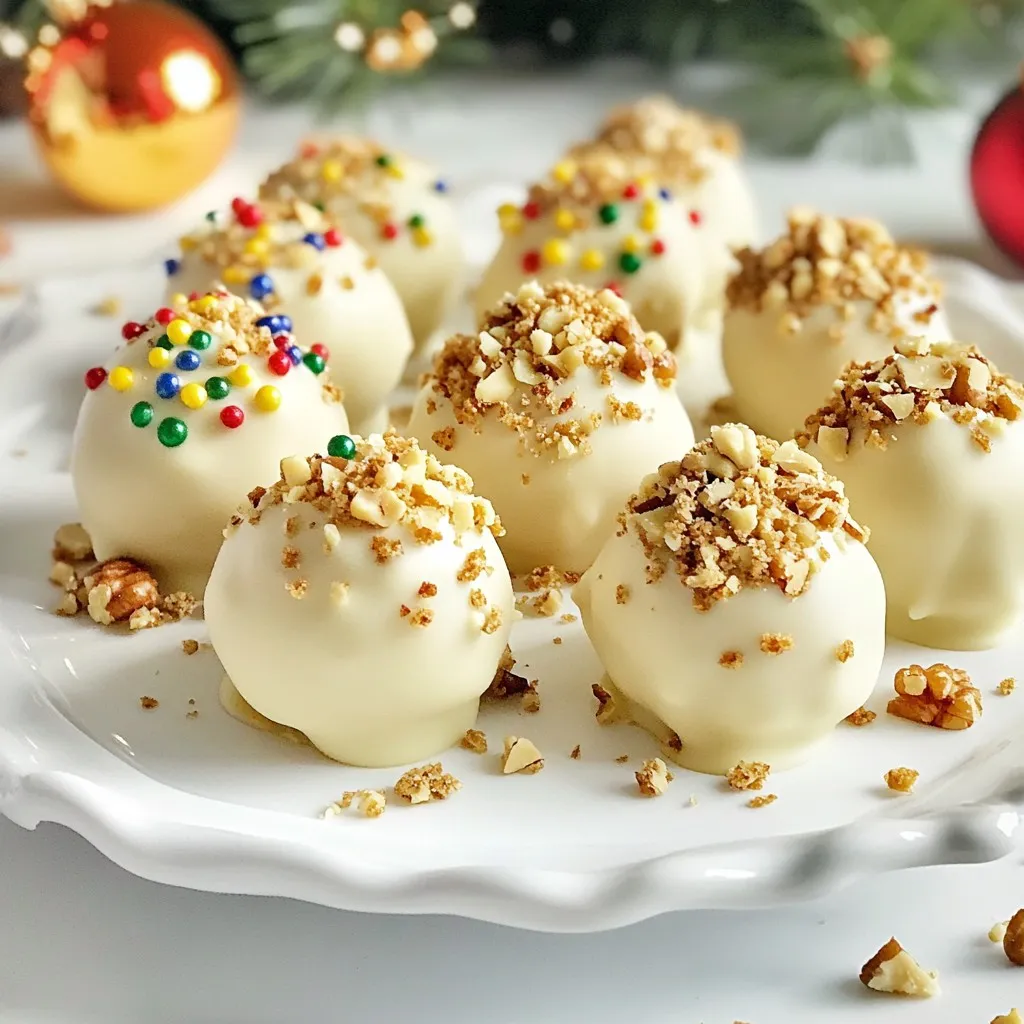

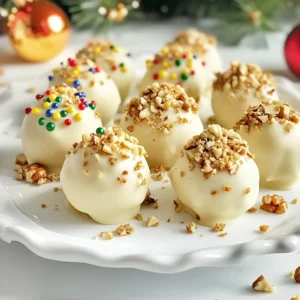
Get ready to impress your friends and family with Gingerbread Cookie Truffles! These sweet treats blend the warmth of gingerbread cookies with creamy goodness, making them a perfect holiday snack. You’ll delight in the rich flavors and the easy steps to create them. Plus, with tips for variations and storage, you’ll want to make a batch for every gathering. Let’s dive into this festive world of truffles!
Why I Love This Recipe
- Festive Flavor: These truffles capture the essence of the holiday season with the warm spices of gingerbread, making them a delightful treat.
- Easy to Make: With simple ingredients and straightforward steps, this recipe is perfect for both novice and experienced bakers.
- Customizable Coating: You can choose to coat your truffles in white chocolate, nuts, or colorful sprinkles, allowing for creative variations.
- Perfect for Gifting: These truffles make a wonderful homemade gift, beautifully arranged on a plate and packaged for friends and family.
Ingredients
Detailed List of Ingredients
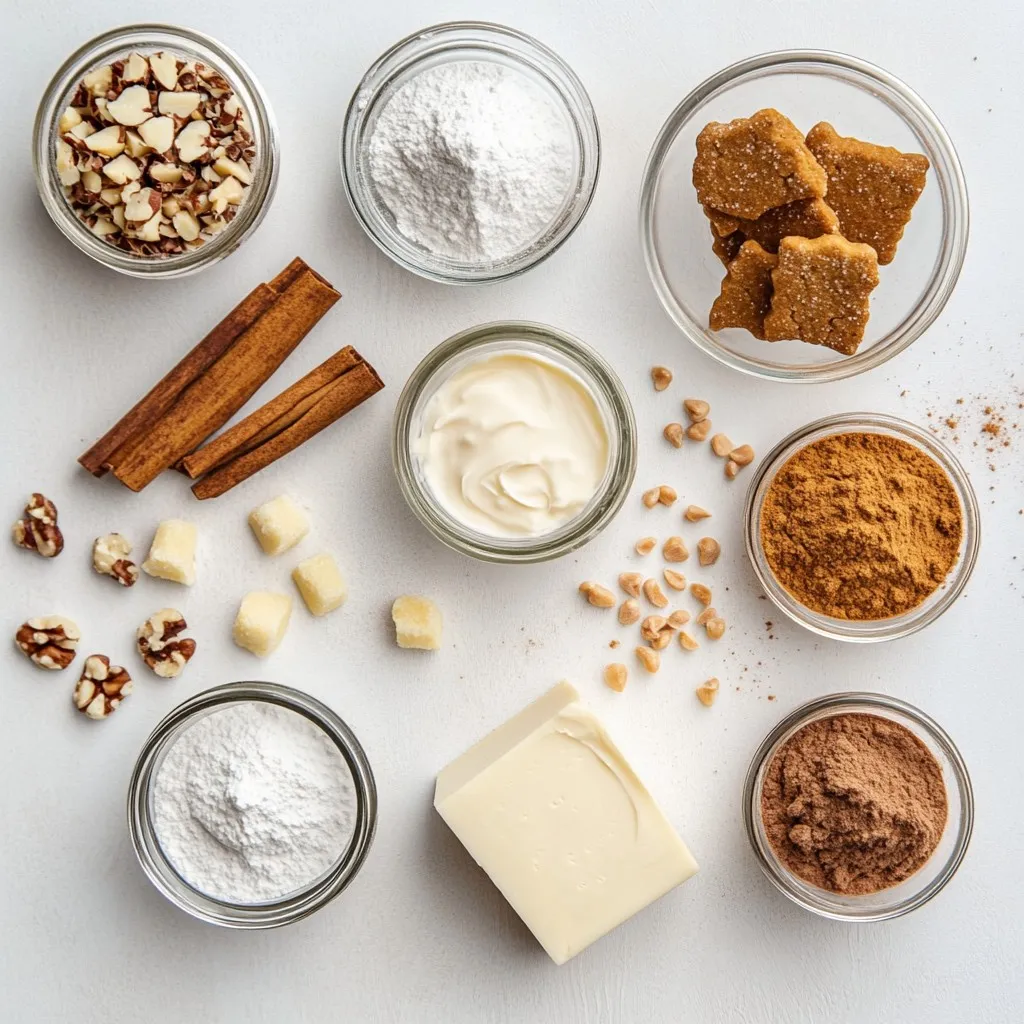
To make these delightful gingerbread cookie truffles, you’ll need:
- 2 cups gingerbread cookies, crushed
- 8 oz cream cheese, softened
- 1/2 cup powdered sugar
- 1 teaspoon ground ginger
- 1 teaspoon cinnamon
- 1/4 teaspoon nutmeg
- 1 cup white chocolate chips, melted
- 1/4 cup crushed nuts or sprinkles for coating (optional)
Key Ingredient Functions
Each ingredient plays a special role in making these truffles tasty and fun.
- Gingerbread cookies add the warm, spicy flavor we love during the holidays.
- Cream cheese gives a rich, smooth texture that binds the cookies together.
- Powdered sugar adds sweetness and helps the mixture to hold its shape.
- Ground ginger, cinnamon, and nutmeg bring out the classic gingerbread taste, making each bite cozy.
- White chocolate chips coat the truffles, adding a sweet, creamy finish.
Optional Coating Ingredients
You can customize your truffles with optional coatings. Here are some fun ideas:
- Crushed nuts add a nice crunch and extra flavor.
- Colorful sprinkles make the truffles look festive and fun for any holiday party.
Feel free to mix and match these ingredients to make your truffles uniquely yours!
Step-by-Step Instructions
Preparation Steps
To start, gather your ingredients. You will need crushed gingerbread cookies, cream cheese, powdered sugar, and spices.
1. In a large mixing bowl, combine:
- 2 cups gingerbread cookies, crushed
- 8 oz cream cheese, softened
- 1/2 cup powdered sugar
- 1 teaspoon ground ginger
- 1 teaspoon cinnamon
- 1/4 teaspoon nutmeg
2. Mix these ingredients well until they form a thick dough-like texture. This step is key to getting the right flavor and consistency.
Chilling and Shaping the Truffles
Now that your mixture is ready, cover the bowl with plastic wrap. Place it in the fridge for about 30 minutes. Chilling helps the mixture firm up, making it easier to shape.
1. After 30 minutes, take the bowl out of the fridge.
2. Scoop out small portions, about 1 tablespoon each.
3. Roll each portion into a ball and place them on a parchment-lined baking sheet.
4. Once you shape all your truffles, put the baking sheet back in the fridge for another 15-20 minutes. This helps them hold their shape.
Coating Instructions
While your truffles chill, it’s time to melt the white chocolate.
1. Place 1 cup of white chocolate chips in a microwave-safe bowl.
2. Heat them in 30-second intervals, stirring in between until they are smooth.
3. Now, take the truffles out of the fridge. Dip each one into the melted white chocolate, making sure they are fully covered.
4. Use a fork to lift them out, letting any excess chocolate drip off.
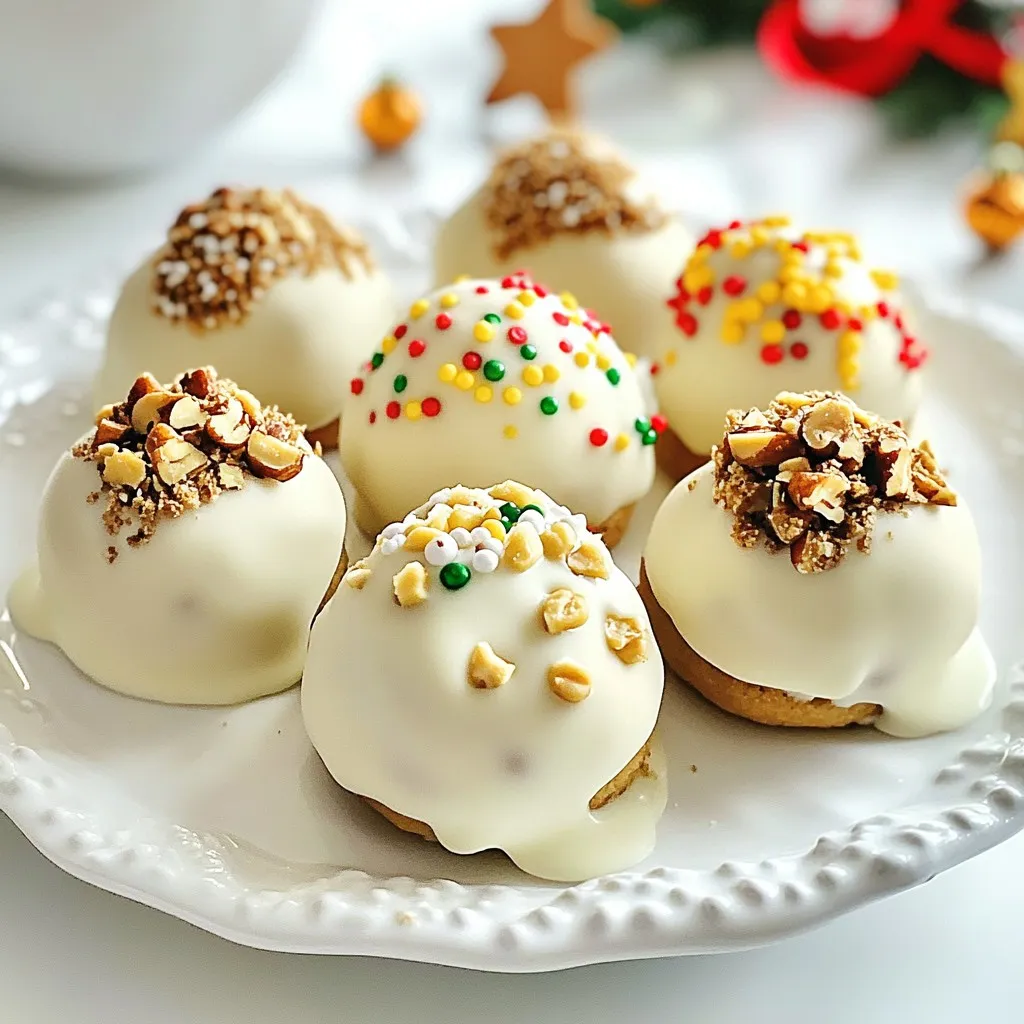
5. If you want to add some fun, sprinkle crushed nuts or colorful sprinkles on top of the truffles. Do this right after coating them, before the chocolate hardens.
6. Finally, return the coated truffles to the fridge for about 15 minutes to set.
Your Gingerbread Cookie Truffles are now ready to impress!
Tips & Tricks
Perfecting Texture and Flavor
To get the best texture and flavor, use fresh gingerbread cookies. Crush them well to avoid big chunks. This helps the truffles mix smoothly. Mix the cream cheese and powdered sugar until creamy. This makes a rich filling. Chill the mixture for at least 30 minutes. This step makes it easier to roll into balls. You want a firm dough that holds its shape. Always taste the mix before rolling. Adjust the spices if you want a bolder flavor.
Decorating Ideas
You can make your truffles stand out with fun toppings. Try crushed nuts for a crunchy bite. Colorful sprinkles add a festive touch. You can also use cocoa powder or edible glitter for flair. For a classic look, drizzle extra melted white chocolate on top. Arrange your truffles on a pretty plate. A sprig of mint adds a nice pop of color.
Avoiding Common Mistakes
One common mistake is not chilling the dough long enough. If the mix is too soft, you’ll struggle to shape the truffles. Always use a fork when dipping in chocolate. This helps avoid messy fingers. Make sure to let the excess chocolate drip off. If you don’t sprinkle the toppings right away, they won’t stick. Lastly, don’t skip the fridge time after coating. This helps the chocolate set properly.
Pro Tips
- Chill for Better Texture: Allowing the truffle mixture to chill for at least 30 minutes helps achieve a firmer texture, making it easier to roll into balls.
- Use Quality Chocolate: For the best flavor, opt for high-quality white chocolate chips. They melt smoothly and provide a rich coating for your truffles.
- Experiment with Coatings: Feel free to get creative with the coating! Try using crushed peppermint candies, cocoa powder, or shredded coconut for different flavors and textures.
- Store Properly: Store the finished truffles in an airtight container in the refrigerator for up to a week. They can also be frozen for longer storage.
Variations
Flavor Variations
You can easily change the flavor of your truffles. Try adding melted dark chocolate instead of white chocolate. This will give your truffles a rich taste. You can also mix in peppermint extract for a festive twist. Just a few drops will bring a fresh minty flavor. Another idea is to add orange zest. This adds a bright touch to the gingerbread spice. Feel free to get creative with flavors that you enjoy!
Dietary Adaptations
You can make these truffles fit different diets. For a vegan option, swap cream cheese for vegan cream cheese. Use a plant-based sweetener like maple syrup instead of powdered sugar. For gluten-free truffles, use gluten-free gingerbread cookies. Always check labels to ensure they fit your needs. These changes let everyone enjoy these tasty treats!
Serving Suggestions
When serving your truffles, make them look festive! Arrange them on a colorful plate. You can garnish with extra crushed gingerbread cookies or a sprig of fresh mint. This adds a nice touch and makes them pop. You can also place them in small gift boxes for friends or family. They make great gifts during the holidays!
Storage Info
Best Storage Practices
To keep your gingerbread cookie truffles fresh, store them in an airtight container. I like to use a plastic or glass container with a tight lid. This helps prevent drying out and keeps them tasty. Place parchment paper between layers if you stack them. It stops them from sticking together.
Freezing Instructions
You can freeze gingerbread cookie truffles for later. First, let them chill completely after coating. Place them on a baking sheet in a single layer. Freeze them until solid, about 1-2 hours. Then, transfer the truffles to a freezer bag or container. Label it with the date. They will stay fresh for about three months in the freezer.
Shelf Life and Quality Preservation
When stored in the fridge, the truffles last about one week. Their taste stays good, but the texture may change slightly over time. I suggest eating them within a few days for the best flavor. If you notice any changes, like an off smell, it’s best to toss them.
FAQs
How do you make Gingerbread Cookie Truffles?
To make Gingerbread Cookie Truffles, start by mixing crushed gingerbread cookies with softened cream cheese, powdered sugar, and spices. Use a large bowl. Stir until the mixture forms a thick dough. Then, chill it in the fridge for 30 minutes. After chilling, scoop the dough and roll it into small balls. Place these on a parchment-lined baking sheet. Chill again for about 15-20 minutes to set. Melt white chocolate chips in a microwave. Dip each truffle in the melted chocolate, covering it well. Sprinkle nuts or sprinkles on top while the chocolate is still wet. Chill again to set the chocolate, and enjoy!
Can I use store-bought gingerbread cookies?
Yes, you can use store-bought gingerbread cookies. They save time and work well in this recipe. Just crush them until fine before mixing. This option is great if you want a quick treat. The flavor will still be delicious, and you will have fun making these truffles.
What can I substitute for cream cheese?
If you want a different option, you can use mascarpone cheese or Greek yogurt. Both will give a rich texture to the truffles. If you need a dairy-free choice, try using coconut cream. It adds a nice flavor too. Just make sure to adjust the sweetness if you use plain yogurt or coconut cream.
This blog post covered the key ingredients needed for gingerbread cookie truffles and their functions. I shared step-by-step instructions to make these treats easy for you. You learned tips for texture, flavor, and decoration. We also explored flavor variations and dietary options. Lastly, I provided storage info to keep your truffles fresh.
Now, you’re ready to create tasty truffles everyone will love. Enjoy your baking journe
Gingerbread Cookie Truffles
Ingredients
- 2 cups gingerbread cookies, crushed
- 8 oz cream cheese, softened
- 0.5 cup powdered sugar
- 1 teaspoon ground ginger
- 1 teaspoon cinnamon
- 0.25 teaspoon nutmeg
- 1 cup white chocolate chips, melted
- 0.25 cup crushed nuts or sprinkles for coating (optional)
Instructions
- In a large mixing bowl, combine the crushed gingerbread cookies, softened cream cheese, powdered sugar, ground ginger, cinnamon, and nutmeg. Mix until all ingredients are thoroughly combined and form a thick dough-like consistency.
- Once mixed, cover the bowl with plastic wrap and refrigerate the mixture for about 30 minutes to firm up.
- After chilling, scoop out small portions of the mixture (about 1 tablespoon each) and roll them into balls. Place the rolled balls onto a parchment-lined baking sheet.
- Once all the truffles are shaped, place the baking sheet back in the refrigerator for an additional 15-20 minutes to set.
- While the truffles are chilling, melt the white chocolate chips in a microwave-safe bowl in 30-second intervals, stirring in between until smooth.
- Remove the truffles from the fridge and dip each one into the melted white chocolate, making sure they are fully coated. Use a fork to lift them out, allowing any excess chocolate to drip off.
- Immediately sprinkle crushed nuts or colorful sprinkles over the chocolate-covered truffles before the coating hardens.
- Once all truffles are coated, return them to the refrigerator for about 15 minutes to set the chocolate.
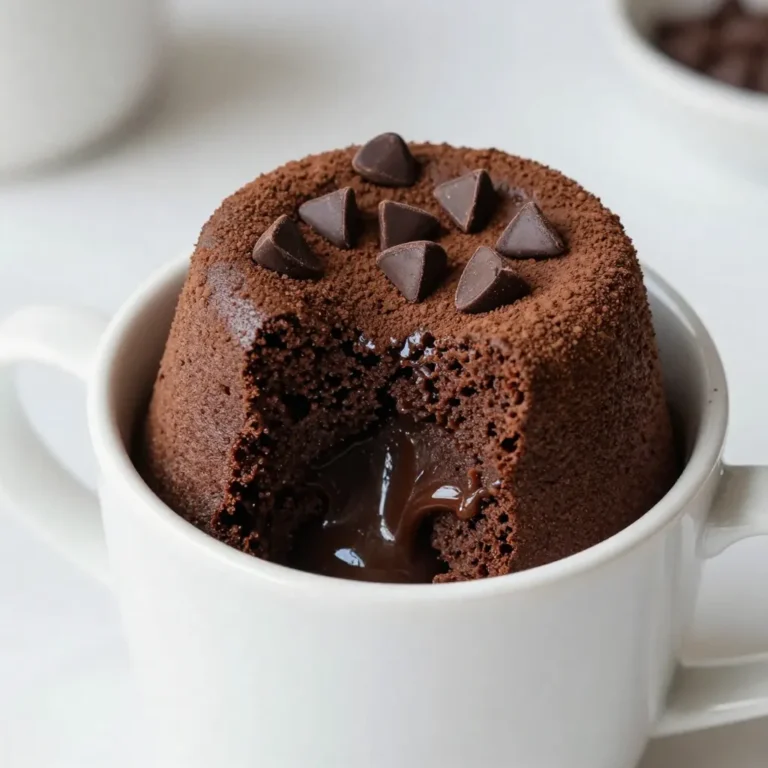
![- 2 cups all-purpose flour - 1 teaspoon baking powder - 1 teaspoon baking soda - 1 teaspoon ground cinnamon - 1/2 teaspoon ground ginger - 1/2 teaspoon salt The dry ingredients are key to getting the right structure. The flour gives body, while the baking powder and baking soda help the whoopie pies rise. The spices add warmth and flavor, making the treats truly delicious. - 1 cup granulated sugar - 1 cup packed brown sugar - 1 cup vegetable oil - 4 large eggs These wet ingredients bring moisture and sweetness. The sugars create a rich taste, while the oil keeps the pies soft. Eggs bind everything together for the perfect texture. - 2 cups grated carrots (about 4 medium carrots) - 1/2 cup crushed pineapple, thoroughly drained - 1 teaspoon vanilla extract Grated carrots add natural sweetness and a lovely color. Pineapple gives a hint of tartness and keeps the cakes moist. Vanilla adds a warm, sweet note that enhances the flavor. - 8 oz cream cheese, softened at room temperature - 1/4 cup unsalted butter, softened at room temperature - 2 cups powdered sugar - 1 teaspoon vanilla extract - A pinch of salt The cream cheese filling is rich and tangy. It balances the sweetness of the whoopie pies. Mixing in butter and powdered sugar creates a smooth texture. A pinch of salt enhances the flavors, while vanilla rounds it out. For the complete recipe, check out the Full Recipe. - Preheat your oven to 350°F (175°C). - Line your baking sheets with parchment paper. This helps keep the whoopie pies from sticking. - In a medium bowl, whisk together the flour, baking powder, baking soda, ground cinnamon, ground ginger, and salt. - Make sure everything is well combined. This will give your cookies the right texture. - In a large bowl, mix the granulated sugar, brown sugar, and vegetable oil. Use an electric mixer to blend them until smooth. - Add the eggs one at a time, mixing well after each addition. This makes your batter light and fluffy. - Gradually add the dry mixture to the wet mixture. Mix on low speed until just combined; some lumps are okay. - Fold in the grated carrots and crushed pineapple. Add the vanilla extract for extra flavor. - Use a cookie scoop or tablespoon to drop rounded scoops of batter onto the prepared baking sheets. - Space them about 2 inches apart to allow for spreading during baking. - Bake for 12-15 minutes. The edges should be set, and the tops should spring back when touched. - While the cookies cool, prepare the filling. In a large bowl, beat the softened cream cheese and butter until creamy. - Gradually add the powdered sugar, mixing until the filling is smooth. Add the vanilla extract and a pinch of salt to enhance the flavor. - Once the cookies are fully cool, take one and spread a layer of cream cheese filling on the flat side. - Top it with another cookie, flat side down, to create a sandwich. - Repeat this with the remaining cookies until all the whoopie pies are assembled. For a special touch, dust them with powdered sugar. - For the full recipe, check out the detailed instructions. To make your whoopie pies soft, avoid overmixing the batter. Overmixing makes cookies tough. Mix just until the dry ingredients blend with the wet. A few lumps are fine. To know when cookies are done, look for set edges. Press the top gently. It should spring back. If it leaves a dent, bake a bit longer. For a pretty presentation, dust the whoopie pies with powdered sugar. You can also sprinkle chopped walnuts on top. This adds texture and looks great on a platter. Pair these sweet treats with milk or tea. A glass of cold milk balances the flavors. Tea adds warmth and comfort. You can add chopped nuts or raisins to the batter. This gives extra crunch and flavor. Try walnuts or pecans for a nutty touch. Using different spices can elevate your whoopie pies. Add nutmeg or allspice for a warm twist. A pinch of cloves can also deepen the flavor. For the full recipe, check out the Carrot Cake Whoopie Pies section above. {{image_4}} You can change the cream cheese filling to suit your taste. Try different flavors like lemon or orange. They add a zesty twist to your whoopie pies. If you want something lighter, use whipped cream instead. Whipped cream gives a fluffy texture that pairs well with the carrot cake base. For gluten-free options, use a gluten-free flour blend. This keeps the whoopie pies soft and tasty. If you need a vegan version, swap eggs with applesauce. Use a plant-based cream cheese for the filling. These adjustments make the treats enjoyable for everyone. Adding coconut brings a tropical vibe to your whoopie pies. Shredded coconut adds texture and sweetness. For chocolate lovers, consider adding cocoa powder to the batter. You can also use chocolate chips for extra richness. These combinations make each bite exciting and delicious. For the complete recipe, check out the [Full Recipe]. You can store carrot cake whoopie pies at room temperature. Place them in an airtight container. This keeps them soft and fresh. They stay good for about three days. If you want them to last longer, keep them in the fridge. To freeze whoopie pies, wrap each pie in plastic wrap. Then place them in a freezer bag. This extra layer keeps them fresh for up to three months. Label the bag with the date. When you're ready to eat them, just pull them out and let them thaw at room temperature. Enjoy whoopie pies at room temperature for the best taste. If you like them warm, heat them in the microwave for 10-15 seconds. This makes the cream cheese filling soft and yummy. You can serve them as is or dust with powdered sugar for a fun touch. For a little crunch, add chopped nuts on top! Check the Full Recipe for more fun ideas. To make carrot cake whoopie pies, start by mixing flour, baking powder, and spices. In another bowl, blend sugars, oil, and eggs. Combine both mixtures and fold in grated carrots and pineapple. Drop spoonfuls onto baking sheets and bake until set. While they cool, whip up a cream cheese filling. Assemble by spreading filling between two cookies. Yes, you can prepare the batter in advance. Just cover it and store it in the fridge for up to 24 hours. When ready to bake, let the batter sit at room temperature for a bit. Then, scoop and bake as usual. Whoopie pies last about 3 to 4 days at room temperature. Keep them in an airtight container to stay soft and fresh. You can also refrigerate them to extend their life by a few more days. You can find carrot cake whoopie pies at local bakeries and specialty shops. Some grocery stores may also carry them in their bakery section. If you prefer homemade, follow the full recipe to make your own! To freeze whoopie pies, wrap each one in plastic wrap. Then, place them in a freezer bag or container. They can last up to 3 months in the freezer. To enjoy, let them thaw in the fridge or at room temperature. Absolutely! You can use different fillings like chocolate ganache, vanilla buttercream, or whipped cream. Get creative with flavors to suit your taste. Just ensure the filling complements the carrot cake flavor for the best results. You learned how to make delicious carrot cake whoopie pies. We covered the ingredients, mixing, baking, and assembling steps. Tips and tricks helped you perfect the texture and enhance flavors. You explored variations for fillings and dietary needs. Finally, I provided storage info for your treats. These whoopie pies will impress family or friends. Enjoy baking and sharing these treats!](https://dailydishlab.com/wp-content/uploads/2025/06/fbfd3e26-f016-49e5-9504-61425c24e368-768x768.webp)