Sweet Chili Pineapple Chicken Flavorful Dinner Idea


Are you ready to spice up your dinner routine? Try this Sweet Chili Pineapple Chicken recipe that bursts with flavor. It combines juicy chicken, fresh pineapple, and vibrant veggies for a dish everyone will love. Whether you’re cooking for family or impressing guests, this quick meal is sure to steal the show. Let’s dive into the ingredients and steps that make it so easy and delicious!
Why I Love This Recipe
- Quick and Easy: This recipe can be prepared in just 40 minutes, making it perfect for busy weeknights.
- Tropical Flavor: The combination of sweet pineapple and spicy chili sauce creates a deliciously unique flavor profile.
- Colorful Presentation: The vibrant colors of the bell pepper and pineapple make this dish visually appealing.
- Versatile Ingredients: This recipe can easily be adapted with different vegetables or proteins to suit your taste.
Ingredients
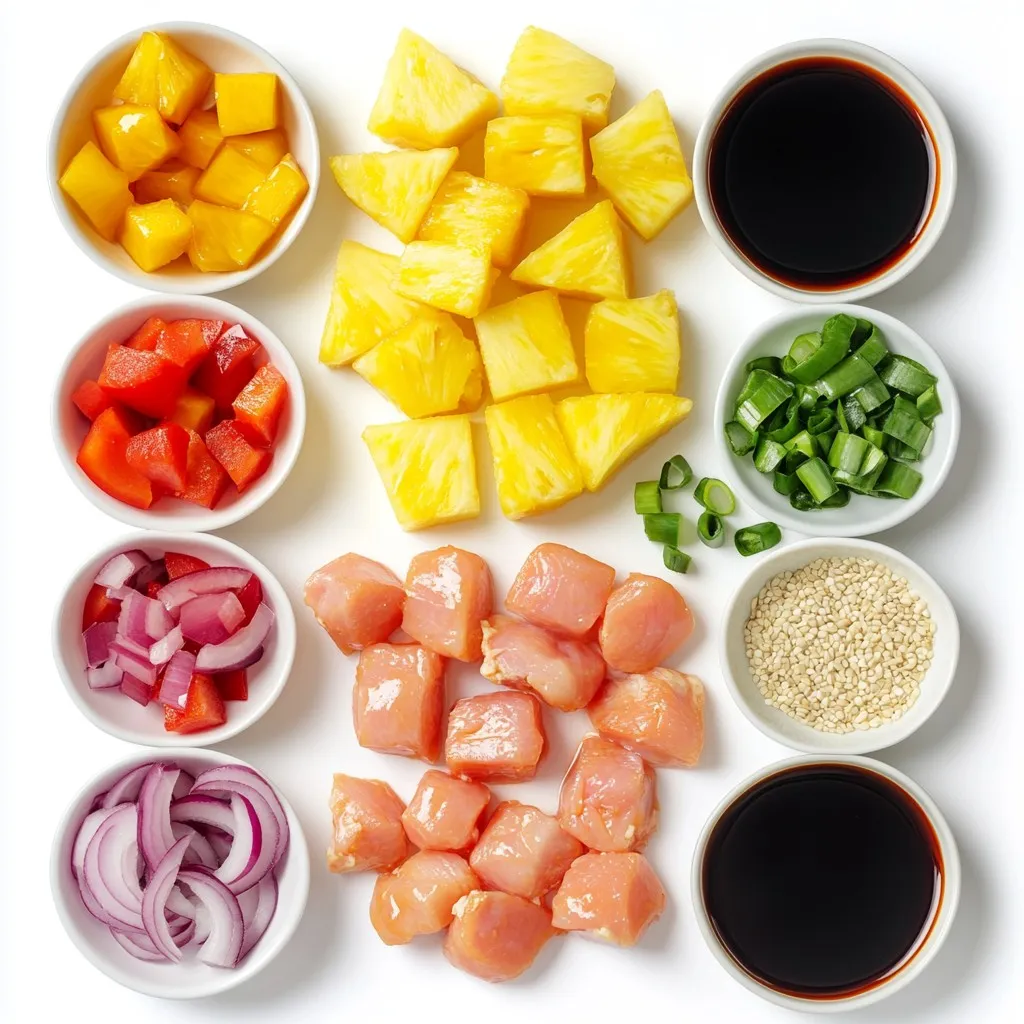
Main Ingredients
- 1 lb chicken breast, cut into bite-sized pieces
- 1 cup fresh pineapple chunks
- 1 bell pepper (red or yellow), sliced
- 1 small red onion, sliced
- 3 cloves garlic, minced
In this dish, chicken breast serves as the main protein. I love using fresh pineapple chunks for sweetness. Bell pepper adds color and crunch, while red onion provides a nice bite. Garlic brings depth to the flavor.
Marinade Components
- 1/4 cup sweet chili sauce
- 2 tablespoons soy sauce
- 1 tablespoon olive oil
- 1 teaspoon grated fresh ginger
- Salt and pepper to taste
The marinade is key for flavor. Sweet chili sauce gives a nice sweetness with heat. Soy sauce adds umami, while olive oil keeps the chicken moist. Fresh ginger brings a zing to the dish. Don’t forget to season with salt and pepper.
Garnishing Options
- Chopped green onions
- Sesame seeds
Garnishing is important for presentation. Chopped green onions add a fresh taste. Sesame seeds give a nice crunch and look great. These small touches make your meal look and taste amazing.
Step-by-Step Instructions
Marinating the Chicken
To start, mix the chicken pieces with sweet chili sauce. Add soy sauce, grated ginger, salt, and pepper. This blend brings out great flavor. Make sure each piece is coated well. Cover the bowl and refrigerate it for at least 30 minutes. You can marinate it for up to 2 hours if you want more taste.
Sautéing Aromatics
Next, heat olive oil in a large skillet over medium-high heat. Once hot, add the sliced red onion and minced garlic. Sauté these for about 2 minutes. This step makes your kitchen smell amazing.
Cooking the Chicken
Now it’s time to add the marinated chicken to the skillet. Cook the chicken for about 5-7 minutes. You want it to brown and cook through. Stir often so it cooks evenly.
Adding Vegetables and Pineapple
After the chicken is cooked, toss in the sliced bell pepper and fresh pineapple chunks. Stir-fry everything together for 3-4 minutes. This allows the pineapple to caramelize and the veggies to soften. The mix of flavors will excite your taste buds.
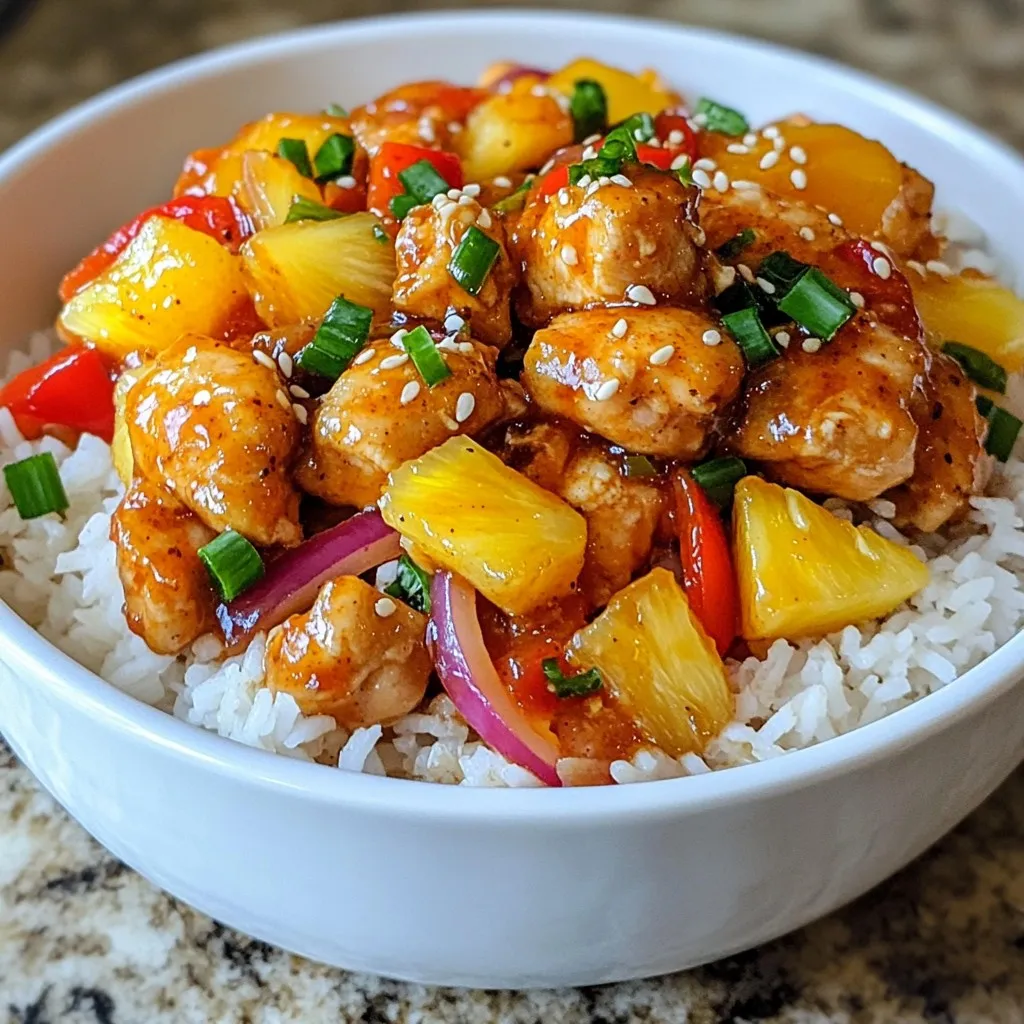
Final Presentation
Once done, remove the skillet from the heat. Transfer your Sweet Chili Pineapple Chicken to a serving platter. Garnish it with chopped green onions and a sprinkle of sesame seeds. Serve it over steamed jasmine rice for a complete meal. Enjoy!
Tips & Tricks
Marinating Time Tips
Marinating adds depth to the flavor of your chicken. It helps the sweet chili sauce soak in. The best time to marinate is at least 30 minutes. For more flavor, try marinating up to 2 hours. This step makes a big difference.
Cooking Technique Suggestions
Stir-frying is the key to a tasty Sweet Chili Pineapple Chicken. Use a large skillet so everything fits. Heat the oil before adding the onion and garlic. This step helps release their flavors. Cook for just a few minutes until fragrant. Then, add the marinated chicken. Stir it often to ensure even cooking. Aim for a nice brown color. Finally, toss in the bell pepper and pineapple. This will bring out their sweetness.
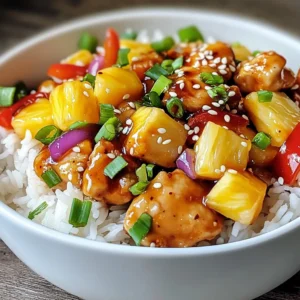
Serving Suggestions
To make your meal complete, serve Sweet Chili Pineapple Chicken with sides. Steamed jasmine rice is a perfect match. It soaks up the sauce well. You can also add fresh pineapple wedges for a tropical touch. Chopped green onions and sesame seeds on top add color and flavor.
Pro Tips
- Marinating Time: For the best flavor, marinate the chicken for at least 2 hours. This allows the sweet chili sauce and ginger to penetrate the meat more deeply.
- Fresh Pineapple: Using fresh pineapple instead of canned will enhance the dish’s flavor and texture. Fresh pineapple caramelizes beautifully when cooked.
- Veggie Crunch: To maintain the crunch of the bell pepper, add it towards the end of the cooking process. This will give you a nice contrast to the tender chicken.
- Garnishing: Don’t skip the garnishes! Chopped green onions and sesame seeds add not just flavor but also visual appeal to the dish.
Variations
Ingredient Swaps
You can swap the chicken for tofu or shrimp. Both options bring unique flavors. If you want a plant-based dish, use chickpeas or tempeh. For veggies, try zucchini, snap peas, or carrots. These will add different textures and tastes.
Heat Level Adjustments
To make the dish spicier, add red pepper flakes or sliced jalapeños. You can also mix in sriracha or chili paste for more heat. Start with a small amount and taste as you go. This way, you control the spice level just right for you.
Serving Different Styles
You can serve Sweet Chili Pineapple Chicken in many ways. Try it in a wrap with lettuce or tortillas. This makes a fun, handheld meal. You can also serve it in a bowl with rice or quinoa. Add extra veggies on top for crunch and color.
Storage Info
Refrigeration Guidance
For best results, store your Sweet Chili Pineapple Chicken leftovers in an airtight container. This keeps the flavors fresh. Use a container that fits the amount of food to reduce air exposure. You can store it in the fridge for up to 3 days. Before serving, reheat it on the stove or in the microwave until it’s hot.
Freezing Suggestions
If you want to keep the dish longer, freezing is a great option. Allow the chicken to cool completely. Then, place it in a freezer-safe bag or container. Remove as much air as possible to prevent freezer burn. Your Sweet Chili Pineapple Chicken can last for up to 3 months in the freezer. To reheat, thaw it overnight in the fridge. Then warm it in a skillet or microwave until hot.
Shelf Life
In the fridge, your Sweet Chili Pineapple Chicken stays good for about 3 days. If you freeze it, the quality lasts about 3 months. After this time, the flavor may fade, but it will still be safe to eat. Always check for any off smells or changes in appearance before consuming leftovers.
FAQs
Can I use frozen chicken?
Yes, you can use frozen chicken. Just make sure to thaw it first. Thaw the chicken overnight in the fridge. If you’re short on time, use cold water. Place the chicken in a sealed bag and submerge it in cold water for about an hour. This method keeps the chicken safe and ready for your dish.
How can I make it spicier?
To add heat, try these ideas:
- Add sliced jalapeños or chili flakes.
- Use a spicy chili sauce instead of sweet chili sauce.
- Mix in some sriracha or hot sauce.
These options will bring a nice kick to the Sweet Chili Pineapple Chicken.
Is it gluten-free?
Yes, but you need to check your ingredients. Use gluten-free soy sauce to make it safe. Many brands offer gluten-free soy sauce. Also, double-check the sweet chili sauce label. Some sauces may contain gluten. By choosing the right products, you can enjoy this dish without worry.
You now have all the steps to make a great Sweet Chili Pineapple Chicken. We covered the key ingredients like chicken, pineapple, and marinades. You learned how to marinate, sauté, and cook. I shared tips to enhance flavor and storage advice.
Feel free to experiment with variations to suit your taste. With practice, you’ll master this dish and impress others. Enjoy your cooking journe
Sweet Chili Pineapple Chicken
Ingredients
- 1 lb chicken breast, cut into bite-sized pieces
- 1 cup fresh pineapple chunks
- 1 whole bell pepper (red or yellow), sliced
- 1 small red onion, sliced
- 3 cloves garlic, minced
- 1 4 cup sweet chili sauce
- 2 tablespoons soy sauce
- 1 tablespoon olive oil
- 1 teaspoon grated fresh ginger
- to taste salt and pepper
- for garnish chopped green onions
- for garnish sesame seeds
Instructions
- In a medium bowl, combine the chicken pieces, sweet chili sauce, soy sauce, grated ginger, salt, and pepper. Mix well to coat the chicken evenly. Cover and let marinate in the refrigerator for at least 30 minutes (or up to 2 hours for more flavor).
- Heat the olive oil in a large skillet over medium-high heat. Add the sliced red onion and minced garlic; sauté for about 2 minutes until fragrant.
- Add the marinated chicken pieces to the skillet, cooking for about 5-7 minutes, or until they are browned and cooked through.
- Toss in the sliced bell pepper and pineapple chunks to the skillet. Stir-fry everything together for an additional 3-4 minutes, allowing the pineapple to caramelize slightly and the veggies to soften.
- Remove from heat and transfer the Sweet Chili Pineapple Chicken to a serving platter. Garnish with chopped green onions and a sprinkle of sesame seeds.


![- 4 large russet potatoes, peeled and cubed - ½ cup cream cheese, softened - ½ cup sour cream - 1 cup shredded sharp cheddar cheese - ½ cup grated Parmesan cheese - 2 tablespoons butter, melted - 1 teaspoon garlic powder - ½ teaspoon onion powder - Salt and pepper to taste - ¼ cup chopped green onions for garnish When I prepare Cheesy Mashed Potato Casserole, I choose high-quality ingredients. Fresh, firm potatoes make the best base. Look for russet potatoes, known for their creamy texture. Cream cheese and sour cream blend well, adding richness. Sharp cheddar cheese gives a bold flavor. I often select a good quality Parmesan for a nice finish. - 4 large russet potatoes = approximately 1.8 kg - ½ cup cream cheese = about 125 g - ½ cup sour cream = about 125 g - 1 cup shredded sharp cheddar cheese = about 115 g - ½ cup grated Parmesan cheese = about 50 g - 2 tablespoons butter = about 30 g For best results, always measure accurately. Using a kitchen scale can help. If you want to substitute an ingredient, choose similar flavors. For example, Greek yogurt can replace sour cream for a healthier option. To enhance your dish, try to use fresh herbs or spices. They can really bring your casserole to life. And remember, the right choice of cheese can elevate the whole dish. If you want to explore more, check out the Full Recipe. Preheating the oven Start by preheating your oven to 350°F (175°C). This ensures your casserole cooks evenly and gets that perfect golden crust. Preparing the potatoes Next, peel and cube 4 large russet potatoes. The size of the cubes matters. Aim for 1-inch pieces. This helps them cook faster and mash easily. Boiling and draining the potatoes Place the cubed potatoes in a large pot. Cover them with cold water. Add a pinch of salt. Bring the water to a boil. Cook the potatoes for about 15-20 minutes. They should be tender when pierced with a fork. After cooking, drain the potatoes and return them to the pot. Mixing in the ingredients Add in ½ cup of softened cream cheese and ½ cup of sour cream. Then, pour in 2 tablespoons of melted butter. Sprinkle in 1 teaspoon of garlic powder and ½ teaspoon of onion powder. Add half of your shredded sharp cheddar cheese and grated Parmesan cheese. Mash everything together until smooth. Season with salt and pepper to taste. Transferring to the baking dish Now, take a greased 9x13-inch baking dish. Transfer your creamy potato mixture into the dish. Use a spatula to smooth the top evenly. Baking time and techniques Sprinkle the remaining cheeses over the top. Bake in the preheated oven for 25-30 minutes. Look for bubbly and golden cheese on top. When done, let it rest for 5 minutes. Garnish with ¼ cup of chopped green onions before serving. Enjoy your cheesy mashed potato casserole! For a full recipe, check out the [Full Recipe]. - Achieving the best texture: To get smooth mashed potatoes, boil them until tender. Use a potato masher for a creamy texture. Mixing with a hand mixer can make them too fluffy, so stick to mashing. - Tips for flavor enhancement: Add cream cheese and sour cream for richness. Garlic powder and onion powder boost flavor. For an extra kick, stir in some cooked bacon or herbs like chives before baking. - Over-mashing potatoes: If you mash too much, potatoes can turn gummy. Aim for a smooth but slightly chunky texture for the best result. - Incorrect baking times: Baking too long can dry out the casserole. Keep an eye on the cheese; it should be bubbly and golden, not burnt. Follow the timing closely for perfect results. For the complete recipe, check the Full Recipe link provided. {{image_2}} You can easily make this casserole vegetarian. Try adding veggies like spinach, broccoli, or carrots. These add color and flavor. Just steam or sauté them before mixing. This way, they blend well with the creamy potatoes. You can also use mushrooms for a rich, umami taste. While sharp cheddar is classic, feel free to mix it up. Gouda or Monterey Jack adds a smooth touch. For a stronger flavor, blue cheese works great too. You can also add herbs like chives or parsley. These give a fresh taste that brightens the dish. Try mixing in some garlic or onion powder for extra zest. For a gluten-free option, check all labels. The ingredients used in this casserole are naturally gluten-free. You can also make it low-calorie. Use Greek yogurt instead of sour cream. Swap cream cheese for a low-fat version. These changes keep your dish light but still tasty. For the full recipe, check out the details provided earlier. To keep your cheesy mashed potato casserole fresh, follow these steps: - Let the casserole cool to room temperature. - Cover it tightly with plastic wrap or aluminum foil. - Place it in the fridge. It stays good for up to three days. - For best taste, try to eat it within two days. If you want to freeze the casserole, follow these tips: - Cool it completely before freezing. - Use an airtight container or a freezer bag. - Label the bag with the date. - It can last in the freezer for up to three months. - Thaw it in the fridge overnight before reheating. To keep the flavor and texture when reheating, here is what I do: - Preheat your oven to 350°F (175°C). - Place the casserole in an oven-safe dish. - Cover it with foil to prevent drying out. - Heat it for about 20-25 minutes. - For a crisp top, remove the foil for the last 5-10 minutes. - You can also reheat individual portions in the microwave for 1-2 minutes. This way, your cheesy mashed potato casserole stays tasty and comforting! For the full recipe, check out the instructions above. You can prepare this dish a day before serving. Just follow these steps: - Make the mashed potatoes as per the recipe. - Once mixed, transfer the potatoes into a greased baking dish. - Cover the dish with plastic wrap or foil. - Store it in the fridge until you’re ready to bake. - When ready to bake, remove the cover and add the remaining cheese on top. - Bake at 350°F for 25-30 minutes. This method saves time and keeps your dish fresh. Yes, you can use many types of potatoes. Here are some great options: - Yukon Gold potatoes add a buttery flavor. - Red potatoes keep their shape well. - Fingerling potatoes offer a unique texture. - Sweet potatoes can add a hint of sweetness. Each type will change the taste and texture a bit, so choose what you like best. This casserole pairs well with many dishes. Here are some tasty ideas: - Roasted chicken for a classic combo. - Grilled steak adds a hearty touch. - Herb-crusted pork chops bring great flavor. - A simple green salad gives a fresh contrast. Feel free to mix and match to find your perfect meal! For the full recipe, check out the details. This blog post shared a simple recipe for Cheesy Mashed Potato Casserole. You learned about the key ingredients and steps to prepare this dish, along with useful tips to make it better. I highlighted variations for dietary needs and how to store leftovers too. Now, you can easily make this tasty casserole for any meal. Enjoy the creamy texture and rich flavors. Remember, with a few tweaks, you can customize it for anyone!](https://dailydishlab.com/wp-content/uploads/2025/07/cab4f5da-1c73-48e2-8f50-2489a9e1b1cd-768x768.webp)