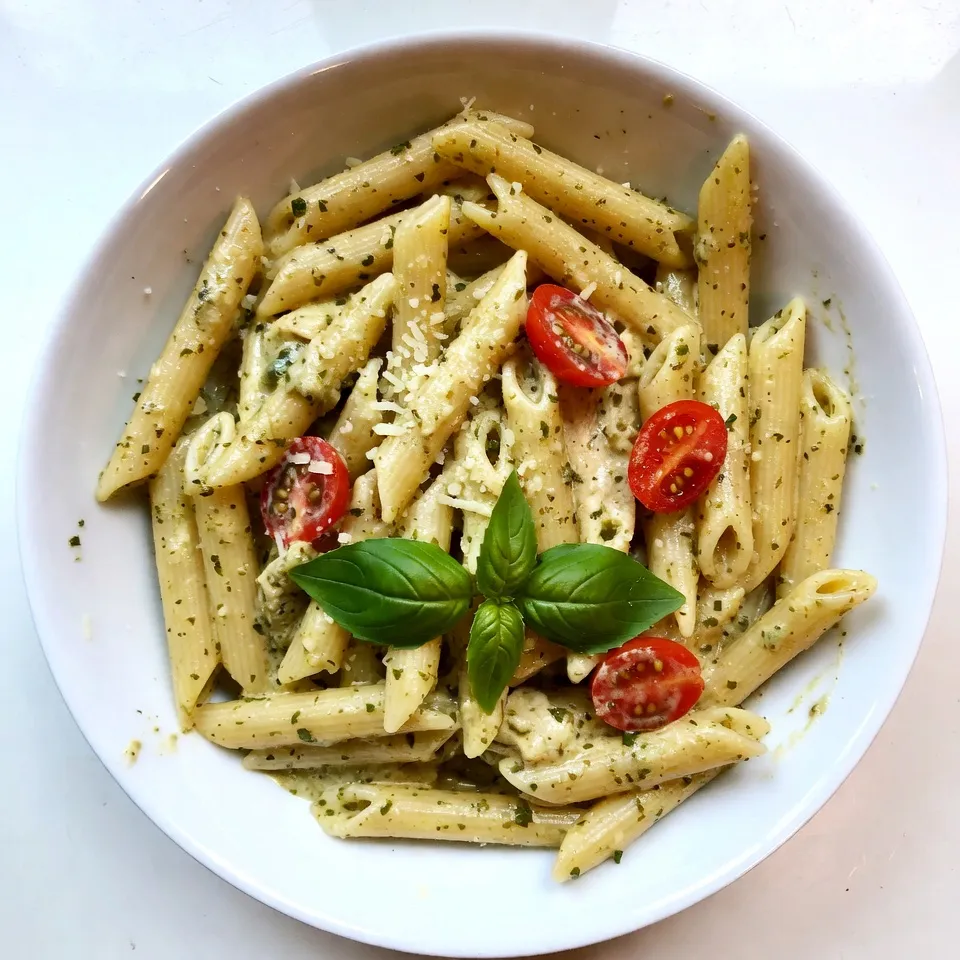
Creamy Chicken Pesto Pasta Quick and Tasty Recipe
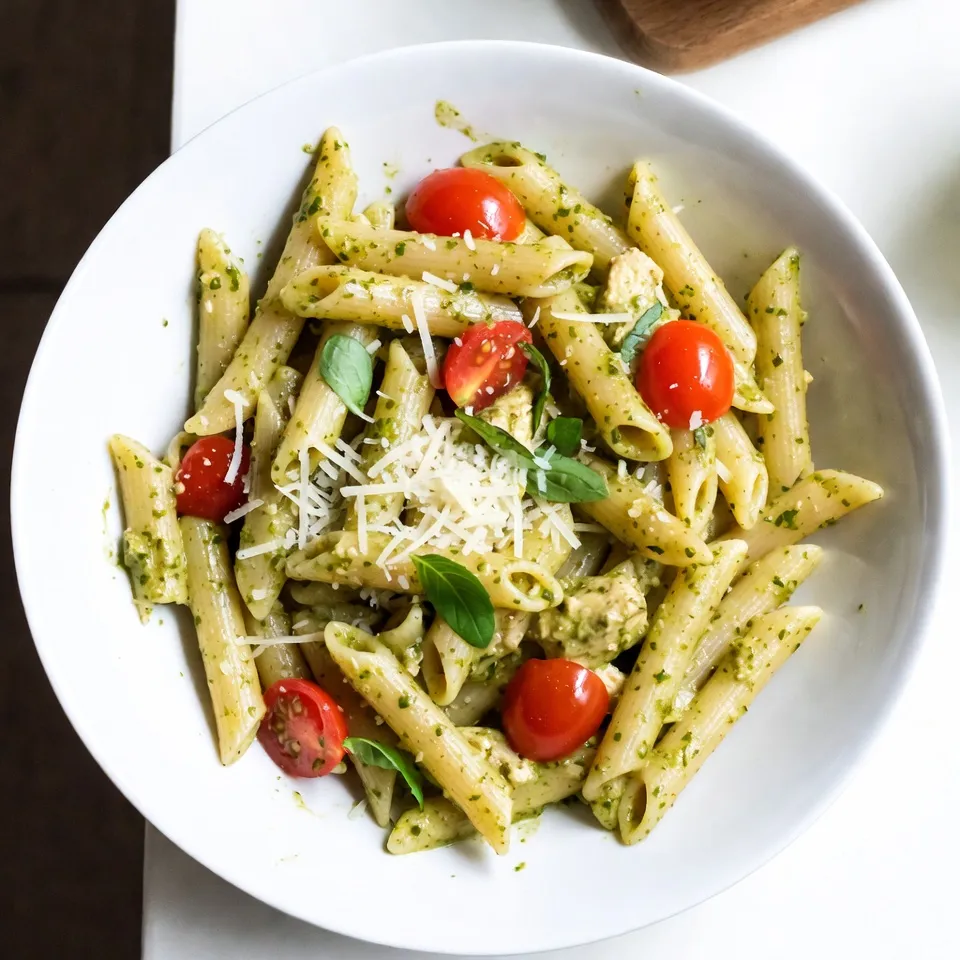

Are you ready to whip up a dish that’s both quick and delightfully tasty? Today, I’ll guide you through making Creamy Chicken Pesto Pasta. This recipe combines tender chicken, vibrant pesto, and luscious cream, all in under 30 minutes. With simple steps and easy-to-find ingredients, you’ll impress your family with this meal. Let’s dive in and see how you can create this creamy delight!
Why I Love This Recipe
- Quick and Easy: This creamy chicken pesto pasta can be prepared in just 30 minutes, making it perfect for busy weeknights.
- Flavorful Ingredients: The combination of basil pesto, cherry tomatoes, and Parmesan cheese creates a rich and delicious flavor profile.
- Versatile Dish: This recipe can be easily adapted with different proteins or vegetables based on your preferences.
- Comfort Food: The creamy sauce and tender chicken make this dish a comforting meal that everyone will love.
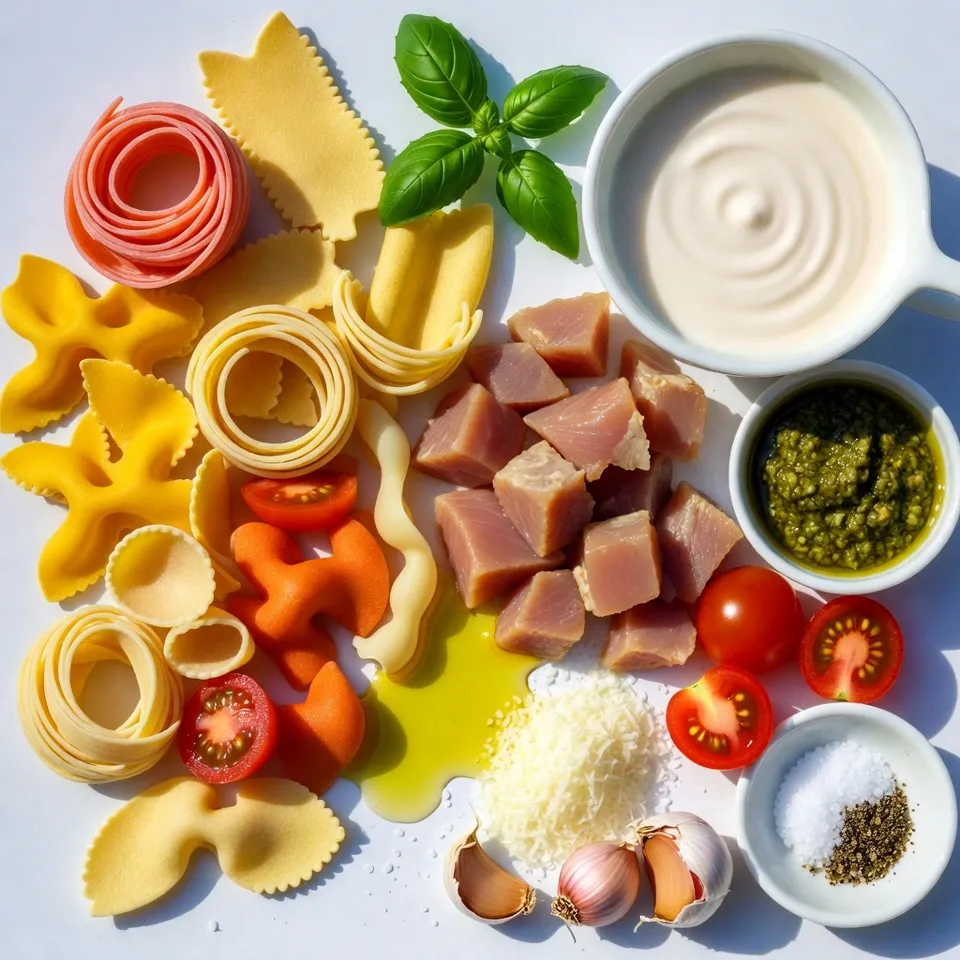
Ingredients
Main Ingredients for Creamy Chicken Pesto Pasta
To make this dish, gather these key ingredients:
- 300g pasta (penne or fettuccine)
- 2 chicken breasts, diced
- 1 cup heavy cream
- 1/2 cup basil pesto (store-bought or homemade)
- 1 cup cherry tomatoes, halved
- 1/2 cup grated Parmesan cheese
- 2 tablespoons olive oil
- 2 cloves garlic, minced
- Salt and pepper to taste
- Fresh basil leaves for garnish
These ingredients blend well to create a creamy and tasty meal.
Optional Ingredients for Personalization
You can add your own twist to this recipe. Some great options include:
- Spinach or kale for added greens
- Mushrooms for an earthy flavor
- Red pepper flakes for a spicy kick
- Lemon zest for brightness
Feel free to mix and match to suit your taste!
Ingredient Substitutions
If you’re missing an ingredient, don’t worry. Here are some substitutions:
- Use chicken thighs instead of breasts for more flavor.
- Swap heavy cream with half-and-half for a lighter sauce.
- Try nutritional yeast in place of Parmesan for a vegan option.
- Use any pasta you have on hand, like spaghetti or rotini.
These swaps keep the dish delicious while catering to what you have available.
Step-by-Step Instructions
Cooking the Pasta Perfectly
To start, grab a large pot. Fill it with water and add salt. Bring the pot to a boil. Next, add 300g of pasta. You can use penne or fettuccine. Cook the pasta according to the package instructions. You want it to be al dente, which means firm but not hard. This usually takes about 8-10 minutes. Once done, drain the pasta in a colander. Save a cup of pasta water for later. This will help with the sauce.
Sautéing the Chicken to Golden Perfection
Now, let’s move on to the chicken. Take a large skillet and heat 2 tablespoons of olive oil over medium heat. Add 2 diced chicken breasts to the skillet. Season the chicken with salt and pepper. Cook the chicken for about 5-7 minutes. Stir it often so it browns evenly. When the chicken is golden brown and cooked through, remove it from the skillet and set it aside.
Creating the Creamy Pesto Sauce
In the same skillet, add 2 minced garlic cloves. Sauté the garlic for 1 minute until it smells great. Then, pour in 1 cup of heavy cream. Bring it to a simmer, which is a gentle boil. Now, stir in 1/2 cup of basil pesto. Allow it to cook for another 2-3 minutes. This lets the flavors mix well.
Combining Ingredients and Final Touches
It’s time to bring it all together! Add the cooked pasta and chicken back into the skillet. Gently toss everything together. If the sauce feels too thick, add some of that reserved pasta water. Do this a little at a time until you reach the right creaminess. Next, add 1/2 cup of grated Parmesan cheese and 1 cup of halved cherry tomatoes. Cook for another 2 minutes, just until the tomatoes are warm. Taste and adjust the seasoning with more salt and pepper if needed.
When serving, plate the creamy chicken pesto pasta. Garnish it with fresh basil leaves and extra Parmesan cheese if you like. Enjoy your dish!
Tips & Tricks
Tips for the Creamiest Sauce
To make the sauce creamy, use heavy cream. It gives a rich flavor. Stir in pesto slowly to mix well. This keeps the sauce smooth. You can add more cream if you like it creamier. Always taste the sauce and adjust seasoning as needed.
How to Achieve Perfect Pasta Texture
Cook pasta until it’s al dente. This means it should be firm but not hard. Follow the package time for best results. Always use plenty of salted water. It helps flavor the pasta. Don’t forget to save some pasta water for the sauce. It can help thin the sauce if needed.
Best Practices for Cooking Chicken
Cut chicken into small, even pieces for quick cooking. Heat olive oil in your skillet before adding the chicken. Season with salt and pepper for great taste. Cook until the chicken is golden brown. This should take about 5 to 7 minutes. Make sure the chicken is fully cooked. Use a meat thermometer if you want. It should read 165°F (75°C) inside.
Pro Tips
- Use Fresh Pesto: Freshly made basil pesto enhances the flavor significantly compared to store-bought options. If time allows, consider making your own for a vibrant, fresh taste.
- Perfectly Cooked Chicken: To ensure your chicken stays juicy, avoid overcooking it. Use a meat thermometer to check for an internal temperature of 165°F (75°C).
- Adjusting Sauce Thickness: If your sauce is too thick, gradually add reserved pasta water to achieve your desired consistency. Start with a little and increase as needed.
- Garnish for Flavor: Adding fresh basil leaves not only adds color but also a burst of flavor. Consider pairing with a sprinkle of lemon zest for a refreshing finish.
Variations
Vegetarian Option with Tofu
You can swap chicken for tofu for a tasty vegetarian dish. Use firm tofu, as it holds up well. Start by pressing the tofu to remove extra water. Cut it into cubes and sauté it in olive oil until golden brown. Add salt and pepper for flavor. Then, follow the same steps to create the creamy sauce. Toss in the cooked pasta and tofu, and enjoy a rich meal without meat.
Adding Veggies for Extra Nutrition
Boost your meal by adding veggies. Spinach, zucchini, or bell peppers work great. Sauté the veggies with the chicken or tofu. Add them before mixing in the pasta. This not only adds color but also gives a health kick. You can also use frozen peas or broccoli for an easy option. They cook quickly and add great flavor.
Gluten-Free Pasta Alternatives
If you want a gluten-free option, choose gluten-free pasta. Many types are available, like rice or quinoa pasta. Cook these according to package instructions. The creamy sauce works well with any pasta type. Just make sure to check for gluten-free pesto too. This way, everyone can enjoy the creamy chicken pesto pasta!
Storage Information
How to Store Leftovers
To store leftovers, let the creamy chicken pesto pasta cool down first. Once cooled, place it in an airtight container. Keep it in the fridge. It will last for about 3 to 4 days. Always label your container with the date to track freshness.
Reheating Instructions for Best Quality
When you’re ready to enjoy your leftovers, reheat them gently. You can use a microwave or a skillet. If using a microwave, cover the dish to keep moisture in. Heat in short bursts, stirring in between. If using a skillet, add a splash of water or cream to keep it creamy. Heat on low to medium heat, stirring often until warmed through.
Freeze and Thaw Tips
If you want to freeze the pasta, do so right after cooking. Use a freezer-safe container and portion it out. It can last up to 2 months in the freezer. When you’re ready to eat, thaw it overnight in the fridge. Reheat it slowly on the stove, adding a bit of cream or water to enhance the texture.
FAQs
Can I use homemade pesto for this recipe?
Yes, you can use homemade pesto! It adds a fresh and bright taste. Making your own is easy. Just blend fresh basil, garlic, nuts, cheese, and olive oil. Adjust the ingredients based on what you like. Homemade pesto offers a unique touch to your creamy chicken pesto pasta.
What can I serve with creamy chicken pesto pasta?
You can serve this dish with various sides. A simple green salad pairs well. Garlic bread is another great choice. You could also serve it with steamed veggies for extra nutrition. If you want a light drink, try sparkling water or a crisp white wine.
How do I make this dish less creamy?
To make it less creamy, reduce the amount of heavy cream. You can also add more pasta or veggies to balance it out. Another option is to use half-and-half instead of heavy cream. This way, you keep flavor but lower the creaminess in your creamy chicken pesto pasta.
Creamy chicken pesto pasta is a simple and tasty dish. We covered the key ingredients, cooking steps, and helpful tips. You can adjust the recipe with optional ingredients or variations like going vegetarian or gluten-free.
In summary, this dish is versatile and fun to make. With the right tricks, you can impress anyone. Enjoy cooking and keep experimentin

Creamy Chicken Pesto Pasta
Ingredients
- 300 g pasta (penne or fettuccine)
- 2 pieces chicken breasts, diced
- 1 cup heavy cream
- 0.5 cup basil pesto (store-bought or homemade)
- 1 cup cherry tomatoes, halved
- 0.5 cup grated Parmesan cheese
- 2 tablespoons olive oil
- 2 cloves garlic, minced
- to taste salt and pepper
- for garnish fresh basil leaves
Instructions
- Cook the Pasta: Bring a large pot of salted water to a boil. Add the pasta and cook according to package instructions until al dente. Drain and set aside, reserving a cup of pasta water.
- Sauté the Chicken: In a large skillet, heat the olive oil over medium heat. Add the diced chicken and season with salt and pepper. Cook for about 5-7 minutes or until the chicken is golden brown and cooked through. Remove from the skillet and set aside.
- Create the Sauce: In the same skillet, add the minced garlic and sauté for 1 minute until fragrant. Pour in the heavy cream and bring to a simmer, then stir in the basil pesto. Cook for another 2-3 minutes, allowing the flavors to meld.
- Combine: Add the cooked pasta and chicken to the skillet. Gently toss everything together to combine. If the sauce is too thick, add reserved pasta water a little at a time until the desired consistency is reached.
- Finish with Cheese and Tomatoes: Stir in the grated Parmesan cheese and cherry tomatoes, cooking for another 2 minutes until the tomatoes are warmed through. Adjust seasoning with salt and pepper as needed.
- Serve: Plate the creamy chicken pesto pasta, garnishing with fresh basil leaves and an extra sprinkle of Parmesan cheese if desired.
![- 1 can (15 oz) chickpeas, drained and rinsed - 2 tablespoons olive oil - 1 teaspoon smoked paprika - 1 teaspoon garlic powder - 1 teaspoon cumin - Salt and pepper to taste - 1 cup quinoa, rinsed - 2 cups vegetable broth - 1 medium avocado, sliced - 1 cup cherry tomatoes, halved - 1 small cucumber, diced - 1 cup spinach or mixed greens - 2 tablespoons tahini - 1 tablespoon lemon juice - Fresh herbs (parsley or cilantro) for garnish Chickpeas are the star of this dish. They add protein and fiber. They also take on flavors well. Roasting them makes them crispy and delicious. Olive oil helps the chickpeas brown nicely. It also adds a rich taste. Use high-quality olive oil for the best flavor. Smoked paprika gives a lovely, smoky flavor. It pairs well with the spices. Garlic powder adds a savory depth. Cumin brings warmth and earthiness. Quinoa serves as a great base. It is gluten-free and full of nutrients. It has a slight nutty taste that complements the other ingredients. Avocado adds creaminess. It also provides healthy fats. Cherry tomatoes bring sweetness and freshness. They add a nice pop of color. Cucumber adds crunch and mild flavor. Spinach or mixed greens provide vitamins and minerals. They also add a nice green touch. Tahini and lemon juice create a tangy dressing. It ties all the flavors together beautifully. When choosing chickpeas, look for those without dents or bulges. Canned chickpeas should be firm, not mushy. For olive oil, choose extra virgin for the best taste. It should have a rich, fruity aroma. Pick ripe avocados that yield slightly when pressed. They should not be hard or overly soft. For tomatoes, choose firm, shiny ones without blemishes. Select cucumbers that are dark green and firm. For greens, look for vibrant, crisp leaves. Avoid any with browning or wilting. When choosing tahini, look for a smooth texture. It should have a nutty aroma. Always check the expiration date. First, preheat your oven to 400°F (200°C). While it heats, drain and rinse the chickpeas. Pat them dry with a paper towel. This helps them crisp up nicely. In a bowl, mix the chickpeas with olive oil, smoked paprika, garlic powder, cumin, salt, and pepper. Toss until all the chickpeas are well coated. Spread them in a single layer on a baking sheet lined with parchment paper. Bake for 25-30 minutes, shaking the pan halfway through. Look for a golden brown color and a crispy texture. While the chickpeas bake, it’s time to cook the quinoa. Rinse 1 cup of quinoa under cold water. In a saucepan, combine the rinsed quinoa and 2 cups of vegetable broth. Bring it to a boil over medium heat. Then, reduce the heat to low. Cover the pot and let it simmer for about 15 minutes. Once done, fluff the quinoa with a fork. Make sure all the broth has absorbed. Now comes the fun part—assembling your Buddha bowl! Start with a base of fluffy quinoa. Next, layer in a handful of spinach or mixed greens. Add the halved cherry tomatoes and diced cucumber on top. Don’t forget the star of the dish: your crispy chickpeas! Place them generously over the greens. Finally, slice your avocado and arrange it on top. Drizzle with tahini dressing made from mixing tahini and lemon juice. Add a splash of water if needed. Garnish with fresh herbs like parsley or cilantro for a burst of flavor. Enjoy this vibrant and healthy meal! For the complete recipe, refer to the [Full Recipe]. To make your chickpeas crispy, start by draining and rinsing them well. Pat them dry with a towel. If they are wet, they won’t crisp up. Toss them in olive oil and your favorite spices. I like smoked paprika and garlic powder. Spread them in a single layer on a baking sheet. Bake them at 400°F for about 25 to 30 minutes. Shake the pan halfway for even cooking. The result? Crunchy, golden chickpeas that add great texture to your bowl. Cooking quinoa is simple if you follow a few tips. First, rinse the quinoa under cold water. This removes any bitterness. Use a ratio of 1 cup quinoa to 2 cups vegetable broth. Bring it to a boil, then reduce the heat. Cover the pan and let it simmer for about 15 minutes. Check for fluffiness and make sure all the broth is absorbed. Fluff with a fork before serving. This will give you light and fluffy quinoa, perfect for your Buddha bowl. When making tahini sauce, mix tahini and lemon juice in a bowl. If it seems too thick, add a little water to thin it out. Stir until you reach a smooth and creamy texture. The sauce should be easy to drizzle over your bowl. This adds a rich, nutty flavor that complements the other ingredients. Adjust the water based on your preference. A good tahini sauce makes your Crispy Chickpea Buddha Bowl even more enjoyable. {{image_2}} You can swap some ingredients to make this bowl even healthier. Use brown rice instead of quinoa for extra fiber. If you want fewer carbs, try cauliflower rice. Add more veggies like bell peppers or carrots for color and crunch. Instead of olive oil, try avocado oil. It has a high smoke point and adds a nice flavor. You can boost protein by adding chicken, tofu, or tempeh to your bowl. If you like chicken, grill or roast it with some spices. For a vegetarian option, marinate tofu or tempeh in soy sauce and bake until golden. This makes your bowl more filling and adds layers of taste. Enhance flavors by using different spices and seasonings. Try adding curry powder for a warm taste. A pinch of chili powder adds a nice kick. Fresh herbs like basil or mint can brighten the dish. You can even mix in a splash of soy sauce or hot sauce for an extra punch. For the full recipe, check out the instructions above! To keep your Crispy Chickpea Buddha Bowl fresh, first cool the leftovers. Place them in a container with a tight lid. Store in the fridge for up to three days. Keep the tahini sauce separate until you are ready to eat. This helps maintain the crunchiness of the chickpeas. You can freeze the chickpeas and quinoa. First, let them cool completely. Then, place them in freezer bags. Remove as much air as you can before sealing. This prevents freezer burn. They can last up to three months. When you are ready to eat, thaw them in the fridge overnight. For best results, use glass containers. They do not retain odors and are safe for the microwave. Choose containers that fit your portion size. If you plan to freeze, select freezer-safe containers. This way, you can enjoy your Buddha bowl whenever you like. A Buddha bowl is a colorful dish. It has a mix of grains, veggies, and protein. You can find these bowls in many restaurants. They are great for a healthy meal. The idea is to fill a bowl with healthy food. Each bowl is unique and can change daily. Yes, you can make this recipe vegan. The main ingredients are already plant-based. Use chickpeas, quinoa, and veggies. The tahini sauce is also vegan. Just skip any animal products like cheese. This makes it a perfect dish for everyone. You can store the Crispy Chickpea Buddha Bowl for up to four days. Keep it in an airtight container. Place it in the fridge to keep it fresh. The chickpeas will stay crispy for a short time. They are best eaten right after baking. You can add many toppings to your bowl. Here are some ideas: - Roasted sweet potatoes - Grated carrots - Sliced radishes - Hummus - Seeds like pumpkin or sunflower These add flavor and nutrients to your meal. Yes, this recipe is gluten-free. The main ingredients, chickpeas and quinoa, do not have gluten. Always check labels on packaged items. Some sauces or dressings might contain gluten. This bowl is a great choice for those who avoid gluten. For the detailed cooking process, check the Full Recipe. This blog post covered how to make a Crispy Chickpea Buddha Bowl. We looked at key ingredients, step-by-step instructions, and tips for perfect results. You learned about variations and how to store your bowl for later. I hope this inspire you to create your own Buddha Bowl at home. With fresh ingredients and some tasty swaps, you can make it just right. Enjoy experimenting with flavors and textures, and remember to share your delicious creations!](https://dailydishlab.com/wp-content/uploads/2025/06/f4e12441-0b70-45ef-b3b3-f6f2a153c11f-768x768.webp)