Classic Rice Krispie Treats Irresistible Easy Recipe

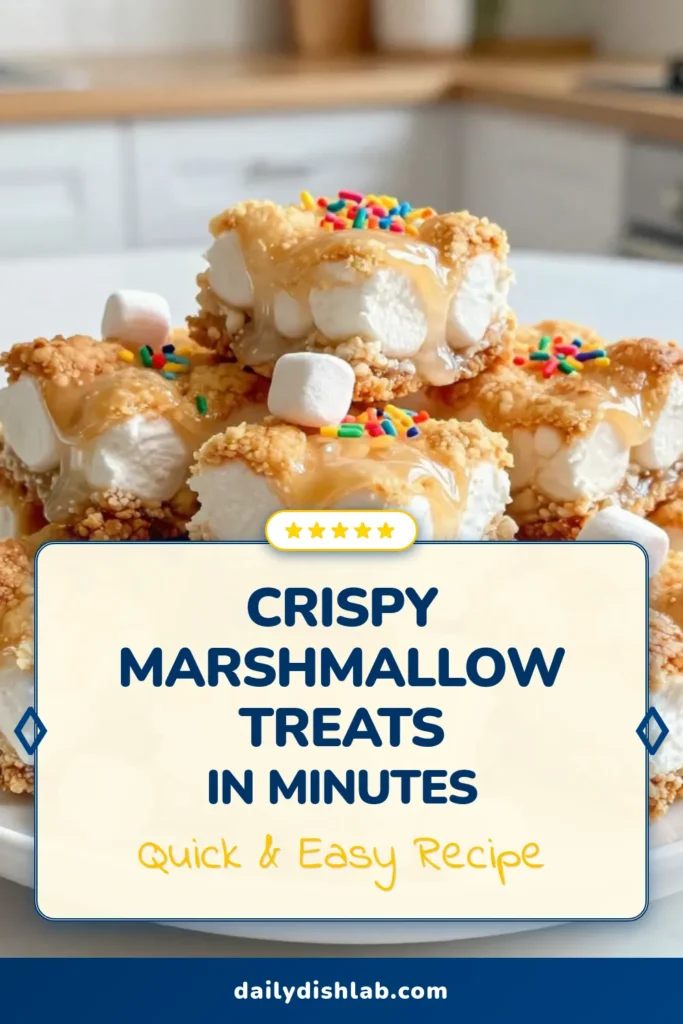
Are you ready for a simple and fun treat? Classic Rice Krispie Treats are the answer! With just four main ingredients, you can whip up these tasty snacks in no time. Whether you’re craving a sweet fix or looking for a quick recipe, this guide has all you need. Let’s dive into the irresistible world of gooey marshmallows and crispy rice—your new favorite dessert awaits!
Why I Love This Recipe
- Quick and Easy: This recipe comes together in just 10 minutes of prep time, making it a perfect treat for last-minute gatherings or cravings.
- Gooey Goodness: With extra mini marshmallows folded in, each bite is packed with delightful gooeyness that will satisfy any sweet tooth.
- Customizable: Feel free to add your favorite mix-ins like chocolate chips or sprinkles to make these treats uniquely yours!
- Fun for All Ages: Kids and adults alike love these crispy marshmallow treats, making them a hit for parties, school events, or just a fun snack at home.
Ingredients
Main Ingredients
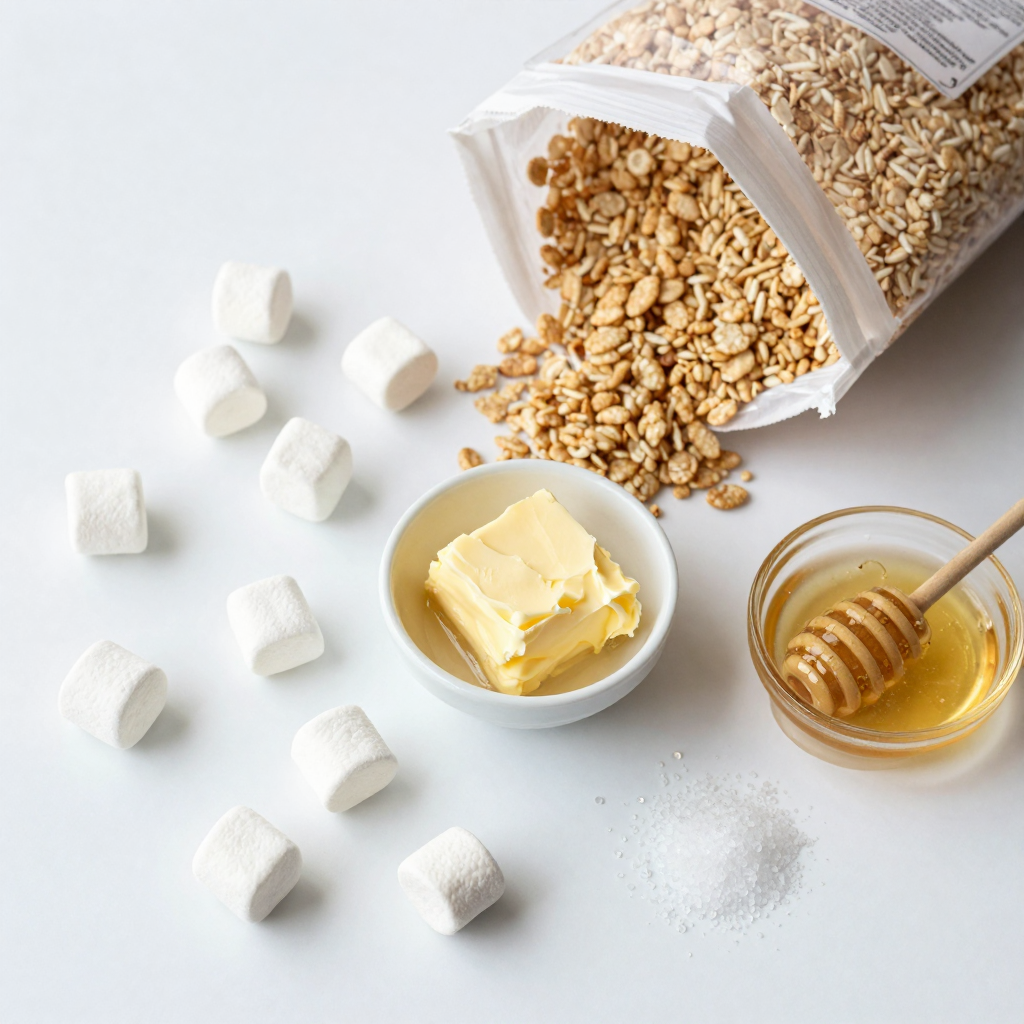
- 6 cups Rice Krispies cereal
- 4 tablespoons unsalted butter
- 1 package (10 oz) mini marshmallows
- 1 teaspoon vanilla extract
Optional Ingredients
- 1 cup extra mini marshmallows
- Rainbow sprinkles
- Chocolate chips
When making Rice Krispie Treats, you only need a few main ingredients. Rice Krispies cereal gives the treats their crunch. Unsalted butter adds richness and helps hold everything together. Mini marshmallows are the star; they melt into a sweet, gooey mix. A touch of vanilla extract adds warmth and depth to the flavor.
If you want to make your treats extra special, consider adding optional ingredients. Extra mini marshmallows create pockets of gooey goodness. Rainbow sprinkles add a fun pop of color, making them perfect for parties. Chocolate chips bring a rich flavor and a delightful texture. Feel free to mix and match these ingredients based on what you love!

Step-by-Step Instructions
Melting the Butter and Marshmallows
Start by putting four tablespoons of unsalted butter into a large saucepan. Set the heat to low. Once the butter melts, add one package of mini marshmallows. Stir this mixture gently. Keep stirring until all the marshmallows melt and the mix is smooth. This step is vital for a great texture.
Mixing Ingredients
Next, remove the saucepan from the heat. Stir in one teaspoon of vanilla extract and a pinch of salt. These add flavor that makes the treats special. Slowly add six cups of Rice Krispies cereal to the marshmallow mix. Make sure to coat every piece of cereal well. Then, fold in one cup of extra mini marshmallows. This gives you pockets of gooey marshmallow goodness.
Preparing the Baking Dish
Now, take a 9×13 inch baking dish. Lightly grease it with butter or non-stick spray. This helps the treats come out easily later. Pour your cereal mixture into the dish. Use a greased spatula or your hands (wet them with water) to press it down evenly. Press firmly, but don’t squish it too much.
Setting and Cutting
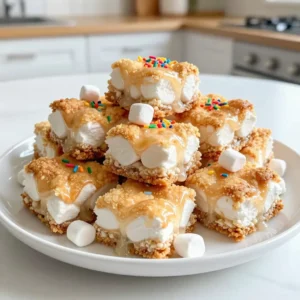
Let the mixture cool at room temperature for about 30 minutes. This allows it to set and firm up. Once set, you can cut the treats into squares or bars. If you like, sprinkle some rainbow sprinkles or chocolate chips on top for extra fun. Enjoy your delicious Rice Krispie Treats!
Tips & Tricks
Achieving the Perfect Texture
Timing is key to making great Rice Krispie treats. When you melt the butter and marshmallows, keep the heat low. This helps to get a smooth mix without burning. Stir the marshmallows well until they melt completely. If you rush, they might clump up.
Adding extra mini marshmallows is a fun trick. These little gems create pockets of gooeyness. Fold them in after mixing the Rice Krispies. This way, you get bursts of marshmallow in every bite. Trust me, your treats will taste even better!
Presentation Tips
Serving your treats can be just as fun as making them. Try cutting them into fun shapes with cookie cutters. You can arrange them on a colorful platter. For a festive touch, sprinkle some extra mini marshmallows or sprinkles on top. This makes the treats look extra special.
If you want to share, think about packaging. Place individual squares in clear bags. Tie them with colorful ribbons. This makes a lovely gift for friends or family. They will love the treat, and you’ll look like a pro!
Pro Tips
- Use Fresh Ingredients: Ensure your marshmallows are fresh for the best texture and flavor; stale marshmallows can affect the gooeyness of the treats.
- Press Firmly: When spreading the mixture into the baking dish, press it down firmly to create a compact and crispy texture that holds together well.
- Experiment with Flavors: Try adding different extracts like almond or coconut for a unique twist on the classic flavor.
- Storing Tips: Store your treats in an airtight container at room temperature to keep them fresh and crispy for a longer time.
Variations
Flavor Variations
You can easily switch up the flavors of Rice Krispie Treats. Here are two popular options:
- Chocolate Rice Krispie Treats: Add 1 cup of chocolate chips to the melted marshmallows. Stir until the chips melt and mix in well. This will give your treats a rich, chocolatey taste. You can also drizzle melted chocolate on top for extra flair.
- Peanut Butter Rice Krispie Treats: Mix in 1 cup of creamy peanut butter as the marshmallows melt. This adds a nutty flavor that pairs well with the sweetness. For a fun twist, fold in some chopped peanuts for a crunchy bite.
Themed Variations
You can make your Rice Krispie Treats fit any occasion. Here are some ideas:
- Holiday-themed Rice Krispie Treats: For Christmas, use red and green sprinkles. For Halloween, add orange and black sprinkles or mini candy corn. You can also shape them into festive forms using cookie cutters.
- Colorful Birthday Treat Options: Use food coloring to tint the melted marshmallows. Create vibrant colors that match your party theme. Top with colorful sprinkles or edible glitter for a special touch that will wow your guests.
Storage Info
Best Practices for Storing
To keep your Rice Krispie Treats fresh, store them in an airtight container. This prevents them from getting hard or stale. Place parchment paper between layers if you stack them. This helps avoid sticking.
The ideal temperature for storage is room temperature. If your home is very warm, consider refrigerating them. When stored correctly, they stay fresh for up to one week.
Reheating Instructions
If your treats lose their gooeyness, you can refresh them. Place a few squares in a microwave-safe dish. Heat them for about 10 seconds. Check them to avoid melting too much.
Do not overheat your treats, or they will become tough. Avoid using the oven, as it can dry them out. Enjoy your treats warm and gooey, just like when you made them!
FAQs
How long do Rice Krispie Treats last?
Rice Krispie Treats last about 2 to 3 days at room temp. To keep them fresh, store them in an airtight container. You can also wrap them tightly in plastic wrap. If you want to keep them longer, store them in the fridge for up to a week.
Can I use different cereals?
Yes, you can use other cereals! Try using Cornflakes, Cocoa Krispies, or Fruity Pebbles. Each cereal will give a new flavor and texture. Just make sure the cereal is crispy. This way, you get that great crunch in every bite.
Are Rice Krispie Treats gluten-free?
Rice Krispie Treats can be gluten-free if you use gluten-free Rice Krispies. Check the label to be sure. The other ingredients, like butter and marshmallows, are usually gluten-free. If you have a gluten allergy, always read labels to avoid any issues.
Rice Krispie treats are simple and fun to make. Start with classic ingredients like Rice Krispies, butter, and mini marshmallows. Follow the steps to melt, mix, and set for the best texture. You can add flavors and sprinkles for a twist. Store them right to enjoy longer. With these tips, you can create tasty treats everyone loves. Get creative and share your fun variations. Enjoy making memories with your delicious Rice Krispie treat
Crispy Marshmallow Dreams
Ingredients
- 6 cups Rice Krispies cereal
- 4 tablespoons unsalted butter
- 1 package (10 oz) mini marshmallows
- 1 cup extra mini marshmallows
- 1 teaspoon vanilla extract
- 1 pinch salt
- optional rainbow sprinkles or chocolate chips for decoration
Instructions
- In a large saucepan over low heat, melt the butter.
- Once melted, add the package of mini marshmallows and stir until they are completely melted and smooth.
- Remove the saucepan from heat and stir in the vanilla extract and a pinch of salt.
- Gradually add the Rice Krispies cereal to the marshmallow mixture, stirring until well-coated.
- Fold in the extra mini marshmallows to create pockets of gooey marshmallow in the mixture.
- Lightly grease a 9×13 inch baking dish with butter or non-stick spray.
- Pour the cereal mixture into the prepared dish. Using a greased spatula or your hands (dipped in water), press the mixture down evenly.
- Let set at room temperature for about 30 minutes until firm.
- Once set, cut into squares or bars and sprinkle with rainbow sprinkles or chocolate chips if desired.
Notes
Crispy Marshmallow Dreams
Ingredients
- 4 cups mini marshmallows
- 3 cups crispy rice cereal
- 3 tablespoons butter
- 1 teaspoon vanilla extract
- 1 pinch salt
Instructions
- In a large saucepan, melt the butter over low heat.
- Add the mini marshmallows and stir until completely melted.
- Remove from heat and stir in the vanilla extract and salt.
- Add the crispy rice cereal and mix until well coated.
- Press the mixture into a greased 9x13 inch pan.
- Allow to cool before cutting into squares.
. To get that perfect soft and chewy texture, use room temperature butter. This helps create a great blend with the sugars. Cream the butter and sugars until they feel light and fluffy. Mix only until combined when adding flour. Over-mixing can lead to tough cookies. Baking time is key too. Take them out when the edges turn golden but the centers still look soft. One common mistake is using cold butter. This won’t mix well and will affect the texture. Another issue is not measuring flour correctly. Too much flour makes cookies dry. Don’t skip the sea salt on top. It enhances the flavors and balances the sweetness. Lastly, don’t overcrowd the baking sheet. Cookies need space to spread. To keep cookies fresh, store them in an airtight container. They stay soft for days that way. For longer storage, freeze them. Just make sure to wrap them well. When you want them warm, pop them in the oven at 350°F for a few minutes. This brings back their soft, chewy goodness. You can also microwave them for about 10 seconds, but be careful not to overheat. Enjoy your cookies as they were meant to be! For more on making these cookies, check out the Full Recipe. {{image_2}} You can choose between classic milk chocolate and rich dark chocolate. The classic version is sweet and creamy. It brings back childhood memories. Dark chocolate has a bold taste, with a hint of bitterness. I love using dark chocolate chips, especially those with 70% cocoa or more. They add depth and contrast to the sweet cookie dough. For a fun twist, mix both types of chocolate. This combo makes for a delightful surprise in every bite. Want to switch things up? Add nuts or spices to your cookies. Chopped walnuts or pecans give the cookies a nice crunch. They also add a warm, nutty flavor. You can also try adding a pinch of cinnamon or a dash of sea salt. These additions elevate the taste. If you want a fruity twist, fold in some dried cherries or cranberries. This adds a chewy texture and a burst of flavor. Each option brings a new life to the classic recipe. You can easily modify this recipe for special diets. For a vegan option, replace the butter with coconut oil. Use flax eggs instead of chicken eggs. To make gluten-free cookies, swap all-purpose flour with almond or oat flour. These swaps work well and still taste great. You can experiment and find the best fit for your needs. Just remember, the texture might change slightly. For more ideas, check the Full Recipe related to adaptations. To keep your cookies soft and chewy, store them in an airtight container. Place a slice of bread in the container. The bread adds moisture and helps the cookies stay fresh. You can also use parchment paper between layers of cookies. This keeps them from sticking together. Freezing cookie dough is easy. First, scoop the dough into balls. Place the balls on a baking sheet. Freeze until firm, about 1-2 hours. Then transfer the dough balls to a freezer bag. Label the bag with the date and type of cookie. This way, you can enjoy fresh cookies later. To thaw frozen cookie dough, move it from the freezer to the fridge overnight. If you need cookies fast, you can bake them straight from the freezer. Just add a minute or two to the baking time. For reheating baked cookies, pop them in the microwave for about 10-15 seconds. This brings back the soft, warm texture. Enjoy your homemade treats with every bite! Chocolate chip cookies stay fresh for about one week at room temperature. Place them in an airtight container to keep them soft. You can also store them in the fridge for longer life. Just remember, cold cookies might lose their soft feel. Yes, you can use oil instead of butter. The cookies may spread a bit more, but they will still taste great. Use a little less oil than the butter amount. For example, if the recipe calls for one cup of butter, use about three-quarters cup of oil. If your dough feels sticky, add a bit more flour. Start with one tablespoon and mix it in. Keep adding until the dough holds together but is still soft. You want it to be easy to scoop but not too wet. To get chewy cookies, use more brown sugar than white sugar. Brown sugar adds moisture. Also, try chilling the dough for at least an hour before baking. This helps the cookies stay thicker and chewier. You can find the full recipe for my decadent dark chocolate chip cookies to see all the tips in action! Now you know how to make the best chocolate chip cookies. We covered key ingredients, step-by-step baking, and tips for the perfect cookie. You can customize your cookies to fit any diet. Remember to store them properly to keep them fresh. With these tips, you can enjoy delicious cookies anytime. Happy baking!](https://dailydishlab.com/wp-content/uploads/2025/06/fa49041d-95ac-4bc8-8fd4-5b20d3bd1dd4-768x768.webp)