
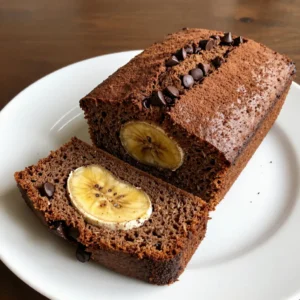
Delicious Double Chocolate Banana Bread Easy Recipe
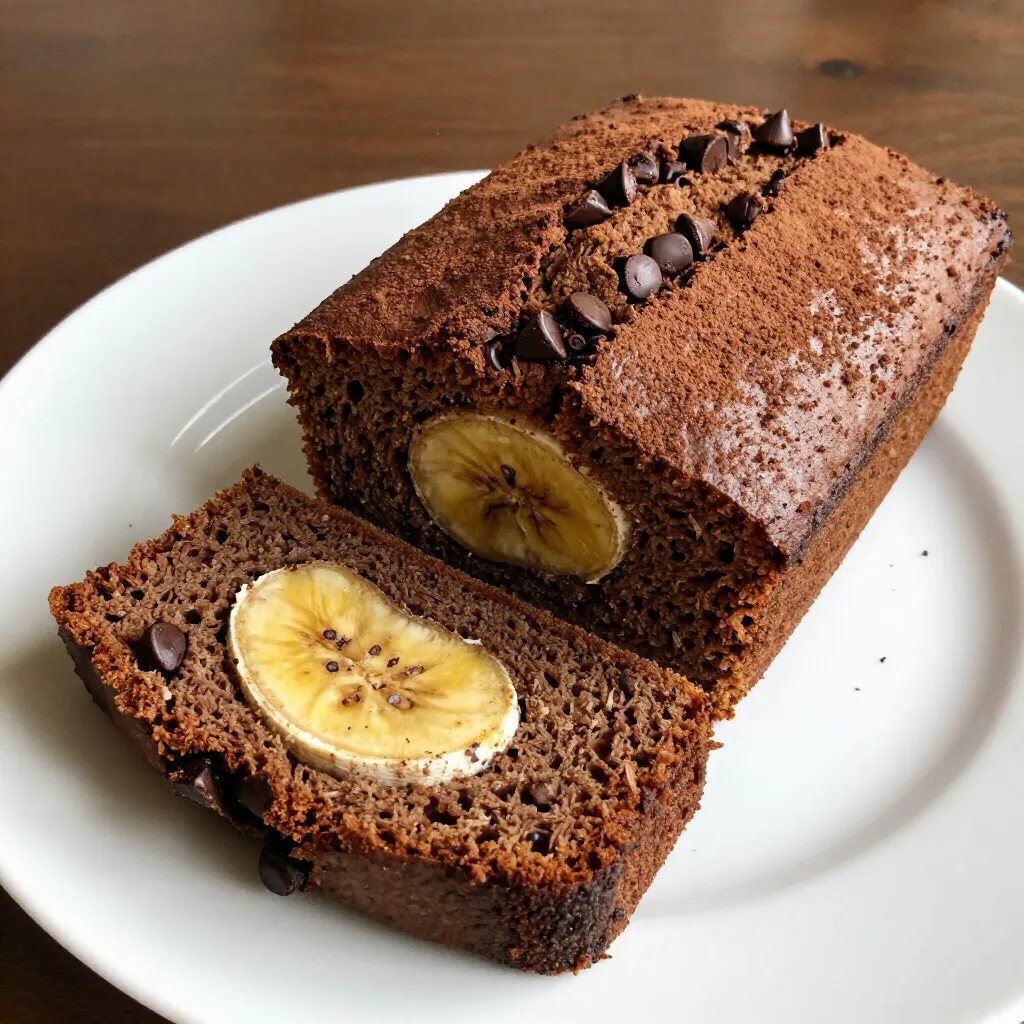
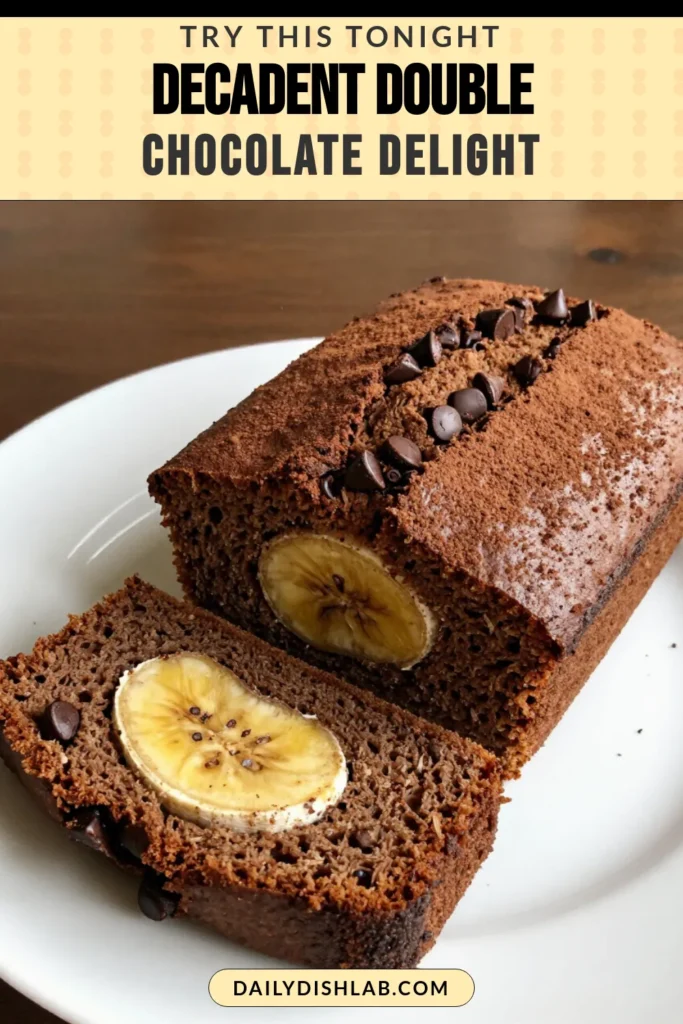
Craving something rich and moist? Double Chocolate Banana Bread is the answer! This easy recipe combines ripe bananas and rich cocoa for a sweet treat you’ll love. With simple steps, you can bake a loaf that’s perfect for breakfast or dessert. Let’s dive into how to whip up this delicious bread and enjoy every chocolatey bite! Get your ingredients ready, and let’s bake something amazing!
Why I Love This Recipe
- Rich Chocolate Flavor: This banana bread is loaded with cocoa and chocolate chips, making it a chocolate lover’s dream come true.
- Moist and Tender: The ripe bananas add natural sweetness and moisture, resulting in an incredibly tender loaf.
- Simple Ingredients: With just a few pantry staples, you can whip up this delectable treat without any fuss.
- Versatile Options: Add nuts or leave them out; this recipe is easy to customize to your liking!
Ingredients
List of Ingredients
- 3 ripe bananas, mashed
- 1/2 cup unsalted butter, melted
- 3/4 cup brown sugar
- 1 large egg, beaten
- 1 teaspoon vanilla extract
- 1 teaspoon baking soda
- 1/4 teaspoon salt
- 1 1/2 cups all-purpose flour
- 1/2 cup cocoa powder
- 1 cup chocolate chips (milk or dark)
- 1/2 cup chopped walnuts or pecans (optional)
To make double chocolate banana bread, gather these ingredients first. Ripe bananas are key to a sweet and moist bread. Use bananas that are brown and soft. The butter must be unsalted and melted for a rich flavor. Brown sugar adds sweetness and moisture. The egg binds everything together. Vanilla extract gives a warm taste. Baking soda helps the bread rise. Salt balances the sweetness. All-purpose flour makes the bread fluffy. Cocoa powder gives the chocolate flavor. Chocolate chips add extra sweetness and texture. Walnuts or pecans are optional but add a nice crunch.
Once you have all your ingredients ready, you’re set to create a delicious treat!

Step-by-Step Instructions
Preparation Steps
Preheating the Oven and Preparing the Loaf Pan
Start by preheating your oven to 350°F (175°C). This temperature helps the bread bake evenly. Next, grease a 9×5 inch loaf pan. Use butter or cooking spray to coat it well. This step keeps the bread from sticking.
Mixing the Wet Ingredients
In a large bowl, mash three ripe bananas. Use a fork for easy mashing. Add 1/2 cup of melted unsalted butter to the bananas. Mix them until smooth. Next, stir in 3/4 cup of brown sugar. Then, add one large beaten egg and one teaspoon of vanilla extract. Mix these well until everything is combined.
Combining Dry Ingredients
Sprinkle one teaspoon of baking soda and 1/4 teaspoon of salt over the wet mixture. Mix this in gently. Now, take 1 1/2 cups of all-purpose flour and 1/2 cup of cocoa powder. Fold these into the wet mix. Be careful not to overmix; just combine until you see no dry flour.
Baking Process
Pouring the Batter
Once your batter is ready, add 1 cup of chocolate chips. If you like, mix in 1/2 cup of chopped walnuts or pecans. Fold them in gently. Now, pour the batter into your prepared loaf pan. Spread it out evenly for even baking.
Baking Time and Doneness Test
Place the pan in your preheated oven. Bake for 60-65 minutes. To check if it’s done, insert a toothpick into the center. If it comes out clean, your bread is ready. If it has batter on it, give it a few more minutes.
Cooling Instructions
After baking, let the bread cool in the pan for about 10 minutes. This cooling time helps it set. Then, carefully transfer the bread to a wire rack to cool completely. Once it’s cool, you can slice and enjoy.
Tips & Tricks
Achieving the Perfect Texture
Recommended Ripe Banana Characteristics
Use bananas that are very ripe. Look for bananas with brown spots. These spots show that the bananas are sweet and soft. Soft bananas mix well into the batter. This helps create a moist bread.
Importance of Not Overmixing
Mix the batter gently. Overmixing can make the bread tough. When you add flour, just fold it in until you see no more dry flour. This ensures a soft and tender bread.
Enhancing Chocolate Flavor
Types of Chocolate to Use
Choose high-quality chocolate chips. You can use milk or dark chocolate chips. Each type gives a different taste. Dark chocolate adds a rich flavor, while milk chocolate is sweet and creamy.
Optional Add-ins for More Flavor
You can add nuts like walnuts or pecans. These add a nice crunch. Consider adding a pinch of espresso powder to boost the chocolate flavor. You can also add a splash of almond extract for a new twist.
Pro Tips
- Use Overripe Bananas: The riper the bananas, the sweeter and more flavorful your bread will be. Look for bananas with brown spots for the best taste.
- Don’t Overmix the Batter: To ensure a tender loaf, mix the batter until just combined. Overmixing can lead to a dense texture.
- Experiment with Add-ins: Feel free to customize your bread by adding nuts, dried fruit, or even a swirl of peanut butter for extra flavor and texture.
- Proper Cooling: Allow the bread to cool completely on a wire rack to prevent it from becoming soggy. This will help maintain its perfect texture.
Variations
Nut Options
You can add nuts to your double chocolate banana bread for extra crunch. Walnuts and pecans are both great choices.
- Walnuts vs. Pecans: Walnuts have a rich, earthy taste. They bring a nice contrast to the chocolate. Pecans, on the other hand, have a sweet, buttery flavor. They add a different texture but also taste great.
- How to Add Flavor with Nuts: To boost the nutty flavor, toast them lightly in a pan before adding. This brings out the oils and enhances the taste. Just chop them and fold them into the batter before baking.
Flavorful Twists
You can easily switch up the flavor of your banana bread with a few fun additions.
- Adding Peanut Butter Swirls: Swirling in peanut butter gives the bread a creamy, nutty twist. Just drop spoonfuls of peanut butter on top of the batter. Then, use a knife to swirl it gently. Don’t mix it too much; you want to see the swirls!
- Using Different Types of Cocoa Powder: Try using dark cocoa powder instead of regular cocoa powder. This will make your banana bread richer and more chocolatey. You can even mix in flavored cocoa powders, like mint or raspberry, for a unique taste.
Storage Info
Storing Banana Bread
To keep your double chocolate banana bread fresh, use the right method. For short-term storage, wrap the bread tightly in plastic wrap or foil. This keeps moisture inside and prevents it from drying out. Place it in an airtight container or a resealable bag for extra protection. Store it at room temperature for up to three days.
For longer storage, freezing is your best option. First, let the bread cool completely. Then, wrap it tightly in plastic wrap. After that, place it in a freezer-safe bag. Label the bag with the date. Your banana bread can stay fresh in the freezer for up to three months.
Reheating Instructions
When you want to enjoy your banana bread again, reheating is easy. The best way is to use the oven. Preheat your oven to 350°F (175°C). Unwrap the bread and place it on a baking sheet. Heat it for about 10-15 minutes. Check it often to avoid drying out. You can also reheat slices in the microwave. Just place a slice on a plate and heat for 15-20 seconds. If you want it warm and soft, cover it with a damp paper towel. This keeps the moisture in while it heats. Enjoy your delicious bread warm!
FAQs
Common Questions about Double Chocolate Banana Bread
Can I use frozen bananas?
Yes, you can use frozen bananas. Just thaw them first. This will help them mash easily. Frozen bananas often taste sweeter and add moisture.
What can I substitute for cocoa powder?
You can use carob powder instead. It has a different flavor but gives a nice taste. If you want a lighter color, use dark chocolate instead.
How do I know when my banana bread is done?
Check with a toothpick. Insert it in the center of the bread. If it comes out clean, it’s ready. If there is wet batter, bake a bit longer.
Alternative Baking Methods
Can I make this recipe as muffins?
Yes, you can make muffins! Just fill muffin cups with the batter. Bake for about 20 minutes. Check with a toothpick for doneness.
How to adapt for gluten-free diets?
To make it gluten-free, use a gluten-free flour blend. Ensure the blend works for baking. Add a little xanthan gum if needed for better texture.
In this post, I shared how to make delicious double chocolate banana bread. We covered the simple ingredients, step-by-step instructions, and helpful tips for perfecting your bread. Remember to choose ripe bananas and avoid overmixing for the best texture. You can also add nuts or even peanut butter swirls for a twist. Storing your bread properly ensures it stays fresh, and reheating techniques help maintain moisture. Enjoy creating your tasty treat, and don’t hesitate to experiment with variation
Double Chocolate Banana Bread
Ingredients
- 3 pieces ripe bananas, mashed
- 0.5 cup unsalted butter, melted
- 0.75 cup brown sugar
- 1 large egg, beaten
- 1 teaspoon vanilla extract
- 1 teaspoon baking soda
- 0.25 teaspoon salt
- 1.5 cups all-purpose flour
- 0.5 cup cocoa powder
- 1 cup chocolate chips (milk or dark)
- 0.5 cup chopped walnuts or pecans (optional)
Instructions
- Preheat your oven to 350°F (175°C) and grease a 9x5 inch loaf pan.
- In a large mixing bowl, combine the mashed bananas and melted butter, mixing until smooth.
- Stir in the brown sugar, beaten egg, and vanilla extract until well combined.
- Sprinkle the baking soda and salt over the mixture, then mix well.
- Gently fold in the flour and cocoa powder until just combined (do not overmix).
- Add the chocolate chips and nuts (if using) and carefully fold them into the batter.
- Pour the batter into the prepared loaf pan, spreading it evenly.
- Bake in the preheated oven for 60-65 minutes, or until a toothpick inserted into the center comes out clean.
- Allow the bread to cool in the pan for about 10 minutes before transferring it to a wire rack to cool completely.
- Slice and serve warm or at room temperature. Enjoy your decadent double chocolate banana bread!

![To make no-bake chocolate oat bars, you need simple and wholesome ingredients. Here’s what you will need: - 2 cups rolled oats - 1 cup natural peanut butter (or almond butter) - 1/2 cup honey or maple syrup - 1/2 cup unsweetened cocoa powder - 1/4 teaspoon salt - 1 teaspoon vanilla extract - 1/2 cup mini chocolate chips (plus more for topping) - Optional: 1/4 cup chopped nuts (e.g., walnuts or almonds) These ingredients create a rich and tasty treat. The oats provide fiber and good nutrients. Peanut butter adds protein and healthy fats. Honey or maple syrup gives sweetness, while cocoa powder delivers that chocolate flavor we all love. Salt enhances the taste, making it all balanced. I love how easy it is to mix these ingredients together. You can customize it, too! Add nuts for crunch or swap the nut butter based on your taste. This recipe is perfect for snacks or dessert. You can find the full recipe with instructions to create these bars. Making no-bake chocolate oat bars is simple and fun. You only need a few basic steps. First, gather your ingredients. This recipe makes 16 bars, perfect for snacks or dessert. Start with a large bowl. Add 2 cups of rolled oats, 1/2 cup of cocoa powder, and 1/4 teaspoon of salt. Mix these dry ingredients well. This mixture gives the bars structure and rich flavor. In a small saucepan, add 1 cup of peanut butter and 1/2 cup of honey. Heat over low heat. Stir until smooth. This step helps the two ingredients blend nicely. Once mixed, take the pan off the heat and add 1 teaspoon of vanilla extract. Stir well to combine. Pour the warm peanut butter mix over your oat mixture. Stir until all the oats get coated. Fold in 1/2 cup of mini chocolate chips and optional chopped nuts if you like. Next, line an 8-inch square baking dish with parchment paper. Leave some paper hanging over the edges. This makes it easy to lift out the bars later. Transfer the oat mixture into the dish. Press it down firmly with a spatula or your hands. Sprinkle more mini chocolate chips on top and press them lightly into the mixture. Now, place the dish in the fridge for at least 2 hours. This will help the bars set. When ready, lift them out using the parchment paper. Cut into squares or rectangles. Enjoy your no-bake chocolate oat bars! For the full recipe, check out the complete list of steps above. To get the right texture for your no-bake chocolate oat bars, focus on the oats. Use rolled oats, not instant oats. Rolled oats give you that chewy bite. Make sure to mix the wet ingredients well. A smooth peanut butter blend helps to bind everything. Press the mixture firmly into your dish. This will help the bars set better. You can make these bars your own with toppings. Add different nuts for crunch, like walnuts or almonds. You can also sprinkle coconut flakes for a tropical twist. If you love chocolate, add more mini chocolate chips on top. Feel free to get creative! Use dried fruit or seeds for added flavor and nutrients. Avoid using too much liquid. This can make your bars too soft. If they don't hold together, they won't slice well. Also, don't skip chilling them long enough. They need at least two hours in the fridge. This helps them set properly. Lastly, always line your baking dish with parchment paper. This makes removing the bars easy and mess-free. For the full recipe, check out the [Full Recipe]. {{image_2}} You can make this treat even healthier. Try using whole grain oats instead of rolled oats. They add more fiber and nutrients. You can swap honey for agave syrup or use mashed bananas for sweetness. Both options lower the glycemic index. If you want a lower-fat option, use a nut butter with less oil. This keeps the flavor while cutting some calories. Let your taste buds explore! You can add spices like cinnamon or nutmeg to the oat mixture. This gives the bars a warm, cozy flavor. Try mixing in dried fruits like raisins or cranberries for a chewy texture. You can also switch up the chocolate chips. Use white chocolate or butterscotch chips for a fun twist. Each change makes the bars unique! Making these bars vegan or nut-free is easy. To go vegan, use maple syrup instead of honey. Replace peanut butter with sunflower seed butter. This keeps the bars nut-free and still delicious. You can also use pumpkin seed butter for a different flavor. Both options are rich in protein and healthy fats. Enjoy your tasty treat without worry! Check out the Full Recipe to see how easy these variations are to make. To keep your no-bake chocolate oat bars fresh, store them in an airtight container. Use parchment paper between layers to prevent sticking. This way, they stay nice and tasty for longer. If you have a big batch, you can also wrap them individually in plastic wrap. This makes it easy to grab one on the go. When stored properly, these bars last about one week at room temperature. You can keep them in the fridge for up to two weeks. The cool air helps keep them firm and tasty. Just make sure they stay in a sealed container to avoid moisture. You can freeze these bars for even longer storage. They freeze well for up to three months. To do this, wrap each bar in plastic wrap. Then, place them in a freezer-safe bag. When you want one, take it out and let it thaw in the fridge. This way, you’ll always have a treat ready to enjoy! For the full recipe, check out the detailed steps above. Yes, you can use other nut butters. Almond butter works well and has a nice flavor. Cashew butter is another tasty choice. Just make sure it is natural and creamy. Each nut butter may change the taste a little. Feel free to experiment with your favorite! To make this recipe gluten-free, choose certified gluten-free oats. Most rolled oats contain gluten. So, look for oats labeled as gluten-free. This small step ensures your tasty bars are safe for gluten-free diets. You can enjoy these bars without worry! If you want to substitute honey or maple syrup, try agave syrup or brown rice syrup. Both options add sweetness and keep the bars moist. You can also use date syrup for a fruity flavor. Just remember, these swaps may slightly change the taste. In this blog post, we covered a delicious recipe for oat bars. You learned about key ingredients like oats, nut butter, and cocoa powder. I shared step-by-step instructions to guide your cooking process. Tips for perfect texture and common mistakes were also discussed. Variations let you customize flavors and ensure everyone can enjoy these bars. Remember to follow storage tips for freshness. Baking these oat bars is fun and rewarding. They make a great snack for everyone. Enjoy your tasty creation!](https://dailydishlab.com/wp-content/uploads/2025/07/967f7db3-ab0b-4ab4-b9dd-ccfa3a2c04e2-768x768.webp)