Creamy Pesto Chicken Penne Easy and Flavorful Meal
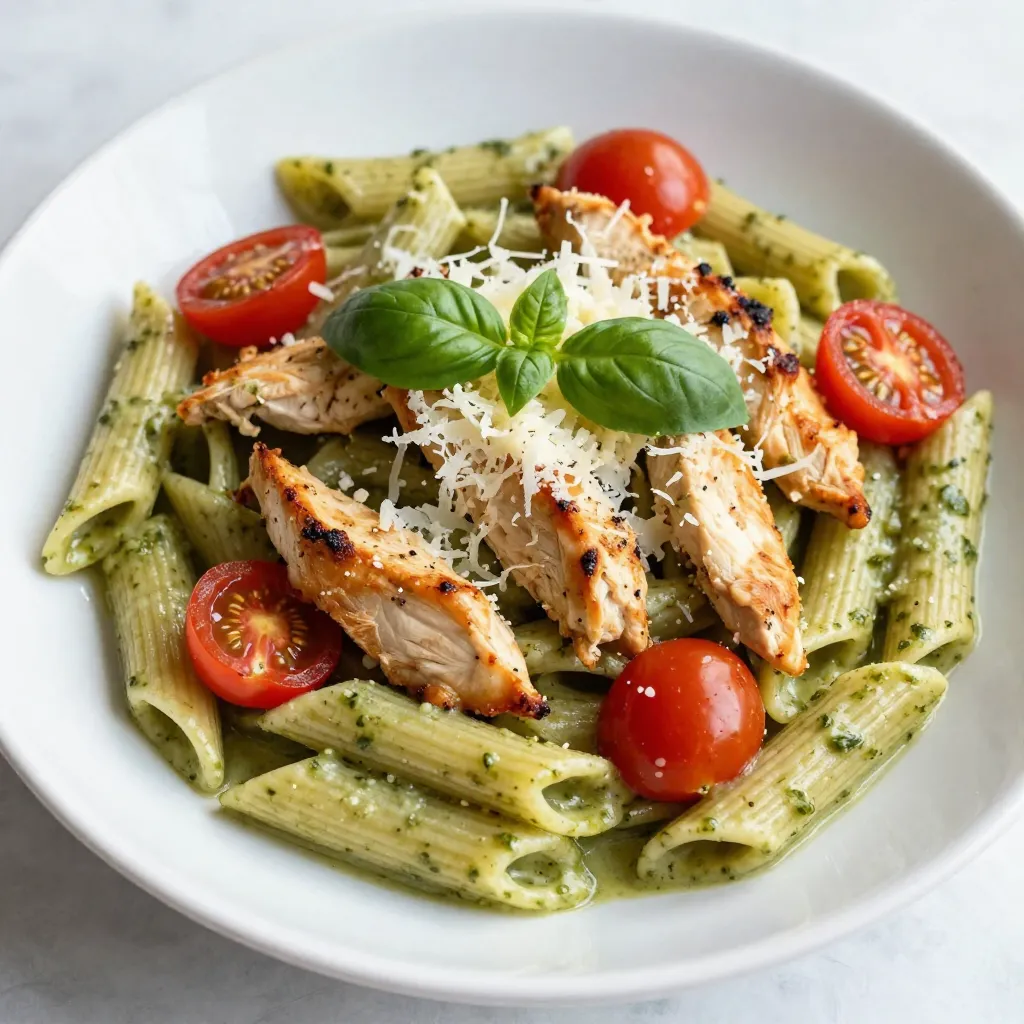
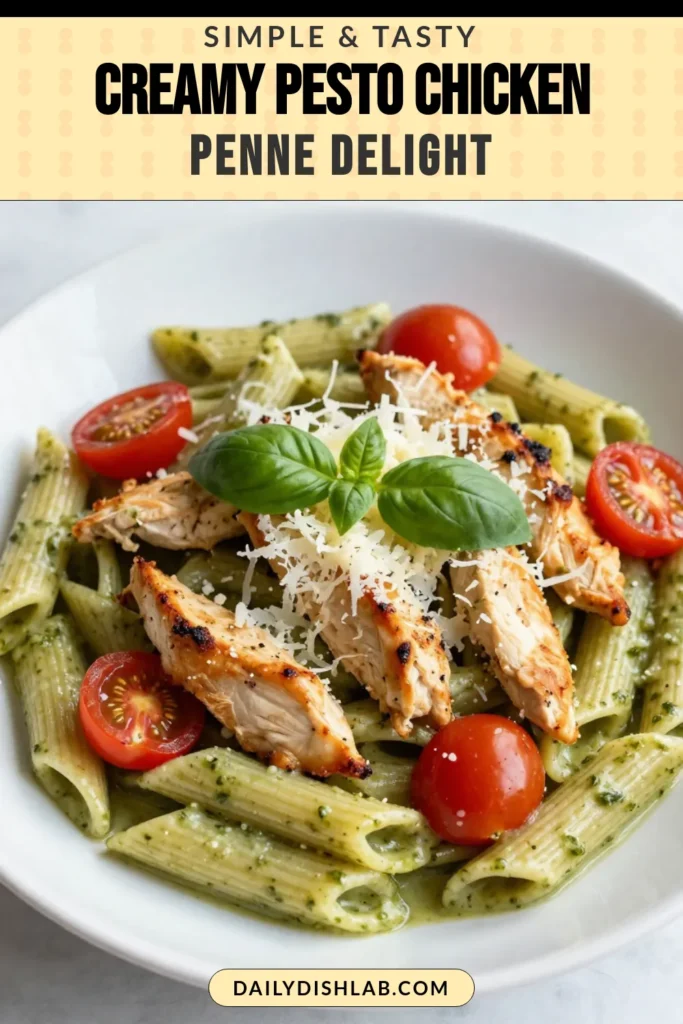
Are you ready to elevate your dinner game? My Creamy Pesto Chicken Penne is an easy and flavorful meal that bursts with taste. With tender chicken, a silky cream sauce, and vibrant basil pesto, this dish comes together in no time. This recipe is perfect for busy weeknights or impressing friends. Let’s dive in and make dinner a delicious experience you’ll want to repeat!
Why I Love This Recipe
- Quick and Easy: This recipe comes together in just 30 minutes, making it perfect for busy weeknights.
- Rich and Creamy: The combination of heavy cream and basil pesto creates a deliciously rich sauce that coats the pasta beautifully.
- Flavorful Chicken: Sautéing the chicken with olive oil adds a golden brown flavor that pairs perfectly with the creamy sauce.
- Fresh Ingredients: The addition of cherry tomatoes and fresh basil not only enhances the flavor but adds a vibrant pop of color to the dish.
Ingredients
Main Ingredients
- 8 oz penne pasta
- 1 pound chicken breast, sliced into strips
- 1 cup heavy cream
- 1 cup basil pesto
- 1 cup cherry tomatoes, halved
Additional Ingredients
- 2 tablespoons olive oil
- ½ cup grated Parmesan cheese
- Fresh basil leaves for garnish
- Salt and pepper to taste
Equipment Needed
- Large pot
- Large skillet
- Measuring cups
- Cooking utensils
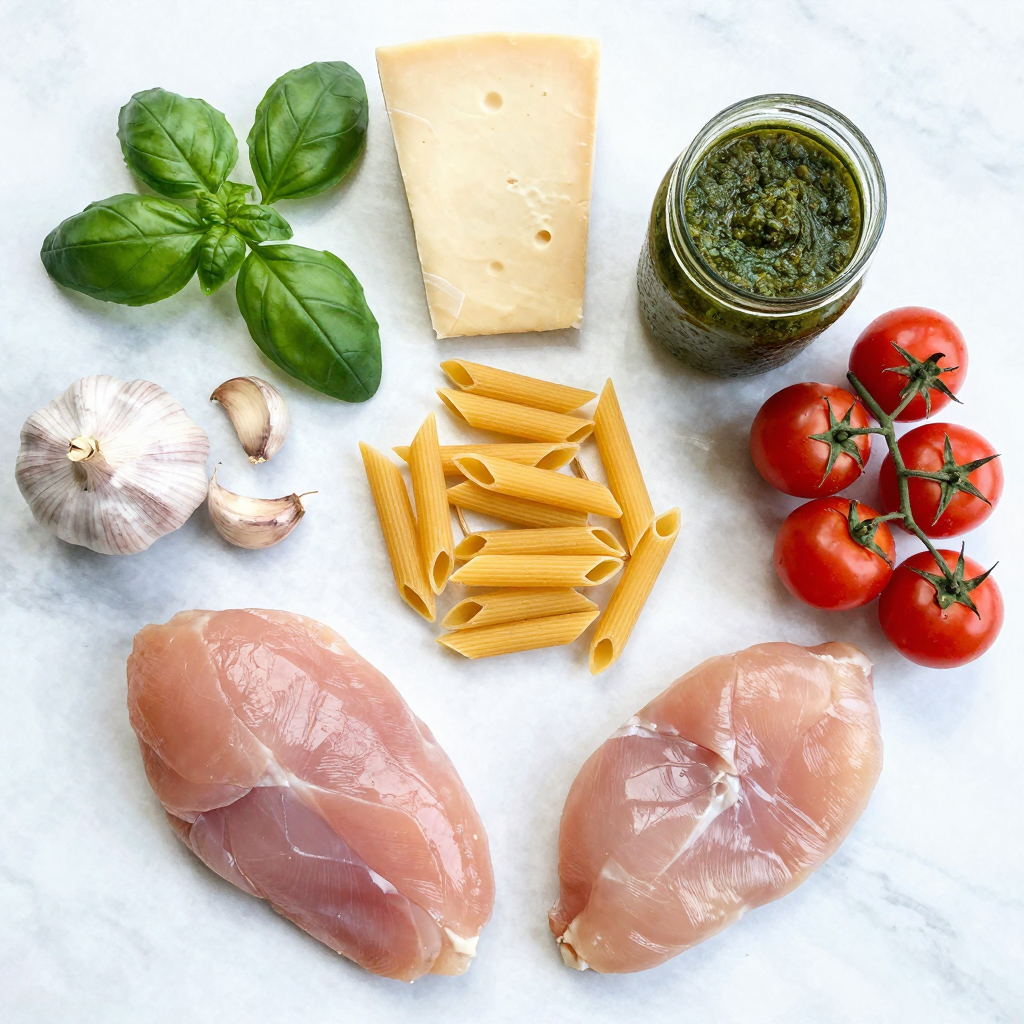
Gathering the right ingredients is key to making creamy pesto chicken penne delicious. The penne pasta serves as a great base. It holds the sauce well and offers a nice bite. Chicken breast adds protein and a hearty texture. Heavy cream gives the dish its rich, creamy flavor. Basil pesto adds a burst of herbal taste. Cherry tomatoes bring a pop of color and sweetness.
You will also need olive oil to sauté the chicken. Parmesan cheese helps make the sauce even cheesier. Fresh basil leaves are perfect for garnishing. Don’t forget salt and pepper for seasoning.
For equipment, a large pot is needed to cook the pasta. A large skillet is essential for sautéing the chicken and making the sauce. Measuring cups help with accuracy, and basic cooking utensils complete your kitchen tools. Getting these right sets you up for success!

Step-by-Step Instructions
Cooking the Pasta
- Boil salted water in a large pot.
- Add the penne pasta and cook it as the package says, usually about 10-12 minutes.
- Drain the pasta and save a bit of the water for later.
Sautéing the Chicken
- Heat two tablespoons of olive oil in a large skillet over medium heat.
- Season your sliced chicken breast with salt and pepper.
- Cook the chicken until it turns golden brown, about 5-7 minutes. Remove it from the skillet and set it aside.
Preparing the Creamy Sauce
- Lower the heat on your skillet.
- Pour in one cup of heavy cream.
- Add one cup of basil pesto and mix it well until it warms up.
- Taste the sauce and adjust the seasoning if needed.
Combining Ingredients
- Toss the cooked penne pasta back into the skillet.
- Add the sautéed chicken and halved cherry tomatoes.
- If the sauce is too thick, add some reserved pasta water.
- Mix everything until it’s well combined and creamy.
Adding Cheese and Garnish
- Stir in half a cup of grated Parmesan cheese until it melts and blends into the sauce.
- Taste again and adjust seasoning with more salt or pepper if necessary.
- Finally, garnish with fresh basil leaves for a pop of color and flavor.
Tips & Tricks
Making the Perfect Cream Sauce
- Use room temperature ingredients. This helps the cream blend well.
- Avoid boiling after adding cream. High heat can cause the cream to separate.
A smooth and creamy sauce makes this dish shine. When you use room temperature cream, it mixes easily with other ingredients. After adding cream, keep the heat low. This keeps the sauce silky and rich.
Enhancing Flavor
- Fresh herbs and spices boost taste. Basil, parsley, or thyme work well.
- Try alternative cheeses for different flavors. Goat cheese or mozzarella add unique twists.
Don’t be shy with herbs. Fresh ones can brighten your dish. Adding a bit of garlic or lemon zest can also lift the flavors. Experimenting with cheese gives you new taste experiences.
Serving Suggestions
- Pair with a side salad or bread for balance. A crisp salad adds freshness.
- Best served fresh. Enjoy it right after cooking for the best taste.
Serving this meal right away is key. The flavors meld beautifully when hot. A simple side salad or some crusty bread makes the meal complete. Enjoy every bite!
Pro Tips
- Use Fresh Pesto: If possible, use homemade basil pesto for a fresher and more vibrant flavor in your dish.
- Perfect Pasta: Be sure to cook the penne pasta al dente, which means firm to the bite, for the best texture in your dish.
- Reserve Pasta Water: Always reserve a cup of pasta water before draining. It’s great for adjusting the sauce’s consistency.
- Garnish Wisely: Fresh basil leaves not only add color but also enhance the aroma and flavor of your creamy pesto chicken penne.
Variations
Protein Alternatives
You can easily change the protein in this dish. If you want a seafood twist, use shrimp instead of chicken. Shrimp cooks fast and adds a sweet flavor. Just sauté it until pink and tender.
If you prefer a plant-based option, swap chicken for tofu. Press and cube firm tofu, then sauté until golden. It absorbs flavors well and adds a nice texture.
Another quick option is using store-bought rotisserie chicken. Just shred it and add it to the creamy sauce. This saves time and still gives you great taste.
Vegan Options
For a vegan version, replace heavy cream with coconut cream. This keeps the dish rich and creamy. The coconut flavor adds a fun twist, too.
Use vegan pesto and cheese alternatives to keep it plant-based. Many stores sell great vegan pesto now. Look for cheese made from nuts or soy to mimic Parmesan. These swaps keep your dish flavorful and satisfying.
Pasta Substitutes
Feel free to switch up the pasta shape. Fusilli or rigatoni are great choices. They hold sauce well, making every bite tasty.
If you need gluten-free options, many brands offer gluten-free penne. These work well without changing the overall taste. Look for options made from rice or chickpeas for added nutrition.
Storage Info
Leftovers Storage
To keep your creamy pesto chicken penne fresh, store it in an airtight container. Place it in the fridge. This method works best to keep flavors intact. Your dish will stay fresh for about 3 to 4 days.
Reheating Tips
For reheating, I prefer using the stove. This method warms the dish evenly. Just place it in a skillet over low heat. Stir often to maintain the creamy texture. If you use the microwave, do it in short bursts. Check and stir every 30 seconds to avoid drying it out.
Freezing Guidance
You can freeze creamy pesto chicken penne! First, let it cool completely. Then, transfer it to a freezer-safe container. This way, you can enjoy it later. It can last up to 2 months in the freezer. To thaw, place it in the fridge overnight. Reheat it on the stove for the best results.
FAQs
Can I make this recipe in advance?
Yes, you can easily make this meal in advance. Cook the penne pasta and chicken, then mix them with the sauce. Store everything in a container in the fridge. When ready to eat, reheat it gently on the stove. You might want to add a splash of cream or pasta water to keep it creamy. This way, you save time for busy days.
What can I substitute for basil pesto?
If you need a substitute for basil pesto, try sun-dried tomato pesto. It offers a rich flavor that pairs well with chicken. You can also use Alfredo sauce for a creamy twist. If you want something lighter, consider a spinach or arugula pesto. Each option adds a unique taste to your dish.
How can I make this dish spicy?
To add some heat, sprinkle in red pepper flakes while cooking the chicken. You can also use a spicy pesto instead of the regular one. If you want more flavor, add diced jalapeños or a dash of hot sauce. These simple changes will give your creamy pesto chicken penne a spicy kick!
This blog post shared a tasty penne pasta dish with chicken and creamy pesto. I covered main and additional ingredients, essential equipment, and easy cooking steps. You learned tips for flavor, serving, and storage, plus variations for different diets. Exploring these options can make cooking fun and simple. Remember, you can mix flavors and ingredients to make the dish your own. Enjoy your cooking adventur

Creamy Pesto Chicken Penne
Ingredients
- 8 oz penne pasta
- 2 tablespoons olive oil
- 1 pound chicken breast, sliced into strips
- to taste salt and pepper
- 1 cup heavy cream
- 1 cup basil pesto
- 1 cup cherry tomatoes, halved
- 0.5 cup grated Parmesan cheese
- for garnish fresh basil leaves
Instructions
- In a large pot, bring salted water to a boil. Add the penne pasta and cook according to package instructions until al dente. Drain and set aside, reserving a little pasta water.
- In a large skillet, heat the olive oil over medium heat. Add the sliced chicken breast to the skillet, season with salt and pepper, and cook until golden brown and cooked through (about 5-7 minutes). Remove the chicken from the skillet and set aside.
- In the same skillet, reduce the heat to low. Pour in the heavy cream and stir in the basil pesto, mixing well until combined and warmed through.
- Add the cooked penne pasta to the skillet along with the sautéed chicken and halved cherry tomatoes. Toss everything together, adding reserved pasta water if needed to create a creamier consistency.
- Stir in the grated Parmesan cheese until melted and creamy. Taste and adjust seasoning with additional salt and pepper if needed.
- Plate the dish and garnish with fresh basil leaves for a delightful aroma and presentation.
Notes
Creamy Pesto Chicken Penne
Ingredients
- 12 ounces penne pasta
- 1 pound chicken breast, diced
- 1 cup heavy cream
- 1/2 cup pesto sauce
- 2 tablespoons olive oil
- 1 teaspoon garlic, minced
- 1/2 teaspoon salt
- 1/4 teaspoon black pepper
- 1/4 cup Parmesan cheese, grated
Instructions
- Cook the penne pasta according to package instructions until al dente. Drain and set aside.
- In a large skillet, heat olive oil over medium heat. Add the diced chicken and cook until browned and cooked through, about 7-10 minutes.
- Add minced garlic to the skillet and sauté for 1 minute until fragrant.
- Stir in the heavy cream and pesto sauce, mixing well. Let it simmer for 2-3 minutes.
- Add the cooked penne pasta to the skillet and toss to coat with the sauce.
- Season with salt and black pepper. Serve hot, topped with grated Parmesan cheese.
![- 1 block (14 oz) firm tofu, drained and pressed - 1 cup cooked brown rice or quinoa - 1 cup broccoli florets - 1 cup shredded carrots - 1 bell pepper, sliced (any color) - 2 green onions, sliced - 1 tablespoon sesame oil - 1 tablespoon olive oil - 1/4 cup soy sauce (or tamari for gluten-free) - 2 tablespoons maple syrup - 1 tablespoon rice vinegar - 1 teaspoon minced garlic - 1 teaspoon grated ginger - 1 tablespoon sesame seeds for garnish Each serving of the Teriyaki Tofu Buddha Bowl is packed with nutrients. You get about 400 calories, 20 grams of protein, 50 grams of carbs, and 15 grams of fats. This bowl is a great balance of macronutrients. The ingredients offer many health benefits. Tofu serves as a fantastic source of plant protein. Brown rice or quinoa adds fiber and essential minerals. Broccoli is rich in vitamins C and K, while carrots provide beta-carotene. Bell peppers can boost your immune system as well. Green onions add flavor and nutrients without many calories. Eating this bowl can support a healthy diet and keep you energized. The blend of flavors and textures makes every bite enjoyable. It's not just a meal; it’s a feast for your body and spirit. For the full recipe, check the details above. First, press the tofu to remove excess water. Wrap it in a clean towel and place a heavy object on top for about 15 minutes. This helps the tofu absorb flavors better. After pressing, cut the tofu into small cubes. Next, make the teriyaki marinade. In a bowl, mix together: - 1/4 cup soy sauce (or tamari for gluten-free) - 2 tablespoons maple syrup - 1 tablespoon rice vinegar - 1 teaspoon minced garlic - 1 teaspoon grated ginger Gently add the tofu cubes to the marinade and stir to coat. Let the tofu soak in the flavors for at least 15 minutes. While the tofu marinates, cook your grains. You can use either brown rice or quinoa. Follow the package instructions for cooking. For perfect grains, use a 2:1 ratio of water to grains. Here’s a tip: After cooking, let the grains sit covered for 5 minutes. This helps them fluff up nicely. Heat a large skillet or wok over medium heat. Add 1 tablespoon of olive oil. Sauté the broccoli and bell pepper for about 4-5 minutes. You want them to be tender but still crisp. Then, add 1 cup of shredded carrots and cook for another 2 minutes. Remove the skillet from the heat and set the vegetables aside. In the same skillet, add 1 tablespoon of sesame oil and heat it over medium-high. Carefully place the marinated tofu cubes in the skillet. Cook for about 5-7 minutes. Turn the tofu occasionally until it is golden brown and slightly crispy. The right oil helps achieve that perfect texture. Now, it’s time to put everything together! Start with a base of cooked brown rice or quinoa in a deep bowl. Layer the sautéed vegetables on top of the grains. Finally, add the crispy teriyaki tofu. For a beautiful presentation, arrange the ingredients in sections. This adds color and makes the dish more appealing. You can also sprinkle some sliced green onions and sesame seeds on top for extra flavor and crunch. Enjoy your Teriyaki Tofu Buddha Bowl! For the complete recipe, check out [Full Recipe]. To make your Teriyaki Tofu Buddha Bowl burst with flavor, focus on your marinade. A great mix includes: - 1/4 cup soy sauce or tamari for gluten-free - 2 tablespoons maple syrup - 1 tablespoon rice vinegar - 1 teaspoon minced garlic - 1 teaspoon grated ginger Letting the tofu soak in this marinade for at least 15 minutes enhances the taste. You can even marinate it longer for a stronger flavor. When cooking, use medium-high heat to get a nice sear on your tofu. This step locks in the flavor and gives it a delightful crunch. Stir-fry the veggies quickly. This keeps them vibrant and crisp. A beautiful bowl is all about colors and textures. Here’s how to make it pop: - Start with a base of brown rice or quinoa. - Layer the sautéed veggies in sections. - Place the crispy tofu on top. - Add a sprinkle of green onions and sesame seeds for crunch. This layout not only looks good but also makes it easy to enjoy each bite. Drizzle a bit of extra teriyaki sauce over the top for shine and flavor. You can easily change this bowl to fit your taste. Here are some ideas: - Swap tofu for tempeh or chickpeas for added protein. - Try adding different vegetables like spinach, corn, or snap peas. - For a gluten-free option, use tamari instead of soy sauce. - For a low-carb version, consider cauliflower rice instead of grains. These simple swaps keep your meals fresh and exciting while catering to your dietary needs. For the full recipe, check out my detailed guide. {{image_2}} You can switch tofu for other proteins. Tempeh is a great choice. It has a nutty flavor and a firm texture. Chickpeas are another option; they add protein and fiber. For tempeh, cook it for about 7-10 minutes until golden. If using chickpeas, add them to the pan for just a few minutes to warm up. Don’t feel stuck with just brown rice. Quinoa is a fantastic alternative. It cooks quickly and is packed with protein. Farro adds a chewy texture and a nutty taste. If you want a low-carb option, try cauliflower rice. Each grain brings different health benefits. Quinoa is high in protein, while farro has fiber. The teriyaki sauce can be boosted with spices. Add a pinch of red pepper flakes for heat. You can also stir in some orange zest for a citrus kick. For toppings, consider avocado for creaminess or nuts for crunch. These little touches make your bowl unique and tasty. Explore various toppings to find your favorite mix. To keep your Teriyaki Tofu Buddha Bowl fresh, store it in airtight containers. Glass containers work best as they do not absorb odors. Make sure the bowl is cool before sealing it. This helps avoid moisture build-up, which can make the food soggy. Store any leftover rice or quinoa separately to keep them fluffy. Reheat your tofu and vegetables gently. The microwave is quick, but it can make the tofu soft. Instead, try using a skillet. Heat a little oil over medium heat, add the tofu and veggies, and stir until hot. This keeps the texture nice and tasty. You can also add a splash of water to create steam and warm everything evenly. If you want to freeze your Buddha bowl, separate the components first. Freeze the tofu and cooked grains in different bags. This way, they stay fresh longer. To thaw, place them in the fridge overnight. For reheating, use the skillet method to ensure everything is hot and tasty. You can even add some fresh veggies during reheating for added crunch. You can use tempeh, chickpeas, or seitan. Tempeh has a nutty taste. It cooks fast and adds protein. Chickpeas add a hearty texture. You can roast them for crunch. Seitan works well for a chewy bite. Cook it in the same way as tofu. Homemade teriyaki sauce lasts about a week in the fridge. Store it in a clean jar. Make sure to seal it tight. If you notice any odd smell, throw it away. You can freeze it for longer storage. Just thaw it when you need it. Yes, you can prep this bowl ahead of time. Cook grains and chop veggies in advance. Store them in airtight containers. The flavors will blend well if left overnight. Just add the tofu before serving. This keeps it crispy and fresh. Yes, you can easily make it gluten-free. Use tamari instead of soy sauce. Choose gluten-free grains like quinoa. All the veggies are naturally gluten-free too. This way, everyone can enjoy it without worry. You can add sriracha or chili flakes for heat. Mix it into the teriyaki sauce. For a different flavor, try fresh jalapeños. You can also serve with spicy sesame oil. Adjust the spice to your taste for a kick! This blog post detailed how to create a tasty Teriyaki Tofu Buddha Bowl. We covered ingredients, step-by-step cooking, and helpful tips for flavor and presentation. You learned about storage and variations for customization. Now, you can make this dish your own. Experiment with flavors, grains, and proteins. Enjoy the health benefits while satisfying your taste buds. This bowl is not just a meal; it's a canvas for your creativity. Happy cooking!](https://dailydishlab.com/wp-content/uploads/2025/07/885aa078-9488-4511-acaf-c3412a5f03ff-768x768.webp)