Savory Quinoa Salad with Veggies Fresh and Flavorful

Are you ready to enjoy a dish that’s both tasty and healthy? My Savory Quinoa Salad with Veggies is packed with fresh flavors and vibrant colors. In this article, I’ll guide you step-by-step to create a meal that pleases everyone. From selecting the right veggies to the perfect dressing, you’ll learn how to make a salad that’s satisfying and nutritious. Let’s dive into this easy recipe that’s perfect for any occasion!
Why I Love This Recipe
- Healthy and Nutritious: This salad is packed with protein-rich quinoa and a variety of colorful vegetables, making it a wholesome meal choice.
- Easy to Prepare: With simple instructions and minimal cooking time, this dish can be whipped up quickly, perfect for busy weeknights.
- Flavorful and Refreshing: The combination of lime juice, cumin, and fresh herbs creates a vibrant flavor profile that’s sure to please your taste buds.
- Versatile and Customizable: You can easily add or substitute your favorite veggies or proteins, making this salad adaptable to your preferences.
Ingredients
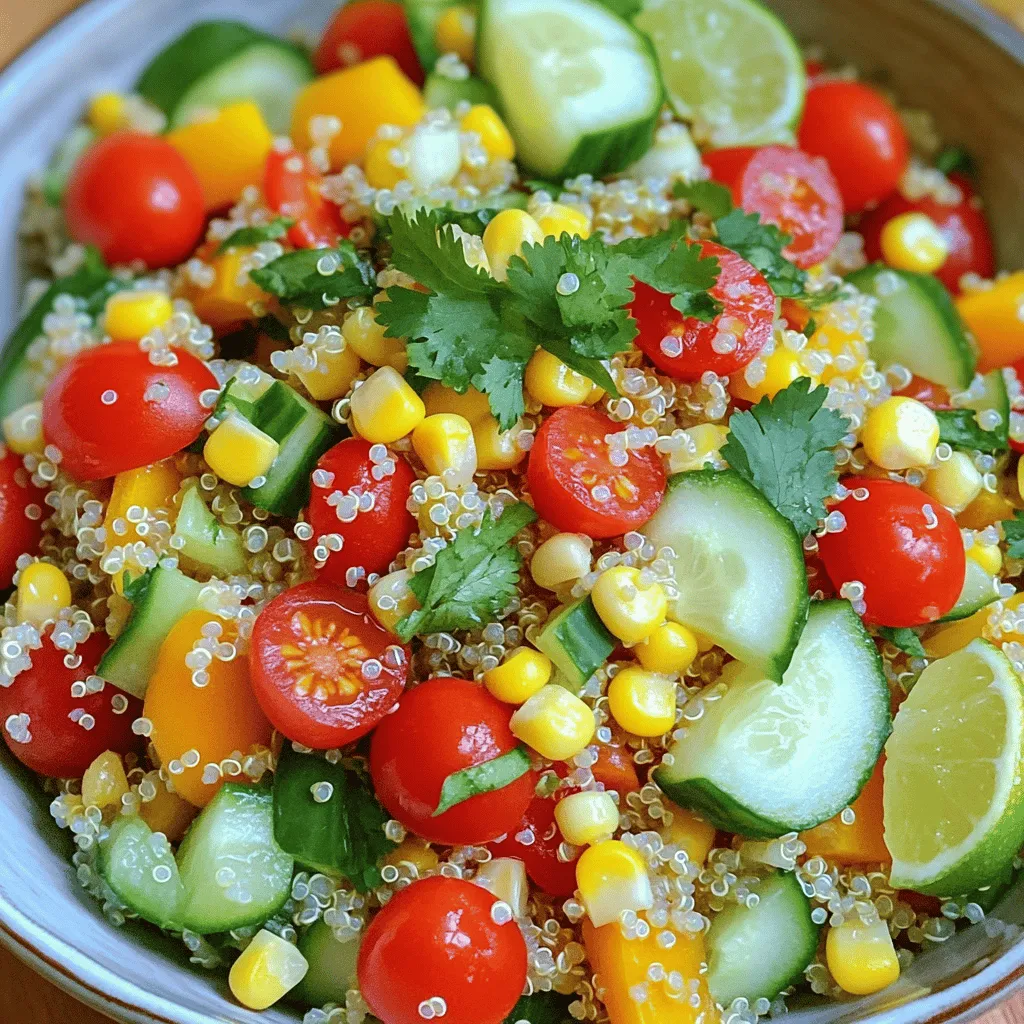
To create a savory quinoa salad that bursts with flavor, you need just a few fresh ingredients. Here’s what you will need:
- 1 cup quinoa, rinsed
- 2 cups vegetable broth
- 1 cup cherry tomatoes, halved
- 1 medium cucumber, diced
- 1 red bell pepper, diced
- 1 yellow bell pepper, diced
- 1 cup corn (fresh or frozen)
- 1/4 red onion, finely chopped
- 1/4 cup fresh cilantro, chopped
- Juice of 1 lime
- 3 tablespoons olive oil
- 1 teaspoon cumin
- Salt and pepper to taste
These ingredients make a colorful and tasty salad that is easy to prepare. I love how quinoa is both filling and healthy. It is packed with protein and fiber. The veggies add a nice crunch and a burst of color. The lime juice and cumin give the salad a bright flavor.

Step-by-Step Instructions
Cooking the Quinoa
First, rinse the quinoa under cold water. This removes any bitter taste. Use a fine mesh strainer to make this easy.
Next, cook the rinsed quinoa in vegetable broth. In a medium saucepan, combine one cup of quinoa and two cups of broth. Bring it to a boil over medium heat. Once boiling, lower the heat and cover the pot. Let it simmer for about 15 minutes. Your quinoa should be fluffy and all the broth will be absorbed. Remove it from the heat and let it cool slightly.
Preparing the Vegetables
Now, let’s chop the vegetables. Cut them into even sizes for a nice look and texture. I like to use a sharp knife for clean cuts.
In a large mixing bowl, combine the chopped cherry tomatoes, diced cucumber, red and yellow bell peppers, corn, red onion, and fresh cilantro. Mixing them in a bowl helps to blend the flavors nicely.
Making the Dressing
For the dressing, gather your ingredients. You will need lime juice, olive oil, cumin, salt, and pepper.
In a small bowl, whisk together the lime juice and olive oil. Add the cumin, salt, and pepper. Whisk until everything is well mixed. This creates a smooth dressing that will coat the salad beautifully.
Combining Ingredients
Now it’s time to bring everything together. Add your cooked quinoa to the bowl with the vegetables. Pour the dressing over the top.
Gently toss everything together. Make sure the quinoa and veggies are well mixed. This step is vital for ensuring every bite is flavorful.
Chilling and Serving
Chilling the salad is key for flavor enhancement. Cover it and place it in the refrigerator for at least 30 minutes. This allows the flavors to meld and taste even better.
When ready to serve, choose a beautiful bowl. Garnish your salad with extra cilantro and lime wedges. This adds a fresh touch to the presentation. Enjoy your Savory Quinoa Salad with Veggies!
Pro Tips
- Use Fresh Ingredients: Always opt for fresh vegetables and herbs to enhance the flavor and nutritional value of your salad.
- Rinse Quinoa Thoroughly: Rinsing quinoa before cooking removes its natural coating, called saponin, which can taste bitter.
- Let It Chill: Allowing the salad to chill for at least 30 minutes helps the flavors to meld beautifully.
- Experiment with Add-Ins: Feel free to add other ingredients like avocado, black beans, or feta cheese for extra flavor and texture.
Tips & Tricks
Cooking Quinoa Perfectly
To cook quinoa perfectly, start by rinsing it. Rinsing helps remove a bitter coating called saponin. This step makes your quinoa taste better. Use a fine mesh strainer to rinse it under cold water.
To avoid mushy quinoa, use the right liquid-to-quinoa ratio. A good rule is two cups of liquid for one cup of quinoa. I recommend using vegetable broth for more flavor. Bring the broth to a boil, then lower the heat. Cover the pot and let it simmer for about 15 minutes. When it’s done, the quinoa should be fluffy and all the liquid should be absorbed.
Flavor Enhancements
You can easily enhance the flavor of your quinoa salad. Try adding fresh herbs like basil or parsley. They add a bright taste that wakes up the dish. You can also use spices like paprika or chili powder for more kick.
For a protein boost, consider adding beans or chickpeas. These options not only add protein but also make the salad more filling. You can also toss in some cooked chicken or tofu for extra heartiness.
Optional Toppings
To add crunch to your salad, sprinkle in some nuts or seeds. Almonds, walnuts, or sunflower seeds work well. They give a nice texture contrast to the soft quinoa.
Cheese can also elevate your salad. Feta or goat cheese adds a creamy flavor that pairs well with the veggies. If you like dairy-free options, try crumbled tofu or nutritional yeast for a cheesy taste.
Variations
Vegan and Gluten-Free Options
You can easily make this salad vegan and gluten-free. Quinoa is naturally gluten-free, which is great. To keep it vegan, just skip any cheese or yogurt toppings. You can swap vegetables based on your taste. Try adding spinach, kale, or zucchini for more greens. You can also use beans like chickpeas or black beans for protein. They add flavor and texture too.
Seasonal Variations
Think about what’s in season when you make this dish. In summer, add fresh corn, zucchini, or radishes. They give a crisp taste and bright color. In winter, use roasted root veggies like carrots or sweet potatoes. They add warmth and heartiness. Adapting your ingredients keeps the salad fresh and fun throughout the year.
Dressing Alternatives
The dressing is key for flavor. You can try different types to mix things up. A balsamic vinaigrette adds a sweet touch. A tahini dressing gives a creamy texture. For a spicy kick, add sriracha or chili flakes to your favorite dressing. Play with herbs like basil or dill for new flavors. Experimenting with dressings makes each salad unique and exciting.
Storage Info
Refrigeration Tips
To keep your Savory Quinoa Salad fresh, use airtight containers. Glass or plastic containers both work well. This helps prevent moisture loss and keeps flavors intact. When stored properly, the salad lasts for about 3 to 5 days in the fridge. Always check for freshness before eating leftovers. If it smells off or looks strange, it’s best to toss it.
Freezing Guidance
You can freeze quinoa salad, but some veggies may not hold up well. To freeze, place the salad in a freezer-safe container. Leave some space at the top for expansion. It can last up to 3 months in the freezer. When you’re ready to eat, thaw it overnight in the fridge. To reheat, you can warm it gently in the microwave. Add a splash of lime juice to refresh the flavors as you heat. Enjoy your delicious salad anytime!
FAQs
How long can I store Savory Quinoa Salad?
You can store Savory Quinoa Salad in the fridge for up to five days. Keep it in a sealed container. This helps keep it fresh and safe to eat. After a few days, the veggies may lose some crunch.
Can I make Savory Quinoa Salad ahead of time?
Yes, you can make Savory Quinoa Salad ahead of time. I recommend making it a day before. This gives the flavors time to mix well. Just remember to chill it in the fridge. It tastes even better the next day.
What can I substitute for quinoa in this salad?
If you want to substitute quinoa, try using brown rice or farro. Both grains have a nice texture. You can also use couscous for a quicker option. Each grain will add its own flavor.
Is Savory Quinoa Salad suitable for meal prep?
Absolutely! Savory Quinoa Salad is great for meal prep. It keeps well and holds its flavor. You can pack it in individual containers for easy lunches. Plus, it’s full of nutrients and very filling.
This article covered how to make a tasty Savory Quinoa Salad. You learned about key ingredients, step-by-step cooking methods, and helpful tips. I shared ways to customize and store your salad for maximum flavor and ease. Think of this salad as a blank canvas; you can switch up the veggies, dressings, and toppings. This dish is great for any meal and perfect for meal prep. Now you have the skills to create a healthy and delicious salad any time you want!
Savory Quinoa Salad with Veggies
Ingredients
1 cup quinoa, rinsed
2 cups vegetable broth
1 cup cherry tomatoes, halved
1 medium cucumber, diced
1 red bell pepper, diced
1 yellow bell pepper, diced
1 cup corn (fresh or frozen)
1/4 red onion, finely chopped
1/4 cup fresh cilantro, chopped
Juice of 1 lime
3 tablespoons olive oil
1 teaspoon cumin
Salt and pepper to taste
Instructions
In a medium saucepan, combine the rinsed quinoa and vegetable broth. Bring to a boil over medium heat.
Once boiling, reduce the heat to low, cover, and simmer for about 15 minutes or until the quinoa is fluffy and all the broth has been absorbed. Remove from heat and let it cool slightly.
In a large mixing bowl, combine the cherry tomatoes, cucumber, red bell pepper, yellow bell pepper, corn, red onion, and cilantro.
In a small bowl, whisk together lime juice, olive oil, cumin, salt, and pepper to create the dressing.
Add the cooked quinoa to the mixing bowl with the vegetables. Pour the dressing over the top and gently toss everything together until well combined.
Taste and adjust seasoning if necessary, adding more lime juice, salt, or pepper to suit your preference.
Chill the quinoa salad in the refrigerator for at least 30 minutes before serving to allow the flavors to meld.
Prep Time: 15 mins | Total Time: 1 hr | Servings: 4
– Presentation Tips: Serve the salad in a beautiful bowl, garnished with extra cilantro and lime wedges for a fresh touch.
Savory Quinoa Salad with Veggies
Ingredients
- 1 cup quinoa, rinsed
- 2 cups vegetable broth
- 1 cup cherry tomatoes, halved
- 1 medium cucumber, diced
- 1 medium red bell pepper, diced
- 1 medium yellow bell pepper, diced
- 1 cup corn (fresh or frozen)
- 0.25 cup red onion, finely chopped
- 0.25 cup fresh cilantro, chopped
- 1 unit Juice of 1 lime
- 3 tablespoons olive oil
- 1 teaspoon cumin
- to taste Salt and pepper
Instructions
- In a medium saucepan, combine the rinsed quinoa and vegetable broth. Bring to a boil over medium heat.
- Once boiling, reduce the heat to low, cover, and simmer for about 15 minutes or until the quinoa is fluffy and all the broth has been absorbed. Remove from heat and let it cool slightly.
- In a large mixing bowl, combine the cherry tomatoes, cucumber, red bell pepper, yellow bell pepper, corn, red onion, and cilantro.
- In a small bowl, whisk together lime juice, olive oil, cumin, salt, and pepper to create the dressing.
- Add the cooked quinoa to the mixing bowl with the vegetables. Pour the dressing over the top and gently toss everything together until well combined.
- Taste and adjust seasoning if necessary, adding more lime juice, salt, or pepper to suit your preference.
- Chill the quinoa salad in the refrigerator for at least 30 minutes before serving to allow the flavors to meld.
- Serve the salad in a beautiful bowl, garnished with extra cilantro and lime wedges for a fresh touch.


![- 1 medium head of cauliflower, cut into florets - 2 tablespoons olive oil - 1 teaspoon smoked paprika - 1 teaspoon ground cumin - 1 teaspoon garlic powder - Salt and pepper to taste - 8 small corn tortillas - 1 cup red cabbage, thinly sliced - 1 avocado, sliced - 1/4 cup fresh cilantro, chopped - Lime wedges, for serving When making roasted cauliflower tacos, the key is to choose fresh, high-quality ingredients. Start with a firm head of cauliflower. Look for florets that are tight and free of brown spots. This ensures your cauliflower is fresh and flavorful. Next, olive oil plays a crucial role. It helps the cauliflower roast evenly and adds richness. You can use other oils, but olive oil enhances the taste best. Seasonings are where the magic happens. Smoked paprika gives a lovely depth. Ground cumin adds warmth, while garlic powder boosts flavor. Don't forget to season with salt and pepper. These basic seasonings are essential for bringing out the natural flavors of the cauliflower. Tortillas are the base of your tacos. Small corn tortillas add a nice texture. They are soft and hold the fillings well. Fresh toppings like red cabbage and avocado add crunch and creaminess. Finally, lime wedges are a must. They add a burst of zest that brightens up the whole dish. This recipe brings together all these ingredients to create a vibrant, delicious meal. For the full recipe, refer to the earlier section. First, you need to preheat your oven to 425°F (220°C). This heat makes the cauliflower crispy and tasty. Next, take a large bowl and toss the cauliflower florets with olive oil. Add smoked paprika, ground cumin, garlic powder, salt, and pepper. Mix it well until every piece gets coated. This step is key for flavor. Now, arrange the seasoned cauliflower on a baking sheet. Make sure the florets are in a single layer. This helps them roast evenly. Place the baking sheet in the preheated oven. Roast the cauliflower for about 25 to 30 minutes. You want them golden brown and tender. Remember to toss them halfway through. This helps them cook evenly. While the cauliflower roasts, take a dry skillet and warm the corn tortillas over medium heat. Heat each side for about 30 seconds. They should be soft and slightly charred. Now it’s time to build your tacos! Start with a corn tortilla and layer on a generous amount of roasted cauliflower. Then, add sliced red cabbage and avocado. Sprinkle fresh cilantro on top for that bright flavor. Don’t forget to serve your tacos with lime wedges. Squeeze some lime over the tacos for an extra zing. Enjoy every bite of your delicious roasted cauliflower tacos! You can find the [Full Recipe] for more details. Roasting cauliflower brings out its natural sweetness. I love it more than grilling. Roasting gives you a crispy outside and a tender inside. To achieve this, use high heat. Preheat your oven to 425°F (220°C). Spread the cauliflower in a single layer. This helps it roast evenly. Spices make a big difference. Try smoked paprika for a deep flavor. Ground cumin adds warmth, while garlic powder gives a nice touch. You can also add chili powder for heat. For balance, serve your tacos with fresh toppings. Red cabbage adds crunch, while avocado brings creaminess. Pair your tacos with simple sides. I recommend black beans or a fresh salad. These sides add fiber and nutrients. For toppings, you can get creative! Try pickled onions for tang, or a drizzle of spicy sauce for extra kick. Don't forget lime wedges for zest! They brighten every bite. {{image_2}} You can easily adjust this recipe to fit your needs. For a gluten-free option, use corn tortillas. They add a nice crunch and pair well with the roasted cauliflower. If you want a vegan meal, this recipe is already vegan! It uses no meat or dairy. You can also try low-carb options by using lettuce wraps instead of tortillas. This keeps the meal light and fresh. Feel free to swap out cauliflower for other veggies. Broccoli or Brussels sprouts work well too. Each veggie brings a unique taste. You can use sweet potatoes for a sweet twist. When it comes to tortillas, consider using whole wheat or spinach wraps. They add different flavors and colors to your tacos. Try giving your tacos an international flair! For an Asian twist, add soy sauce and sesame oil to the cauliflower before roasting. Top with pickled veggies and sriracha. For Mediterranean flavors, use herbs like oregano and serve with tzatziki sauce. You can also add seasonal produce. In summer, fresh corn and tomatoes shine. In fall, roasted squash adds warmth. These variations keep your tacos exciting and new. Check out the Full Recipe for more details! To keep your tacos fresh, store them in a sealed container. Place them in the fridge right away. They will stay good for about three days. If you want to keep the tacos crispy, store the cauliflower and tortillas separately. Wrap the tortillas in foil or plastic wrap to avoid drying out. When you want to eat the leftovers, reheat them gently. You can use a skillet on low heat. Just warm the cauliflower for a few minutes. This helps it stay tasty and not soggy. For an easy option, pop them in the microwave for about 30 seconds. If you have leftover cauliflower, add it to salads or grain bowls for extra flavor. You can freeze roasted cauliflower too! Just let it cool down before you pack it. Place it in a freezer bag and squeeze out the air. It can last up to three months in the freezer. For tortillas, stack them and wrap tightly before freezing. When you’re ready to use them, thaw the cauliflower in the fridge overnight. Warm the tortillas in a skillet before serving. For more details, check the Full Recipe. Yes, you can make these tacos ahead of time. They are great for breakfast, lunch, or quick meals. If you want to prepare in advance, roast the cauliflower and store it in the fridge. Warm it up when you are ready to eat. You can also prepare the toppings ahead. Just slice the avocado and cabbage, then keep them in separate containers. This way, you can enjoy fresh tacos anytime! Toppings can make your tacos shine. Here are some great ideas: - Sliced red cabbage adds crunch. - Avocado gives a creamy texture. - Fresh cilantro brings bright flavor. - Lime wedges add a zesty kick. - You can also use salsa or hot sauce for spice. Mix and match to find your favorites! You can use frozen cauliflower, but it needs some tips. Thaw the cauliflower first and drain any water. This keeps your tacos from getting soggy. You may need to roast them a bit longer to get them crispy. Check them halfway to see if they need more time. Frozen cauliflower can still taste great in your tacos! This blog post covers the delicious journey of making roasted cauliflower tacos. We explored the key ingredients, detailed step-by-step instructions, and shared tips for enhancing flavor. You learned how to store leftovers and adapt recipes to meet different dietary needs. Remember, you can enjoy these tacos in many creative ways. Try new toppings or flavors to keep things fresh. Delicious meals should always spark joy and inspire you to cook more. Dive into this tasty recipe and enjoy every bite!](https://dailydishlab.com/wp-content/uploads/2025/06/61582cbb-5ce3-472b-acca-9a15eb330d0c-768x768.webp)