Cheesy Garlic Breadsticks Irresistible and Easy Recipe
To make Cheesy Garlic Breadsticks, gather these items: - 1 cup warm water (110°F) - 2 teaspoons active dry yeast - 2 tablespoons sugar - 3 cups all-purpose flour - 1 teaspoon salt - 2 tablespoons olive oil - 4 tablespoons unsalted butter, melted - 4 cloves garlic, minced - 1 cup shredded mozzarella cheese - 1/2 cup grated Parmesan cheese - 1 teaspoon dried oregano - Fresh parsley, chopped (for garnish) These ingredients come together to create a tasty treat. The warm water helps the yeast rise, while the cheese gives that gooey, cheesy goodness. Want to up your cheesy garlic breadstick game? Here are a few optional ingredients to think about: - Red pepper flakes for heat - Italian seasoning for a blend of herbs - Fresh basil or rosemary for a fresh twist Adding these can make your breadsticks even more exciting. Experiment with what you like! Don’t have all the ingredients? No worries! Here are some swaps you can use: - Use bread flour instead of all-purpose flour for a chewier texture. - Try garlic powder instead of fresh garlic if you’re in a pinch. - Substitute any cheese you love for mozzarella or Parmesan. Cheddar works great! These substitutions keep the recipe flexible. You can still enjoy cheesy garlic breadsticks your way! For the full recipe, check out the entire guide. To start, gather your ingredients. You will need warm water, yeast, sugar, flour, salt, olive oil, and melted butter. In a bowl, mix the warm water, yeast, and sugar. Let it sit for about five minutes until it becomes frothy. This step wakes up the yeast, helping your dough rise. Next, in a mixing bowl, combine the flour and salt. Add the yeast mixture and olive oil. Mix it until a dough forms. It should not be sticky. Now, knead the dough on a floured surface for about five to seven minutes. This makes it smooth and elastic. Place it in a greased bowl, cover it, and let it rise in a warm spot for one hour, or until it doubles in size. After the dough has risen, it’s time to shape your breadsticks. Punch down the dough to release air. Roll it out into a rectangle on a floured surface. Make sure it is about half an inch thick. Transfer the dough to a parchment-lined baking sheet. In a small bowl, mix the melted butter, minced garlic, and oregano. Brush this mixture over the rolled dough. Next, sprinkle the mozzarella and Parmesan cheese evenly on top. Using a sharp knife or pizza cutter, slice the dough into breadstick shapes. Be careful not to cut all the way through; this keeps them attached at the bottom. Now, preheat your oven to 400°F (200°C). Once heated, bake the breadsticks for about 15 to 20 minutes. You want them golden and bubbly. For the best bake, keep a close eye on your breadsticks. Ovens can vary, so check them a few minutes early. If they look golden brown and smell amazing, they are likely done. Once they come out of the oven, drizzle any leftover garlic butter over the top. Garnish with chopped parsley for a fresh touch. Serve them warm to enjoy the gooey cheese and rich garlic flavor. For a fun twist, try pairing them with marinara sauce for dipping. You can find the Full Recipe to follow these steps easily. To boost the cheesy goodness, use more cheese. Add an extra half cup of mozzarella on top. You can also mix in different cheeses like cheddar or gouda. These will melt well and add flavor. For a fun twist, try adding cheese inside the dough before rolling it out. This secret step takes your breadsticks to a new level. Fluffy breadsticks come from good dough. Always knead the dough well for about 5-7 minutes. This helps develop gluten, which gives bread its rise. Let the dough rise in a warm place. This can be next to a radiator or in a sunny spot. Make sure the dough doubles in size before rolling it out. The longer you let it rise, the fluffier it will be. For a stronger garlic taste, use roasted garlic instead of fresh. Roasting softens the flavor and adds sweetness. You can also mix garlic powder into the dough for more flavor. Another idea is to sprinkle garlic salt on top before baking. This gives a nice finish and boosts the garlic flavor. If you love herbs, add chopped fresh basil or parsley for extra taste. For detailed steps, check the Full Recipe to make these delicious cheesy garlic breadsticks! {{image_2}} You can change the cheese to create new flavors. Try using cheddar for a sharp taste. Gouda adds a smoky flavor that many love. For a tangy twist, use feta cheese. Mixing cheeses can give you a unique and yummy breadstick. Use a blend of mozzarella and provolone for a creamy texture. The options are endless, so feel free to experiment. Adding herbs and spices can boost the flavor of your breadsticks. A little crushed red pepper can give a nice kick. You can also mix in some Italian seasoning for a classic taste. Fresh basil or thyme will make your breadsticks pop with flavor. If you like a stronger taste, try adding rosemary. These simple changes can elevate your breadsticks to a new level. If you need gluten-free breadsticks, you can still enjoy this recipe. Use a gluten-free flour blend that works well for baking. Make sure it has xanthan gum, as it helps give the dough structure. Follow the same steps as in the Full Recipe. Your gluten-free breadsticks will be just as cheesy and delicious. Enjoy the same taste without the gluten! Store your leftover cheesy garlic breadsticks in an airtight container. This keeps them fresh. You can leave them at room temperature for one day. If you want to keep them longer, place them in the fridge. They will stay good for up to four days in the fridge. Make sure to let them cool before sealing. To reheat your breadsticks, use the oven. Preheat it to 350°F (175°C). Place the breadsticks on a baking sheet. Heat them for about 10 minutes. This will make them warm and crispy again. You can also use the microwave. If using the microwave, heat for 20-30 seconds. This method will make them soft, but they won't be crispy. Freezing is a great option for longer storage. Allow the breadsticks to cool completely. Wrap each stick in plastic wrap. Place the wrapped sticks in a freezer bag. They can stay in the freezer for up to three months. To enjoy them later, thaw them overnight in the fridge. Reheat them in the oven for the best taste. For more details, check the Full Recipe. Cheesy garlic breadsticks last about 2 to 3 days when stored properly. Keep them in an airtight container at room temperature. If you want them to last longer, you can freeze them. They stay good for up to 3 months in the freezer. Yes, you can make these breadsticks ahead of time. Prepare the dough and let it rise. Then, shape the breadsticks but do not bake them yet. You can cover them with plastic wrap and place them in the fridge for up to 24 hours. When you're ready, let them sit at room temperature for about 30 minutes, then bake as usual. Serve cheesy garlic breadsticks warm for the best taste. You can place them on a cutting board or a nice platter. Pair them with marinara sauce or an herb dip for extra flavor. I love to sprinkle fresh parsley on top for a colorful touch. If you want to impress, serve them with a side of garlic butter for dipping. For the full recipe, check out the complete instructions above. We explored how to make delicious cheesy garlic breadsticks. You learned about key ingredients, easy steps, and useful tips for the best texture. Don’t forget variations like different cheeses or gluten-free options. Proper storage keeps them fresh longer. Remember to reheat for that tasty crunch. With these insights, you can create breadsticks that impress. Enjoy every bite as you share them with friends and family!
WANT TO SAVE THIS RECIPE?

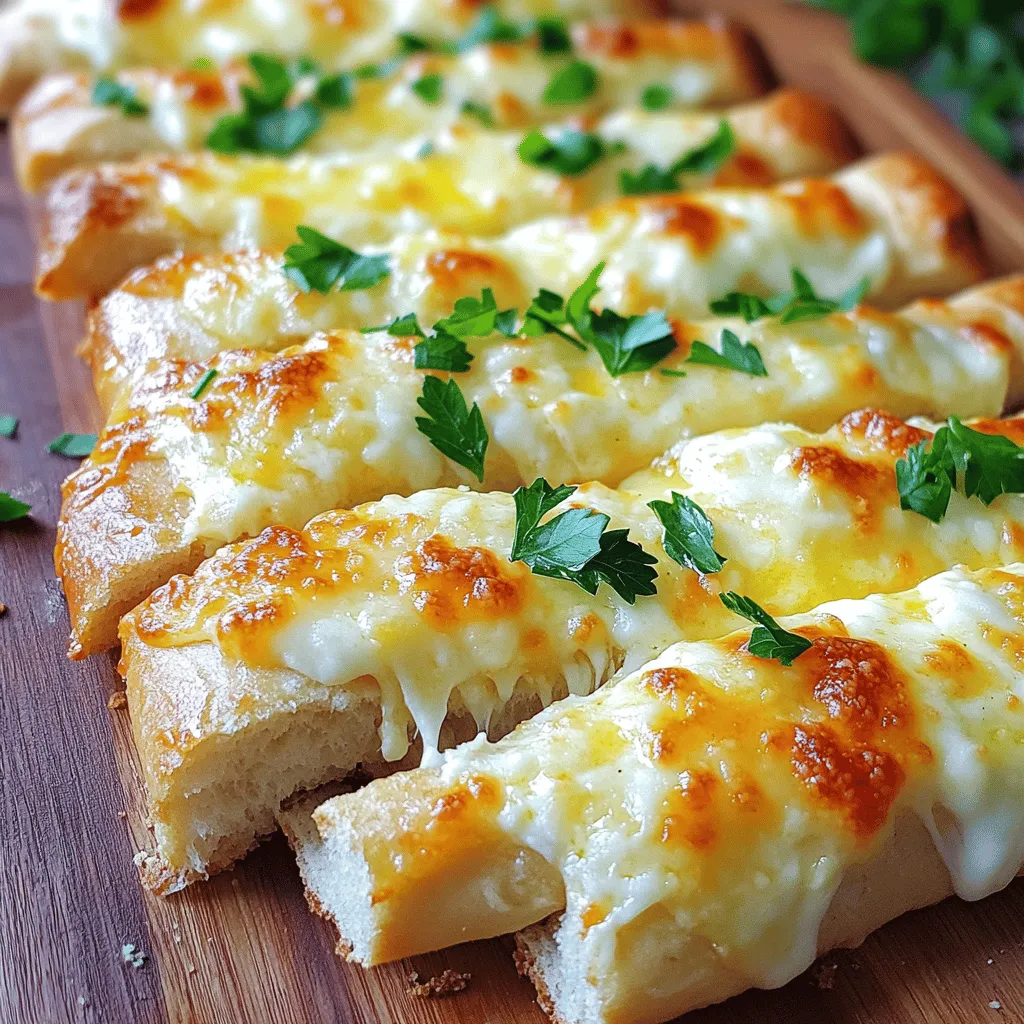
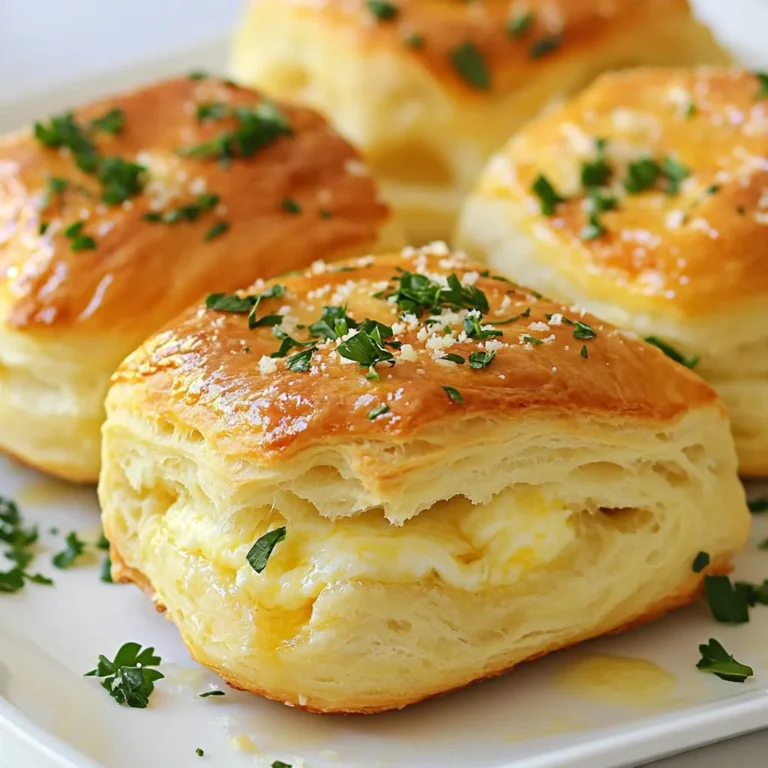
Craving a tasty snack that’s easy to whip up? Look no further than Cheesy Garlic Breadsticks! These warm, buttery delights are perfect for game nights, family dinners, or even just a cozy night in. With simple ingredients and quick steps, you can make your own cheesy breadsticks that everyone will love. Let’s dive into this easy recipe and elevate your snack game!

Ingredients

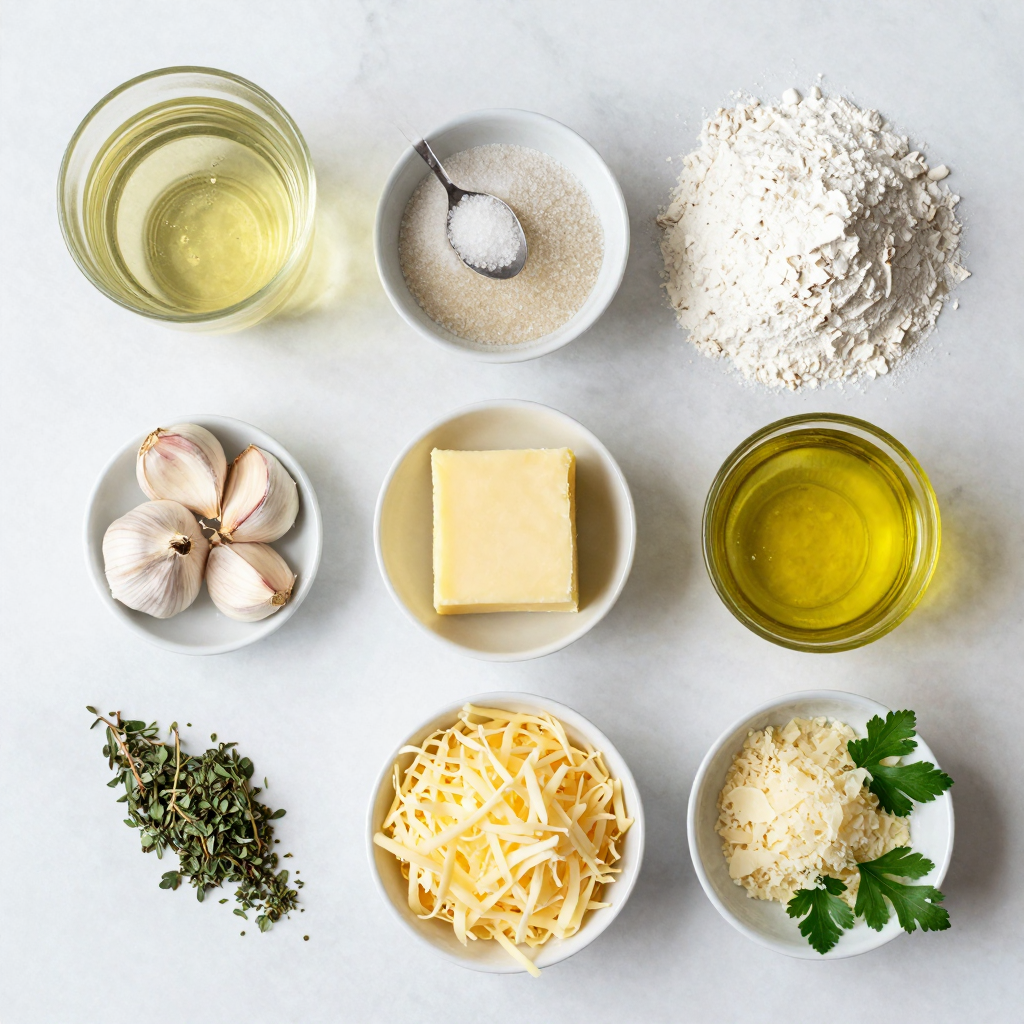
Complete List of Ingredients

To make Cheesy Garlic Breadsticks, gather these items:

– 1 cup warm water (110°F)

– 2 teaspoons active dry yeast

– 2 tablespoons sugar

– 3 cups all-purpose flour

– 1 teaspoon salt

– 2 tablespoons olive oil

– 4 tablespoons unsalted butter, melted

– 4 cloves garlic, minced

– 1 cup shredded mozzarella cheese

– 1/2 cup grated Parmesan cheese

– 1 teaspoon dried oregano

– Fresh parsley, chopped (for garnish)

These ingredients come together to create a tasty treat. The warm water helps the yeast rise, while the cheese gives that gooey, cheesy goodness.

Optional Ingredients for Extra Flavor

Want to up your cheesy garlic breadstick game? Here are a few optional ingredients to think about:

– Red pepper flakes for heat

– Italian seasoning for a blend of herbs

– Fresh basil or rosemary for a fresh twist

Adding these can make your breadsticks even more exciting. Experiment with what you like!

Ingredient Substitutions

Don’t have all the ingredients? No worries! Here are some swaps you can use:

– Use bread flour instead of all-purpose flour for a chewier texture.

– Try garlic powder instead of fresh garlic if you’re in a pinch.

– Substitute any cheese you love for mozzarella or Parmesan. Cheddar works great!

These substitutions keep the recipe flexible. You can still enjoy cheesy garlic breadsticks your way! For the full recipe, check out the entire guide.

Step-by-Step Instructions

Preparation of Dough

To start, gather your ingredients. You will need warm water, yeast, sugar, flour, salt, olive oil, and melted butter. In a bowl, mix the warm water, yeast, and sugar. Let it sit for about five minutes until it becomes frothy. This step wakes up the yeast, helping your dough rise.

Next, in a mixing bowl, combine the flour and salt. Add the yeast mixture and olive oil. Mix it until a dough forms. It should not be sticky. Now, knead the dough on a floured surface for about five to seven minutes. This makes it smooth and elastic. Place it in a greased bowl, cover it, and let it rise in a warm spot for one hour, or until it doubles in size.

Shaping and Baking the Breadsticks

After the dough has risen, it’s time to shape your breadsticks. Punch down the dough to release air. Roll it out into a rectangle on a floured surface. Make sure it is about half an inch thick. Transfer the dough to a parchment-lined baking sheet.

In a small bowl, mix the melted butter, minced garlic, and oregano. Brush this mixture over the rolled dough. Next, sprinkle the mozzarella and Parmesan cheese evenly on top. Using a sharp knife or pizza cutter, slice the dough into breadstick shapes. Be careful not to cut all the way through; this keeps them attached at the bottom.

Now, preheat your oven to 400°F (200°C). Once heated, bake the breadsticks for about 15 to 20 minutes. You want them golden and bubbly.

Tips for Achieving the Perfect Bake

For the best bake, keep a close eye on your breadsticks. Ovens can vary, so check them a few minutes early. If they look golden brown and smell amazing, they are likely done.

Once they come out of the oven, drizzle any leftover garlic butter over the top. Garnish with chopped parsley for a fresh touch. Serve them warm to enjoy the gooey cheese and rich garlic flavor. For a fun twist, try pairing them with marinara sauce for dipping. You can find the Full Recipe to follow these steps easily.

Tips & Tricks

How to Make Breadsticks Extra Cheesy

To boost the cheesy goodness, use more cheese. Add an extra half cup of mozzarella on top. You can also mix in different cheeses like cheddar or gouda. These will melt well and add flavor. For a fun twist, try adding cheese inside the dough before rolling it out. This secret step takes your breadsticks to a new level.

Key Techniques for Fluffy Breadsticks

Fluffy breadsticks come from good dough. Always knead the dough well for about 5-7 minutes. This helps develop gluten, which gives bread its rise. Let the dough rise in a warm place. This can be next to a radiator or in a sunny spot. Make sure the dough doubles in size before rolling it out. The longer you let it rise, the fluffier it will be.

Enhancements for Garlic Flavor

For a stronger garlic taste, use roasted garlic instead of fresh. Roasting softens the flavor and adds sweetness. You can also mix garlic powder into the dough for more flavor. Another idea is to sprinkle garlic salt on top before baking. This gives a nice finish and boosts the garlic flavor. If you love herbs, add chopped fresh basil or parsley for extra taste.
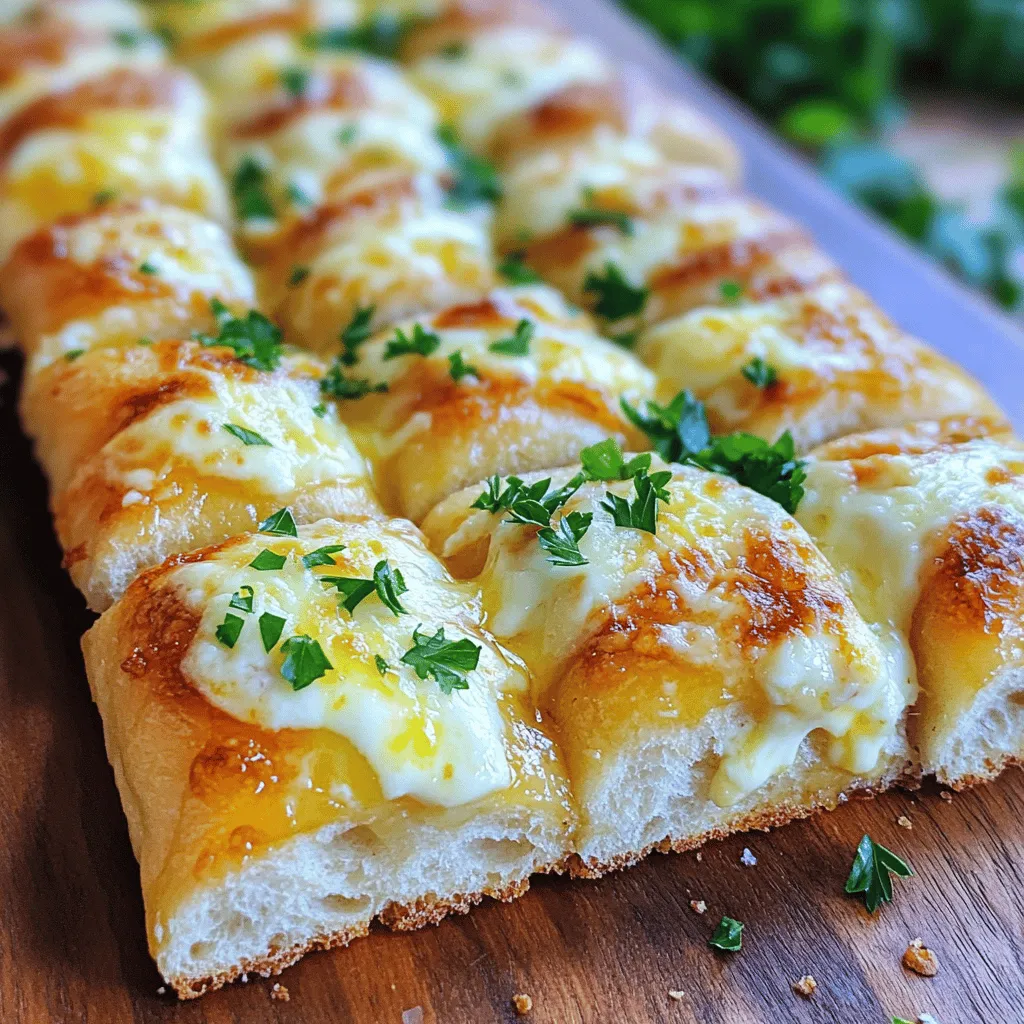
For detailed steps, check the Full Recipe to make these delicious cheesy garlic breadsticks!

Variations

Different Cheese Combinations

You can change the cheese to create new flavors. Try using cheddar for a sharp taste. Gouda adds a smoky flavor that many love. For a tangy twist, use feta cheese. Mixing cheeses can give you a unique and yummy breadstick. Use a blend of mozzarella and provolone for a creamy texture. The options are endless, so feel free to experiment.

Herb and Spice Additions

Adding herbs and spices can boost the flavor of your breadsticks. A little crushed red pepper can give a nice kick. You can also mix in some Italian seasoning for a classic taste. Fresh basil or thyme will make your breadsticks pop with flavor. If you like a stronger taste, try adding rosemary. These simple changes can elevate your breadsticks to a new level.

Gluten-Free Options

If you need gluten-free breadsticks, you can still enjoy this recipe. Use a gluten-free flour blend that works well for baking. Make sure it has xanthan gum, as it helps give the dough structure. Follow the same steps as in the Full Recipe. Your gluten-free breadsticks will be just as cheesy and delicious. Enjoy the same taste without the gluten!

Storage Info

Best Practices for Storing Leftovers

Store your leftover cheesy garlic breadsticks in an airtight container. This keeps them fresh. You can leave them at room temperature for one day. If you want to keep them longer, place them in the fridge. They will stay good for up to four days in the fridge. Make sure to let them cool before sealing.

Reheating Tips for Optimal Taste

To reheat your breadsticks, use the oven. Preheat it to 350°F (175°C). Place the breadsticks on a baking sheet. Heat them for about 10 minutes. This will make them warm and crispy again. You can also use the microwave. If using the microwave, heat for 20-30 seconds. This method will make them soft, but they won’t be crispy.

Freezing Instructions

Freezing is a great option for longer storage. Allow the breadsticks to cool completely. Wrap each stick in plastic wrap. Place the wrapped sticks in a freezer bag. They can stay in the freezer for up to three months. To enjoy them later, thaw them overnight in the fridge. Reheat them in the oven for the best taste. For more details, check the Full Recipe.

FAQs

How long do Cheesy Garlic Breadsticks last?

Cheesy garlic breadsticks last about 2 to 3 days when stored properly. Keep them in an airtight container at room temperature. If you want them to last longer, you can freeze them. They stay good for up to 3 months in the freezer.

Can I make these breadsticks ahead of time?

Yes, you can make these breadsticks ahead of time. Prepare the dough and let it rise. Then, shape the breadsticks but do not bake them yet. You can cover them with plastic wrap and place them in the fridge for up to 24 hours. When you’re ready, let them sit at room temperature for about 30 minutes, then bake as usual.

What’s the best way to serve Cheesy Garlic Breadsticks?

Serve cheesy garlic breadsticks warm for the best taste. You can place them on a cutting board or a nice platter. Pair them with marinara sauce or an herb dip for extra flavor. I love to sprinkle fresh parsley on top for a colorful touch. If you want to impress, serve them with a side of garlic butter for dipping. For the full recipe, check out the complete instructions above.

We explored how to make delicious cheesy garlic breadsticks. You learned about key ingredients, easy steps, and useful tips for the best texture. Don’t forget variations like different cheeses or gluten-free options. Proper storage keeps them fresh longer. Remember to reheat for that tasty crunch. With these insights, you can create breadsticks that impress. Enjoy every bite as you share them with friends and family!
To make Cheesy Garlic Breadsticks, gather these items: - 1 cup warm water (110°F) - 2 teaspoons active dry yeast - 2 tablespoons sugar - 3 cups all-purpose flour - 1 teaspoon salt - 2 tablespoons olive oil - 4 tablespoons unsalted butter, melted - 4 cloves garlic, minced - 1 cup shredded mozzarella cheese - 1/2 cup grated Parmesan cheese - 1 teaspoon dried oregano - Fresh parsley, chopped (for garnish) These ingredients come together to create a tasty treat. The warm water helps the yeast rise, while the cheese gives that gooey, cheesy goodness. Want to up your cheesy garlic breadstick game? Here are a few optional ingredients to think about: - Red pepper flakes for heat - Italian seasoning for a blend of herbs - Fresh basil or rosemary for a fresh twist Adding these can make your breadsticks even more exciting. Experiment with what you like! Don’t have all the ingredients? No worries! Here are some swaps you can use: - Use bread flour instead of all-purpose flour for a chewier texture. - Try garlic powder instead of fresh garlic if you’re in a pinch. - Substitute any cheese you love for mozzarella or Parmesan. Cheddar works great! These substitutions keep the recipe flexible. You can still enjoy cheesy garlic breadsticks your way! For the full recipe, check out the entire guide. To start, gather your ingredients. You will need warm water, yeast, sugar, flour, salt, olive oil, and melted butter. In a bowl, mix the warm water, yeast, and sugar. Let it sit for about five minutes until it becomes frothy. This step wakes up the yeast, helping your dough rise. Next, in a mixing bowl, combine the flour and salt. Add the yeast mixture and olive oil. Mix it until a dough forms. It should not be sticky. Now, knead the dough on a floured surface for about five to seven minutes. This makes it smooth and elastic. Place it in a greased bowl, cover it, and let it rise in a warm spot for one hour, or until it doubles in size. After the dough has risen, it’s time to shape your breadsticks. Punch down the dough to release air. Roll it out into a rectangle on a floured surface. Make sure it is about half an inch thick. Transfer the dough to a parchment-lined baking sheet. In a small bowl, mix the melted butter, minced garlic, and oregano. Brush this mixture over the rolled dough. Next, sprinkle the mozzarella and Parmesan cheese evenly on top. Using a sharp knife or pizza cutter, slice the dough into breadstick shapes. Be careful not to cut all the way through; this keeps them attached at the bottom. Now, preheat your oven to 400°F (200°C). Once heated, bake the breadsticks for about 15 to 20 minutes. You want them golden and bubbly. For the best bake, keep a close eye on your breadsticks. Ovens can vary, so check them a few minutes early. If they look golden brown and smell amazing, they are likely done. Once they come out of the oven, drizzle any leftover garlic butter over the top. Garnish with chopped parsley for a fresh touch. Serve them warm to enjoy the gooey cheese and rich garlic flavor. For a fun twist, try pairing them with marinara sauce for dipping. You can find the Full Recipe to follow these steps easily. To boost the cheesy goodness, use more cheese. Add an extra half cup of mozzarella on top. You can also mix in different cheeses like cheddar or gouda. These will melt well and add flavor. For a fun twist, try adding cheese inside the dough before rolling it out. This secret step takes your breadsticks to a new level. Fluffy breadsticks come from good dough. Always knead the dough well for about 5-7 minutes. This helps develop gluten, which gives bread its rise. Let the dough rise in a warm place. This can be next to a radiator or in a sunny spot. Make sure the dough doubles in size before rolling it out. The longer you let it rise, the fluffier it will be. For a stronger garlic taste, use roasted garlic instead of fresh. Roasting softens the flavor and adds sweetness. You can also mix garlic powder into the dough for more flavor. Another idea is to sprinkle garlic salt on top before baking. This gives a nice finish and boosts the garlic flavor. If you love herbs, add chopped fresh basil or parsley for extra taste. For detailed steps, check the Full Recipe to make these delicious cheesy garlic breadsticks! {{image_2}} You can change the cheese to create new flavors. Try using cheddar for a sharp taste. Gouda adds a smoky flavor that many love. For a tangy twist, use feta cheese. Mixing cheeses can give you a unique and yummy breadstick. Use a blend of mozzarella and provolone for a creamy texture. The options are endless, so feel free to experiment. Adding herbs and spices can boost the flavor of your breadsticks. A little crushed red pepper can give a nice kick. You can also mix in some Italian seasoning for a classic taste. Fresh basil or thyme will make your breadsticks pop with flavor. If you like a stronger taste, try adding rosemary. These simple changes can elevate your breadsticks to a new level. If you need gluten-free breadsticks, you can still enjoy this recipe. Use a gluten-free flour blend that works well for baking. Make sure it has xanthan gum, as it helps give the dough structure. Follow the same steps as in the Full Recipe. Your gluten-free breadsticks will be just as cheesy and delicious. Enjoy the same taste without the gluten! Store your leftover cheesy garlic breadsticks in an airtight container. This keeps them fresh. You can leave them at room temperature for one day. If you want to keep them longer, place them in the fridge. They will stay good for up to four days in the fridge. Make sure to let them cool before sealing. To reheat your breadsticks, use the oven. Preheat it to 350°F (175°C). Place the breadsticks on a baking sheet. Heat them for about 10 minutes. This will make them warm and crispy again. You can also use the microwave. If using the microwave, heat for 20-30 seconds. This method will make them soft, but they won't be crispy. Freezing is a great option for longer storage. Allow the breadsticks to cool completely. Wrap each stick in plastic wrap. Place the wrapped sticks in a freezer bag. They can stay in the freezer for up to three months. To enjoy them later, thaw them overnight in the fridge. Reheat them in the oven for the best taste. For more details, check the Full Recipe. Cheesy garlic breadsticks last about 2 to 3 days when stored properly. Keep them in an airtight container at room temperature. If you want them to last longer, you can freeze them. They stay good for up to 3 months in the freezer. Yes, you can make these breadsticks ahead of time. Prepare the dough and let it rise. Then, shape the breadsticks but do not bake them yet. You can cover them with plastic wrap and place them in the fridge for up to 24 hours. When you're ready, let them sit at room temperature for about 30 minutes, then bake as usual. Serve cheesy garlic breadsticks warm for the best taste. You can place them on a cutting board or a nice platter. Pair them with marinara sauce or an herb dip for extra flavor. I love to sprinkle fresh parsley on top for a colorful touch. If you want to impress, serve them with a side of garlic butter for dipping. For the full recipe, check out the complete instructions above. We explored how to make delicious cheesy garlic breadsticks. You learned about key ingredients, easy steps, and useful tips for the best texture. Don’t forget variations like different cheeses or gluten-free options. Proper storage keeps them fresh longer. Remember to reheat for that tasty crunch. With these insights, you can create breadsticks that impress. Enjoy every bite as you share them with friends and family!

Cheesy Garlic Breadsticks

Indulge in the ultimate comfort food with these cheesy garlic breadsticks! Perfect for any occasion, this easy recipe combines warm bread with gooey mozzarella, Parmesan, and a delicious garlic butter topping. Whether you're hosting a party or just craving a tasty snack, these breadsticks are sure to impress. Click through to explore the step-by-step instructions and elevate your snack game today!

Ingredients
  

1 cup warm water (110°F)

2 teaspoons active dry yeast

2 tablespoons sugar

3 cups all-purpose flour

1 teaspoon salt

2 tablespoons olive oil

4 tablespoons unsalted butter, melted

4 cloves garlic, minced

1 cup shredded mozzarella cheese

1/2 cup grated Parmesan cheese

1 teaspoon dried oregano

Fresh parsley, chopped (for garnish)

Instructions
 

In a bowl, combine warm water, yeast, and sugar. Let it sit for about 5 minutes until it becomes frothy.

    In a mixing bowl, combine flour and salt. Add the yeast mixture and olive oil. Mix until a dough forms.

      Knead the dough on a floured surface for about 5-7 minutes until smooth. Place it in a greased bowl, cover, and let it rise in a warm place for 1 hour, or until doubled in size.

        Preheat your oven to 400°F (200°C).

          Punch down the risen dough and roll it out into a rectangle on a floured surface. Transfer the dough to a parchment-lined baking sheet.

            In a small bowl, mix melted butter, minced garlic, and dried oregano. Brush this mixture over the rolled dough.

              Sprinkle shredded mozzarella and grated Parmesan cheese evenly over the top.

                Using a sharp knife or pizza cutter, slice the dough into breadstick shapes without cutting all the way through. This allows the breadsticks to stay attached at the bottom.

                  Bake the breadsticks in the preheated oven for about 15-20 minutes, or until golden and bubbly.

                    Remove from the oven and drizzle any remaining garlic butter over the top. Garnish with chopped fresh parsley.

                      Allow to cool slightly before serving.

                        Prep Time: 15 min | Total Time: 1 hr 35 min | Servings: 12-15 sticks

                          - Presentation Tips: Serve warm on a cutting board or a decorative platter. Pair with a marinara sauce or herb dip for added flavor.

                            WANT TO SAVE THIS RECIPE?

                            Related Posts