Crispy Air Fryer Falafel Perfectly Seasoned and Light

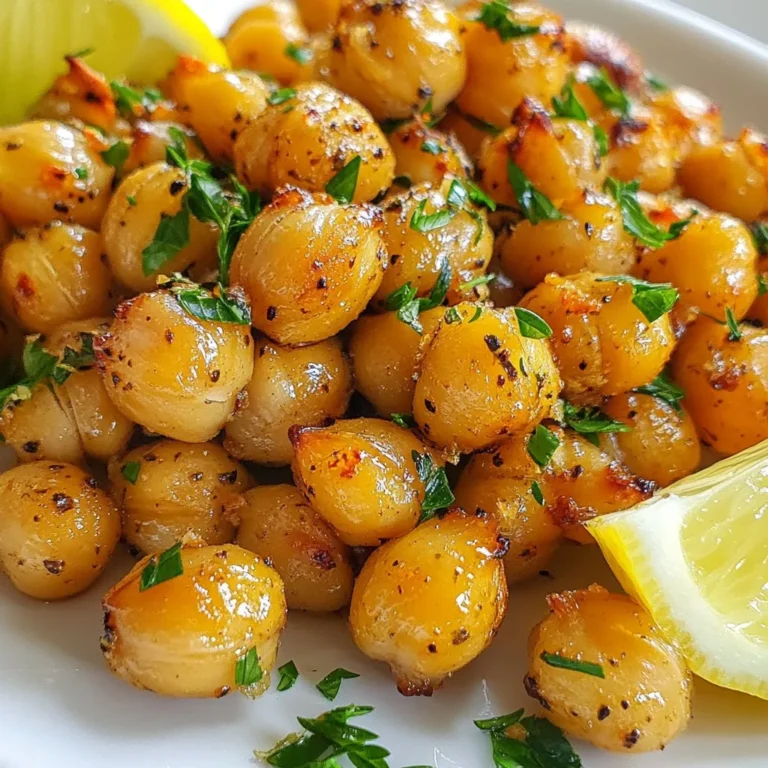
Are you craving a healthy snack that’s packed with flavor? Look no further than my Crispy Air Fryer Falafel! This recipe uses simple ingredients like chickpeas, garlic, and fresh herbs to create a tasty treat. Whether you’re a busy parent or a meal prep enthusiast, these perfectly seasoned falafel are easy to make and even easier to enjoy. Get ready to impress your taste buds with this light and crispy delight!
Why I Love This Recipe
- Healthy and Nutritious: This crispy falafel is packed with protein and fiber from chickpeas, making it a wholesome option for any meal.
- Easy Preparation: With just a few simple steps, you can whip up this delicious dish in no time, perfect for busy weeknights.
- Versatile Serving Options: Enjoy it in pita bread, over salads, or as a snack with your favorite sauces—there are endless ways to savor falafel!
- Crispy Texture: The air fryer gives these falafel a delightful crunch without the excess oil, making them a guilt-free indulgence.
Ingredients
List of Required Ingredients
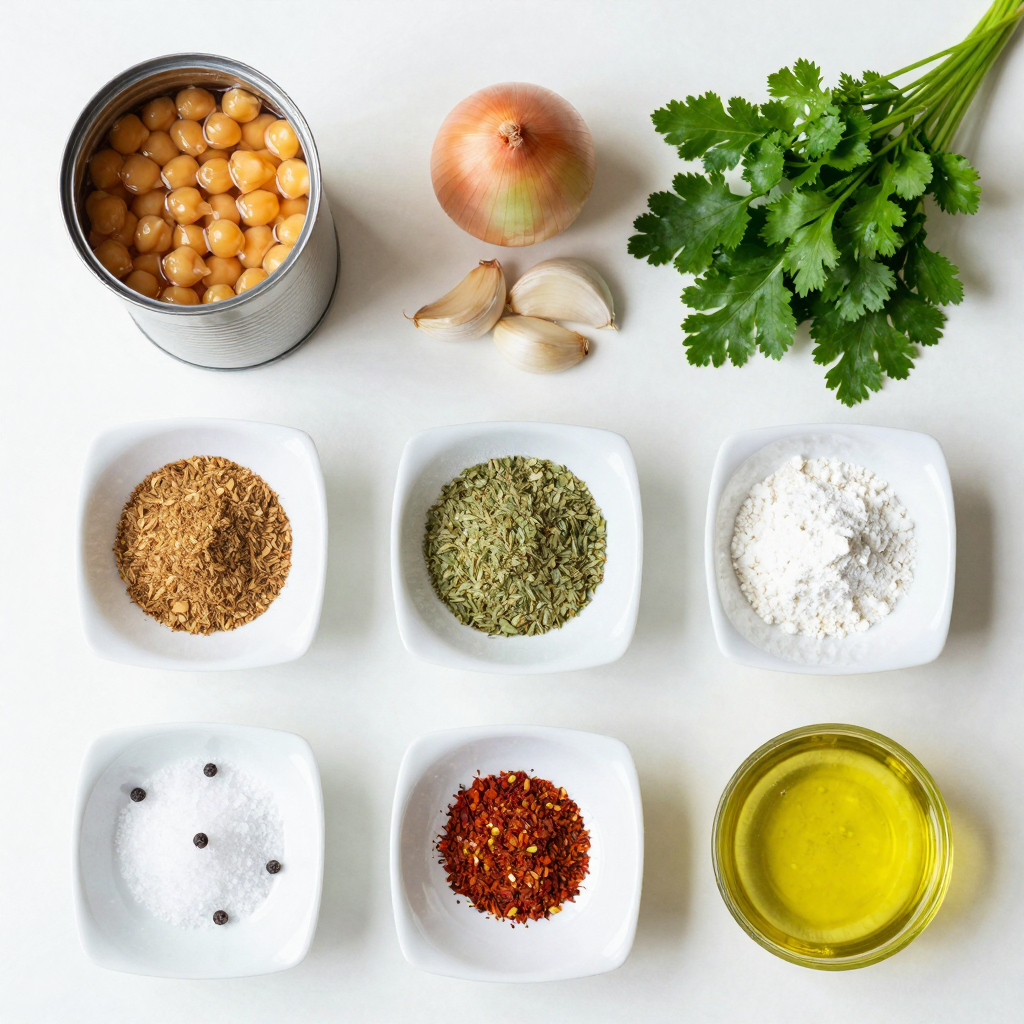
To make crispy air fryer falafel, gather these simple ingredients:
- 1 can (15 oz) chickpeas, drained and rinsed
- 1 small onion, chopped
- 3 cloves garlic, minced
- 1/4 cup fresh parsley, chopped
- 1/4 cup fresh cilantro, chopped
- 1 teaspoon ground cumin
- 1 teaspoon ground coriander
- 1/2 teaspoon baking powder
- 1/2 teaspoon salt
- 1/4 teaspoon black pepper
- 1/4 teaspoon cayenne pepper (optional, for heat)
- 3 tablespoons olive oil (for brushing or spraying)
Recommended Substitutions
If you don’t have fresh herbs, you can use dried ones. Just use less, about one-third of the amount. For gluten-free falafel, swap regular baking powder with gluten-free options. You can also serve the falafel in lettuce wraps instead of pita.
Tips for Fresh Ingredients
When choosing chickpeas, look for ones that are firm and not soft. If you use dried chickpeas, soak them overnight for the best texture. Fresh herbs make a big difference in flavor. Always choose bright green parsley and cilantro. They should smell fresh and not wilted.
Step-by-Step Instructions
Preparing the Mixture
To start, gather your ingredients. In a food processor, combine the drained chickpeas, chopped onion, minced garlic, parsley, cilantro, cumin, coriander, baking powder, salt, black pepper, and cayenne pepper if you like some heat. Pulse the mixture until it blends well but still has some texture. You want it to be thick but not too smooth. This gives the falafel its great bite.
After mixing, transfer the falafel mixture to a bowl. Refrigerate it for about 30 minutes. Chilling helps the falafel hold their shape while cooking.
Forming the Falafel
Now it’s time to shape your falafel. Take a scoop of the mixture and roll it into a ball about 1.5 inches wide. You can also make patties if you prefer. Make sure to press them tightly so they hold together well.
If you find the mixture is too crumbly, add a little water, just a teaspoon at a time. This will help it stick.
Cooking in the Air Fryer
Next, preheat your air fryer to 400°F (200°C). This step is key for getting that crispy texture. Once preheated, place your formed falafel in the air fryer basket in a single layer. Make sure they are not touching to allow even cooking.
Cook the falafel for about 12-15 minutes. Flip them halfway through to ensure they brown nicely on both sides. You’ll know they are done when they are golden brown and crispy on the outside.
Once cooked, remove them from the air fryer and let them cool slightly. Now you can serve your crispy falafel with pita and your favorite toppings.Enjoy!
Pro Tips
- Chill for Best Shape: Refrigerating the falafel mixture for at least 30 minutes helps it hold its shape during cooking, preventing them from falling apart.
- Do Not Over-Process: Pulse the chickpea mixture until just combined; keeping some texture will give your falafel a delightful bite.
- Batch Cooking: Cook the falafel in batches to ensure even cooking and crispiness. Avoid overcrowding the air fryer basket.
- Experiment with Spices: Feel free to adjust the spices according to your taste. Adding herbs like dill or spices like smoked paprika can elevate the flavor profile.
Tips & Tricks
Achieving Crispy Texture
To get that perfect crispy falafel, refrigerate the mixture for at least 30 minutes. This step helps the falafel hold their shape. A cold mixture firms up the balls, making them less likely to break apart while cooking.
When it comes to oil, use it wisely. Brush or spray each falafel lightly with olive oil. Too much oil can lead to sogginess, so be sparing. A light coat helps achieve that golden-brown crust.
Air Fryer Best Practices
Arrange your falafel properly in the air fryer basket. Place them in a single layer and make sure they do not touch. This allows hot air to flow freely around each falafel, ensuring even cooking.
Avoid overcrowding the basket. If you have a lot of falafel to cook, do it in batches. This keeps them crispy and prevents steaming, which can ruin the texture.
Serving Suggestions
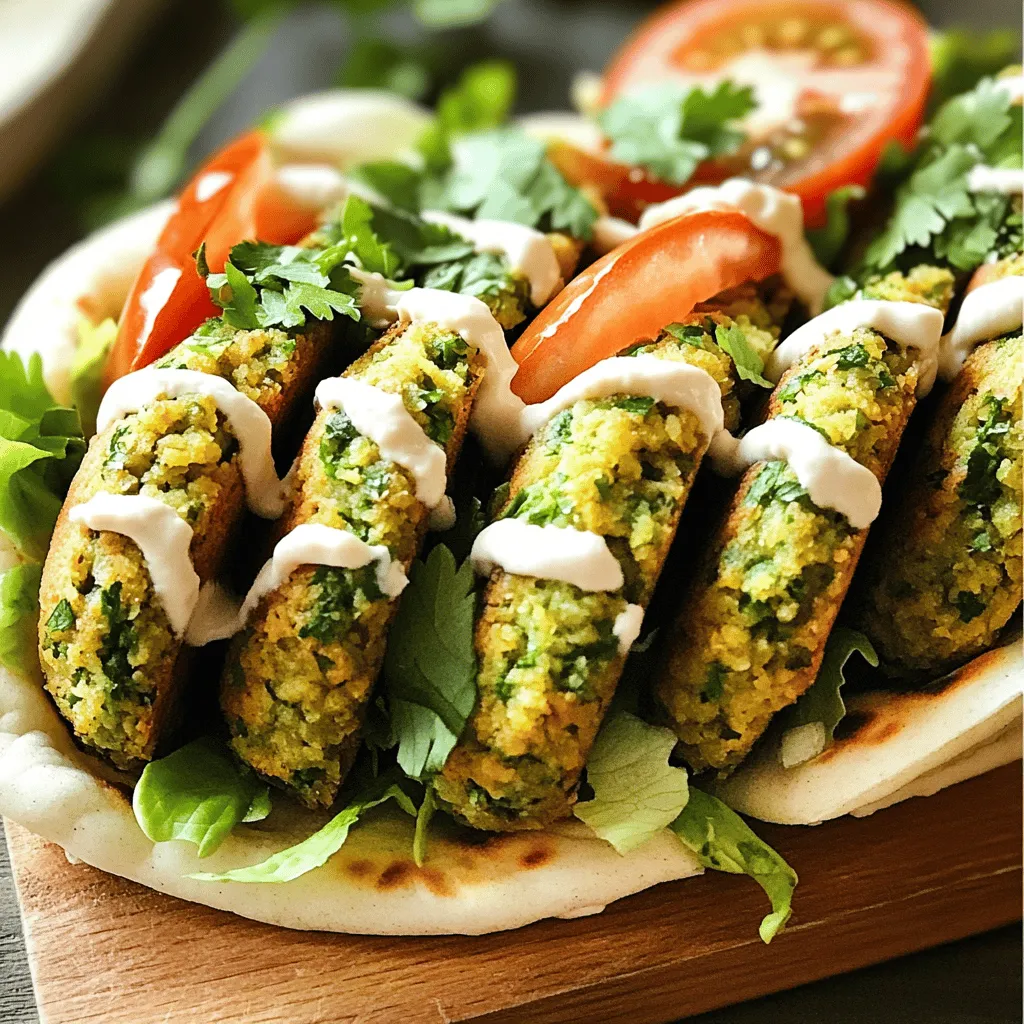
For toppings, I love using fresh lettuce, tomatoes, and a drizzle of tahini sauce. These add great flavor and crunch. You can also try adding pickles or red onions for a tangy bite.
Pair your falafel with sides like hummus or a fresh salad. These flavors enhance the falafel and make your meal complete. Enjoy your Crispy Air Fryer Falafel with your favorite sauces for a fun twist.
Variations
Flavor Variations
You can spice up your falafel in many ways. If you love heat, add more cayenne pepper. It gives the falafel a nice kick. You can also try mixing in some diced jalapeños for a fresh twist. For a Mediterranean flavor, add sun-dried tomatoes or feta cheese. These ingredients bring a new taste to a classic dish.
Customizing for Dietary Needs
If you need vegan options, this recipe is perfect. All the ingredients are plant-based. To make it low-carb, swap chickpeas with cauliflower. This keeps the falafel light but still tasty. You can also use almond flour instead of chickpea flour for a keto-friendly choice.
Serving as a Meal
Falafel makes a great meal on its own or as part of a dish. Try making falafel salad bowls. Just add greens, veggies, and your favorite dressing. For lunch, wrap the falafel in pita bread with lettuce and tomato. This makes a quick meal that you can take on the go.
Storage Info
Storing Leftover Falafel
To keep your leftover falafel fresh, store them in an airtight container. Line the bottom with paper towels to soak up moisture. This step helps maintain their crispiness. Leftover falafel can last in the fridge for about 3 to 5 days. Always check for any signs of spoilage before eating.
Freezing Instructions
If you want to freeze uncooked falafel, shape them first. Place them on a baking sheet lined with parchment paper. Make sure they are not touching. Freeze for about 1 to 2 hours until firm. Then, transfer them to a freezer bag. They can stay in the freezer for up to 3 months.
To reheat frozen falafel, simply air fry them at 400°F (200°C) for about 15 to 18 minutes. No need to thaw them first! This method keeps them crispy and delicious.
Recommendations for Reheating
To keep falafel crispy when reheating, use an air fryer or oven. Avoid using a microwave, as it can make them soggy. If reheating in an oven, preheat it to 375°F (190°C) and bake for about 10 minutes. Check them halfway through and flip if needed. This method will help you enjoy your crispy falafel just like when they were freshly made.
FAQs
What can I serve with Crispy Air Fryer Falafel?
You can serve falafel with many tasty sides and dips. Here are some popular choices:
- Hummus: Creamy and rich, it pairs well with falafel.
- Tahini Sauce: This sesame sauce adds a nutty flavor.
- Tzatziki: A cool yogurt dip that complements the spices.
- Pita Bread: Soft pita wraps the falafel perfectly.
- Salad: Fresh greens and veggies add crunch and color.
Can I make this recipe ahead of time?
Yes, you can prep falafel ahead of time. Here are steps to consider:
- Make the Mixture: Follow the recipe to combine all ingredients.
- Chill: Refrigerate the mixture for up to a day.
- Shape and Freeze: Form balls and freeze them for later use.
- Cook When Ready: Just air fry the frozen falafel when you want them.
How do I know when my falafel are done?
You can check for doneness by looking for these cues:
- Color: They should be golden brown on the outside.
- Texture: The outside should be crispy, while the inside is soft.
- Cooking Time: Aim for 12-15 minutes in the air fryer.
These signs will help ensure your falafel are perfectly cooked!
This blog post detailed how to make crispy air fryer falafel. We covered the essential ingredients, such as chickpeas, herbs, and spices. You learned about helpful substitutions and tips for selecting fresh ingredients. We explored step-by-step instructions, cooking techniques, and variations to enhance your dish. By following these guidelines and tips, you can create delicious falafel that fits your tastes. Enjoy experimenting with flavors and presenting your falafel in fun ways! Happy cooking!

Crispy Air Fryer Falafel
Ingredients
1 can (15 oz) chickpeas, drained and rinsed
1 small onion, chopped
3 cloves garlic, minced
1/4 cup fresh parsley, chopped
1/4 cup fresh cilantro, chopped
1 teaspoon ground cumin
1 teaspoon ground coriander
1/2 teaspoon baking powder
1/2 teaspoon salt
1/4 teaspoon black pepper
1/4 teaspoon cayenne pepper (optional, for heat)
3 tablespoons olive oil (for brushing or spraying)
Pita bread and toppings (like lettuce, tomato, and tahini sauce) for serving
Instructions
In a food processor, combine the drained chickpeas, chopped onion, minced garlic, parsley, cilantro, cumin, coriander, baking powder, salt, black pepper, and cayenne pepper (if using). Pulse until the mixture is well combined but still has some texture; do not over-process.
Transfer the mixture to a bowl and refrigerate for about 30 minutes. This will help the falafel hold their shape during cooking.
Preheat your air fryer to 400°F (200°C).
Once the mixture has chilled, form small balls or patties (about 1.5 inches in diameter) and place them on a plate.
Brush or spray each falafel lightly with olive oil on all sides.
Place the falafel in the air fryer basket in a single layer, making sure they are not touching. You may need to do this in batches depending on the size of your air fryer.
Air fry for about 12-15 minutes, flipping halfway through, until the falafel are golden brown and crispy on the outside.
Once cooked, remove them from the air fryer and let them cool slightly.
Serve the crispy falafel in pita bread with your choice of toppings such as lettuce, tomato, and tahini sauce.
Prep Time, Total Time, Servings: 30 min | 45 min | Serves 4
Crispy Air Fryer Falafel
Ingredients
- 1 can (15 oz) chickpeas, drained and rinsed
- 1 small onion, chopped
- 3 cloves garlic, minced
- 0.25 cup fresh parsley, chopped
- 0.25 cup fresh cilantro, chopped
- 1 teaspoon ground cumin
- 1 teaspoon ground coriander
- 0.5 teaspoon baking powder
- 0.5 teaspoon salt
- 0.25 teaspoon black pepper
- 0.25 teaspoon cayenne pepper (optional, for heat)
- 3 tablespoons olive oil (for brushing or spraying)
- 1 serving Pita bread and toppings (like lettuce, tomato, and tahini sauce) for serving
Instructions
- In a food processor, combine the drained chickpeas, chopped onion, minced garlic, parsley, cilantro, cumin, coriander, baking powder, salt, black pepper, and cayenne pepper (if using). Pulse until the mixture is well combined but still has some texture; do not over-process.
- Transfer the mixture to a bowl and refrigerate for about 30 minutes. This will help the falafel hold their shape during cooking.
- Preheat your air fryer to 400°F (200°C).
- Once the mixture has chilled, form small balls or patties (about 1.5 inches in diameter) and place them on a plate.
- Brush or spray each falafel lightly with olive oil on all sides.
- Place the falafel in the air fryer basket in a single layer, making sure they are not touching. You may need to do this in batches depending on the size of your air fryer.
- Air fry for about 12-15 minutes, flipping halfway through, until the falafel are golden brown and crispy on the outside.
- Once cooked, remove them from the air fryer and let them cool slightly.
- Serve the crispy falafel in pita bread with your choice of toppings such as lettuce, tomato, and tahini sauce.
![- 1 pound ground beef (or turkey) - 1/2 cup breadcrumbs (plain or seasoned) - 1/4 cup grated Parmesan cheese - 1/4 cup finely chopped onion - 1 egg - 2 cloves garlic, minced The main ingredients for honey garlic slow cooker meatballs are simple yet flavorful. Ground beef or turkey serves as a great base, giving the meatballs a hearty texture. I like to use breadcrumbs to hold everything together while adding a nice crunch. Adding grated Parmesan cheese gives the meatballs a savory kick. Finely chopped onion and minced garlic infuse rich flavors that blend perfectly. Finally, one egg binds all these ingredients and keeps the meatballs moist. - 1/3 cup honey - 1/4 cup soy sauce (or tamari for gluten-free) - 1 tablespoon apple cider vinegar - 1 teaspoon ground ginger - 1/4 teaspoon black pepper For the sauce, honey is the star. Its sweetness balances well with the salty soy sauce. You can use tamari if you want a gluten-free option. A splash of apple cider vinegar adds a tangy note, while ground ginger brings warmth and depth. Just a sprinkle of black pepper rounds out the flavors nicely. - Chopped green onions - Sesame seeds Garnishes can elevate your dish. Chopped green onions add a fresh crunch, while sesame seeds give a nice nutty flavor. You can add these right before serving for a beautiful finish. For the full recipe, refer to [Full Recipe]. - Combine the main ingredients in a bowl. Mix 1 pound of ground beef or turkey, 1/2 cup of breadcrumbs, 1/4 cup of grated Parmesan cheese, 1/4 cup of finely chopped onion, 1 egg, and 2 minced garlic cloves. - Form the mixture into small meatballs, about 1 inch in diameter. Set them aside on a plate. - In a separate bowl, whisk together the sauce ingredients. Mix 1/3 cup of honey, 1/4 cup of soy sauce, 1 tablespoon of apple cider vinegar, 1 teaspoon of ground ginger, and 1/4 teaspoon of black pepper. - Place the meatballs in the slow cooker. Arrange them in a single layer for even cooking. - Pour the honey garlic sauce over the meatballs. Make sure they are well coated. - Cook on low for 4-5 hours or on high for 2-3 hours. Check that the meatballs are cooked through and tender. - After cooking, gently stir the meatballs. Let them soak up the sauce for about 10 minutes before serving. - Garnish with chopped green onions and sesame seeds if you want. Enjoy these tasty bites! For the full recipe, check out the detailed instructions. To make great honey garlic meatballs, start by ensuring even cooking. This means forming your meatballs to the same size. Aim for about one inch in diameter. This way, they cook at the same rate. If you make them too big, they may not cook through. For cooking time, I recommend using low heat for about 4 to 5 hours. If you are short on time, use high heat for 2 to 3 hours. Either way, check the meatballs near the end. They should be tender and fully cooked. You can also use a meat thermometer to check for doneness. The internal temperature should reach 165°F. Honey garlic meatballs shine with simple sides. Serve them with steamed rice, noodles, or even a fresh salad. These pair well with the sweet and savory flavors of the meatballs. For presentation, arrange the meatballs on a large platter. Drizzle extra sauce over them for a glossy look. Sprinkle chopped green onions and sesame seeds on top. This adds color and a fresh crunch. When making meatballs, some issues may pop up. If your meatballs fall apart, it could be too much moisture. Ensure you use the right amount of breadcrumbs. Another common problem is dry meatballs. This can happen if you overcook them. Always check your cooking time and temperature. If they seem dry, serve them with more sauce to help. These tips can guide you through making perfect honey garlic slow cooker meatballs. For the full recipe, check back to the main section. {{image_2}} You can easily switch the meat you use. Ground turkey works well instead of beef. If you want a plant-based option, use lentils or chickpeas. Both are tasty and healthy. When it comes to breadcrumbs, you can use gluten-free options. Look for gluten-free bread or crushed rice crackers. This swap keeps the dish friendly for those with gluten issues. To boost the taste, think about adding spices. A pinch of red pepper flakes gives a nice kick. Fresh herbs like basil or cilantro can add a fresh twist. You can also adjust the sweetness. If you want it less sweet, cut back on the honey. To add saltiness, consider a splash more soy sauce. Each of these changes can make your dish unique. You don’t have to use a slow cooker for this recipe. You can bake the meatballs in the oven. Just preheat it to 400°F. Place the meatballs on a baking sheet. Bake for about 20 minutes until they are golden brown. For stovetop cooking, heat a skillet over medium heat. Brown the meatballs on all sides. Then add the sauce and simmer until cooked through. Each method brings a different texture and flavor to the dish. Remember, you can find the full recipe in the earlier section. To store leftover meatballs, place them in an airtight container. Make sure to cover them well. This keeps the meatballs fresh and tasty. You can store them in the fridge for up to 4 days. If you want to enjoy them later, freezing may be a better choice. For the best results, freeze meatballs in a single layer on a baking sheet. Once they are frozen, place them in a freezer bag. This helps prevent them from sticking together. You can freeze them for up to 3 months. When you're ready to eat, thaw the meatballs in the fridge overnight. Reheat them in the slow cooker or microwave until hot. Preparing ahead is a great way to save time. You can mix and form the meatballs a day in advance. Just store them in the fridge until you're ready to cook. Portioning is also key. Consider making small bags with the right amount for meals. This makes it easy for quick dinners during busy days. For a delightful meal, try the Full Recipe for Honey Garlic Slow Cooker Meatballs. You can tell meatballs are done by checking their internal temperature. Use a meat thermometer. The safe temperature for ground meat is 165°F (74°C). Insert the thermometer into the center of a meatball. If it reads 165°F, they are ready to eat. If not, cook them a bit longer. Yes, you can prepare honey garlic meatballs in advance. Mix the meatball ingredients and form them into balls. Place them in the fridge for up to 24 hours before cooking. You can also freeze them for later. Just thaw them in the fridge overnight before cooking. This saves time on busy days. Definitely! You can swap ground beef for turkey or a plant-based option. For gluten-free diets, use gluten-free breadcrumbs and tamari instead of soy sauce. If you prefer less sugar, reduce the amount of honey or use a sugar-free substitute. There are many options to fit your needs. Honey garlic meatballs pair well with various side dishes. Here are some great options: - Steamed rice or quinoa - Roasted vegetables - Noodles, like rice or soba - A fresh green salad - Mashed potatoes These sides complement the sweet and savory flavors of the meatballs. Enjoy mixing and matching to find your favorite combination! For the complete recipe, check the Full Recipe section. This blog post covered how to make juicy honey garlic meatballs. We explored the main ingredients, including ground beef and Parmesan cheese. Then, we discussed the sauce, which combines honey and soy sauce, and provided cooking tips. Plus, we shared variations and storage tips for leftovers. Whether you follow the recipe or make your own tweaks, you can enjoy delicious meatballs. Now, it's your turn to try this easy dish and share it with your loved ones!](https://dailydishlab.com/wp-content/uploads/2025/07/f340aba1-8a32-460a-95c5-e4b0f40aca57-768x768.webp)

![- 1 can (15 oz) chickpeas, drained and rinsed - 2 tablespoons olive oil - 1 tablespoon Sriracha sauce - 2 tablespoons honey Chickpeas are the heart of this snack. They give crunch and protein. Sriracha sauce adds heat and flavor. Honey brings sweetness to balance the spice. Together, they create a tasty mix. - 1 teaspoon garlic powder - 1 teaspoon smoked paprika - Salt to taste Garlic powder adds depth. Smoked paprika gives a nice, smoky flavor. Salt enhances all the tastes. Each seasoning plays a key role in making this snack special. - Fresh cilantro for garnish (optional) Fresh cilantro adds a burst of color and flavor. It is not a must, but it makes the dish look fresh and bright. You can skip it or use it based on your taste. You can find the [Full Recipe] to make this delicious snack. First, preheat your oven to 400°F (200°C). This step is key for crispy chickpeas. Next, line a baking sheet with parchment paper. This makes for easy clean-up and helps the chickpeas roast evenly. Open the can of chickpeas and drain them well. Rinse them under cold water to remove excess sodium. Then, spread them on a clean kitchen towel. Pat them dry gently to soak up any moisture. This helps them get nice and crunchy. In a mixing bowl, combine 2 tablespoons of olive oil, 1 tablespoon of Sriracha sauce, and 2 tablespoons of honey. Add in 1 teaspoon of garlic powder, 1 teaspoon of smoked paprika, and a pinch of salt. Stir until it's smooth. Now, toss the dried chickpeas into the bowl. Mix well until all the chickpeas are coated evenly in the sauce. Spread the coated chickpeas out in a single layer on your prepared baking sheet. This allows them to roast evenly. Place them in the oven and roast for 25-30 minutes. Halfway through, shake the baking sheet to ensure they cook evenly. You want them golden brown and crispy. Once they are done, take them out of the oven. Let them cool for a few minutes. They will continue to crisp up as they cool. If you like, garnish with fresh cilantro for a pop of color and flavor. Serve them warm or at room temperature for a delightful snack. You can find the full recipe above. To get crispy chickpeas, you must dry them well. After rinsing, spread them on a towel. Pat them gently until they feel dry. This step is key for crunch. Adjust your cooking time if your oven runs hot or cool. Check them often as they roast. You want them golden brown and crunchy, not burnt. Feel free to experiment with spices. Add cumin for warmth or chili powder for more heat. You can mix in onion powder for depth. You can also adjust sweetness and heat to your taste. If you like it sweeter, add more honey. For extra spice, increase the Sriracha. Taste as you go for the best results. Pair these chickpeas with dips like hummus or guacamole. They also work well with a cool drink. You can use them as a snack or add them to salads. They make a great topping on soups for extra crunch. For the full recipe, check out the cooking steps above. {{image_2}} You can change the heat in your Sriracha honey roasted chickpeas. If you want less heat, try using a milder hot sauce. Sweet chili sauce can also add a nice touch. If you crave more spice, add cayenne pepper or chili flakes. Adjust the amount to fit your taste. For a different sweetness, use maple syrup or agave syrup instead of honey. Both options give a nice flavor. If you want to cut down on sugar, try using stevia or monk fruit sweetener. These sugar alternatives can make your snack healthier without losing taste. If you have dietary restrictions, you can still enjoy this snack. Swap honey for agave syrup to make it vegan. You can also try different legumes like black beans or lentils. This way, you can enjoy crispy bites while sticking to your dietary needs. You can store Sriracha honey roasted chickpeas at room temperature. Use an airtight container to keep them fresh. If you live in a very humid area, put them in the fridge. This helps them last longer. Just remember, they might lose some crispiness in the fridge. For the best taste, eat the chickpeas within a week. Keep an eye out for signs of spoilage. If they smell off or have a soft texture, it’s time to toss them. Freshness is key for that crunchy bite you love. To enjoy their crunch again, use an oven to reheat. Set it to 350°F (175°C) and warm them for about 10 minutes. This method keeps them crispy. If you use a microwave, they may turn soft. So, the oven is best for reheating. Enjoy every bite of your tasty snack! Yes, you can use frozen chickpeas. First, thaw them completely. Then, drain and rinse them well. Pat them dry to remove moisture. This helps them crisp up nicely when roasted. You can serve these chickpeas as a snack or a side dish. They pair well with dips like hummus or guacamole. You can also add them to salads for crunch or on top of grain bowls for extra flavor. This recipe is already gluten-free! Just make sure the Sriracha sauce you use does not have added gluten. Always check labels if you have gluten concerns. Yes, you can prep the chickpeas ahead of time. Rinse and dry them, then store them in an airtight container in the fridge. Mix the sauce and keep it separate until you are ready to roast. The chickpeas are done when they are golden brown and crispy. They should feel firm and crunchy when you bite into them. If they feel soft, roast them a bit longer. Enjoy the satisfying crunch! In this post, we explored the tasty world of Sriracha Honey Roasted Chickpeas. You learned about key ingredients like chickpeas, sriracha, and honey. We covered step-by-step instructions for making this snack, plus tips for the best texture. Remember, you can switch ingredients for your taste. These crunchy bites make a great snack or meal side. Enjoy your cooking, and don’t hesitate to try new flavors!](https://dailydishlab.com/wp-content/uploads/2025/06/f8f73e0a-0d80-4e02-8677-78bbb221fc07-768x768.webp)