
Pumpkin Spice Icebox Cake Quick and Easy Dessert
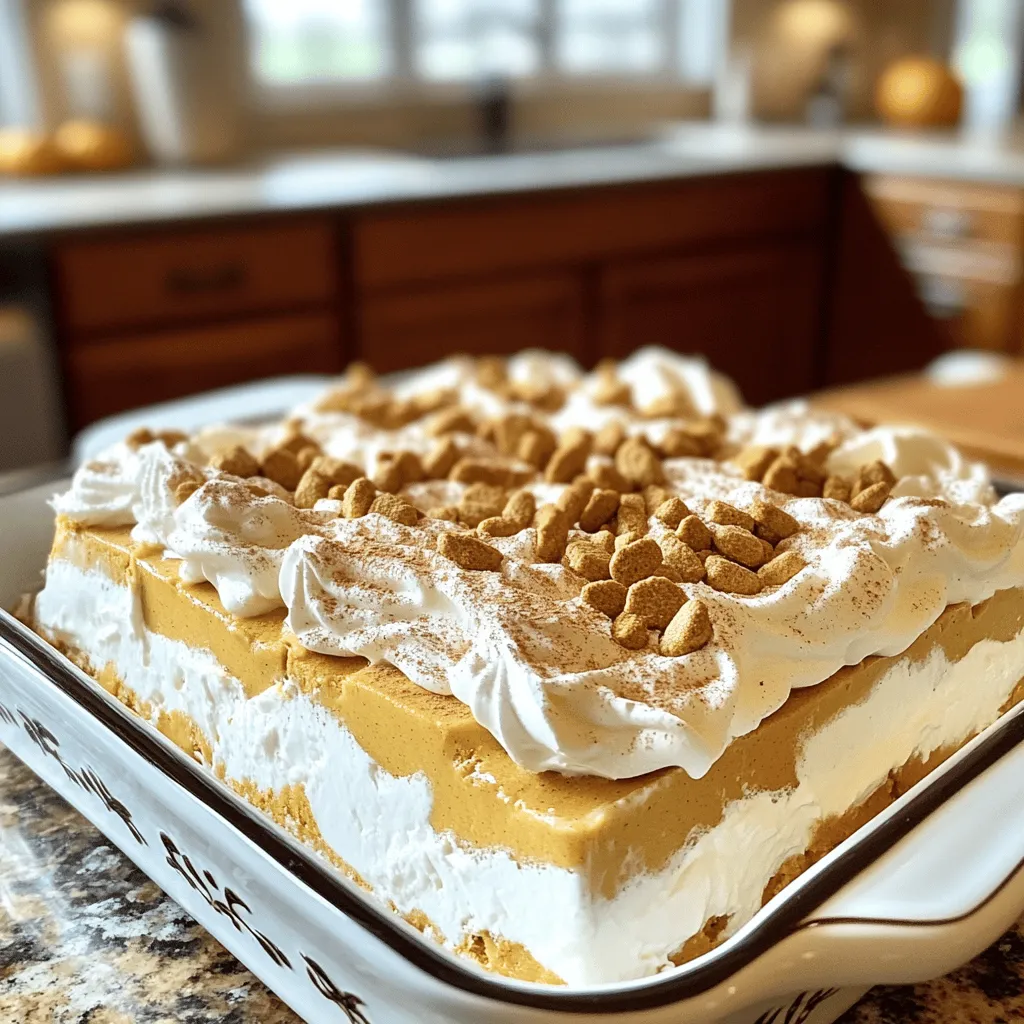
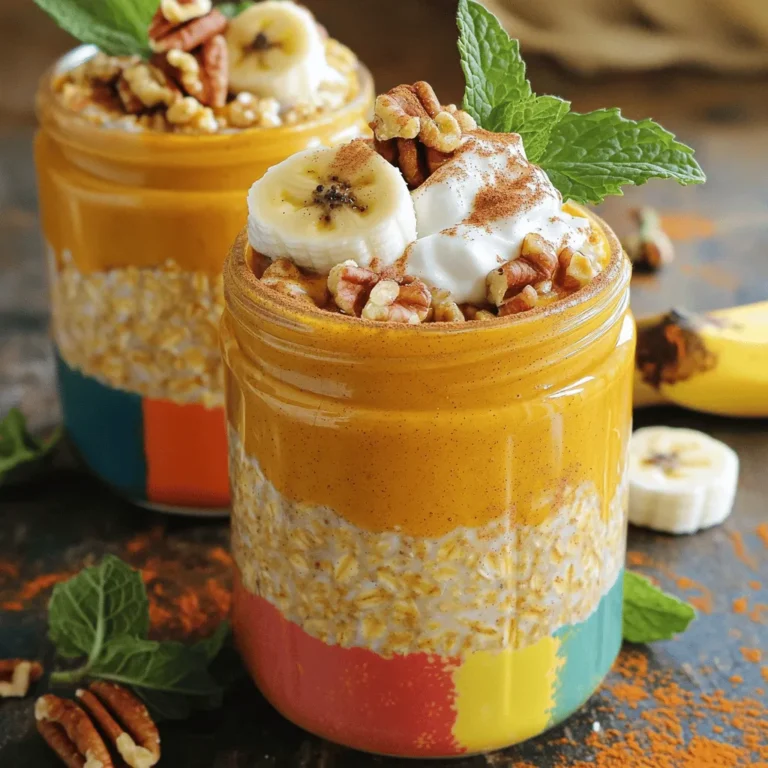
Craving a dessert that screams autumn? The Pumpkin Spice Icebox Cake is your answer! This quick and easy treat combines creamy pumpkin goodness with layers of flavor. Perfect for any gathering, it only takes a few ingredients and a little time. I’ll guide you through each step, share tips, and offer tasty variations. Get ready to impress your guests with this delightful no-bake dessert!
Why I Love This Recipe
- Delicious Flavor Combination: This icebox cake perfectly marries the warm spices of pumpkin pie with creamy whipped goodness, creating a dessert that feels like a cozy hug.
- No-Bake Convenience: With minimal effort and no baking required, this dessert is perfect for those warm days or when you want to save time in the kitchen.
- Make-Ahead Friendly: This cake only gets better after chilling, allowing you to prepare it in advance for parties or gatherings.
- Customizable Toppings: You can easily switch up the toppings or add your favorite spices to make it your own, ensuring that every bite is unique.
Ingredients
Complete list of ingredients
To make this Pumpkin Spice Icebox Cake, gather these simple ingredients:
- 2 cups heavy whipping cream
- 1 cup pumpkin puree
- 1 cup powdered sugar
- 1 teaspoon vanilla extract
- 1 teaspoon pumpkin pie spice
- 24 graham cracker sheets
- 1 cup crushed ginger snap cookies (for topping)
- Optional: additional pumpkin pie spice for garnish
Equipment needed for preparation
You will need a few basic tools to prepare this dessert:
- Large mixing bowl
- Electric mixer or whisk
- 8×8 inch dish
- Plastic wrap
- Measuring cups and spoons
Optional ingredients for enhanced flavor
If you want to add more flavor, consider these options:
- A pinch of nutmeg for warmth
- A splash of maple syrup for sweetness
- Chopped pecans or walnuts for crunch
These ingredients create a delicious and easy dessert. Feel free to mix and match as you see fit!

Step-by-Step Instructions
Detailed preparation steps
1. Start by whipping the heavy cream in a large bowl. Use a hand mixer or whisk until soft peaks form. This step is important for a light texture.
2. Slowly add the powdered sugar, vanilla extract, and pumpkin pie spice. Keep mixing until you see stiff peaks. Stiff peaks mean the cream holds its shape well.
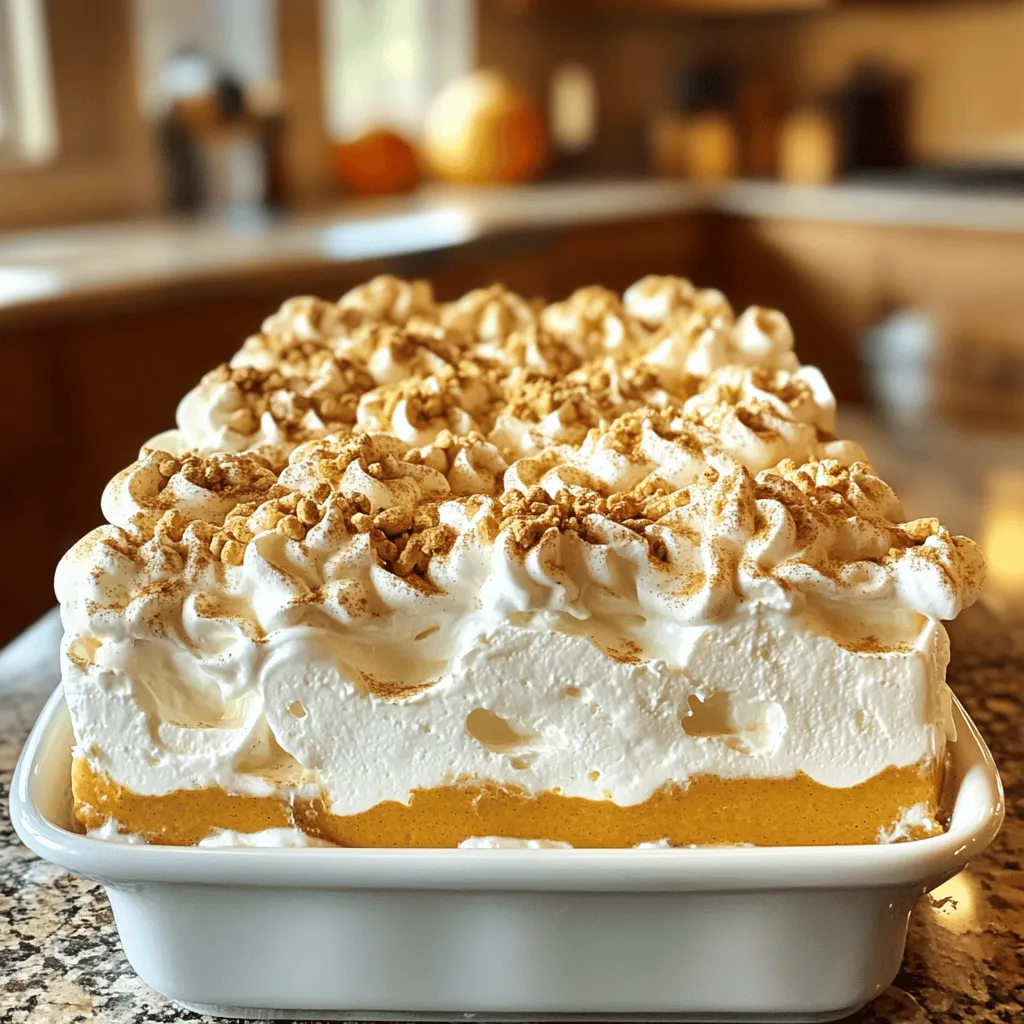
3. Grab an 8×8 inch dish. Spread a layer of the pumpkin cream mixture evenly at the bottom. This creates the base for your cake.
4. Next, place a layer of graham crackers over the cream. If needed, break them to fit the dish. This will add a nice crunch.
5. Repeat the layers. Start with another layer of pumpkin cream, then add more graham crackers. Keep going until you fill the dish, ending with pumpkin cream on top.
6. For the final touch, sprinkle crushed ginger snap cookies over the top. This adds both flavor and crunch.
7. Cover the dish tightly with plastic wrap. Chill in the fridge for at least 4 hours, or overnight. Chilling helps the flavors blend and softens the crackers.
8. Before you serve, dust the top with a bit more pumpkin pie spice. This is optional but makes it look nice.
Visual aids for each step (images or video links)
Using visual aids can make this process more fun and easy. Look for step-by-step videos or images online. They show each step clearly. This will help you follow along and avoid mistakes.
Common mistakes to avoid during preparation
- Not whipping the cream enough: If the cream is too soft, your cake won’t hold its shape.
- Skipping the chilling time: If you skip chilling, the layers won’t set well.
- Using stale graham crackers: Fresh crackers make a big difference in taste.
- Not layering correctly: Make sure each layer is even for the best results.
- Over-mixing the cream: This can turn your cream into butter. Stop mixing when stiff peaks form.
Following these steps will help you make a perfect Pumpkin Spice Icebox Cake!
Pro Tips
- Chill the Mixing Bowl: For an even fluffier whipped cream, place your mixing bowl and beaters in the freezer for about 10 minutes before whipping the cream.
- Layering Technique: Ensure even layers by pressing down gently on each layer of graham crackers before adding the next layer of pumpkin cream.
- Ginger Snap Variation: For a spicier kick, consider adding finely chopped candied ginger to the crushed ginger snap topping.
- Make Ahead: This icebox cake is perfect for making ahead of time. It tastes even better the next day as the flavors meld together.
Tips & Tricks
Best practices for whipping cream
Whipping cream is key to a light and fluffy texture. Start with cold cream. It whips better when it’s cold. Use a large bowl to give the cream space to expand. Whip with a hand mixer or stand mixer on medium speed. Stop when you see soft peaks. If you want it firmer, keep going until you see stiff peaks. Be careful not to over-whip. You don’t want butter!
How to achieve the perfect layers
Layering is fun and simple! Begin with a layer of the pumpkin cream mixture at the bottom. Then, place graham crackers on top. Make sure to break them if needed to fit. Repeat this process. Keep your layers even for the best look. End with a final layer of the cream mixture. This helps the top stay smooth and pretty.
Suggestions for enhancing flavor and texture
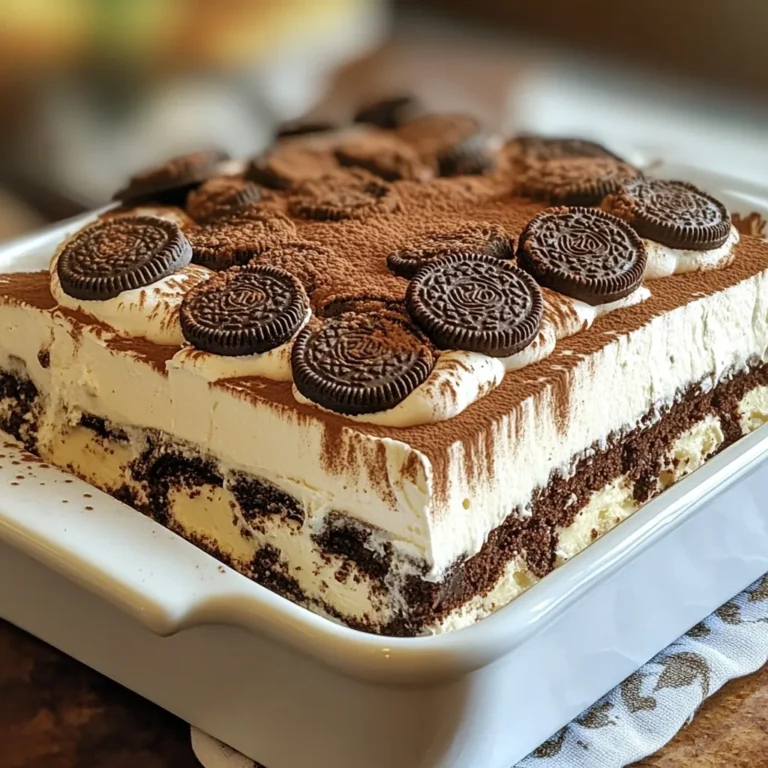
To boost the flavor, consider adding a pinch of nutmeg or cinnamon to the cream. This extra spice brings warmth. You can also try mixing in some finely chopped nuts or chocolate chips. They add a great crunch. For a twist, use crushed Oreos instead of graham crackers. This change gives a rich, chocolatey flavor. Enjoy experimenting with toppings like whipped cream or caramel sauce!
Variations
Alternative flavors and add-ins
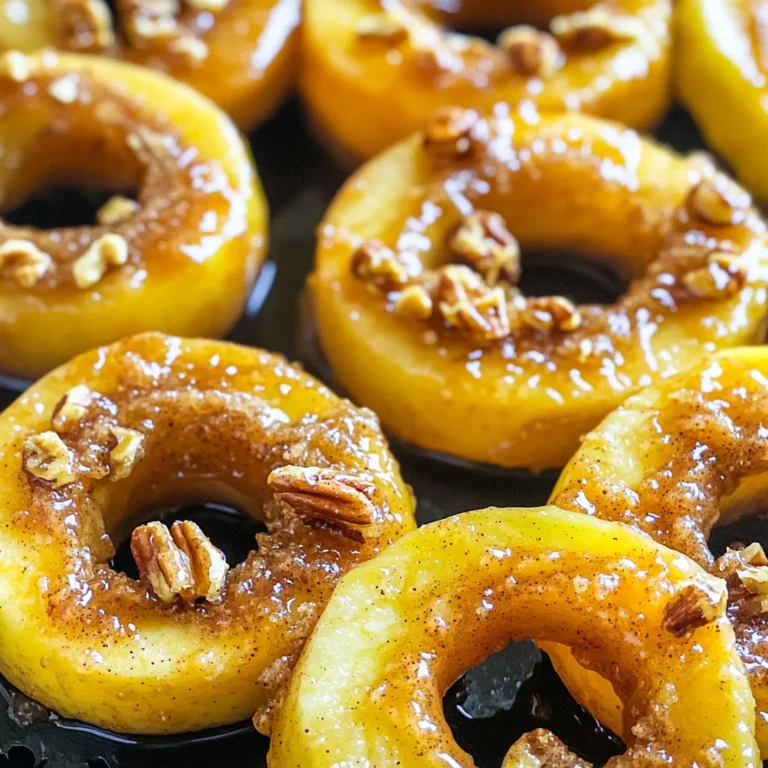
You can change the flavor of your Pumpkin Spice Icebox Cake easily. Try using different spices, like cinnamon or nutmeg, to mix up the taste. You can also add a layer of chocolate pudding for a rich twist. For a fruity touch, consider adding layers of sliced bananas or apples. These additions bring new flavors and textures to your dessert, making it fun and unique.
Substituting for dietary restrictions (gluten-free, dairy-free)
If you need a gluten-free option, use gluten-free graham crackers instead. Many brands offer these, and they work well in this recipe. For a dairy-free version, replace the heavy cream with coconut cream. Just chill a can of coconut milk overnight, and scoop out the thick part. This gives you a creamy base without any dairy. These swaps keep the dessert tasty and friendly for everyone.
Serving suggestions for different occasions
This Pumpkin Spice Icebox Cake is perfect for many events. For a cozy family gathering, serve it with warm apple cider. If you have friends over for a game night, slice it into small squares for easy sharing. For a festive holiday dinner, place it on a beautiful platter and garnish it with fresh whipped cream and a sprinkle of cinnamon. No matter the occasion, this cake shines and delights your guests.
Storage Info
Best practices for refrigerating leftovers
After you make your Pumpkin Spice Icebox Cake, you may have some left. Store it in the fridge. Use plastic wrap or a lid to cover it well. This keeps it fresh and tasty. Try to eat leftovers within three days for the best flavor. If you notice any changes in texture or smell, it’s best to toss it.
Freezing options and tips
You can freeze this dessert if you want to save some for later. First, cut it into pieces. Wrap each piece tightly in plastic wrap. Then, place the wrapped pieces in an airtight container or a freezer bag. This helps prevent freezer burn. It can stay in the freezer for up to three months. When you want to eat it, just thaw it in the fridge overnight.
Shelf life guidelines
The Pumpkin Spice Icebox Cake is best when fresh. In the fridge, it lasts about three to four days. If you freeze it, it can last up to three months. Always check for any off smells or changes in texture before eating. Enjoy your cake while it’s at its best!
FAQs
Can I use store-bought whipped cream?
Yes, you can use store-bought whipped cream. It saves time and still tastes good. Just make sure it is in a tub, not in a can. This whipped cream has a nice texture for this cake.
How long does the Pumpkin Spice Icebox Cake last?
The cake lasts about four to five days in the fridge. Keep it covered to stay fresh. The flavors will deepen as it sits, making it even tastier. Just remember to serve it cold for the best flavor.
What can I substitute for graham crackers?
You can use vanilla wafers or digestive biscuits. Both options work well and add a nice flavor. If you want a crunch, try crushed pretzels or even cookies. They will change the taste but still make a great dessert. For a gluten-free option, use gluten-free graham crackers.
This guide covered everything you need for your Pumpkin Spice Icebox Cake. We went over the ingredients, equipment, and optional flavors to enhance your dish. You learned step-by-step how to prepare, avoiding common mistakes. Tips helped you whip cream perfectly and create great layers. Variations showed how to cater to different tastes and diets. We also discussed how to store your cake safely. Now you’re ready to make a delicious dessert that everyone will love. Enjoy your baking adventure!

Pumpkin Spice Icebox Cake
Ingredients
2 cups heavy whipping cream
1 cup pumpkin puree
1 cup powdered sugar
1 teaspoon vanilla extract
1 teaspoon pumpkin pie spice
24 graham cracker sheets
1 cup crushed ginger snap cookies (for topping)
Optional: additional pumpkin pie spice for garnish
Instructions
In a large mixing bowl, whip the heavy cream until soft peaks form.
Gradually add the powdered sugar, vanilla extract, and pumpkin pie spice while continuing to whip until stiff peaks form.
In an 8×8 inch dish, spread a layer of the pumpkin cream mixture evenly at the bottom.
Place a layer of graham crackers over the cream mixture, breaking them as necessary to fit.
Repeat layering: another layer of pumpkin cream, followed by a layer of graham crackers. Continue until you reach the top, ending with a layer of pumpkin cream.
Sprinkle the crushed ginger snap cookies on top of the final layer for added texture and flavor.
Cover the dish with plastic wrap and refrigerate for at least 4 hours, preferably overnight, to allow the flavors to meld and the graham crackers to soften.
Before serving, dust with additional pumpkin pie spice if desired.
Prep Time: 30 minutes | Total Time: 4 hours (plus chilling time) | Servings: 8
Pumpkin Spice Icebox Cake
Ingredients
- 2 cups heavy whipping cream
- 1 cup pumpkin puree
- 1 cup powdered sugar
- 1 teaspoon vanilla extract
- 1 teaspoon pumpkin pie spice
- 24 sheets graham crackers
- 1 cup crushed ginger snap cookies
- optional additional pumpkin pie spice for garnish
Instructions
- In a large mixing bowl, whip the heavy cream until soft peaks form.
- Gradually add the powdered sugar, vanilla extract, and pumpkin pie spice while continuing to whip until stiff peaks form.
- In an 8x8 inch dish, spread a layer of the pumpkin cream mixture evenly at the bottom.
- Place a layer of graham crackers over the cream mixture, breaking them as necessary to fit.
- Repeat layering: another layer of pumpkin cream, followed by a layer of graham crackers. Continue until you reach the top, ending with a layer of pumpkin cream.
- Sprinkle the crushed ginger snap cookies on top of the final layer for added texture and flavor.
- Cover the dish with plastic wrap and refrigerate for at least 4 hours, preferably overnight, to allow the flavors to meld and the graham crackers to soften.
- Before serving, dust with additional pumpkin pie spice if desired.
![- 2 cups fresh strawberries - 1/4 cup granulated sugar - 1 teaspoon vanilla extract - 2 cups whipped cream - 1 pound pound cake - 1 cup vanilla pudding - Mint leaves for garnish Fresh strawberries are the star of this dish. Choose ripe, sweet ones for the best flavor. The sugar helps draw out their juices, creating a tasty syrup. Vanilla extract adds depth to the whipped cream and pudding, enhancing the overall taste. I like to use a pound cake for its light, soft texture. You can buy it or make it from scratch. Vanilla pudding adds creaminess and richness to the layers. Finally, mint leaves add a pop of color and a refreshing touch on top. - Flavor variations for whipped cream - Additional fruits to mix in - Alternative cake options You can personalize your trifle with various options. For whipped cream, try adding lemon zest or almond extract for a new twist. Mix in more fruits like blueberries or raspberries for added flavor and color. If you want to change the cake, you could use angel food cake or sponge cake. Both options keep the dessert light and airy. Feel free to play with flavors and textures to make your own unique trifle. For the full recipe, check the earlier section. First, toss 2 cups of sliced strawberries with 1/4 cup of granulated sugar. This simple step helps bring out their sweet flavor. Let them sit for about 15 minutes. This process is called macerating. As the strawberries sit, they release their juices. These juices will add moisture and sweetness to your trifle. Grab your trifle dish or a large glass bowl. Start by layering the ingredients. Place cubes of pound cake at the bottom. Next, drizzle some of the strawberry juice over the cake. This makes the cake soft and tasty. Now, spread a layer of vanilla pudding over the soaked cake. Add the macerated strawberries on top. Make sure to distribute them evenly. Spoon a layer of whipped cream over the strawberries. Smooth it out gently. Repeat these layers until your dish is full. Finish with one last layer of whipped cream. To make your trifle look pretty, garnish the top. Place a few whole strawberries and some fresh mint leaves on the whipped cream. This adds a pop of color. Chill your trifle in the fridge for at least 1 hour. This helps the flavors blend together. For a fun twist, serve it in individual glass cups. It makes for a charming presentation. Enjoy your Strawberry Shortcake Trifle Delightful Summer Treat! For a stunning trifle, focus on layering. Start with a layer of pound cake cubes. Soak them with the juice from the strawberries. This adds flavor and keeps the cake moist. Next, pour a layer of vanilla pudding. It should be smooth but not too runny. If your pudding is too thick, add a splash of milk. This will help it spread easily. After pudding, add the strawberries. Place them evenly for a nice look. Finally, top with whipped cream. A gentle swirl makes it pretty. Repeat these steps until you fill your dish. End with whipped cream on top for a lovely finish. You can save time by using store-bought items. Grab pre-made vanilla pudding and whipped cream. This cuts down on prep time. You can also use ready-made pound cake. Just cube it, and you are set. If you're in a rush, layer ingredients in jars. This is fast and fun for serving. You can make individual servings quickly. Plus, it looks great at parties! Even with shortcuts, your trifle will taste amazing. You can still enjoy the full flavors of the Strawberry Shortcake Trifle with these easy steps. For the full recipe, check out the details above. {{image_2}} You can switch up the classic Strawberry Shortcake Trifle in fun ways. One tasty option is the Chocolate Strawberry Shortcake Trifle. Use chocolate cake instead of pound cake. Layer it with strawberries and chocolate pudding. Top it all with whipped cream. This twist adds rich flavors and a fun look. Another great choice is a lemon-infused variation. Substitute lemon pudding for vanilla pudding. You can also add lemon zest to the whipped cream. This will give the trifle a bright, zesty taste. It complements the strawberries nicely. You’ll have a refreshing treat perfect for hot days. If you need gluten-free options, use gluten-free cake. You can find mixes in stores or make your own. Just make sure the other ingredients are also gluten-free. This way, everyone can enjoy this dessert. For vegan adaptations, swap the whipped cream with a plant-based version. Use coconut cream or almond whipped cream. Replace the pudding with a vegan version too. You can make it with silken tofu and a bit of sweetener. These changes keep the trifle tasty while meeting dietary needs. For the full recipe, click here: [Full Recipe]. To store leftovers, cover the trifle with plastic wrap. Make sure it fits tightly to keep air out. You can also use a lid if your dish has one. This keeps the trifle fresh and tasty. The shelf life of the trifle is about 2-3 days in the fridge. After that, the layers may start to blend together. The strawberries can lose their texture, too. Always check for freshness before you dig in. If you want to refresh the trifle before serving, here are some tips. First, scoop out the top layer and set it aside. This lets you see if the layers need some help. Add fresh whipped cream to the top for a light touch. You can also add more sliced strawberries to make it look pretty. If the cake is too soft, consider adding a new layer of pound cake. This can help restore some of the texture and taste. Enjoy your delightful summer treat! Can I use frozen strawberries? Yes, you can use frozen strawberries. Thaw them first and drain any extra juice. This way, they still add great flavor to your trifle. How do I make it ahead of time? You can make your trifle a day before you serve it. Just layer everything and cover it well. Chill it in the fridge overnight. This helps the flavors mix nicely. What can I substitute for pound cake? If you don’t have pound cake, you can use angel food cake or sponge cake. Both options keep the trifle light and fluffy. You can also use cookies for a fun twist. For the full recipe, check the earlier section. Enjoy your delicious strawberry shortcake trifle! In this post, we covered how to make a delicious strawberry shortcake trifle. I shared the key ingredients, like fresh strawberries, whipped cream, and pound cake. You learned step-by-step instructions for preparation, assembly, and presentation. Tips helped you perfect your trifle and save time. Remember to explore flavor variations and dietary options. The trifle is easy to store and refresh, ensuring you enjoy every bite. Now, it's time to create your own tasty masterpiece!](https://dailydishlab.com/wp-content/uploads/2025/07/b9031d10-5e28-4fea-a2af-b8fc9fc435a5-768x768.webp)