
Sheet Pan Steak Fajitas Flavorful and Easy Meal
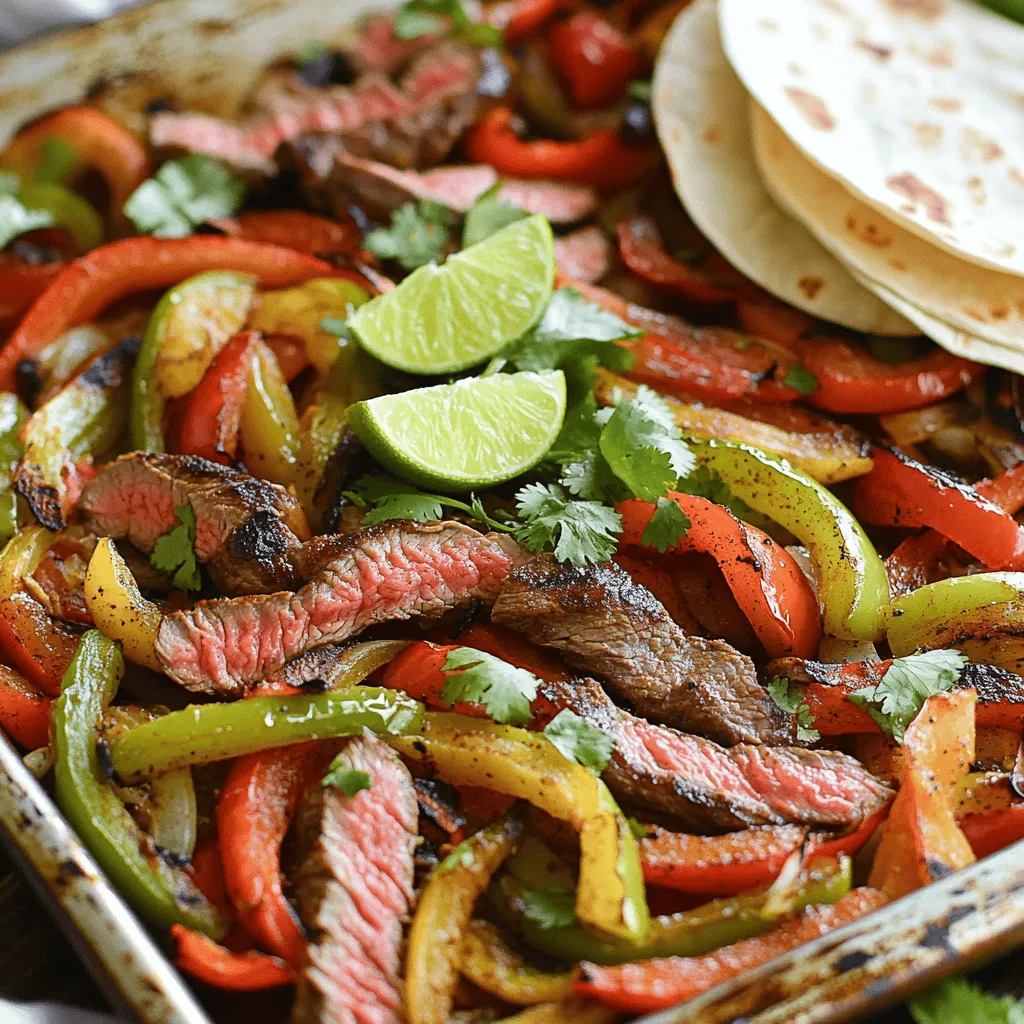
Looking for a quick, tasty dinner? You’ll love these Sheet Pan Steak Fajitas! With just a few simple ingredients, including flank steak and colorful veggies, you can whip up a flavorful meal in under 30 minutes. Follow my easy steps, and impress everyone at your table. Get ready to enjoy mouthwatering fajitas that fit into any busy weeknight! Let’s dive into this delicious recipe!
Why I Love This Recipe
- Quick and Easy: This recipe comes together in just 35 minutes, making it perfect for busy weeknights.
- One Pan Wonder: Cooking everything on a sheet pan means less cleanup and all the flavors meld together beautifully.
- Flavor Packed: The combination of spices adds a delicious depth to the steak and veggies that everyone will love.
- Customizable: Easily adjust the toppings and sides to suit your family’s preferences for a personalized meal.
Ingredients
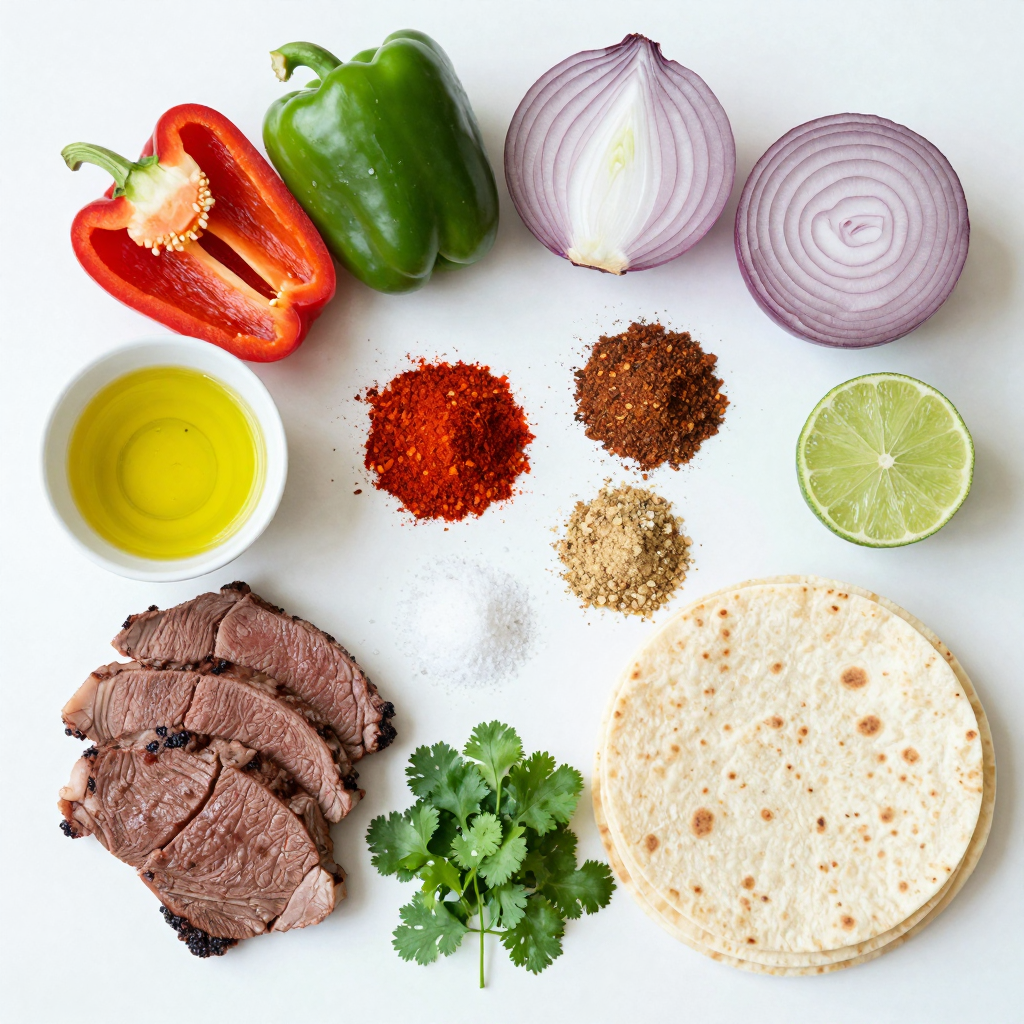
Main Ingredients
- 1.5 lbs flank steak, sliced into thin strips
- 2 bell peppers (one red, one green), sliced
- 1 large onion, sliced
Flank steak gives this dish a rich flavor. The bell peppers add color and sweetness. The onion brings a nice depth to the mix.
Seasonings
- 2 tablespoons olive oil
- 2 teaspoons chili powder
- 1 teaspoon ground cumin
- 1 teaspoon smoked paprika
- 1/2 teaspoon garlic powder
- 1/2 teaspoon onion powder
- Salt and pepper to taste
- Juice of 1 lime
The olive oil helps the spices stick. Chili powder adds heat, while cumin and paprika give a smoky flavor. Garlic and onion powder enhance the savory notes. A squeeze of lime brightens everything up!
Garnishes and Serving Suggestions
- Fresh cilantro, chopped (for garnish)
- Warm tortillas (for serving)
- Toppings (sour cream, guacamole, salsa)
Cilantro adds freshness and color. Serving on warm tortillas makes it fun to eat. You can add toppings like sour cream and guacamole for extra creaminess.
Step-by-Step Instructions
Preparing the Oven and Sheet Pan
First, preheat your oven to 450°F (232°C). This high heat gives a nice char to the veggies and steak. While the oven heats, line your large baking sheet with parchment paper. This will help with cleanup later.
Mixing Ingredients
In a big bowl, combine the sliced flank steak, bell peppers, and onion. Pour in the olive oil. Next, add chili powder, ground cumin, smoked paprika, garlic powder, onion powder, salt, and pepper. Toss everything well so the meat and veggies are coated with the spices. This step is key for flavor!
Cooking the Fajitas
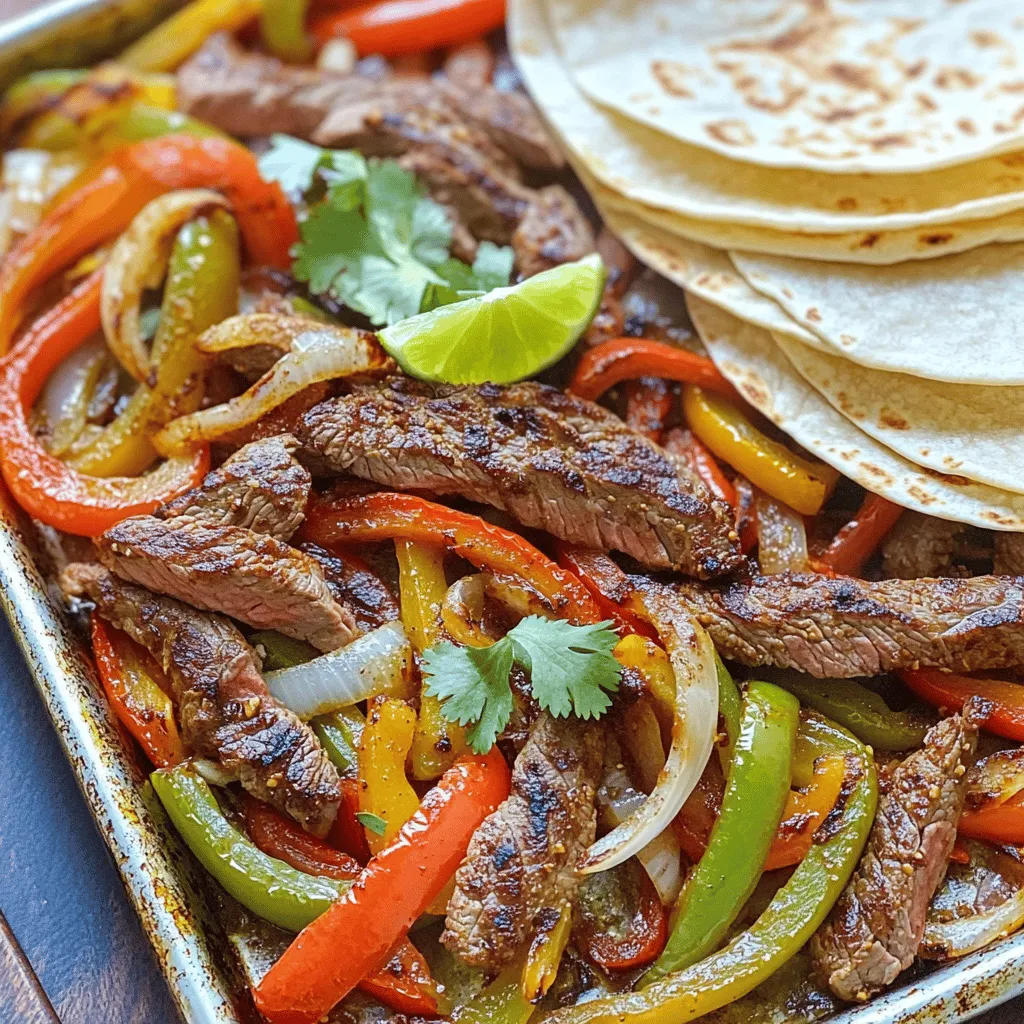
Spread the mixture evenly on the prepared baking sheet. Make sure to keep it in a single layer. This helps everything cook evenly. Roast in the oven for 20-25 minutes. Stir the mixture halfway through cooking for even browning. When done, the steak should be cooked to your liking, and the veggies should be tender and slightly charred.
Remove the pan from the oven. Squeeze fresh lime juice over the top for a bright finish. Adjust the seasoning with more salt or lime juice if needed. Don’t forget to garnish with chopped cilantro before serving! Serve warm with tortillas and your favorite toppings.
Pro Tips
- Slice Against the Grain: For the most tender steak, make sure to slice the flank steak against the grain. This shortens the muscle fibers and makes each bite easier to chew.
- Marinate for Extra Flavor: If you have time, marinate the flank steak in lime juice and spices for 30 minutes to a few hours before cooking to enhance the flavor and tenderness.
- Use a Meat Thermometer: To achieve the perfect doneness, use a meat thermometer. Aim for 130°F (54°C) for medium-rare and 140°F (60°C) for medium.
- Customize Your Veggies: Feel free to add other vegetables like zucchini, mushrooms, or corn to the sheet pan for extra flavor and nutrition.
Tips & Tricks
How to Achieve Perfectly Cooked Steak
For juicy steak, aim for an internal temperature of 130°F (54°C) for medium-rare. Let the steak rest for about five minutes after cooking. This keeps the juices inside, making it more tender. If you prefer medium, cook it to 140°F (60°C). Use a meat thermometer for accuracy.
Vegetable Cooking Tips
Choose vibrant bell peppers and sweet onions for the best taste. Slice them into even pieces to ensure they cook at the same rate. Thin strips work best for quick roasting. You can add zucchini or mushrooms for extra flavor. Just make sure to cut them similarly to your other veggies.
Enhancing Flavor Profiles
To switch things up, consider adding a marinade. Mix olive oil, lime juice, and spices for a tangy soak. Let the steak marinate for at least 30 minutes. If you want a kick, add cayenne pepper or jalapeños. Experiment with different herbs like oregano or thyme for unique flavor notes.
Variations
Different Proteins
You can switch out flank steak for other proteins. Chicken works well and cooks quickly. Shrimp adds a nice seafood twist. If you’re looking for a plant-based option, tofu is great too. Just remember to press the tofu to remove excess water. This helps it absorb the flavors better. Adjust cooking times based on the protein you choose. Chicken and shrimp cook faster than steak.
Flavorful Additions
Adding seasonal veggies or fruits brightens up your fajitas. Pineapple brings a sweet touch that balances the spice. Zucchini adds a nice crunch and absorbs flavors well. Get creative! You can mix in corn or mushrooms for extra texture. Think about what’s fresh at your local market. Each season offers unique options that can enhance this dish.
Spice Level Adjustments
You can easily change the spice level in your fajitas. If you like it mild, reduce the chili powder. You can also skip the smoked paprika. For more heat, add diced jalapeños or cayenne pepper. Taste as you go! This way, you can adjust the flavors to match your preference. Remember, it’s all about what you enjoy.
Storage Info
Storing Leftovers
After enjoying your sheet pan steak fajitas, let any leftovers cool. Place them in airtight containers. This keeps your fajitas fresh. You can store them in the fridge for up to three days. If you want to keep them longer, consider freezing. Just remember to label the container with the date.
Reheating Guidelines
When it’s time to eat your leftovers, reheating is key. Use the oven for the best results. Preheat your oven to 350°F (177°C). Place the fajitas on a baking sheet. Cover them with foil to keep moisture in. Heat for about 10 to 15 minutes, or until warm. This keeps the steak tender and the veggies crisp. You can also use a microwave, but the oven works better for texture.
Freezing Fajitas
To freeze your fajitas, first let them cool completely. Pack them in freezer-safe bags. Squeeze out as much air as you can before sealing. You can freeze them for up to three months. When ready to eat, thaw them overnight in the fridge. Reheat using the oven for the best taste. This way, you can enjoy this meal anytime!
FAQs
Can I use frozen steak for this recipe?
You can use frozen steak, but fresh is best. Frozen steak takes longer to cook. Thaw it first for even cooking. If you cook it frozen, add extra time. This may change the texture, making it less tender. For the best results, I suggest using fresh flank steak.
What can I serve with sheet pan steak fajitas?
There are many great sides to pair with fajitas. Here are some ideas:
- Mexican rice
- Black beans
- Refried beans
- Corn salad
- Guacamole
- Salsa
- Sour cream
These sides add flavor and texture. You can mix and match to suit your taste.
How to customize the dish for dietary restrictions?
You can easily adapt this dish. For gluten-free fajitas, use corn tortillas. If you want a dairy-free option, skip the sour cream and cheese. You can also use oil instead of butter for cooking. If you need a low-carb option, serve it with lettuce wraps instead of tortillas. These tips help you enjoy fajitas no matter your dietary needs.
You can create delicious sheet pan steak fajitas with simple ingredients and steps. We covered the main ingredients, key seasonings, and ways to serve this dish. Remember to cook the steak just right and choose veggies that add flavor. I shared tips for variations, storage, and reheating, so you can enjoy these fajitas anytime. Try using different proteins or spices to make them your own. Now, gather your ingredients and get cooking! Your tasty fajitas await!

Sheet Pan Steak Fajitas
Ingredients
1.5 lbs flank steak, sliced into thin strips
2 bell peppers (one red, one green), sliced
1 large onion, sliced
2 tablespoons olive oil
2 teaspoons chili powder
1 teaspoon ground cumin
1 teaspoon smoked paprika
1/2 teaspoon garlic powder
1/2 teaspoon onion powder
Salt and pepper to taste
Juice of 1 lime
Fresh cilantro, chopped (for garnish)
Warm tortillas (for serving)
Instructions
Preheat your oven to 450°F (232°C). Line a large baking sheet with parchment paper for easy cleanup.
In a large bowl, combine the sliced flank steak, bell peppers, and onion.
Drizzle the olive oil over the mixture. Then, sprinkle the chili powder, ground cumin, smoked paprika, garlic powder, onion powder, salt, and pepper. Toss everything together until the meat and vegetables are well-coated with the seasoning.
Spread the mixture evenly onto the prepared baking sheet in a single layer.
Roast in the preheated oven for 20-25 minutes, stirring halfway through, until the steak is cooked to your desired doneness and the vegetables are tender and slightly charred.
Remove from the oven and squeeze fresh lime juice over the top. Adjust seasoning with more salt or lime juice if needed.
Garnish with chopped cilantro before serving.
Serve the steak and veggie mixture warm with tortillas and your favorite toppings (sour cream, guacamole, or salsa).
Prep Time: 10 min | Total Time: 35 min | Servings: 4
Sheet Pan Steak Fajitas
Ingredients
- 1.5 lbs flank steak, sliced into thin strips
- 2 whole bell peppers (one red, one green), sliced
- 1 large onion, sliced
- 2 tablespoons olive oil
- 2 teaspoons chili powder
- 1 teaspoon ground cumin
- 1 teaspoon smoked paprika
- 0.5 teaspoon garlic powder
- 0.5 teaspoon onion powder
- to taste salt and pepper
- 1 whole juice of lime
- for garnish fresh cilantro, chopped
- for serving warm tortillas
Instructions
- Preheat your oven to 450°F (232°C). Line a large baking sheet with parchment paper for easy cleanup.
- In a large bowl, combine the sliced flank steak, bell peppers, and onion.
- Drizzle the olive oil over the mixture. Then, sprinkle the chili powder, ground cumin, smoked paprika, garlic powder, onion powder, salt, and pepper. Toss everything together until the meat and vegetables are well-coated with the seasoning.
- Spread the mixture evenly onto the prepared baking sheet in a single layer.
- Roast in the preheated oven for 20-25 minutes, stirring halfway through, until the steak is cooked to your desired doneness and the vegetables are tender and slightly charred.
- Remove from the oven and squeeze fresh lime juice over the top. Adjust seasoning with more salt or lime juice if needed.
- Garnish with chopped cilantro before serving.
- Serve the steak and veggie mixture warm with tortillas and your favorite toppings (sour cream, guacamole, or salsa).


![- 1 cup Arborio rice - 4 cups vegetable broth - 1 cup assorted mushrooms (cremini, shiitake, oyster), sliced - 1 small onion, finely chopped - 2 cloves garlic, minced Arborio rice is the star of the show. This rice has a high starch content, which gives risotto its creamy texture. You can use various mushrooms to add depth. I love using cremini, shiitake, and oyster mushrooms. They give a rich flavor that shines through. Vegetable broth is essential. It infuses the rice with flavor. Keep it warm in a saucepan as you cook. Aromatics like onion and garlic lay the base for the dish. They add sweetness and depth when sautéed until soft. - 1/2 cup grated Parmesan cheese or nutritional yeast - Various types of mushrooms for changes - Vegan butter option Adding Parmesan cheese enhances the creaminess. If you're vegan, nutritional yeast is a great substitute. You can also swap in different mushrooms. Try portobello or button mushrooms for a twist. If you want to make it vegan, use vegan butter instead of regular butter. - Skillet for cooking - Saucepan for broth - Ladle for adding broth A good skillet is key for sautéing. Use a wide one to cook the mushrooms evenly. The saucepan keeps your broth warm. A ladle makes it easy to add broth bit by bit. This helps the rice absorb the liquid and become creamy. For the full recipe, check out the [Full Recipe]. Warm broth is key for great risotto. It helps the rice cook evenly and stay creamy. Cold broth can shock the rice and ruin the dish. To keep your broth warm, set it on low heat in a saucepan. Stir it gently now and then. This will help keep it at the right temperature until you need it. First, heat your olive oil and butter in a skillet over medium heat. Add the chopped onion. Cook for 3 to 4 minutes until it is soft and clear. Next, stir in minced garlic. Let it cook for about 30 seconds until fragrant. Now, add your sliced mushrooms. Cook them for 5 to 7 minutes. They should be tender and lightly browned for the best flavor. Toasting the Arborio rice brings out its nutty flavor. Add the rice to the skillet and stir it well to coat it in oil and butter. Toast the rice for about 2 minutes. You will see it start to turn clear around the edges. Now, it's time to add the broth. Use a ladle to add one scoop of warm broth at a time. Stir the rice often. Wait until most of the broth is absorbed before adding more. This process takes 18 to 20 minutes. Keep stirring until the rice is creamy and just firm to the bite. When the risotto is done, stir in grated Parmesan cheese or nutritional yeast. Add dried thyme, salt, and pepper to taste. Mix it all together until creamy. Let it sit for a couple of minutes to thicken. For the complete guide, you can refer to the Full Recipe. To make your risotto creamy, you need to stir often. Stirring helps release the starch from the rice. This starch gives risotto its signature creaminess. Use a wooden spoon for the best results. Patience is key. Don’t rush the process. Add broth slowly, one ladle at a time. Wait until the rice absorbs the broth before adding more. This method takes about 18 to 20 minutes. Start with salt and pepper to season your risotto. Taste as you go. You want a rich and balanced flavor. Fresh herbs, like thyme or parsley, really boost the taste. Adding cheese enhances the creaminess. I like to use grated Parmesan. If you want a vegan option, try nutritional yeast. It gives a cheesy flavor without dairy. Be careful not to overcook or undercook the rice. Overcooked rice turns mushy, while undercooked rice stays hard. Aim for al dente, which means it should have a slight bite. Do not skip the toasting process. Toasting the Arborio rice in oil and butter adds depth to the flavor. It helps the rice absorb the broth better. Follow these tips for a perfect Mushroom Risotto every time! For the full recipe and all the steps, check out the Full Recipe. {{image_2}} For a vegetarian risotto, use plant-based cheeses like cashew or almond cheese. These options melt well and add a creamy touch. If you like a nutty flavor, try a vegan cheese with a hint of garlic. For a vegan risotto, nutritional yeast works great. It adds a cheesy taste without dairy. When it comes to broth, vegetable broth is the best choice for flavor. But you can also use mushroom broth for a deeper taste. This adds umami notes that enhance the dish. You can add proteins like chicken or shrimp for a heartier dish. Cook the protein separately, then stir it into the risotto just before serving. This keeps everything warm and tasty. For a plant-based option, consider adding lentils or chickpeas. They provide protein and fiber, making the meal more filling. To boost flavor, include a splash of white wine. Add it after sautéing the mushrooms but before adding the broth. This step adds acidity and depth. You can also toss in vegetables like peas or spinach. They brighten the dish and add color. Adding these at the end of cooking keeps them vibrant. Enjoy experimenting with these variations to make your risotto unique. For a complete guide, check out the Full Recipe. To keep your mushroom risotto fresh, use airtight containers. Glass containers work great. They won't absorb smells. Before sealing, let the risotto cool down. This helps prevent sogginess. Place it in the fridge within two hours. This keeps it safe to eat later. Reheat risotto on the stove for best results. Use a non-stick skillet. Add a splash of broth or water. Stir it often on low heat. This helps keep it creamy. You can also microwave it. Use a microwave-safe bowl and cover it. Stir every minute for even heating. Can you freeze risotto? Yes, but it changes texture. If you freeze it, use a freezer-safe container. Leave space for expansion. To thaw, move it to the fridge overnight. Reheat on the stove, adding liquid to help it regain creaminess. This way, you can enjoy your mushroom risotto later. For the full recipe, check out the complete guide. The best rice for risotto is Arborio rice. This rice has a high starch content. As it cooks, it releases this starch, creating a creamy texture. Arborio rice also absorbs flavors well, making it great for dishes like Mushroom Risotto. You can find it in most grocery stores. Yes, you can use regular broth. Chicken broth adds a different flavor to the risotto. However, vegetable broth keeps it lighter and plant-based. Each broth option will change the taste slightly, so pick what you like best. If your risotto is dry, add more warm broth slowly. Stir it well to help the rice absorb the liquid. If it’s gummy, you may have added too much liquid too fast. Stirring less helps too. Always cook the rice until it is creamy but not mushy. Yes, Mushroom Risotto is gluten-free. The main ingredients, like Arborio rice and vegetable broth, do not contain gluten. Always check labels on broth to ensure no hidden gluten is present. Enjoy this dish worry-free! To make Mushroom Risotto ahead, cook it as normal but stop cooking a bit early. Let it cool and store it in an airtight container. When ready to serve, reheat it on low heat, adding a splash of broth to restore creaminess. For a detailed guide on making this dish, check the Full Recipe for Mushroom Risotto. Mushroom risotto is creamy and delightful. It includes Arborio rice, assorted mushrooms, and warm broth. You can play with the flavors using optional ingredients like cheese or different mushrooms. Remember to sauté your aromatics and add broth slowly for the best texture. Avoid common mistakes, such as overcooking the rice. Store leftovers well and reheat properly to enjoy again. With these tips, you’ll make a risotto that’s both delicious and satisfying. Enjoy this dish with your loved ones or as a comforting solo treat. Happy cooking!](https://dailydishlab.com/wp-content/uploads/2025/06/605d9e12-4d99-4b54-946e-78c72948a8ac-768x768.webp)
![To make Chicken Alfredo Lasagna, you need simple and tasty ingredients. Here’s what you will need: - 8 lasagna noodles - 2 cups cooked chicken, shredded - 2 cups ricotta cheese - 2 cups mozzarella cheese, shredded - 1 cup grated Parmesan cheese - 3 cups Alfredo sauce (store-bought or homemade) - 1 teaspoon garlic powder - 1 teaspoon Italian seasoning - Salt and pepper to taste These ingredients work together to create a creamy and comforting dish. The lasagna noodles give it structure, while the chicken adds protein. Ricotta and mozzarella create a rich, cheesy base. Alfredo sauce makes it all creamy and delicious. You can add a few garnishes to make your Chicken Alfredo Lasagna even better. Here are some ideas: - Fresh parsley, chopped - Extra Parmesan cheese, grated - A sprinkle of red pepper flakes for spice These garnishes not only look nice but also enhance the flavor. A touch of parsley adds color, while red pepper flakes give a little kick. Knowing the nutritional facts helps you enjoy your meal fully. For each serving of Chicken Alfredo Lasagna, you get: - Calories: 450 - Protein: 30g - Fat: 25g - Carbohydrates: 35g - Fiber: 2g - Sugar: 3g This dish is filling and satisfying. It provides a good amount of protein and energy to keep you going. Just remember that it’s rich, so enjoy it in moderation. For the full recipe, check out the section above. To make Chicken Alfredo Lasagna, start by gathering all your ingredients. This includes lasagna noodles, cooked chicken, ricotta cheese, mozzarella cheese, Parmesan cheese, and Alfredo sauce. It helps to have everything ready before you start cooking. Preheating the oven to 375°F (190°C) is essential to ensure even baking. For the lasagna noodles, boil a large pot of salted water. Add the noodles and cook them until they are al dente, about 8 to 10 minutes. After cooking, drain the noodles and rinse them under cold water. This stops the cooking process and helps them stay firm. Set the noodles aside on a clean towel or plate. Now, let’s start layering! First, spread a thin layer of Alfredo sauce on the bottom of a 9x13-inch baking dish. Place four lasagna noodles on top of the sauce. Next, add half of the chicken mixture, which includes shredded chicken and ricotta cheese. Then, sprinkle one cup of mozzarella cheese over the chicken. Pour another cup of Alfredo sauce on top. Repeat this layering: add another set of four noodles, the remaining chicken mixture, one more cup of mozzarella cheese, and another cup of Alfredo sauce. Finish with a final layer of noodles. Pour the remaining Alfredo sauce over this top layer, then sprinkle grated Parmesan cheese and any leftover mozzarella cheese. Now cover the dish with aluminum foil and bake it in the preheated oven for about 25 minutes. After 25 minutes, remove the foil and bake for another 15 to 20 minutes. The cheese should be bubbly and golden when done. Let the lasagna rest for about 10 minutes before slicing. Garnish with fresh parsley for a lovely touch. Enjoy your creamy Chicken Alfredo Lasagna! For a complete guide, refer to the Full Recipe. To get great texture in your lasagna, cook the noodles just right. Aim for al dente, which means they should still have a slight bite. This will help keep your lasagna from becoming mushy. Don't forget to rinse the noodles in cold water after boiling. This step stops the cooking and prevents them from sticking together. Making homemade Alfredo sauce is simple and rewarding. You will need butter, heavy cream, and Parmesan cheese. Start by melting butter in a pan. Add heavy cream and let it simmer. Stir in grated Parmesan until smooth. Season with garlic powder and salt. This sauce will make your lasagna extra creamy and delicious. When serving Chicken Alfredo Lasagna, a fresh salad pairs nicely. A side of garlic bread is also a great choice. For drinks, consider a light white wine or sparkling water with lemon. This adds a refreshing touch to your meal. You can find the full recipe for Chicken Alfredo Lasagna above to guide you. {{image_2}} You can easily make a vegetarian version. Just swap the chicken for mushrooms or spinach. Use a blend of ricotta and cottage cheese for texture. This change keeps the dish creamy and rich without meat. Gluten-free lasagna noodles work great in this dish. Look for brands made from rice or corn. They cook similarly to regular noodles. Just follow the package instructions closely. This way, everyone can enjoy your Chicken Alfredo Lasagna. Feel free to add veggies for extra flavor and nutrients. Zucchini, bell peppers, or broccoli are great choices. Just sauté them lightly before adding to the layers. This adds color and a healthy twist to your lasagna. To store leftover Chicken Alfredo Lasagna, let it cool first. Then, place it in an airtight container. You can keep it in the fridge for up to three days. Make sure to cover the dish tightly to prevent it from drying out. If you want to freeze your lasagna, wrap it well in plastic wrap and then in foil. You can freeze it for up to three months. It’s best to freeze it before baking. When you're ready to eat it, thaw it in the fridge overnight. To reheat your lasagna, preheat your oven to 350°F (175°C). Place the lasagna in an oven-safe dish. Cover it with foil to keep it moist. Heat for about 25-30 minutes or until it’s hot all the way through. If you want a bubbly top, uncover it for the last 5-10 minutes. Enjoy your creamy Chicken Alfredo Lasagna! For the complete recipe, check out [Full Recipe]. Yes, you can use no-boil lasagna noodles. They save time and effort. Just layer them as you would regular noodles. They will cook in the oven with the sauce. This method keeps your lasagna moist and creamy. Chicken Alfredo Lasagna lasts about 3 to 5 days in the fridge. Make sure to store it in an airtight container. This keeps it fresh and tasty. Just reheat individual portions in the microwave or oven. Enjoy it warm, and it tastes almost as good as fresh! If you need substitutions, here are some easy swaps: - Use cottage cheese instead of ricotta. - Swap mozzarella for provolone for a bolder flavor. - Try a white sauce if you don’t have Alfredo. - You can replace chicken with cooked spinach for a veggie version. These changes still give you a great taste and texture in your lasagna. Check out the Full Recipe for more ideas! This blog post covered how to make Chicken Alfredo Lasagna, from ingredients to storage tips. I shared step-by-step instructions, helpful tricks, and tasty variations. With this guide, you can enjoy a rich, creamy dish that fits your needs, whether you're vegetarian or gluten-free. Remember to store any leftovers properly and try my tips for reheating. Get ready to savor this easy-to-make favorite!](https://dailydishlab.com/wp-content/uploads/2025/06/d9fb5a23-c67e-4c93-be8f-149e76ff08bb-768x768.webp)