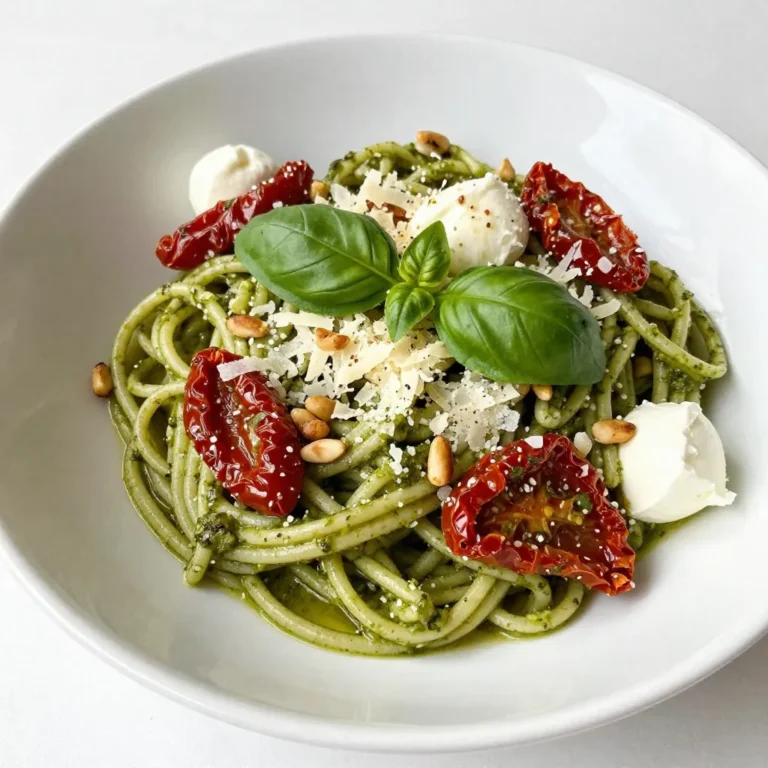
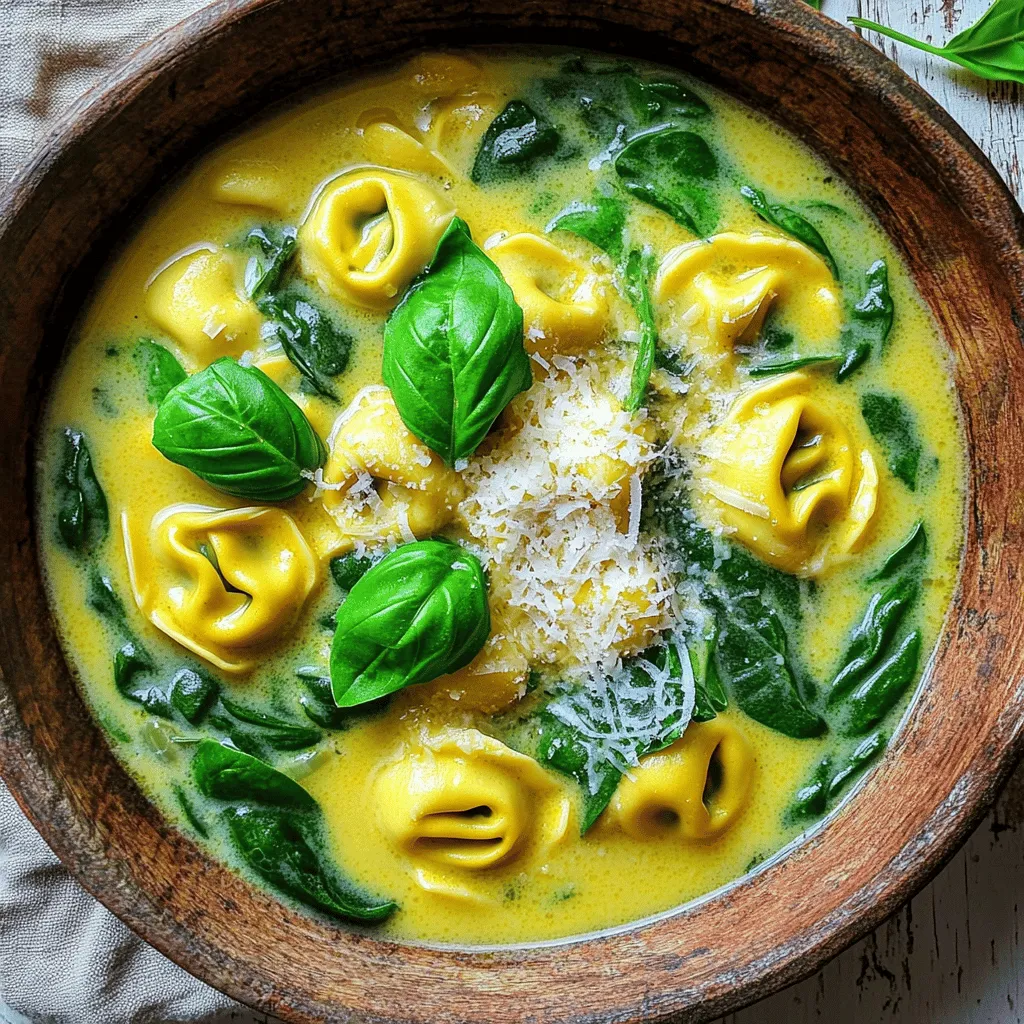
Creamy Tuscan Tortellini Soup Savory and Comforting Dish

Warm your heart and fill your belly with Creamy Tuscan Tortellini Soup, a dish that brings comfort and joy to any table. With rich flavors from fresh herbs and a creamy base, this recipe is perfect for cozy nights or quick lunches. Dive into my step-by-step guide to create your own bowl of savory goodness, packed with tortellini and vibrant greens. You won’t want to miss the tips to make this soup your own!
Why I Love This Recipe
- Comforting and Creamy: This soup is the perfect bowl of comfort, combining rich flavors with creamy goodness that warms you up on a chilly day.
- Quick and Easy: With just 30 minutes from start to finish, this recipe is ideal for busy weeknights while still feeling gourmet.
- Loaded with Flavor: The combination of garlic, herbs, and spinach elevates this soup, making each spoonful burst with deliciousness.
- Versatile Ingredients: You can easily customize the soup by adding other vegetables or proteins, making it a great base for creativity.
Ingredients
Main Ingredients for Creamy Tuscan Tortellini Soup
- 2 tablespoons olive oil
- 1 medium onion, diced
- 3 cloves garlic, minced
- 1 teaspoon dried oregano
- 1 teaspoon dried basil
- 1/4 teaspoon red pepper flakes (optional)
- 4 cups vegetable broth
- 1 (14.5-ounce) can diced tomatoes, undrained
- 1 cup heavy cream
- 9 ounces cheese tortellini (fresh or frozen)
- 2 cups baby spinach
- Salt and pepper to taste
- Grated Parmesan cheese for serving
- Fresh basil leaves for garnish
These ingredients make a rich, creamy soup. The olive oil brings flavor, and the onion and garlic add depth. Oregano and basil give the soup a classic Italian taste. The broth and tomatoes create a savory base, while the heavy cream adds a luscious texture. Tortellini makes it filling, and spinach adds color and nutrition.
Optional Ingredients and Substitutions
- Coconut milk or half-and-half as cream alternatives
- Fresh or frozen tortellini
- Kale or arugula as alternative greens
You can switch heavy cream with coconut milk or half-and-half for a lighter version. Fresh or frozen tortellini works well, so pick what you have. If you want to change the greens, kale or arugula can add different flavors and textures.
Recommended Toppings
- Grated Parmesan cheese and fresh basil
- Crusty bread for serving
- Cooked chicken or sausage for protein
Top your soup with grated Parmesan cheese and fresh basil for extra flavor. Serve it with crusty bread to soak up the soup. You can also add cooked chicken or sausage to make the dish heartier.

Step-by-Step Instructions
Preparing the Base
Start by heating the olive oil in a large pot over medium heat. Once the oil is hot, add the diced onion. Cook it for about 5 minutes until it becomes soft and clear. This step builds the base flavor.
Next, stir in the minced garlic along with the dried oregano, dried basil, and red pepper flakes. Sauté this mix for one minute. You want to release the flavors from the garlic and herbs. The aroma will be amazing!
Building the Soup
Now, pour in the vegetable broth and the can of diced tomatoes. Do not drain the tomatoes; their juice adds flavor! Bring this mixture to a gentle boil, then lower the heat. Let it simmer for about 10 minutes. This allows the flavors to blend well.
After 10 minutes, add the heavy cream. Stir it in slowly. If the soup seems too thick, add a little more broth or water. You want a nice, creamy consistency. Taste the soup and adjust the seasoning as needed.
Cooking the Tortellini
It’s time for the star of the dish: the tortellini! If you’re using fresh tortellini, cook it for about 3 to 5 minutes. For frozen tortellini, it will take around 7 to 9 minutes. Stir the tortellini into the soup while it cooks.
In the last minute, fold in the baby spinach. It will wilt quickly. This adds color and nutrition to the soup. Taste again and adjust the seasoning with salt and pepper, if needed.
Now your Creamy Tuscan Tortellini Soup is ready!
Pro Tips
- Use Fresh Herbs: Fresh basil or oregano can enhance the flavor profile of your soup compared to dried herbs.
- Adjust Creaminess: If you prefer a lighter soup, substitute half of the heavy cream with milk or a non-dairy alternative.
- Customize Your Greens: Feel free to add other greens like kale or Swiss chard for extra nutrition and flavor.
- Leftover Storage: Store any leftovers in an airtight container in the fridge for up to 3 days, but note that the tortellini may absorb some soup liquid.
Tips & Tricks
Achieving the Perfect Creaminess
To make your soup creamy, start with heavy cream. If it gets too thick, add more broth or water. This helps you reach your ideal texture. Fresh ingredients also boost flavor. Use fresh spinach and high-quality broth for the best taste.
Timing & Control
It’s key to cook tortellini just right. Fresh tortellini cooks in about 3 to 5 minutes. Frozen tortellini needs around 7 to 9 minutes. Stir gently to avoid breaking them. Add spinach in the last minute of cooking. This keeps the bright green color and nutrients intact.
Flavor Enhancements
For extra flavor, try adding spices like thyme or parsley. A pinch of nutmeg can add warmth, too. Always taste your soup before serving. Adjust salt and pepper as needed. This ensures a well-balanced dish.
Variations
Vegetarian and Vegan Options
You can easily make this soup vegetarian or vegan. Use plant-based cream instead of heavy cream. Almond, coconut, or soy cream works well. Swap the vegetable broth for a homemade or store-bought vegan broth. Add more vegetables to boost nutrition. Chopped carrots, bell peppers, or zucchini add color and flavor.
Protein-packed Variations
If you want more protein, incorporate chicken or shrimp. Cook them in the pot before adding the broth. This gives the soup a rich flavor. You can also use meat tortellini for a heartier soup. It adds a nice texture and makes it more filling.
Flavor Profile Changes
You can change the flavor profile by experimenting with herbs. Try adding thyme or rosemary for a different taste. If you like it spicy, add more red pepper flakes. This gives the soup a kick and enhances the overall flavor.
Storage Info
Refrigerating the Soup
To store leftover Creamy Tuscan Tortellini Soup, let it cool first. Place the soup in an airtight container. This helps keep it fresh. It will stay good in the fridge for about three days. If you want the best taste, eat it sooner. Always reheat thoroughly before eating.
Freezing Tips
Yes, you can freeze Creamy Tuscan Tortellini Soup. To do this, pour the soup into freezer-safe containers. Leave some space at the top for expansion. It can last for about three months in the freezer. To reheat, thaw it overnight in the fridge. Warm it slowly on the stove, stirring often.
Meal Prep Considerations
You can prepare parts of the soup ahead of time. Chop onions and garlic, and store them in the fridge. Cook the tortellini separately and add it just before serving. This makes quick lunches or dinners easy. Just heat the soup, add tortellini, and enjoy a warm meal.
FAQs
Can I use frozen tortellini in this recipe?
Yes, you can use frozen tortellini. Just remember to check the cooking time. For frozen tortellini, cook for about 7–9 minutes. This ensures they are fully cooked and tender. If you use fresh tortellini, the cooking time is shorter, about 3–5 minutes. Adjust your cooking time based on what you choose.
Is this soup gluten-free?
This soup can be gluten-free with some changes. Many stores sell gluten-free tortellini. Check the packaging to ensure it fits your needs. You can also use gluten-free pasta if you cannot find gluten-free tortellini. It’s a great way to enjoy this soup without gluten.
What can I serve with Creamy Tuscan Tortellini Soup?
I recommend serving this soup with crusty bread. A nice baguette or garlic bread pairs well. You can also add a fresh salad for a light touch. A simple green salad with a lemon vinaigrette works great. These sides balance the rich flavors of the soup.
How can I make this soup lighter?
To create a lighter version, consider using lighter cream options. You can use half-and-half or coconut milk. These substitutes will reduce the calorie count. Also, try adding more vegetables like zucchini or carrots. They make the soup heartier without adding many calories.
Creamy Tuscan Tortellini Soup brings comfort and flavor to your table. We covered the key ingredients, from olive oil and garlic to tortellini and fresh greens. I shared simple steps to prepare and build the soup’s base. You can customize it with optional ingredients and tasty toppings. Remember to adjust flavors and enjoy experimenting with spices. With these tips, this soup can fit any meal. Finally, don’t forget to try variations for a new experience each time you cook. This soup is sure to impress in any kitchen.

Creamy Tuscan Tortellini Soup
Ingredients
2 tablespoons olive oil
1 medium onion, diced
3 cloves garlic, minced
1 teaspoon dried oregano
1 teaspoon dried basil
1/4 teaspoon red pepper flakes (optional)
4 cups vegetable broth
1 (14.5-ounce) can diced tomatoes, undrained
1 cup heavy cream
9 ounces cheese tortellini (fresh or frozen)
2 cups baby spinach
Salt and pepper to taste
Grated Parmesan cheese for serving
Fresh basil leaves for garnish
Instructions
In a large pot, heat the olive oil over medium heat. Add the diced onion and cook until it becomes translucent, about 5 minutes.
Stir in the minced garlic, dried oregano, dried basil, and red pepper flakes. Sauté for another minute until fragrant.
Pour in the vegetable broth and canned diced tomatoes. Bring the mixture to a slight boil, then reduce the heat and let it simmer for 10 minutes.
Add the heavy cream to the pot, stirring well to combine. If the soup is too thick, add a little more broth or water to achieve your desired consistency.
Stir in the cheese tortellini and cook according to package instructions, usually about 3–5 minutes for fresh tortellini or 7–9 minutes for frozen tortellini.
In the last minute of cooking, gently fold in the baby spinach until wilted. Season the soup with salt and pepper to taste.
Remove from heat and serve the soup hot, topped with grated Parmesan cheese and fresh basil leaves for garnish.
Prep Time: 10 minutes | Total Time: 30 minutes | Servings: 4-6
Creamy Tuscan Tortellini Soup
Ingredients
- 2 tablespoons olive oil
- 1 medium onion, diced
- 3 cloves garlic, minced
- 1 teaspoon dried oregano
- 1 teaspoon dried basil
- 1 quarter teaspoon red pepper flakes (optional)
- 4 cups vegetable broth
- 1 14.5-ounce can diced tomatoes, undrained
- 1 cup heavy cream
- 9 ounces cheese tortellini (fresh or frozen)
- 2 cups baby spinach
- to taste salt and pepper
- for serving grated Parmesan cheese
- for garnish fresh basil leaves
Instructions
- In a large pot, heat the olive oil over medium heat. Add the diced onion and cook until it becomes translucent, about 5 minutes.
- Stir in the minced garlic, dried oregano, dried basil, and red pepper flakes. Sauté for another minute until fragrant.
- Pour in the vegetable broth and canned diced tomatoes. Bring the mixture to a slight boil, then reduce the heat and let it simmer for 10 minutes.
- Add the heavy cream to the pot, stirring well to combine. If the soup is too thick, add a little more broth or water to achieve your desired consistency.
- Stir in the cheese tortellini and cook according to package instructions, usually about 3–5 minutes for fresh tortellini or 7–9 minutes for frozen tortellini.
- In the last minute of cooking, gently fold in the baby spinach until wilted. Season the soup with salt and pepper to taste.
- Remove from heat and serve the soup hot, topped with grated Parmesan cheese and fresh basil leaves for garnish.
![- 2 cups cooked rice (white or brown) - 1 lb boneless, skinless chicken breasts, diced - 2 cups broccoli florets (fresh or frozen) - 1 cup heavy cream - 1 cup chicken broth - 1 cup grated Parmesan cheese - 2 cups shredded mozzarella cheese - 2 tablespoons olive oil - 3 cloves garlic, minced - 1 teaspoon Italian seasoning - Salt and pepper to taste - Fresh parsley, chopped (for garnish) When creating my Chicken and Rice Skillet Alfredo Bake, I focus on fresh and simple ingredients. The rice serves as the base, and you can use either white or brown rice. Both options bring a nice texture. I always use boneless, skinless chicken breasts because they are lean and cook quickly. Adding broccoli is a great way to boost nutrition. You can use fresh florets or frozen ones, whichever you have on hand. The heavy cream and chicken broth create a rich sauce that binds everything together. I love using both Parmesan and mozzarella cheese. Parmesan adds a sharp flavor, while mozzarella gives a creamy melt. Olive oil is my go-to for sautéing the chicken. Garlic brings a wonderful aroma and taste to the dish. Italian seasoning adds depth to the flavor. Finally, I season with salt and pepper to enhance all the ingredients. A sprinkle of fresh parsley adds a pop of color and freshness to finish the dish. This recipe is perfect for families or a cozy dinner with friends. You can find the full recipe [here]. - Preheat your oven to 375°F (190°C). Getting the oven hot is key to a great bake. This helps the cheese melt perfectly and gives a nice color to the top. - Heat olive oil over medium heat. - Season and cook diced chicken until no longer pink (5-7 mins). In a large skillet, add olive oil. Let it heat for a minute. Then, toss in your seasoned chicken. You want to cook it until it’s no longer pink. This usually takes about 5 to 7 minutes. Stir often to make sure it cooks evenly. - Add garlic, rice, and broccoli to the skillet. - Combine the cream mixture and cheese before baking. Once the chicken is cooked, add minced garlic. Cook it for just a minute until fragrant. Then, stir in the cooked rice and broccoli. Mix well. In a bowl, whisk together heavy cream, chicken broth, and half the Parmesan cheese. Pour this over the chicken and rice. Stir until everything is combined. This step is crucial because it brings all the flavors together. It’s the heart of the dish. After mixing, sprinkle the top with mozzarella and the rest of the Parmesan. Now, your dish is ready for the oven! For the full recipe, refer to the above ingredients and steps. - Make sure the chicken is cooked through but not dry. - To check, cut into a piece. It should be white, not pink. If it is still pink, keep cooking it for a bit longer. - Choose the right type of rice for the perfect texture. - I suggest using long-grain rice. It holds up well when mixed with sauce. Brown rice gives a nutty taste, while white rice is softer. - Garnish with freshly chopped parsley for color. - Just a sprinkle adds bright green and freshness to your dish. It makes it look fancy! - Serve with a side salad for a balanced meal. - A simple green salad with a light dressing can complement the creamy dish well. It adds crunch and freshness. These tips can help you create a tasty Chicken and Rice Skillet Alfredo Bake that looks great on the table. For the full recipe, check the above section. {{image_2}} You can easily change this recipe to fit your needs. Here are some quick ideas: - Use cauliflower rice for a low-carb version. This swap keeps the dish tasty and light. - Substitute chicken with shrimp or tofu for different proteins. Both options add unique flavors and textures. Want to spice things up? Here are some flavor additions: - Add spicy seasonings for heat. A pinch of cayenne or red pepper flakes can make it pop. - Incorporate different vegetables like bell peppers or spinach. These veggies not only add color but also boost nutrition. Feel free to mix and match these ideas to create your perfect Chicken and Rice Skillet Alfredo Bake. Your taste buds will thank you! For the full recipe, check out the details above. Store your Chicken and Rice Skillet Alfredo Bake in an airtight container. It keeps well in the fridge for up to three days. If you have extra portions, freezing them is a great option. For freezing, use freezer-safe bags or containers. Remove as much air as possible to prevent freezer burn. Label the container with the date before placing it in the freezer. You can reheat your dish in the microwave or oven. For the microwave, place a portion in a bowl and cover it with a damp paper towel. Heat for one to two minutes, stirring halfway. For the oven, preheat it to 350°F (175°C). Place the dish in an oven-safe container, cover it with foil, and heat for about 20 minutes. This method helps keep the cheese nice and melty. To maintain texture, add a splash of cream or broth before reheating. This helps prevent it from drying out. Enjoy your comforting meal again! - Can I make this dish ahead of time? Yes, you can. Prepare the dish up to the baking step, then store it in the fridge. When ready, bake it for about 25 minutes at 375°F (190°C). This makes it easy for busy days. - How do I know when the chicken is cooked through? The chicken should be white and no longer pink in the center. You can also use a meat thermometer. It should read 165°F (74°C) to ensure it's safe to eat. - What can I serve with Chicken and Rice Skillet Alfredo Bake? This dish pairs well with a fresh side salad or steamed vegetables. You can also serve garlic bread for added comfort. - Is it possible to make this dish gluten-free? Yes, you can make it gluten-free. Just use gluten-free pasta or rice. Check that your chicken broth does not contain gluten. This way, everyone can enjoy the meal! For the full recipe, check out the detailed instructions above and enjoy a hearty comfort meal! This Chicken and Rice Skillet Alfredo Bake is simple and tasty. We covered every step, from selecting fresh ingredients to storing leftovers. Remember, you can customize the recipe with different proteins and spices. This dish is perfect for a quick dinner. Keep experimenting with flavors and textures. Enjoy the cooking process and have fun with your food. Your family will love this meal!](https://dailydishlab.com/wp-content/uploads/2025/06/4392da79-0369-4862-8466-e1a2d5a9e46b-768x768.webp)
![For a tasty beef stir fry, you need some key items. They include: - 1 lb (450g) flank steak, sliced thinly against the grain - 2 tablespoons soy sauce - 1 tablespoon cornstarch - 2 tablespoons vegetable oil These ingredients form the base of your dish. The flank steak gives a rich flavor, while the soy sauce adds a nice salty touch. Seasonings turn a good dish into a great one. For this stir fry, you will use: - 3 cloves garlic, minced - 1 tablespoon ginger, grated - 2 tablespoons oyster sauce - 1 teaspoon sesame oil - Salt and pepper to taste Garlic and ginger bring a warm, aromatic flavor. Oyster sauce adds depth, while sesame oil gives a nutty note. Fresh veggies make your stir fry colorful and healthy. I suggest: - 1 red bell pepper, sliced - 1 yellow bell pepper, sliced - 1 cup broccoli florets - 1 cup snap peas These vegetables stay crisp and bright in the stir fry. They add texture and flavor, making your meal more fun to eat. Follow this [Full Recipe] for a complete guide to making your easy beef stir fry. Start by slicing the flank steak thinly. This helps the beef cook fast and stay tender. Place the sliced beef in a bowl. Add soy sauce and cornstarch. Mix these well to coat the beef. Let it sit for about 15 minutes. This time helps the beef soak up the flavor. While it marinates, you can prepare your veggies. Heat one tablespoon of vegetable oil in a large skillet or wok over high heat. Once hot, add the marinated beef. Stir-fry for about 3 to 4 minutes. You want the beef to brown and cook through. Once it’s done, remove the beef from the skillet. Set it aside while you cook the veggies. This keeps the beef juicy and tasty. In the same skillet, add the last tablespoon of vegetable oil. Add minced garlic and grated ginger. Stir-fry these for about 30 seconds until they smell great. Next, add the sliced red and yellow bell peppers, broccoli, and snap peas. Stir-fry everything for about 5 to 7 minutes. You want the colors bright and the veggies tender-crisp. Return the cooked beef to the skillet. Pour in oyster sauce and sesame oil. Add salt and pepper to taste. Toss everything together for 1 to 2 minutes. Make sure the beef and veggies are coated in the sauce. Now, it’s ready to serve over cooked rice or noodles. For the full recipe, check out the details above. Marinating beef adds great taste. I recommend using soy sauce and cornstarch. Mix these with the beef and let it sit for 15 minutes. This makes the beef tender and juicy. The soy sauce gives it a salty kick. Cornstarch helps create a nice sear when you cook it. To get the best texture, heat your pan well. Start with high heat before adding the beef. Cook it for just 3-4 minutes. If you overcook it, the beef becomes tough. After cooking, remove it from the pan. This keeps it tender. Then, cook your veggies. Stir-fry them until they are bright and crisp. This keeps their nutrients and crunch. One big mistake is overcrowding the pan. If you add too much beef or veggies at once, they steam instead of fry. Fry in batches if needed. Another mistake is not prepping all your ingredients first. Stir fry cooks fast. Have everything ready before you start. Lastly, don’t skip the sauces. They add depth and make your dish pop. For the full recipe, check out the details above! {{image_2}} If you want to switch things up, try chicken or tofu. Both work well in stir fry. Chicken breast, sliced thin, cooks fast and absorbs flavors. Tofu brings a nice texture and is great for vegans. Use firm or extra-firm tofu for the best results. Just press it to remove excess water before cooking. You can change the veggies based on what you have. Carrots add sweetness and color. Zucchini is tender and cooks quickly. You can also use mushrooms for a savory flavor. Snap peas and green beans are great for crunch too. Mix and match to keep it fun and fresh. Want to try something new? Add some pineapple for sweetness. A splash of lime juice gives a zesty kick. You can also sprinkle sesame seeds on top for a nutty taste. If you like heat, add chili flakes or sriracha. These little changes can make your beef stir fry exciting each time you make it. For the full recipe, check out the detailed instructions above. To keep your Easy Beef Stir Fry fresh, let it cool first. Place it in an airtight container. You can store it in the fridge for up to three days. Make sure not to leave it out at room temperature for too long. Bacteria can grow quickly in warm food. Reheating is simple. You can use the microwave or a skillet. If using a microwave, heat in short bursts. Stir the food in between to heat it evenly. If using a skillet, add a splash of water or oil. Heat over medium heat while stirring until warm. You can freeze Easy Beef Stir Fry for up to three months. Use a freezer-safe container or bag. Be sure to squeeze out as much air as you can. When you want to eat it, thaw it in the fridge overnight. Reheat as mentioned before for the best taste. For the full recipe, check the earlier sections. You can make Easy Beef Stir Fry spicier by adding chili sauce or fresh chilies. A dash of sriracha or crushed red pepper can boost the heat. Start with small amounts and taste as you go. This way, you can find the perfect level of spice for your dish. Yes, you can use other cuts of beef for this stir fry. Cuts like sirloin, ribeye, or even ground beef will work. Just remember to slice them thinly. This helps them cook quickly and stay tender. Each cut adds a unique flavor and texture to your meal. Easy Beef Stir Fry pairs well with rice or noodles. You can use white rice, brown rice, or even cauliflower rice. Noodles like soba or rice noodles are also great options. For added crunch, serve with a side of fresh salad or crispy spring rolls. Easy Beef Stir Fry lasts about 3 to 4 days in the fridge. Store it in an airtight container to keep it fresh. When you reheat it, make sure it’s warmed through to avoid any cold spots. Enjoy it again for a quick lunch or dinner! For the full recipe, check out the Quick & Colorful Beef Stir Fry section. In this blog post, I covered the key ingredients and straightforward steps to make an easy beef stir fry. You learned about the best vegetables, seasonings, and cooking tips. Avoid common mistakes to get the right taste and texture. Explore variations for different diets and flavor twists. Remember to store leftovers properly and reheat them correctly for the best taste. Making stir fry is simple, fun, and opens up many options. Enjoy your cooking journey and savor your meals!](https://dailydishlab.com/wp-content/uploads/2025/06/724361ab-9d8c-4328-84bd-9e8ad7b606f6-768x768.webp)