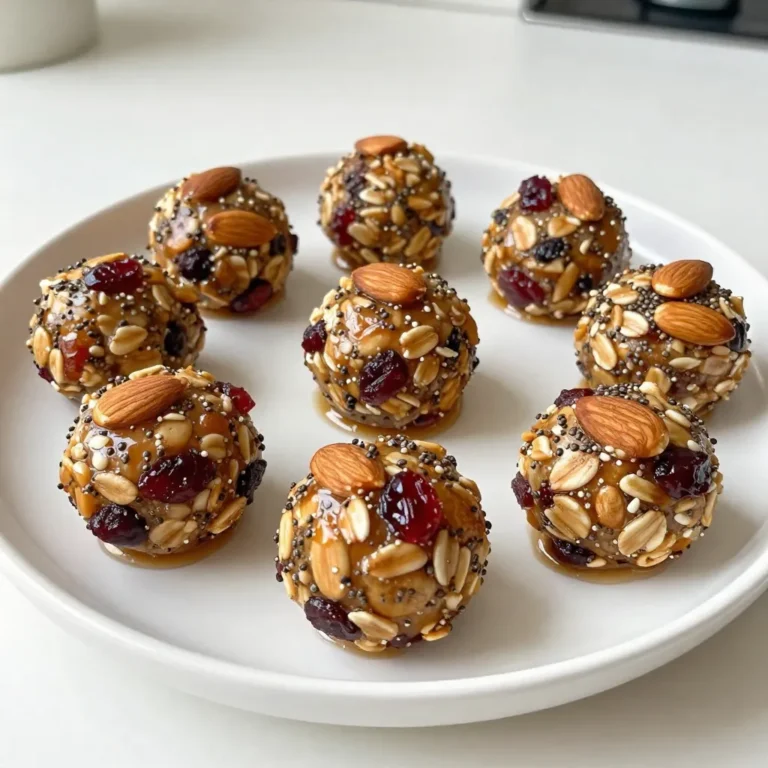
Peanut Butter Protein Balls Simple and Nutritious Snack
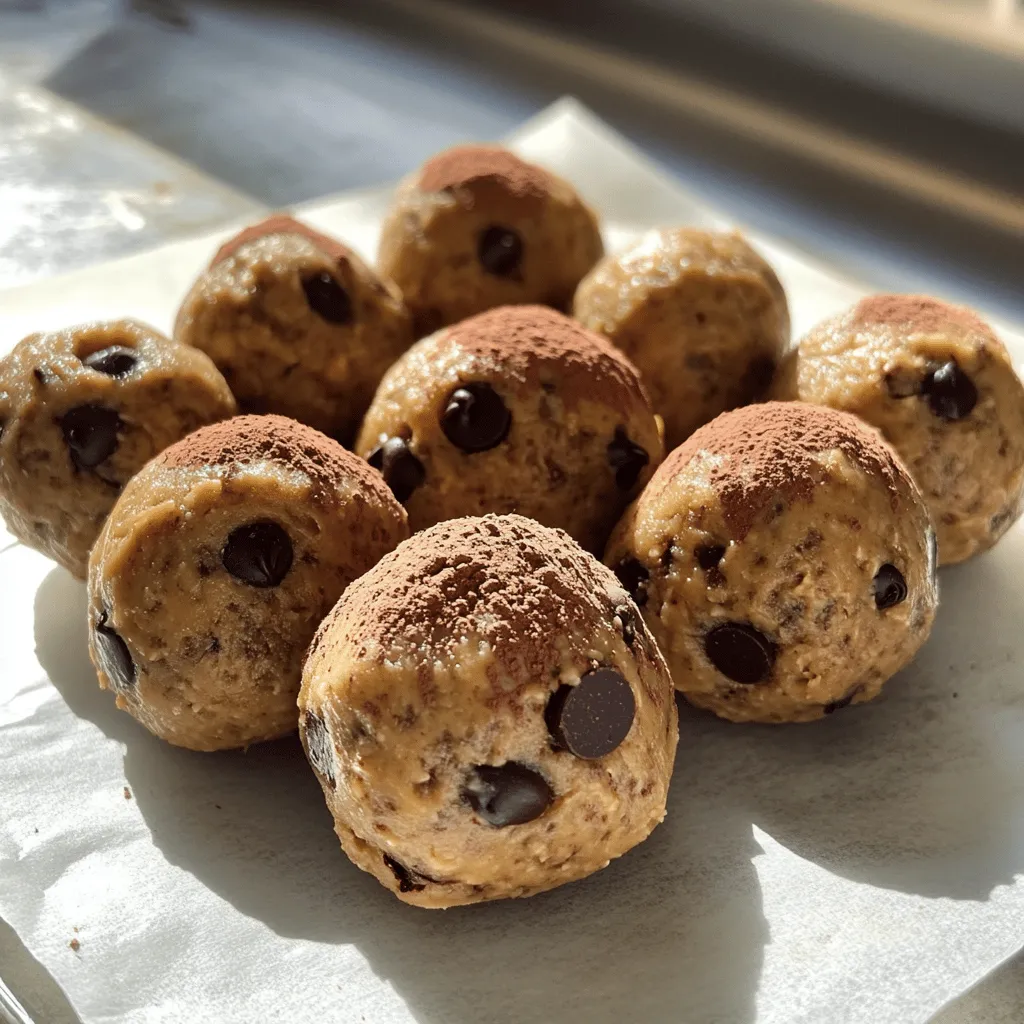
Are you looking for a quick and healthy snack? Peanut Butter Protein Balls are simple to make and packed with nutrients. I’ll guide you through easy steps, show you the best ingredients, and share tips for adding flavor. These tasty bites are perfect for busy days or a post-workout boost. Let’s dive into how to whip up these delicious snacks that both you and your family will love!
Why I Love This Recipe
- Nutritious Snack: These protein balls are packed with healthy ingredients, providing a great balance of protein, fiber, and healthy fats.
- Easy to Make: With just a few simple steps and no baking required, you can whip these up in no time!
- Customizable: You can easily modify the recipe by adding your favorite mix-ins, such as nuts or seeds, to suit your taste.
- Perfect for Meal Prep: These protein balls store well in the fridge or freezer, making them a convenient on-the-go snack for busy days.
Ingredients
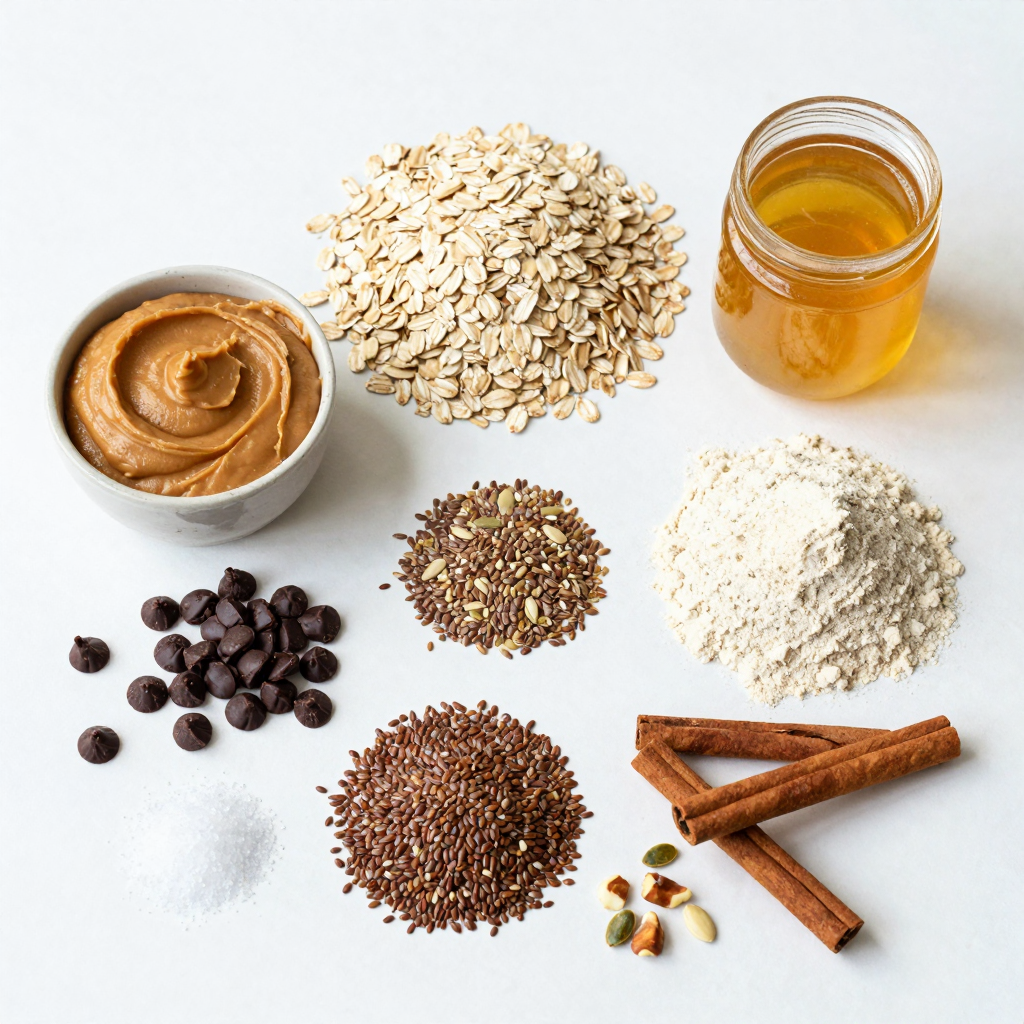
Key Ingredients for Peanut Butter Protein Balls
To make peanut butter protein balls, gather these simple ingredients:
- 1 cup natural peanut butter
- 1 cup rolled oats
- 1/4 cup honey or maple syrup
- 1/2 cup protein powder (vanilla flavor)
- 1/4 cup dark chocolate chips or cacao nibs
- 1/4 cup ground flaxseed
- 1/4 teaspoon salt
- 1 teaspoon cinnamon
- Optional: 1/2 cup chopped nuts or seeds (e.g., almonds, chia seeds)
These ingredients give the protein balls their taste and texture. The natural peanut butter offers creaminess and rich flavor. Rolled oats add a nice chewiness and fiber. Honey or maple syrup provides sweetness and binds everything together. Protein powder boosts the protein content, making them great for a snack or post-workout treat.
Nutritional Benefits of Each Ingredient
Each ingredient in peanut butter protein balls has its own benefits:
- Natural peanut butter: Packed with protein and healthy fats. It supports muscle growth and keeps you full longer.
- Rolled oats: A great source of fiber. They help with digestion and provide energy.
- Honey or maple syrup: Natural sweeteners that add flavor and quick energy.
- Protein powder: Offers a concentrated source of protein. It helps with recovery after workouts.
- Dark chocolate chips or cacao nibs: Add antioxidants and a little indulgence.
- Ground flaxseed: Rich in omega-3 fatty acids. It promotes heart health and reduces inflammation.
- Salt: Balances flavors and helps with hydration.
- Cinnamon: Adds warmth and may help regulate blood sugar levels.
Optional Add-ins for Enhanced Flavor and Nutrition
You can customize your peanut butter protein balls with these optional add-ins:
- Chopped nuts (e.g., almonds, walnuts): Add crunch and extra protein.
- Chia seeds: Boost the fiber and omega-3 content.
- Dried fruit (e.g., raisins, cranberries): Provide natural sweetness and chewiness.
- Shredded coconut: Adds a tropical twist and healthy fats.
Mixing in these extras not only enhances flavor but also increases the nutritional value. Explore different combinations to find your favorite!
Step-by-Step Instructions
Overview of Preparation
To make peanut butter protein balls, start by gathering all your ingredients. This simple recipe needs just a few items. You will need natural peanut butter, rolled oats, honey or maple syrup, protein powder, dark chocolate chips, ground flaxseed, salt, and cinnamon. Optional nuts or seeds can add crunch.
Mixing and Chilling Process
In a large mixing bowl, combine peanut butter, honey (or maple syrup), and cinnamon. Stir until the mixture is smooth. Next, add rolled oats, protein powder, ground flaxseed, and salt. Mix well until everything blends together. This is where you can get creative. If you want, fold in dark chocolate chips or cacao nibs. After mixing, cover the bowl and refrigerate it for about 30 minutes. This step helps the mixture firm up, making it easier to shape later.
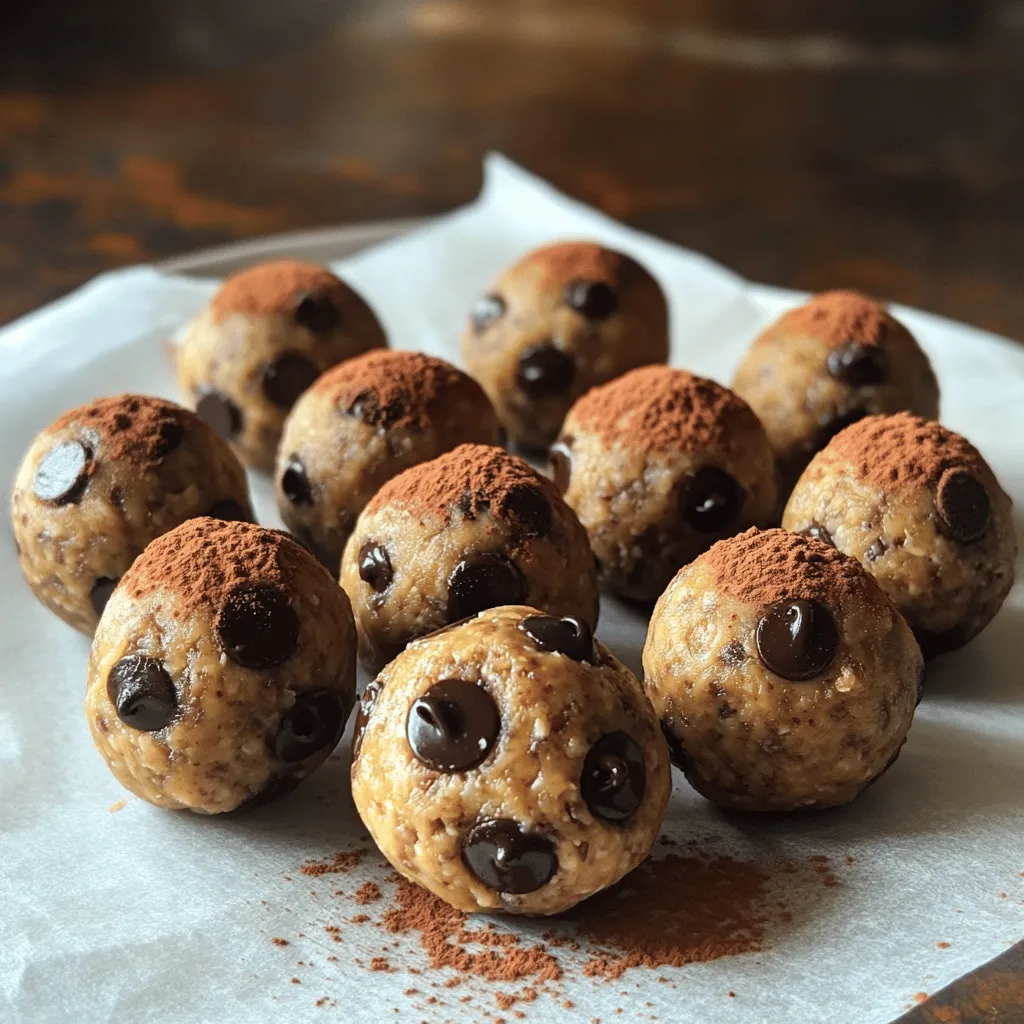
Shaping and Storing the Protein Balls
Once chilled, scoop out tablespoon-sized portions of the mixture. Roll each portion into a ball with your hands. Place the protein balls on a parchment-lined baking sheet or plate. For an extra touch, you can roll them in shredded coconut or cocoa powder. After shaping, refrigerate the balls for another 15 to 30 minutes to set completely. Store your protein balls in an airtight container in the fridge for a week, or freeze them for longer enjoyment.
Pro Tips
- Chill the Mixture: Allowing the mixture to chill for 30 minutes not only helps it firm up but also makes it easier to roll into perfect balls.
- Customize Your Flavor: Experiment with different add-ins like dried fruits or spices to create unique flavor profiles that suit your taste.
- Storage Tips: Store your protein balls in an airtight container in the refrigerator for up to a week, or freeze them for longer shelf life.
- Perfect Protein Balance: Adjust the amount of protein powder based on your dietary needs to ensure you get the right amount of protein per serving.
Tips & Tricks
Common Mistakes to Avoid
When making peanut butter protein balls, avoid using too much liquid. This can make your mixture too runny.If the mix feels too dry, add a tiny bit of water or more honey. Be careful with the protein powder. Too much can make your balls crumbly.
Another mistake is not chilling the mixture. Chilling helps the balls firm up. If you skip this step, they may fall apart when you roll them. Lastly, don’t forget to measure your ingredients correctly. This ensures a good balance of flavors and textures.
How to Make Protein Balls with Kids
Making protein balls with kids can be fun! Start by letting them help measure ingredients. This teaches them about cooking. Use a large bowl so they can mix easily. Kids can also help scoop the mixture. Use a small ice cream scoop for even portions.
Encourage creativity! Let them choose add-ins like nuts or chocolate chips. You can even set up a topping station. Kids love rolling the balls in coconut or cocoa powder. This makes cooking a fun activity for everyone.
Enhancing Flavor and Texture
To boost flavor, try adding spices like nutmeg or vanilla extract. These add warmth and depth. You can also mix in different nut butters, like almond or cashew. This gives a new twist to your protein balls.
For extra crunch, include seeds like chia or sunflower seeds. They add great texture and are packed with nutrients. If you want a sweeter taste, add a bit more honey or maple syrup.
Experiment with different mix-ins to find your favorite flavor combinations. Your protein balls can be unique and delicious!
Variations
Different Flavor Combinations
You can easily change the flavor of your peanut butter protein balls. Here are some fun ideas:
- Chocolate Lovers: Use chocolate protein powder and add cocoa powder.
- Nutty Delight: Mix in almond or cashew butter for a different taste.
- Fruity Twist: Add dried fruits like cranberries or raisins for sweetness.
- Spicy Kick: Incorporate a pinch of cayenne pepper for some heat.
These flavors can spice up your snacks and keep things interesting!
Customizing with Allergies in Mind
If you or someone you know has allergies, you can still enjoy these protein balls. Here are some tips:
- Nut-Free: Substitute peanut butter with sunbutter or soy nut butter.
- Dairy-Free: Use plant-based protein powder to keep it dairy-free.
- Gluten-Free: Choose certified gluten-free oats for a safe option.
Always check labels to ensure all ingredients meet your needs.
Vegan and Gluten-Free Options
Making vegan and gluten-free peanut butter protein balls is simple. Use these swaps:
- Replace honey with maple syrup or agave nectar for a vegan option.
- Stick to gluten-free oats to make sure they fit the gluten-free diet.
These options keep your snacks healthy and accessible to everyone. Enjoy making your protein balls just the way you like!
Storage Info
Best Practices for Short-term Storage
Store your peanut butter protein balls in an airtight container. This keeps them fresh. Place them in the fridge for up to one week. You can enjoy them cold or at room temperature. Just make sure they stay sealed to avoid drying out.
Long-term Freezing Instructions
If you want to store them longer, freezing is perfect. Line a baking sheet with parchment paper. Place the protein balls on the sheet, leaving space between each one. Freeze them for about one hour until firm. Once frozen, transfer them to a freezer-safe bag. Squeeze out the air and seal tightly. They will last up to three months in the freezer.
Signs of Spoilage
Watch for any changes in smell or texture. If they smell off or feel sticky, it’s best to toss them. Mold is a clear sign they should not be eaten. Always check before enjoying your snack. Keeping an eye on your protein balls will ensure you have a tasty treat when you need it.
FAQs
How long do homemade protein balls last?
Homemade protein balls can last up to one week in the fridge. Store them in an airtight container to keep them fresh. If you freeze them, they can last for up to three months. Just remember to separate them with parchment paper to avoid sticking.
Can I use different nut butters?
Yes, you can use different nut butters! Almond butter, cashew butter, or sunflower seed butter work well. Each nut butter adds a unique flavor. Just keep in mind that the texture and taste may change a bit based on your choice.
Are Peanut Butter Protein Balls healthy?
Peanut Butter Protein Balls are quite healthy. They are packed with protein, fiber, and healthy fats. The oats and flaxseed provide good nutrients too. As long as you watch your portion sizes, these snacks can fit well into a balanced diet. They offer energy and satisfaction without added sugars.
In this post, we explored the key ingredients that make peanut butter protein balls a tasty snack. I shared how to prepare, mix, and store them. We also covered tips to avoid common mistakes and make cooking fun with kids. You learned about flavor variations and storage best practices.
Peanut butter protein balls are simple to customize for your needs. They are nutritious and enjoyable snacks. Now you can create your own delicious protein balls with ease.

Peanut Butter Protein Balls
Ingredients
1 cup natural peanut butter
1 cup rolled oats
1/4 cup honey or maple syrup
1/2 cup protein powder (vanilla flavor)
1/4 cup dark chocolate chips or cacao nibs
1/4 cup ground flaxseed
1/4 teaspoon salt
1 teaspoon cinnamon
Optional: 1/2 cup chopped nuts or seeds (e.g. almonds, chia seeds)
Instructions
In a large mixing bowl, combine the peanut butter, honey (or maple syrup), and cinnamon until smooth.
Add in the rolled oats, protein powder, ground flaxseed, and salt. Mix well until all ingredients are fully incorporated.
Fold in the dark chocolate chips or cacao nibs and any optional nuts or seeds you’d like to add for additional crunch.
Once the mixture is well combined, cover the bowl and refrigerate for about 30 minutes. This will help the mixture firm up, making it easier to shape.
After chilling, scoop out tablespoon-sized portions of the mixture and roll them into balls using your hands.
Place the protein balls on a parchment-lined baking sheet or plate.
For a little extra flavor, you can roll the balls in shredded coconut or additional cocoa powder before placing them on the baking dish.
Refrigerate the protein balls for another 15-30 minutes to set completely.
Prep Time: 15 minutes | Total Time: 1 hour | Servings: 12-15 balls
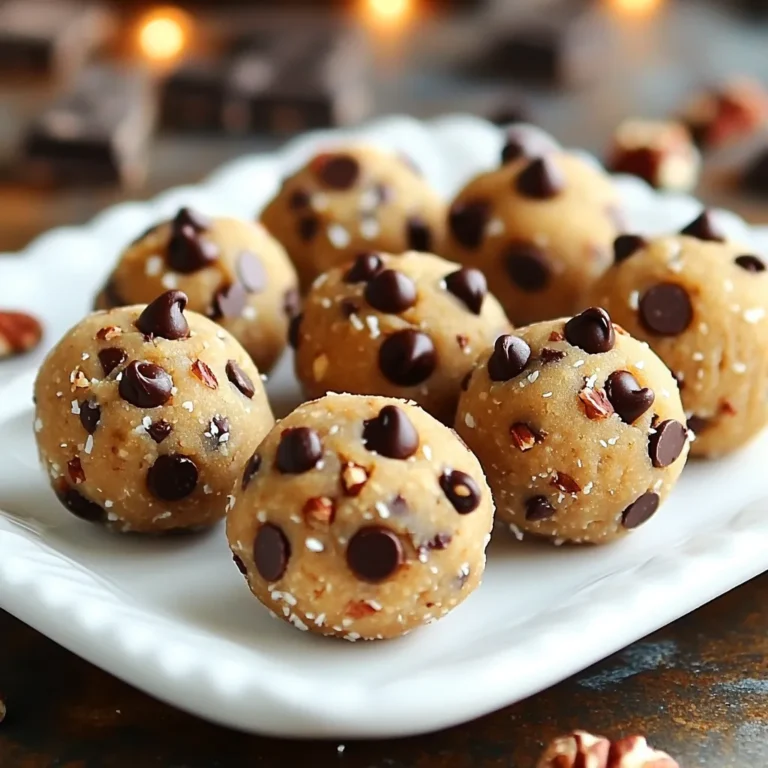
– Serving Suggestions: Enjoy these protein balls as a snack, pre-workout boost, or a quick breakfast on-the-go. Store in an airtight container in the refrigerator for up to a week, or freeze for longer storage!
Peanut Butter Protein Balls
Ingredients
- 1 cup natural peanut butter
- 1 cup rolled oats
- 0.25 cup honey or maple syrup
- 0.5 cup protein powder (vanilla flavor)
- 0.25 cup dark chocolate chips or cacao nibs
- 0.25 cup ground flaxseed
- 0.25 teaspoon salt
- 1 teaspoon cinnamon
- 0.5 cup chopped nuts or seeds (optional)
Instructions
- In a large mixing bowl, combine the peanut butter, honey (or maple syrup), and cinnamon until smooth.
- Add in the rolled oats, protein powder, ground flaxseed, and salt. Mix well until all ingredients are fully incorporated.
- Fold in the dark chocolate chips or cacao nibs and any optional nuts or seeds you’d like to add for additional crunch.
- Once the mixture is well combined, cover the bowl and refrigerate for about 30 minutes. This will help the mixture firm up, making it easier to shape.
- After chilling, scoop out tablespoon-sized portions of the mixture and roll them into balls using your hands.
- Place the protein balls on a parchment-lined baking sheet or plate.
- For a little extra flavor, you can roll the balls in shredded coconut or additional cocoa powder before placing them on the baking dish.
- Refrigerate the protein balls for another 15-30 minutes to set completely.
- Enjoy these protein balls as a snack, pre-workout boost, or a quick breakfast on-the-go.
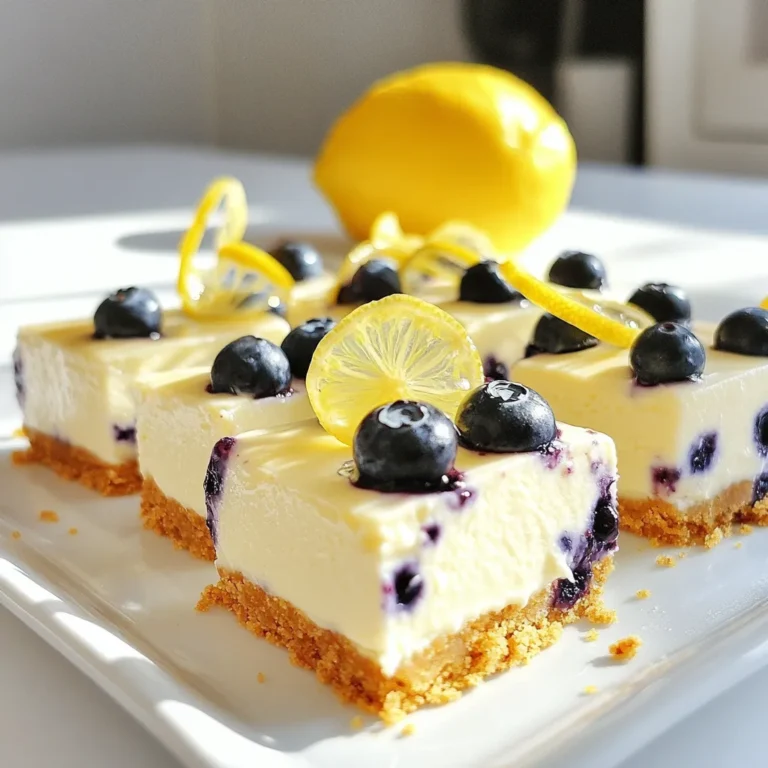
![- 1 cup rolled oats - 1 cup almond milk (or your preferred milk) - 1/2 cup plain Greek yogurt - 1/4 cup cream cheese, softened - 2 tablespoons maple syrup (or honey) - 1 teaspoon vanilla extract - 1/2 cup fresh blueberries - 1 tablespoon chia seeds (optional) - 1/4 teaspoon ground cinnamon - Fresh blueberries and graham cracker crumbs for topping - If you want dairy-free options, swap cream cheese and Greek yogurt for coconut yogurt. Almond milk works well, but you can also use oat or soy milk. - For gluten-free oats, use certified gluten-free rolled oats. They are easy to find in most stores. - If you prefer a different sweetener, try agave syrup or coconut sugar instead of maple syrup or honey. When I create this dish, I aim for the best taste and texture. These ingredients blend well, giving you that cheesecake flavor you crave. The oats soak up the almond milk and yogurt, creating a creamy base. The blueberries add a burst of natural sweetness and freshness. Plus, the graham cracker crumbs on top provide a nice crunch. You can find the full recipe here, which shows you how to mix everything perfectly. 1. In a medium bowl, combine the rolled oats, almond milk, Greek yogurt, and cream cheese. 2. Whisk these ingredients together until they form a creamy mixture. 3. Next, stir in the maple syrup, vanilla extract, chia seeds, and ground cinnamon. 4. Mix until all the flavors blend smoothly. 5. Now, gently fold in the fresh blueberries. 6. Be careful not to crush the blueberries while mixing. 1. Divide the mixture evenly into two mason jars or airtight containers. 2. Close the jars with their lids tightly. 3. Place the jars in the fridge overnight. 4. This helps the oats soak up the flavors and get soft. 1. When it's time to serve, remove the jars from the fridge. 2. Give each jar a good stir to mix everything up again. 3. For a cheesecake effect, top your oats with more fresh blueberries. 4. Sprinkle graham cracker crumbs on top to finish it off. For the full recipe, you can refer to the recipe section above. To get the best texture, use rolled oats. They soak up the liquid without getting mushy. You want your oats creamy but still holding their shape. Avoid quick oats; they can turn your dish into a mushy mess. For a thicker texture, add a bit more oats or reduce the milk slightly. Spices can take your oats to the next level. A pinch of nutmeg or a dash of vanilla can make a big difference. You can also add fresh lemon zest for a bright flavor. Don't forget about crunch! Toss in some chopped nuts or seeds. They add a nice texture and extra nutrition. Making a larger batch saves time. Double or triple the recipe and store in jars. This way, you can grab a jar for breakfast all week. These oats keep well in the fridge for up to five days. Use airtight containers to keep them fresh. Enjoy a quick and easy meal every morning! For the full recipe, check the earlier section. {{image_2}} You can swap blueberries for other fruits. Strawberries, raspberries, or blackberries work great, too. Each fruit brings its own sweet flavor. You can also use seasonal fruits. In summer, try peaches or cherries. In fall, apple slices or pumpkin puree can add a fun twist. Want to make your oats even better? You can add protein powders or nut butters. These add a great taste and extra protein. Almond butter or peanut butter mix well. Seeds like chia or flax can add crunch and fiber. They also help keep you full longer. Feeling fancy? You can create fun dessert flavors. Try adding cocoa powder for chocolate oats. You can also use caramel syrup for a sweet treat. Using flavored yogurt can make it even tastier. Vanilla or strawberry yogurt adds a nice twist. You can explore so many flavors with just a few tweaks! Check the [Full Recipe] for all the details you need. To keep your blueberry cheesecake overnight oats fresh, use glass jars or airtight containers. These options seal well and prevent odors from mixing in the fridge. Make sure to store them in the refrigerator. This keeps the oats cool and safe to eat. For the best taste and texture, eat your oats within three days. After this, the oats may lose their creamy texture. Signs of spoilage include a sour smell, watery separation, or mold. If you see any of these, throw them away. Yes, you can freeze overnight oats! This is great for meal prep. Just make sure to use freezer-safe containers. When you’re ready to eat, transfer the oats to the fridge to thaw overnight. Avoid heating them directly from the freezer. This can change the texture and flavor. Blueberry Cheesecake Overnight Oats stay fresh for about 3 to 5 days in the fridge. Store them in airtight containers. This keeps them moist and tasty. If you notice any strange smell or mold, it's best to toss them out. Yes, you can use frozen blueberries. However, they may change the texture a bit. Frozen berries can make the oats a little mushy. If you want to keep the fresh taste, add frozen blueberries just before serving. Almond milk is my go-to for these oats. It adds a nice flavor without extra calories. You can also use oat milk, soy milk, or regular cow's milk. Choose what you like best. Each type gives a different taste and creaminess. To make this recipe vegan, swap Greek yogurt for coconut yogurt. Use vegan cream cheese instead of regular cream cheese. For sweeteners, choose maple syrup or agave nectar. These simple swaps keep it dairy-free and delicious. Yes, you can meal prep these oats for the week. Just make sure to portion them in jars. They keep well in the fridge. This is a great way to have a quick and healthy breakfast ready. Just grab a jar each morning! For the full recipe, check out the provided link. This article covered how to make Blueberry Cheesecake Overnight Oats. We went over key ingredients, easy steps, and various storage tips. You learned how to customize your oats and enjoy delicious flavors. Whether you need a quick breakfast or snack, these oats fit the bill. Enjoy the creamy texture and fresh taste. Give this recipe a try and discover your favorite mix!](https://dailydishlab.com/wp-content/uploads/2025/07/6a6a2d5b-d90b-4d1a-93b4-34eef24f4ecd-768x768.webp)
![- 2 cups all-purpose flour - 1 teaspoon baking powder - 1 teaspoon baking soda - 1 teaspoon ground cinnamon - 1/2 teaspoon ground ginger - 1/2 teaspoon salt The dry ingredients are key to getting the right structure. The flour gives body, while the baking powder and baking soda help the whoopie pies rise. The spices add warmth and flavor, making the treats truly delicious. - 1 cup granulated sugar - 1 cup packed brown sugar - 1 cup vegetable oil - 4 large eggs These wet ingredients bring moisture and sweetness. The sugars create a rich taste, while the oil keeps the pies soft. Eggs bind everything together for the perfect texture. - 2 cups grated carrots (about 4 medium carrots) - 1/2 cup crushed pineapple, thoroughly drained - 1 teaspoon vanilla extract Grated carrots add natural sweetness and a lovely color. Pineapple gives a hint of tartness and keeps the cakes moist. Vanilla adds a warm, sweet note that enhances the flavor. - 8 oz cream cheese, softened at room temperature - 1/4 cup unsalted butter, softened at room temperature - 2 cups powdered sugar - 1 teaspoon vanilla extract - A pinch of salt The cream cheese filling is rich and tangy. It balances the sweetness of the whoopie pies. Mixing in butter and powdered sugar creates a smooth texture. A pinch of salt enhances the flavors, while vanilla rounds it out. For the complete recipe, check out the Full Recipe. - Preheat your oven to 350°F (175°C). - Line your baking sheets with parchment paper. This helps keep the whoopie pies from sticking. - In a medium bowl, whisk together the flour, baking powder, baking soda, ground cinnamon, ground ginger, and salt. - Make sure everything is well combined. This will give your cookies the right texture. - In a large bowl, mix the granulated sugar, brown sugar, and vegetable oil. Use an electric mixer to blend them until smooth. - Add the eggs one at a time, mixing well after each addition. This makes your batter light and fluffy. - Gradually add the dry mixture to the wet mixture. Mix on low speed until just combined; some lumps are okay. - Fold in the grated carrots and crushed pineapple. Add the vanilla extract for extra flavor. - Use a cookie scoop or tablespoon to drop rounded scoops of batter onto the prepared baking sheets. - Space them about 2 inches apart to allow for spreading during baking. - Bake for 12-15 minutes. The edges should be set, and the tops should spring back when touched. - While the cookies cool, prepare the filling. In a large bowl, beat the softened cream cheese and butter until creamy. - Gradually add the powdered sugar, mixing until the filling is smooth. Add the vanilla extract and a pinch of salt to enhance the flavor. - Once the cookies are fully cool, take one and spread a layer of cream cheese filling on the flat side. - Top it with another cookie, flat side down, to create a sandwich. - Repeat this with the remaining cookies until all the whoopie pies are assembled. For a special touch, dust them with powdered sugar. - For the full recipe, check out the detailed instructions. To make your whoopie pies soft, avoid overmixing the batter. Overmixing makes cookies tough. Mix just until the dry ingredients blend with the wet. A few lumps are fine. To know when cookies are done, look for set edges. Press the top gently. It should spring back. If it leaves a dent, bake a bit longer. For a pretty presentation, dust the whoopie pies with powdered sugar. You can also sprinkle chopped walnuts on top. This adds texture and looks great on a platter. Pair these sweet treats with milk or tea. A glass of cold milk balances the flavors. Tea adds warmth and comfort. You can add chopped nuts or raisins to the batter. This gives extra crunch and flavor. Try walnuts or pecans for a nutty touch. Using different spices can elevate your whoopie pies. Add nutmeg or allspice for a warm twist. A pinch of cloves can also deepen the flavor. For the full recipe, check out the Carrot Cake Whoopie Pies section above. {{image_4}} You can change the cream cheese filling to suit your taste. Try different flavors like lemon or orange. They add a zesty twist to your whoopie pies. If you want something lighter, use whipped cream instead. Whipped cream gives a fluffy texture that pairs well with the carrot cake base. For gluten-free options, use a gluten-free flour blend. This keeps the whoopie pies soft and tasty. If you need a vegan version, swap eggs with applesauce. Use a plant-based cream cheese for the filling. These adjustments make the treats enjoyable for everyone. Adding coconut brings a tropical vibe to your whoopie pies. Shredded coconut adds texture and sweetness. For chocolate lovers, consider adding cocoa powder to the batter. You can also use chocolate chips for extra richness. These combinations make each bite exciting and delicious. For the complete recipe, check out the [Full Recipe]. You can store carrot cake whoopie pies at room temperature. Place them in an airtight container. This keeps them soft and fresh. They stay good for about three days. If you want them to last longer, keep them in the fridge. To freeze whoopie pies, wrap each pie in plastic wrap. Then place them in a freezer bag. This extra layer keeps them fresh for up to three months. Label the bag with the date. When you're ready to eat them, just pull them out and let them thaw at room temperature. Enjoy whoopie pies at room temperature for the best taste. If you like them warm, heat them in the microwave for 10-15 seconds. This makes the cream cheese filling soft and yummy. You can serve them as is or dust with powdered sugar for a fun touch. For a little crunch, add chopped nuts on top! Check the Full Recipe for more fun ideas. To make carrot cake whoopie pies, start by mixing flour, baking powder, and spices. In another bowl, blend sugars, oil, and eggs. Combine both mixtures and fold in grated carrots and pineapple. Drop spoonfuls onto baking sheets and bake until set. While they cool, whip up a cream cheese filling. Assemble by spreading filling between two cookies. Yes, you can prepare the batter in advance. Just cover it and store it in the fridge for up to 24 hours. When ready to bake, let the batter sit at room temperature for a bit. Then, scoop and bake as usual. Whoopie pies last about 3 to 4 days at room temperature. Keep them in an airtight container to stay soft and fresh. You can also refrigerate them to extend their life by a few more days. You can find carrot cake whoopie pies at local bakeries and specialty shops. Some grocery stores may also carry them in their bakery section. If you prefer homemade, follow the full recipe to make your own! To freeze whoopie pies, wrap each one in plastic wrap. Then, place them in a freezer bag or container. They can last up to 3 months in the freezer. To enjoy, let them thaw in the fridge or at room temperature. Absolutely! You can use different fillings like chocolate ganache, vanilla buttercream, or whipped cream. Get creative with flavors to suit your taste. Just ensure the filling complements the carrot cake flavor for the best results. You learned how to make delicious carrot cake whoopie pies. We covered the ingredients, mixing, baking, and assembling steps. Tips and tricks helped you perfect the texture and enhance flavors. You explored variations for fillings and dietary needs. Finally, I provided storage info for your treats. These whoopie pies will impress family or friends. Enjoy baking and sharing these treats!](https://dailydishlab.com/wp-content/uploads/2025/06/fbfd3e26-f016-49e5-9504-61425c24e368-768x768.webp)