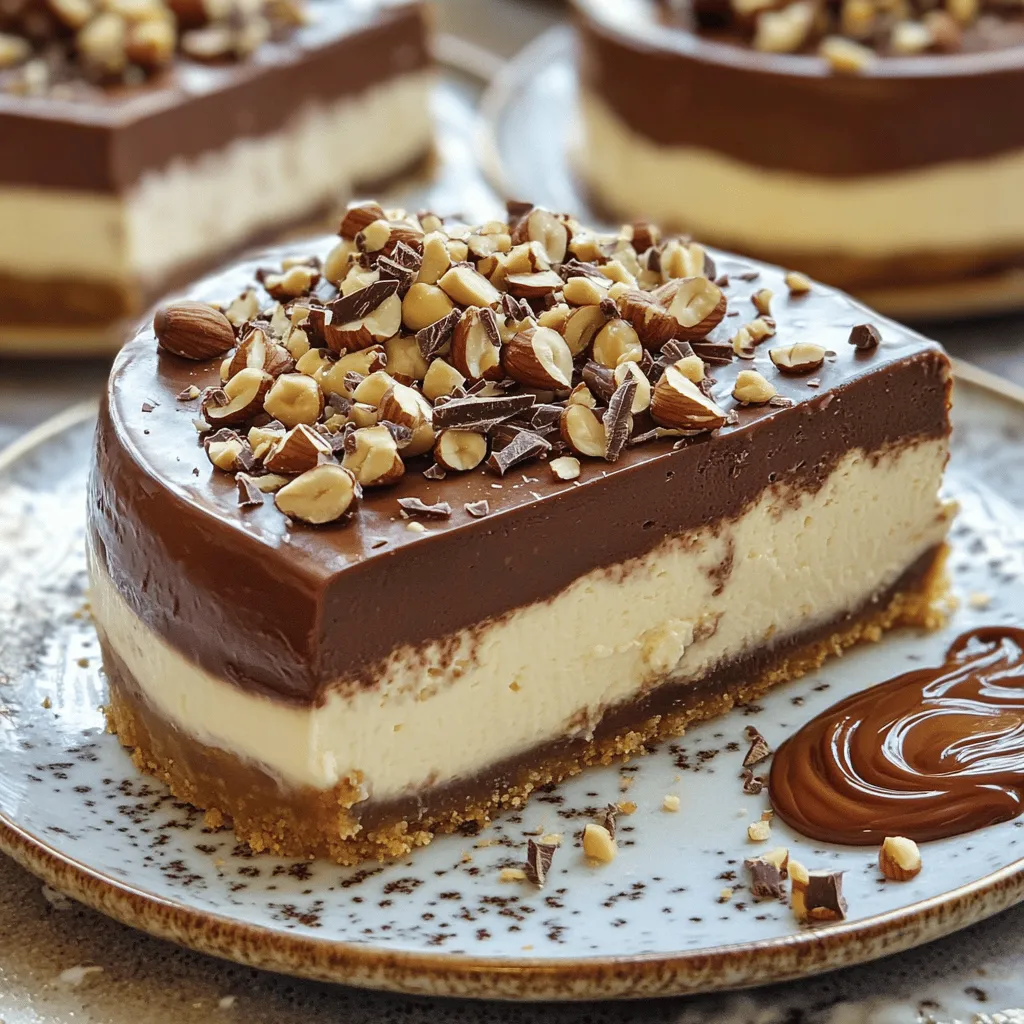
Chocolate Hazelnut Cheesecake Divine Dessert Delight
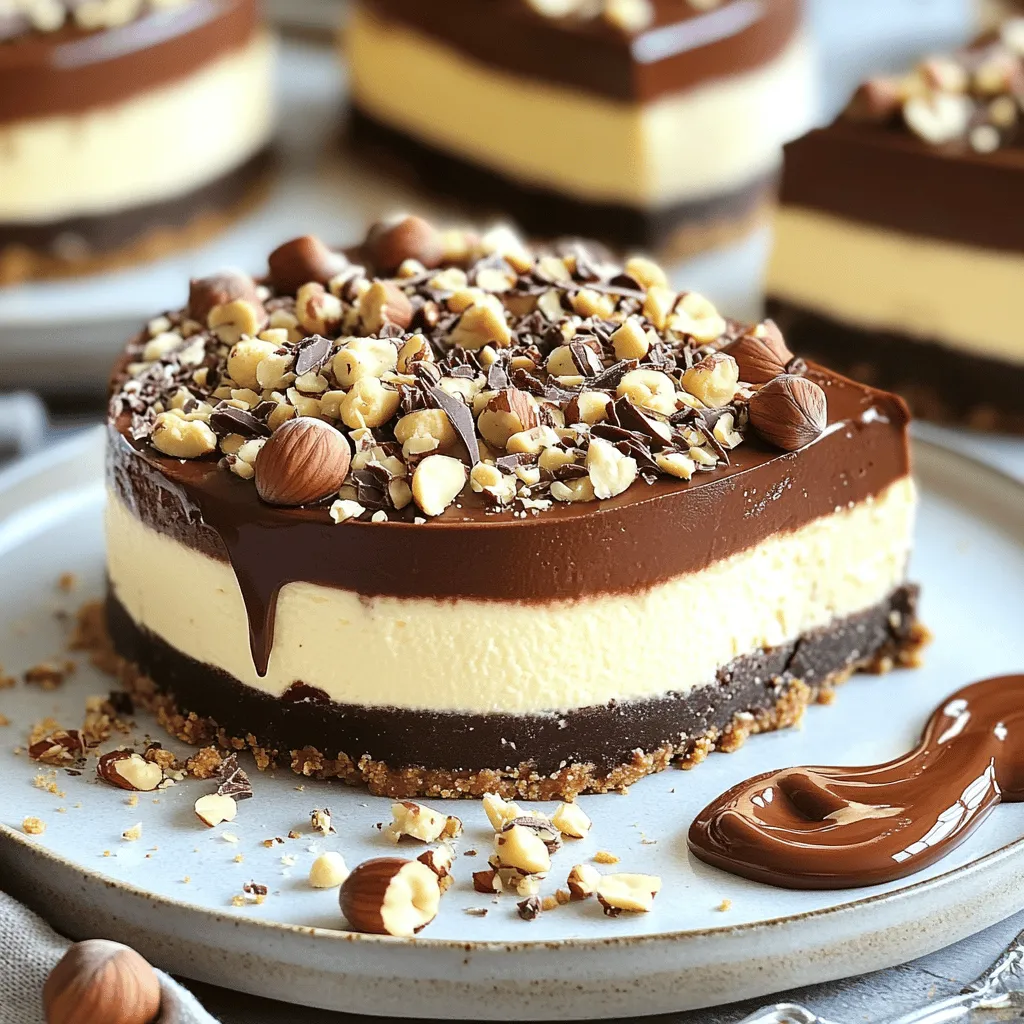
Craving a dessert that’s rich, creamy, and packed with flavor? Let me introduce you to the Chocolate Hazelnut Cheesecake! This divine treat combines smooth cream cheese with luscious hazelnut spread, creating a dessert that’s both decadent and delightful. In this guide, I’ll walk you through easy steps, essential tips, and variations to make this cheesecake your own. Get ready to impress your friends and family with a dessert dreamy enough to be called divine!
Why I Love This Recipe
- Decadent Flavor Combination: The rich chocolate and nutty hazelnut spread create an indulgent taste that is hard to resist.
- Creamy Texture: The smooth cream cheese base makes each slice melt in your mouth, providing a luxurious dessert experience.
- Easy to Make: With straightforward steps and minimal fuss, this cheesecake is perfect for bakers of all skill levels.
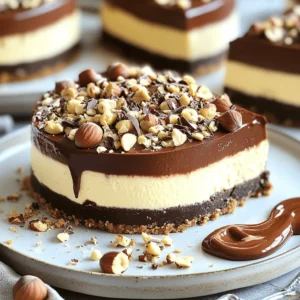
- Impressive Presentation: With its stunning layers and garnished toppings, this cheesecake is sure to wow your guests at any gathering.
Ingredients
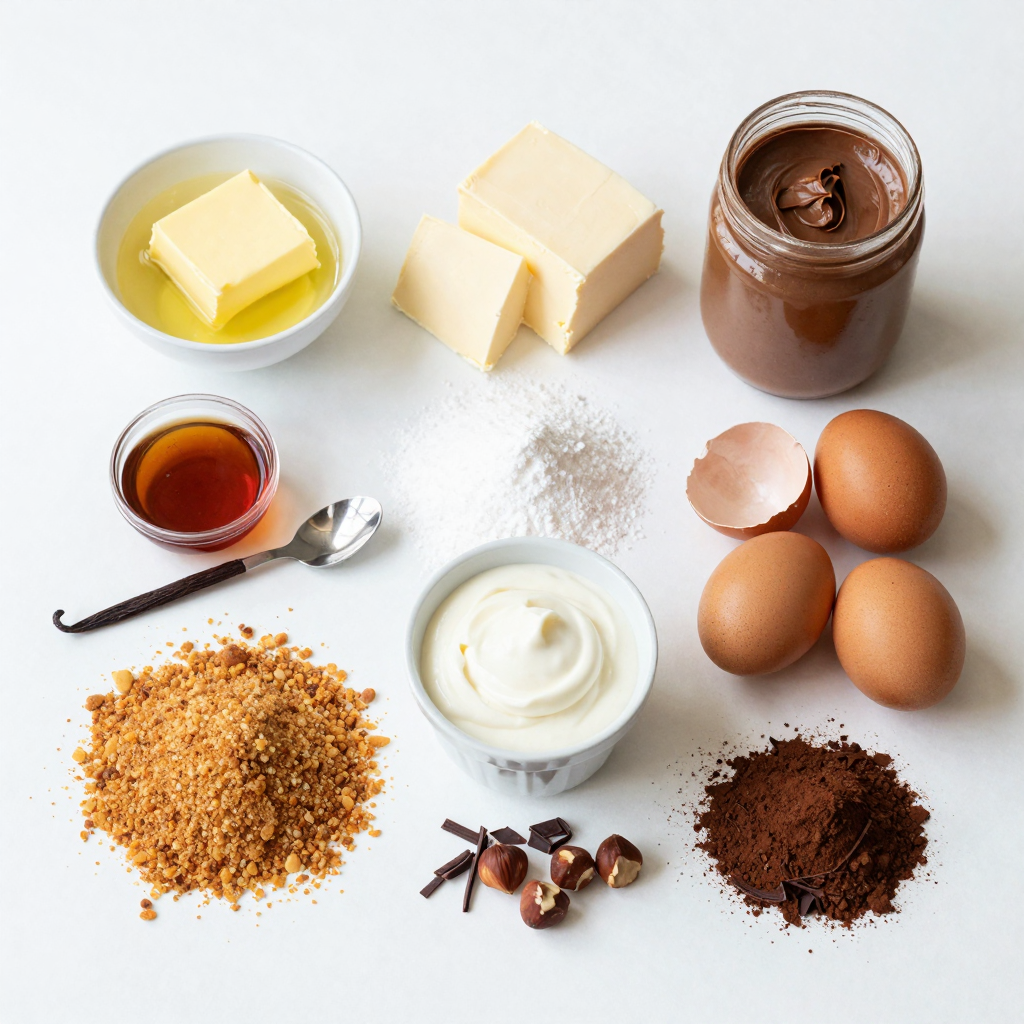
List of Required Ingredients
- 1 ½ cups graham cracker crumbs
- ½ cup unsalted butter, melted
- 2 cups cream cheese, softened
- 1 cup powdered sugar
- 1 cup hazelnut spread
- 3 large eggs
- 1 teaspoon vanilla extract
- 1 cup sour cream
- ¼ cup cocoa powder
- ½ cup crushed hazelnuts (for topping)
- Chocolate shavings (for garnish)
Optional Ingredients for Variations
- Gluten-free graham cracker crumbs
- Dairy-free cream cheese options
The ingredients for this chocolate hazelnut cheesecake are simple yet effective. The graham cracker crumbs form a crunchy base. The melted butter binds them together. Cream cheese adds a rich, creamy texture. Powdered sugar balances the flavors with sweetness. Hazelnut spread gives that irresistible nutty taste. Eggs help set the cheesecake, making it firm. Vanilla extract adds warmth and depth. Sour cream contributes a slight tang. Cocoa powder gives a rich chocolate flavor. Crushed hazelnuts on top add a nice crunch. Finally, chocolate shavings make it look fancy and inviting.
If you want to switch up the recipe, try gluten-free graham cracker crumbs. They work well for those with gluten issues. You can also use dairy-free cream cheese for a lactose-free option. This way, everyone can enjoy this divine dessert delight!
Step-by-Step Instructions
Preheat and Prepare the Crust
- Preheat oven to 325°F (160°C).
- In a bowl, combine 1 ½ cups of graham cracker crumbs with ½ cup of melted butter.
- Press this mix firmly into the bottom of a 9-inch springform pan.
Make the Cheesecake Filling
- In a large bowl, beat 2 cups of softened cream cheese with 1 cup of powdered sugar until smooth.
- Add 1 cup of hazelnut spread and mix until well combined.
- Add 3 large eggs, one at a time, mixing well after each.
- Stir in 1 teaspoon of vanilla extract, 1 cup of sour cream, and ¼ cup of cocoa powder. Mix until everything is smooth.
Bake and Cool the Cheesecake
- Pour the cheesecake batter over the cooled crust. Smooth the top with a spatula.
- Bake in the preheated oven for 55 to 60 minutes, or until the center is set but slightly jiggly.
- Turn off the oven and crack the door. Let the cheesecake cool in the oven for about 1 hour. This helps prevent cracks.
Pro Tips
- Use Room Temperature Ingredients: Ensuring your cream cheese and eggs are at room temperature will help create a smoother batter and prevent lumps.
- Prevent Cracks: Cooling the cheesecake slowly in the oven helps prevent cracks on the surface. Avoid opening the oven door too soon!
- Chill Overnight: For the best texture and flavor, refrigerate your cheesecake overnight before serving. It allows the flavors to meld beautifully.
- Garnish Creatively: Enhance the presentation with additional toppings like whipped cream, fresh berries, or a sprinkle of sea salt for a gourmet touch.
Tips & Tricks
Baking Tips for a Perfect Cheesecake
To make a smooth cheesecake, proper mixing is key. Start with softened cream cheese. This helps it blend well with the sugar. Mix on low speed to avoid air bubbles. Air bubbles can cause cracks later.
Bring all your ingredients to room temperature. This helps them mix better. Cold eggs or cream cheese can lead to lumps. So, let them sit out for about 30 minutes before you start.
Cooling and Chilling Guidelines
Cooling your cheesecake slowly is important. After baking, turn off the oven. Crack the door and let it cool for an hour. This helps prevent cracks on the surface.
Once it’s cool, refrigerate it for at least four hours. For the best texture, chill it overnight. The longer it sits, the better the flavors meld together.
Presentation and Serving Suggestions
When serving, think about how to make it look nice. Use elegant dessert plates for a classy touch. Drizzle some extra hazelnut spread on the side for added richness.
Pair your cheesecake with a nice drink. Coffee or a glass of dessert wine works well. These drinks enhance the chocolate and hazelnut flavors.
Variations
Flavor Variations
You can make this cheesecake even more special. Adding coffee or espresso makes a great mocha cheesecake. The coffee enhances the chocolate flavor. Just mix in 1-2 teaspoons of instant coffee or espresso powder with the cream cheese.
Another fun twist is to add orange zest. Zest from one orange brightens the flavor of the cheesecake. It gives a fresh, citrusy note that pairs well with chocolate. Just fold it into the filling before baking.
Dietary Substitutions
If you need gluten-free options, use gluten-free graham cracker crumbs. They work just like regular crumbs. This keeps your crust tasty and safe for those avoiding gluten.
For vegan adaptations, swap cream cheese for a dairy-free version. Use a plant-based hazelnut spread too. Replace eggs with flax eggs or a commercial egg replacer. This way, everyone can enjoy the cheesecake.
Serving Ideas
You can get creative with toppings. Fresh fruits like strawberries or raspberries add color and flavor. Drizzling chocolate or caramel sauce over the top makes it even more indulgent.
Pairing cheesecake with ice cream adds a fun texture. Vanilla or hazelnut ice cream works well. The cold creaminess balances the rich cheesecake. Serve a slice of cheesecake with a scoop of ice cream for a perfect dessert treat.
Storage Info
How to Store Leftovers
To keep your cheesecake fresh, store it in the fridge. Place it in an airtight container or wrap it tightly with plastic wrap. This keeps the flavors intact and prevents it from drying out. If you want to cover it, use aluminum foil. Just make sure it does not touch the top of the cheesecake.
Freezing Instructions
If you have extra cheesecake, you can freeze it. First, let it cool completely. Then, wrap it tightly in plastic wrap and aluminum foil. This protects it from freezer burn. You can freeze it for up to three months. When you’re ready to eat it, move it to the fridge to thaw overnight. This keeps it creamy and tasty.
Shelf Life
Chocolate hazelnut cheesecake lasts about five days in the fridge. After that, it may lose its best taste and texture. If frozen, the cheesecake is good for three months. Enjoy your cheesecake while it’s fresh for the best flavor!
FAQs
Common Questions About Making Cheesecake
Can I substitute yogurt for sour cream?
Yes, you can use plain yogurt. It will give a similar tangy flavor and creamy texture. Greek yogurt works well too. Just keep the amount the same.
What causes cracks in cheesecake and how to prevent them?
Cracks often form from baking at high heat or overmixing. To prevent them, bake at a lower temperature. Let the cheesecake cool slowly in the oven with the door ajar. This helps avoid sudden temperature changes.
Serving and Serving Size Questions
How do I know when the cheesecake is done?
Look for the edges to be firm while the center is slightly jiggly. The cheesecake will set as it cools. A toothpick inserted should come out clean.
What’s the best way to slice cheesecake for serving?
Use a sharp knife or a cake slicer. Dip the knife in warm water and wipe it dry between cuts. This gives you clean, smooth slices.
Ingredient-Specific Questions
Can I use a different type of spread instead of hazelnut?
Yes, you can try almond spread or chocolate spread. Each will change the flavor but can still taste great.
How can I make this recipe healthier?
You can use low-fat cream cheese and sugar substitutes. Consider adding less hazelnut spread too. You can also use a crust made of nuts for more fiber.
This blog covers delicious hazelnut cheesecake creation. You learned the essential ingredients and step-by-step instructions. Tips and tricks ensure perfect results, while variations allow for creativity. You also discovered how to store your cheesecake to keep it fresh. Finally, I answered common questions to guide you. Enjoy making this rich dessert and impress your friends! Remember, with each bite, you bring joy to your table. Happy baking!
Chocolate Hazelnut Cheesecake
Ingredients
1 ½ cups graham cracker crumbs
½ cup unsalted butter, melted
2 cups cream cheese, softened
1 cup powdered sugar
1 cup hazelnut spread (like Nutella)
3 large eggs
1 teaspoon vanilla extract
1 cup sour cream
¼ cup cocoa powder
½ cup crushed hazelnuts (for topping)
Chocolate shavings (for garnish)
Instructions
Preheat your oven to 325°F (160°C).
In a medium bowl, combine the graham cracker crumbs and melted butter. Press the mixture firmly into the bottom of a 9-inch springform pan to form the crust. Bake for 10 minutes, then set aside to cool.
In a large mixing bowl, beat the softened cream cheese with the powdered sugar until smooth and creamy.
Add the hazelnut spread, mixing until well combined.
Add the eggs one at a time, mixing well after each addition.
Stir in the vanilla extract, sour cream, and cocoa powder until everything is fully incorporated and smooth.
Pour the cheesecake batter over the cooled crust in the springform pan. Smooth the top with a spatula.
Bake in the preheated oven for 55-60 minutes, or until the center is set but still slightly jiggly.
Turn off the oven and crack the door, allowing the cheesecake to cool in the oven for about 1 hour. This will help prevent cracks in the top.
Once cooled, refrigerate the cheesecake for at least 4 hours or overnight for best results.
Before serving, top with crushed hazelnuts and chocolate shavings for added texture and flavor.
Prep Time: 30 minutes | Total Time: 5 hours | Servings: 10
– Presentation Tips: Serve slices of the cheesecake on elegant dessert plates, drizzling some extra hazelnut spread on the side for added richness.
Chocolate Hazelnut Cheesecake
Ingredients
- 1.5 cups graham cracker crumbs
- 0.5 cup unsalted butter, melted
- 2 cups cream cheese, softened
- 1 cup powdered sugar
- 1 cup hazelnut spread (like Nutella)
- 3 large eggs
- 1 teaspoon vanilla extract
- 1 cup sour cream
- 0.25 cup cocoa powder
- 0.5 cup crushed hazelnuts (for topping)
- to taste Chocolate shavings (for garnish)
Instructions
- Preheat your oven to 325°F (160°C).
- In a medium bowl, combine the graham cracker crumbs and melted butter. Press the mixture firmly into the bottom of a 9-inch springform pan to form the crust. Bake for 10 minutes, then set aside to cool.
- In a large mixing bowl, beat the softened cream cheese with the powdered sugar until smooth and creamy.
- Add the hazelnut spread, mixing until well combined.
- Add the eggs one at a time, mixing well after each addition.
- Stir in the vanilla extract, sour cream, and cocoa powder until everything is fully incorporated and smooth.
- Pour the cheesecake batter over the cooled crust in the springform pan. Smooth the top with a spatula.
- Bake in the preheated oven for 55-60 minutes, or until the center is set but still slightly jiggly.
- Turn off the oven and crack the door, allowing the cheesecake to cool in the oven for about 1 hour. This will help prevent cracks in the top.
- Once cooled, refrigerate the cheesecake for at least 4 hours or overnight for best results.
- Before serving, top with crushed hazelnuts and chocolate shavings for added texture and flavor.
![- Fresh strawberries - Semi-sweet chocolate chips - Coconut oil for smooth melting - Crushed nuts (almonds or hazelnuts) - Colorful sprinkles - Lollipop sticks - Microwave-safe bowl - Parchment paper To make delicious chocolate-covered strawberry pops, you need a few key items. Start with fresh strawberries. Choose ripe, firm ones for the best taste. Next, grab semi-sweet chocolate chips. They melt well and add a rich flavor. Also, use coconut oil. This helps the chocolate melt smoothly and stick to the strawberries. You can add fun toppings to make your pops even better. Try crushed nuts, like almonds or hazelnuts, for a crunchy bite. Colorful sprinkles also add a nice touch. They make the pops look festive and fun. For the tools, have lollipop sticks ready. They help you hold the strawberries while dipping. Use a microwave-safe bowl for melting the chocolate. Finally, get parchment paper. It keeps your pops from sticking as they cool. With these ingredients and tools, you're all set to create a tasty delight. For the full recipe, check the details above. First, wash the strawberries gently. Make sure they are dry. Any water will stop the chocolate from sticking. You can use a paper towel to help. Next, take the lollipop sticks. Push one stick into the stem end of each strawberry. Aim to push it about halfway in. This gives you a nice handle for dipping. Now, let’s melt the chocolate. In a microwave-safe bowl, mix the chocolate chips with coconut oil. The coconut oil helps the chocolate melt smoothly. Microwave this mix in 30-second bursts. Stir after each burst until it is fully melted. Be careful not to overheat it, or the chocolate can burn. Hold the strawberry by the stick. Dip it into the melted chocolate. Make sure to cover it fully. Let any extra chocolate drip off. After dipping, it’s time to add toppings. While the chocolate is still wet, sprinkle on crushed nuts or colorful sprinkles. This helps them stick well. Finally, place the dipped strawberries upright in a container or on parchment paper. Let them sit until the chocolate hardens. This usually takes about 15-20 minutes at room temperature. If you’re in a hurry, the fridge works too; just chill them for 10 minutes. To get a smooth coat on your pops, always add coconut oil. Coconut oil helps the chocolate melt evenly. This helps create a shiny finish that looks great. If you don't have coconut oil, you can use vegetable oil. Just keep in mind that it may not shine as much. When you melt the chocolate, do it slowly. Use short bursts in the microwave. Stir well after each burst to keep the texture just right. Making your chocolate-covered strawberry pops look fun is easy. Use colorful lollipop holders to make them pop at parties. Consider sticking them in a piece of foam or a pretty container. You can also arrange them in a fun shape, like a heart. Another idea is to drizzle white chocolate on top for a more stylish look. These small touches make your dessert stand out. Watch out for moisture! If your strawberries are wet, the chocolate will not stick. Always dry them well before dipping. Another mistake is overheating the chocolate. If it gets too hot, it can clump. This ruins the smooth finish you want. Always use a low heat and stir often to prevent this. {{image_2}} You can switch up the chocolate for your pops. Dark chocolate gives a rich taste. Milk chocolate is sweet and creamy. White chocolate adds a fun twist with its sweet flavor. You can also add flavor. Try a drop of peppermint extract for a cool touch. Vanilla extract brings a warm, sweet note to the mix. Get creative with toppings! Coconut flakes add a tropical flair. Mini chocolate chips bring extra sweetness and crunch. You can also use crushed nuts for a nutty bite. Rainbow sprinkles make the pops fun and colorful. Just make sure to add them right after dipping the strawberry. Make your pops party-ready! For holidays, decorate with colors that match the theme. Use red and green for Christmas or pastel colors for Easter. You can even customize them for birthdays. Just add sprinkles or edible glitter to match the party theme. These small touches make your pops stand out! For the complete recipe, check out the [Full Recipe]. Store chocolate-covered strawberry pops in a cool, dry place. The ideal temperature is between 60°F and 70°F. Keep them away from direct sunlight. This helps keep the chocolate smooth and shiny. To stack the pops, use a container with dividers. Place parchment paper between layers. This prevents them from sticking to each other. If you don't have dividers, lay them flat on a tray lined with parchment paper. For the best taste, eat the pops within two days. After that, the strawberries may lose their freshness. You can freeze chocolate-covered strawberry pops. Wrap them well in plastic wrap, then place them in a freezer bag. They can last up to a month in the freezer. To enjoy, thaw them in the fridge. Avoid thawing at room temperature. This keeps the chocolate from getting too soft. If you have leftover chocolate, pour it into molds. You can make chocolate bites or bars. This is a fun way to enjoy extra chocolate. For leftover strawberries, try making a smoothie. Blend them with yogurt or milk. You can also slice them for topping on pancakes or oatmeal. This way, nothing goes to waste, and you enjoy more treats. You can use frozen strawberries, but they change the texture. They may become mushy when thawed. This can affect how well the chocolate sticks to them. Fresh strawberries hold up better, ensuring a firm bite. If you choose frozen, let them thaw completely and dry them well before dipping. To make the chocolate smoother, you can add coconut oil during melting. This helps create a nice, glossy finish. Melt the chocolate in short bursts in the microwave, stirring well in between. Avoid overheating, as this can make the chocolate clumpy. Stirring helps keep the heat even, giving you a smooth result. Yes, there are vegan options! You can use dairy-free chocolate chips for a vegan treat. Look for brands that use plant-based ingredients. For toppings, consider nuts, seeds, or dairy-free sprinkles. This way, you can enjoy chocolate-covered strawberry pops while sticking to a vegan diet. We explored how to create delicious chocolate-covered strawberry pops, from essential ingredients to creative variations. Remember, fresh strawberries, coconut oil, and careful melting are key. Avoid common mistakes like moisture and overheating for the best results. With these tips, you can impress at any event. Enjoy experimenting with toppings and flavors, and get creative in your presentations. These treats are not just tasty; they can also be fun to make and share. Happy dipping!](https://dailydishlab.com/wp-content/uploads/2025/07/28782691-e2ef-4ba1-b328-d9019563a0b5-768x768.webp)