
Cranberry Pecan Energy Bites Quick and Tasty Snack
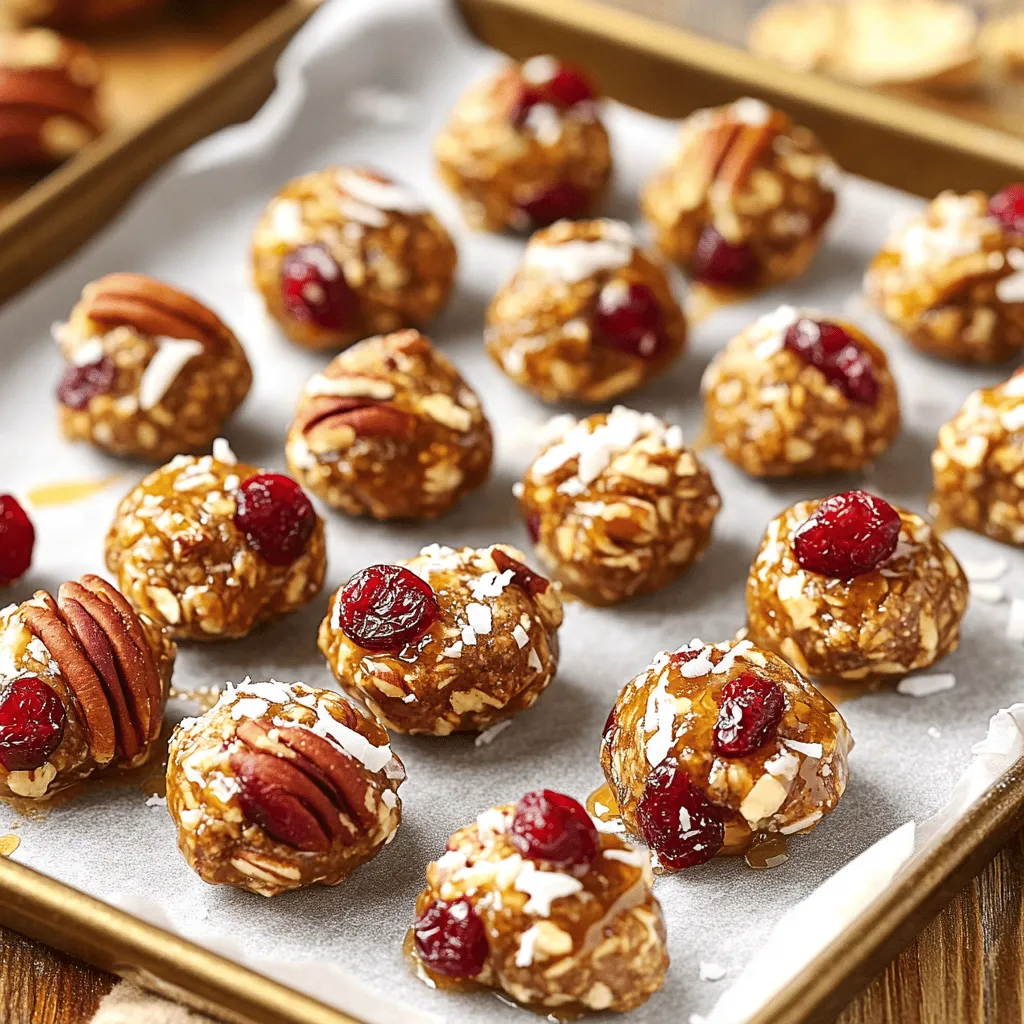
Looking for a quick and tasty snack? Try my Cranberry Pecan Energy Bites! These little balls pack a punch of flavor and nutrition. With just a few simple ingredients—oats, pecans, and cranberries—you can whip them up in no time. Perfect for busy days or a post-workout boost, these bites are tasty and easy to make. Let’s dive in and create this delicious snack together!
Why I Love This Recipe
- Healthy Snacking: These energy bites are a perfect balance of nutrients, making them an ideal healthy snack for any time of the day.
- Quick & Easy: With just a few simple ingredients and minimal prep time, you can whip these up in no time!
- Customizable: You can easily swap out ingredients to suit your taste, such as using different nuts or dried fruits.
- Perfect for Meal Prep: These bites can be made ahead of time and stored in the fridge for a week, making them a convenient grab-and-go option.
Ingredients
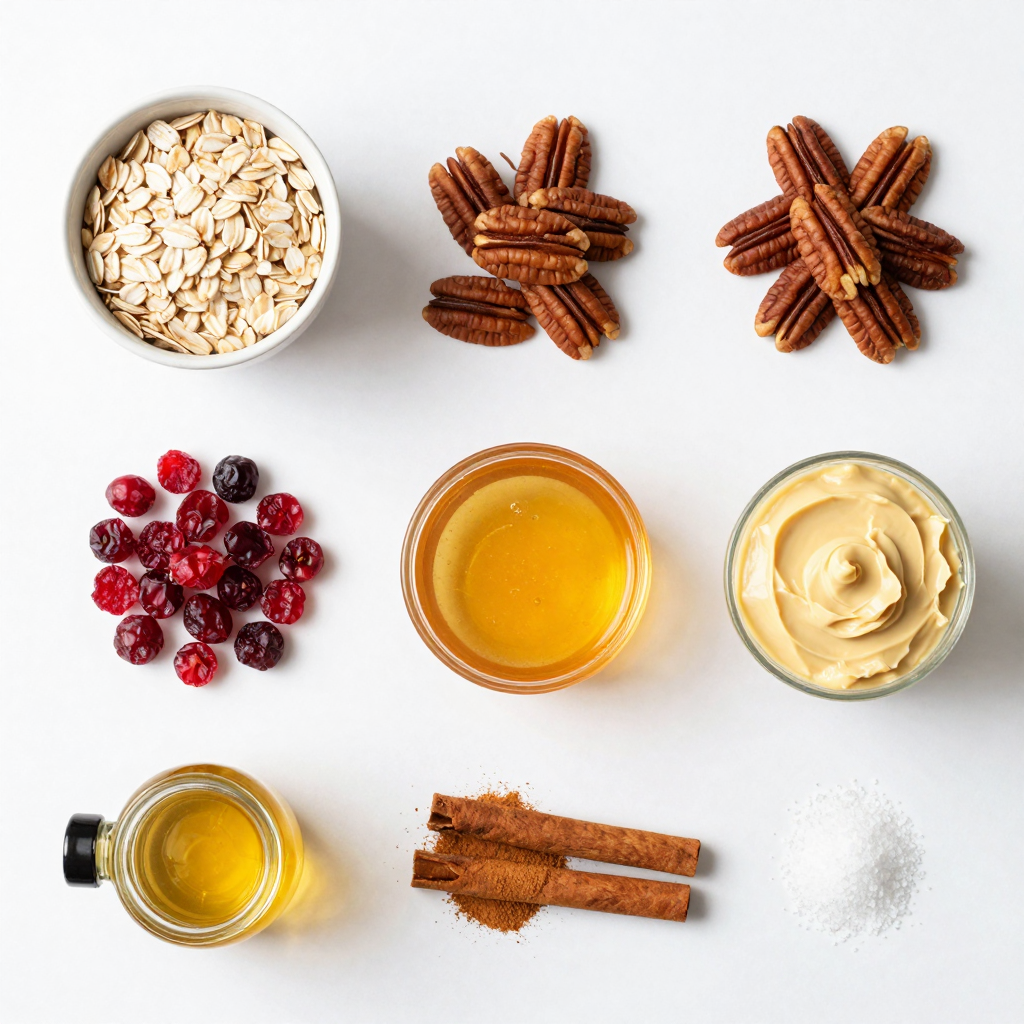
Main Ingredients
- 1 cup old-fashioned oats
- ½ cup chopped pecans
- ½ cup chopped dried cranberries
Wet Ingredients
- ¼ cup honey or maple syrup
- ¼ cup almond or peanut butter
- 1 teaspoon vanilla extract
Seasoning
- ½ teaspoon cinnamon
- Pinch of salt
Cranberry Pecan Energy Bites are simple yet full of flavor. The main ingredients start with old-fashioned oats, which provide a great base. They add texture and fiber. Next, chopped pecans bring a nice crunch and nutty taste. Dried cranberries add sweetness and a bit of tang.
For the wet ingredients, you can choose honey or maple syrup. Both options add sweetness and help bind the bites. Almond or peanut butter gives creaminess and healthy fats. A dash of vanilla extract enhances the flavor.
Lastly, a sprinkle of cinnamon and a pinch of salt lift these bites to a new level. Cinnamon adds warmth, while salt balances the sweetness. These ingredients work together to create a tasty and nutritious snack.
Step-by-Step Instructions
Preparation of Dry Ingredients
Start by mixing the dry ingredients. In a large mixing bowl, combine 1 cup of old-fashioned oats, ½ cup of chopped pecans, and ½ cup of chopped dried cranberries. Stir everything together until it is well mixed. This blend gives your energy bites a nice crunch and sweetness.
Mixing Wet Ingredients
Next, we’ll make the wet mixture. In a separate bowl, blend ¼ cup of honey or maple syrup with ¼ cup of almond or peanut butter. Add in 1 teaspoon of vanilla extract, ½ teaspoon of cinnamon, and a pinch of salt. Stir until the mixture is smooth. This blend adds flavor and moisture to the bites.
Combining Mixtures
Now, it’s time to combine both mixtures. Pour the wet mixture over the dry ingredients in the large bowl. Use a spatula or your hands to mix everything until it is sticky and holds together. If it feels too dry, you can add a little more honey or peanut butter.
Shaping the Energy Bites
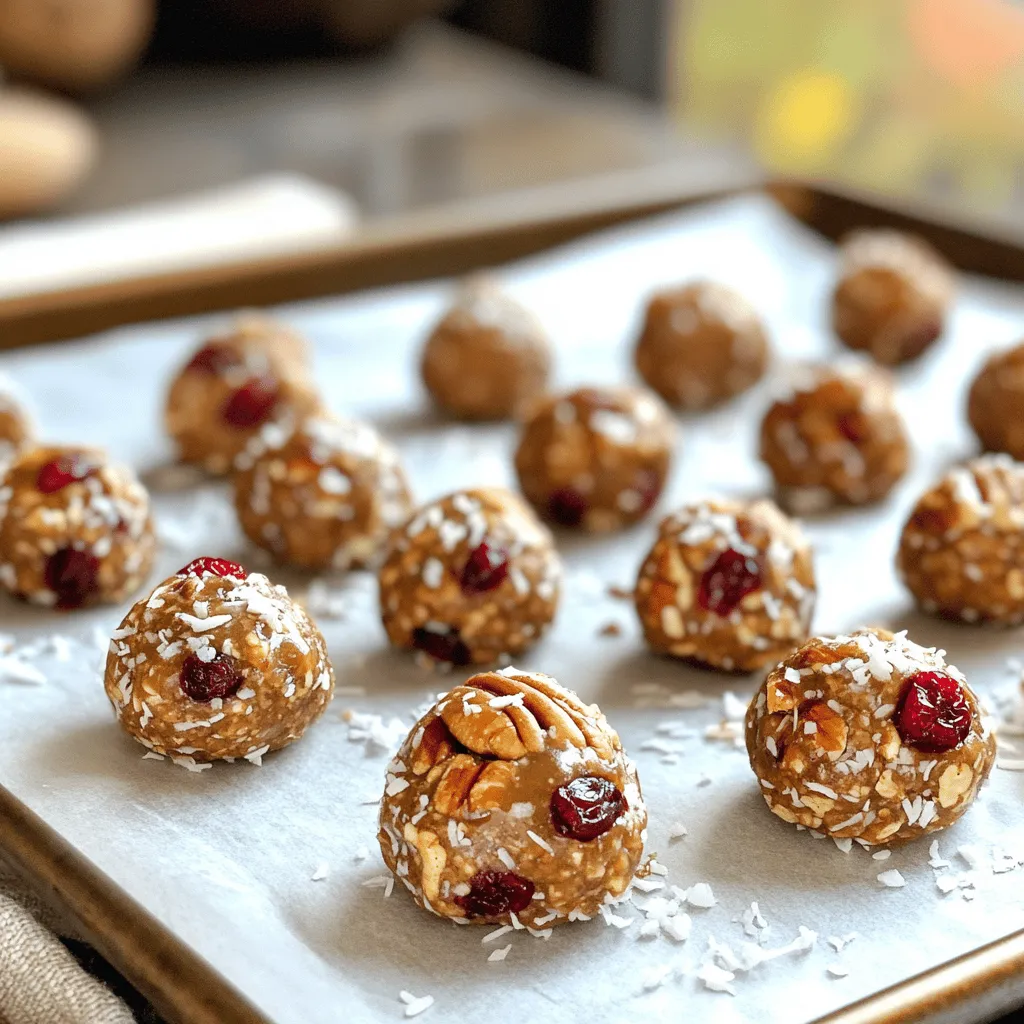
Once mixed, let the mixture sit for about 10 minutes. This helps it bind better. Then, scoop out about 1 tablespoon of the mixture. Roll it into a ball with your hands. Repeat this until all the mixture is used. You should get around 12-15 energy bites. Place them on a parchment-lined baking sheet. If you like, roll them in extra chopped pecans or coconut flakes. Finally, refrigerate the energy bites for at least 30 minutes to firm them up before you enjoy them.
Pro Tips
- Use Fresh Ingredients: Freshly chopped pecans and cranberries will enhance the flavor and texture of your energy bites.
- Experiment with Nut Butters: Try different nut butters like cashew or sunflower seed butter for a unique taste.
- Chill for Better Texture: Allow the energy bites to chill longer than 30 minutes if you prefer a firmer texture.
- Customize Your Add-ins: Feel free to add in extras like chocolate chips, chia seeds, or flaxseeds for added nutrition and flavor.
Tips & Tricks
Ensuring Texture
Let the mixture sit for about 10 minutes. This step helps the ingredients bind better. The oats soak up moisture, making it easier to roll into bites. You want a sticky texture that holds together well.
Handling the Mixture
You can use your hands or a spatula to mix. I find that using my hands works best. It gives me a better feel for the texture. If you prefer a cleaner method, a spatula will do the job. Just make sure everything is well combined.
Presentation Ideas
For a fun look, serve the energy bites in a cute jar. Tie a ribbon around the jar for a nice touch. You can also place them on a platter. If you want a special effect, roll them in extra chopped pecans or coconut flakes. This adds texture and makes them eye-catching.
Variations
Vegan Option
To make these energy bites vegan, simply swap honey for maple syrup. Maple syrup adds a sweet flavor that works well with the oats and nuts. It keeps the bites moist and sticky, just like honey. This way, everyone can enjoy the snack!
Gluten-Free Option
If you need a gluten-free snack, use certified gluten-free oats. These oats are made in a way that avoids cross-contamination with gluten. They taste just as good and keep the energy bites soft and chewy. You won’t even notice the difference!
Flavor Variations
Get creative with your energy bites! You can add chocolate chips for a sweet twist or coconut flakes for a tropical vibe. These add-ins will change the taste and texture. Don’t be afraid to mix and match to find your favorite combination!
Storage Info
Refrigeration Tips
To keep your energy bites fresh, store them in the fridge. Place them in an airtight container. This helps keep them moist and tasty. You can also layer them with parchment paper to prevent sticking. They will stay good for up to one week this way.
Freezing Information
If you want to save some energy bites for later, freezing works great. First, place the bites on a baking sheet in a single layer. Freeze them for about an hour. Once frozen, transfer them to a freezer bag. This method prevents them from sticking together. When you want to eat them, thaw in the fridge overnight for best results.
Shelf Life
Cranberry Pecan Energy Bites last for about a week in the fridge. If frozen, they can last up to three months. Just remember to label your bags with the date. This way, you will know how long they have been stored. Enjoy your healthy snack anytime!
FAQs
Can I use different nuts in the recipe?
Yes, you can use other nuts for energy bites. Almonds, walnuts, or cashews work well. Each nut adds a unique taste and texture. If you prefer a softer bite, go for walnuts. For a crunchier option, use almonds.
How do I make these energy bites sweeter?
To make the energy bites sweeter, add more honey or maple syrup. You can also mix in a bit of brown sugar or agave syrup. Taste the mixture before rolling them into balls. Adjust the sweetness to your liking.
Are Cranberry Pecan Energy Bites healthy?
Yes, these energy bites are healthy. They contain oats, which provide fiber. Pecans add healthy fats and protein. Dried cranberries offer vitamins and antioxidants. The nut butter gives energy and keeps you full. Overall, these bites are a nutritious snack choice.
In this post, we explored making delicious Cranberry Pecan Energy Bites. We covered all ingredients, from oats to honey, and shared step-by-step instructions for preparation. I included tips for texture and creative serving ideas. You learned about variations, such as vegan and gluten-free options, plus storage tips. These bites can be a tasty, healthy snack. Give them a try and enjoy their benefits!

Cranberry Pecan Energy Bites
Ingredients
1 cup old-fashioned oats
½ cup pecans, chopped
½ cup dried cranberries, chopped
¼ cup honey or maple syrup
¼ cup almond or peanut butter
1 teaspoon vanilla extract
½ teaspoon cinnamon
Pinch of salt
Instructions
In a large mixing bowl, combine the old-fashioned oats, chopped pecans, and dried cranberries. Stir until well mixed.
In a separate bowl, blend the honey (or maple syrup), almond butter (or peanut butter), vanilla extract, cinnamon, and salt until smooth.
Pour the wet mixture over the dry ingredients in the large bowl. Use a spatula or your hands to combine everything until thoroughly incorporated. The mixture should be sticky and hold together.
Once mixed, let the mixture sit for about 10 minutes to enhance the binding.
With your hands, scoop out about 1 tablespoon of the mixture and roll it into a ball. Repeat until all the mixture is used. You should have about 12-15 energy bites.
Place the energy bites on a parchment-lined baking sheet or plate. If desired, you can roll them in extra chopped pecans or coconut flakes for added texture.
Refrigerate the energy bites for at least 30 minutes to firm them up before serving.
Prep Time: 15 minutes | Total Time: 45 minutes | Servings: 12-15 bites
– Presentation Tips: Serve the energy bites in a cute jar with a ribbon on top, or arrange them neatly on a platter for a healthy snack option.
Cranberry Pecan Energy Bites
Ingredients
- 1 cup old-fashioned oats
- 0.5 cup pecans, chopped
- 0.5 cup dried cranberries, chopped
- 0.25 cup honey or maple syrup
- 0.25 cup almond or peanut butter
- 1 teaspoon vanilla extract
- 0.5 teaspoon cinnamon
- a pinch salt
Instructions
- In a large mixing bowl, combine the old-fashioned oats, chopped pecans, and dried cranberries. Stir until well mixed.
- In a separate bowl, blend the honey (or maple syrup), almond butter (or peanut butter), vanilla extract, cinnamon, and salt until smooth.
- Pour the wet mixture over the dry ingredients in the large bowl. Use a spatula or your hands to combine everything until thoroughly incorporated. The mixture should be sticky and hold together.
- Once mixed, let the mixture sit for about 10 minutes to enhance the binding.
- With your hands, scoop out about 1 tablespoon of the mixture and roll it into a ball. Repeat until all the mixture is used. You should have about 12-15 energy bites.
- Place the energy bites on a parchment-lined baking sheet or plate. If desired, you can roll them in extra chopped pecans or coconut flakes for added texture.
- Refrigerate the energy bites for at least 30 minutes to firm them up before serving.


. After you enjoy your cheesy pizza bombs, store any leftovers in an airtight container. Make sure they cool down before sealing. This helps keep them fresh. You can keep them in the fridge for up to three days. If you want to keep them longer, freezing is a great option. To reheat your pizza bombs, use the oven for the best results. Preheat your oven to 350°F (175°C). Place the pizza bombs on a baking sheet and heat for about 10-12 minutes. This keeps them crispy on the outside and warm on the inside. You can also use a microwave, but they may lose their crunch. Heat them for about 30 seconds to 1 minute. Check to see if they are warm enough. Freezing pizza bombs is easy! Before baking, form the bombs and place them on a baking sheet. Freeze them until solid, about 1-2 hours. Once frozen, transfer them to a freezer bag. Label the bag with the date. You can freeze them for up to three months. When you are ready to bake, no need to thaw. Just bake them straight from the freezer for an extra few minutes. Enjoy the convenience of having a tasty snack ready at any time! For the full recipe, refer back to the earlier section. Yes, you can use homemade dough! Creating your own dough allows for fresh flavors. It also lets you adjust the thickness. Just ensure it has the right texture for folding. If your dough is soft, let it rest for a few minutes. This helps with handling. I love dipping sauces! Marinara sauce is a classic choice. It pairs well with the cheesy filling. You could try ranch dressing for a cool taste. Another great option is garlic butter. Each sauce adds a unique twist to the pizza bombs. Watch for a golden brown color. The pizza bombs should puff up nicely. Baking them for 12-15 minutes usually works well. You can tap the top gently; it should feel firm. If they look golden and smell amazing, they’re ready to eat! You learned about the key ingredients and steps to make tasty cheesy pizza bombs. Customization options let you create your perfect snack. With tips for a golden-brown crust and serving suggestions, you can impress everyone. Explore variations for everyone's taste, including vegetarian and spicy options. Also, we covered how to store and reheat your leftovers. Now, you can enjoy pizza bombs any time. Remember, the fun is in making and sharing your creations. Get cooking and enjoy an amazing treat!](https://dailydishlab.com/wp-content/uploads/2025/06/c3a3dcc5-c3b0-4ab5-b047-a70aa5503971-768x768.webp)
![- 4 cups fresh broccoli florets - 1 cup cherry tomatoes, halved - 1/2 cup red onion, finely chopped - 1/2 cup dried cranberries - 1/2 cup sunflower seeds - 1/2 cup shredded sharp cheddar cheese - 1/2 cup Greek yogurt - 2 tablespoons apple cider vinegar - 1 tablespoon honey - Salt and pepper to taste For this classic broccoli salad, you start with fresh produce. I love using bright green broccoli florets. They add a lovely crunch and color. Cherry tomatoes bring sweetness, while red onion adds a nice bite. Next, we add some fun components. Dried cranberries offer a sweet contrast. Sunflower seeds give a nutty flavor and crunch. Shredded sharp cheddar cheese adds richness. Now, let’s not forget about the dressing. I prefer Greek yogurt for creaminess. Apple cider vinegar adds a tangy kick. Honey sweetens the mix just right. Finally, a sprinkle of salt and pepper rounds it all out. With these ingredients, you create a dish that is both nutritious and refreshing! For the full recipe, check out the Broccoli Bliss Salad. To start, we need to blanch the broccoli florets. Blanching means cooking them quickly. Bring a pot of water to a boil. Add the florets and boil for just 2 to 3 minutes. This makes the broccoli bright green and keeps it crunchy. After boiling, drain the broccoli right away. Next, you should immerse it in ice water. This stops the cooking process and keeps the color bright. Once chilled, drain the broccoli well and pat it dry with a clean towel. Now, it's time to mix our salad. In a large bowl, combine the blanched broccoli, cherry tomatoes, red onion, dried cranberries, sunflower seeds, and shredded cheddar cheese. Each ingredient adds a unique flavor and texture. In a separate small bowl, prepare the dressing. Whisk together Greek yogurt, apple cider vinegar, honey, salt, and pepper until smooth. This dressing is creamy and tangy. Pour it over the salad mixture and toss gently. Make sure every piece is well coated in dressing. After mixing, taste the salad. Adjust the seasoning if needed. You might want to add more salt or pepper. This step is important for the best flavor. Once seasoned, let the salad chill in the fridge. Allow it to rest for at least 30 minutes. This helps the flavors blend nicely. When you serve it, the salad will be cool and refreshing, perfect for any meal. For the complete recipe, check out the [Full Recipe]. To make the best classic broccoli salad, start with fresh ingredients. Use crisp broccoli florets. They should be bright green and firm. This keeps the texture crunchy and fun to eat. Blanch the broccoli briefly, then cool it in ice water. This step locks in the vibrant color and taste. Chilling your salad is key to enhancing flavors. After mixing, let it sit in the fridge for 30 minutes. This waiting time allows the ingredients to meld. The flavors become richer and more balanced. For a beautiful display, serve the salad in a large glass bowl. This lets the vibrant colors shine. You can also layer the ingredients for a nice effect. Garnish with extra sunflower seeds or cranberries. A sprinkle of fresh herbs adds a pop of color. This makes the salad look even more inviting. Broccoli is packed with vitamins and minerals. It has vitamin C, vitamin K, and fiber. These nutrients support your immune system and digestion. The dried cranberries add antioxidants and a touch of sweetness. To make the salad even healthier, you can use plain Greek yogurt. It adds protein without extra calories. Swap out the cheddar for a lighter cheese, or leave it out. You can also add grilled chicken or chickpeas for protein. These changes can boost the nutrition of your dish. For the full recipe, check out the Broccoli Bliss Salad 🥦. {{image_2}} You can change the recipe to fit your needs. For a dairy-free version, use alternative yogurt. There are many options like almond or coconut yogurt. They add creaminess without dairy. If you want extra protein, try adding grilled chicken or chickpeas. Grilled chicken gives a nice smoky flavor. Chickpeas add a hearty texture and are great for plant-based diets. Want a kick? Add jalapeños or sriracha for spice. These ingredients can wake up the salad and bring heat. Just a little makes a big difference. If you prefer sweetness, try diced apples or pears. They add a crunchy texture and a hint of natural sugar. This balance of sweet and savory makes the salad even better. You can mix up the dressing too. A vinegar-based dressing is a fresh alternative. Combine vinegar with olive oil for a light and tangy taste. For a creamy twist, use dressings other than Greek yogurt. You might try ranch or a creamy tahini dressing. These options can change the flavor profile while keeping it delicious. For the complete recipe, check the Full Recipe section. To keep your classic broccoli salad fresh, store it in an airtight container. This helps to lock in flavor and crunch. Always place it in the fridge right after serving. The salad stays fresh for about 3 to 5 days. Check for any signs of wilting or spoilage before eating. Freezing broccoli salad is not ideal. The texture of fresh ingredients can change when thawed. If you must freeze it, separate the dressing from the salad mix. This helps to keep the veggies crisp. When ready to eat, thaw the salad in the fridge overnight. Add the dressing just before serving to restore its taste. You can make the salad ahead of time, but store parts separately. Keep the blanched broccoli, tomatoes, and other veggies in one container. Store the dressing in another. This keeps everything fresh and tasty. Combine right before serving for the best flavor. Always chill the salad for at least 30 minutes for the flavors to blend well. For the full recipe, check out the broccoli bliss salad. You can keep classic broccoli salad in the fridge for about 3 to 5 days. The salad stays fresh if stored in an airtight container. Over time, the vegetables may soften, but it will still taste good. Yes, you can make broccoli salad in advance. I often prepare it a day ahead. This allows the flavors to blend well. Just remember to keep it in the fridge until you’re ready to serve. You can add many tasty ingredients to broccoli salad. Some favorites include: - Cooked bacon pieces - Chopped apples for sweetness - Grated carrots for crunch - Chopped nuts like almonds or walnuts - Diced bell peppers for color Feel free to mix and match based on your taste! Using frozen broccoli is okay, but I recommend using fresh for the best taste and texture. If you choose frozen, make sure to thaw and drain it well. Blanching frozen broccoli briefly can help it stay vibrant and crisp. This blog post covered how to make a fresh and tasty broccoli salad. We highlighted ingredients such as broccoli, cherry tomatoes, and cheddar cheese. The steps included blanching broccoli, mixing everything, and perfecting the dressing. Remember, chilling the salad boosts its flavor. Plus, various tips helped enhance your dish. You can customize with lots of fun add-ins. Store it well, and enjoy each bite fresh. This salad is not just tasty; it’s also good for you. Get creative and make it your own!](https://dailydishlab.com/wp-content/uploads/2025/06/c30f1a23-0ac2-43f2-95bf-3ec2b469a032-768x768.webp)
