Air Fryer Teriyaki Salmon Bites Quick and Flavorful Meal

Looking for a quick and tasty meal? Air Fryer Teriyaki Salmon Bites are your answer. With simple ingredients, you can whip up a flavorful dish in just minutes. This recipe combines savory soy sauce, sweet honey, and fresh ginger for an explosion of flavor. Whether you treat it as a main course or a snack, these bites are both satisfying and healthy. Let’s dive into the easy steps to make this delicious meal!
Why I Love This Recipe
- Quick and Easy: This recipe comes together in under an hour, making it perfect for a weeknight dinner.
- Flavorful Marinade: The combination of soy sauce, honey, ginger, and garlic creates a deliciously rich flavor that elevates the salmon.
- Healthy Option: Salmon is packed with omega-3 fatty acids, and cooking it in the air fryer reduces the need for excess oil.
- Customizable: You can easily adjust the marinade ingredients to suit your taste preferences or dietary needs.
Ingredients
Main Ingredients
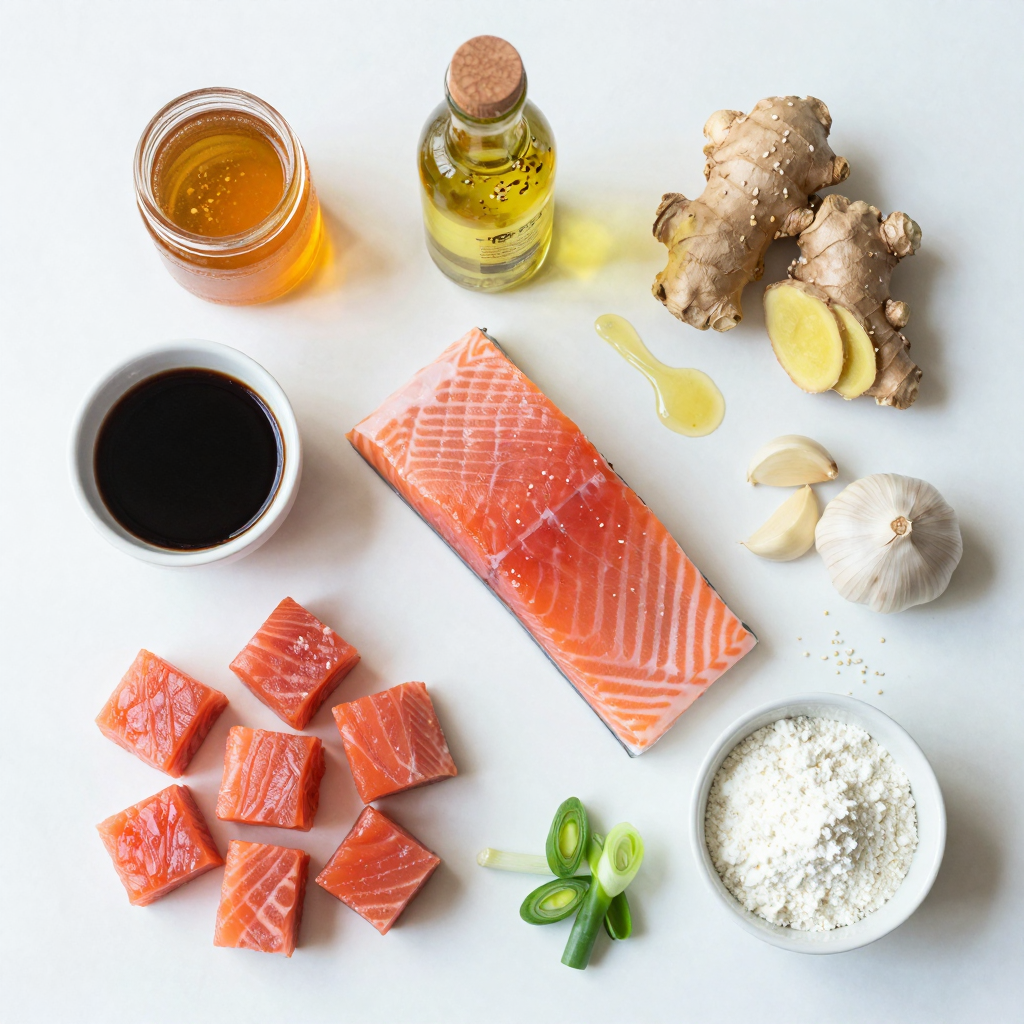
- 1 lb salmon fillet
- 1/4 cup soy sauce or tamari
- 2 tablespoons honey or maple syrup
Marinade Components
- 1 tablespoon sesame oil
- 1 tablespoon rice vinegar
- 1 teaspoon fresh ginger
Garnishes
- 2 cloves garlic
- 1 tablespoon cornstarch
- 1 tablespoon sesame seeds
- 2 green onions
To make air fryer teriyaki salmon bites, you need fresh and simple ingredients. The main ingredient is salmon. I suggest using one pound of salmon fillet. Make sure to remove the skin and cut it into bite-sized cubes. This helps the salmon cook evenly and makes it easy to eat.
For the marinade, I use 1/4 cup of soy sauce or tamari. Tamari is a great choice if you want a gluten-free option. I also add 2 tablespoons of honey or maple syrup for a touch of sweetness. This will balance the salty flavor of the soy sauce.
Next, I include key marinade components. You need 1 tablespoon of sesame oil for a nutty taste. I also add 1 tablespoon of rice vinegar to bring some acidity. Lastly, 1 teaspoon of fresh ginger gives a nice zing that enhances the flavor.
For garnishing, you will need 2 cloves of garlic. Minced garlic adds depth to the dish. I also use 1 tablespoon of cornstarch to help the salmon get crispy. Finally, I sprinkle 1 tablespoon of sesame seeds and 2 sliced green onions on top. These add a pop of color and crunch.
Gather these ingredients before you start cooking. It makes the process quick and fun!
Step-by-Step Instructions
Marinating the Salmon
- In a bowl, whisk together these marinade ingredients:
- 1/4 cup soy sauce (or tamari)
- 2 tablespoons honey (or maple syrup)
- 1 tablespoon sesame oil
- 1 tablespoon rice vinegar
- 1 teaspoon grated fresh ginger
- 2 minced garlic cloves
- Cut 1 pound of salmon fillet into bite-sized cubes.
- Add the salmon cubes to the marinade and mix well.
- Cover the bowl with plastic wrap and refrigerate for at least 30 minutes. For deeper flavor, marinate up to 2 hours.
Preparing for Air Frying
- After marinating, take the salmon out of the bowl.
- Lightly toss the salmon cubes in 1 tablespoon of cornstarch. This helps make them crispy.
- Preheat your air fryer to 400°F (200°C). This step is important for even cooking.
Cooking Process
- Place the salmon bites in the air fryer basket in a single layer. Avoid overcrowding them.
- Air fry the salmon bites for 8 to 10 minutes.
- Shake the basket halfway through to cook them evenly. They should be cooked through and have a nice, crispy outside.
Pro Tips
- Marination Time: For the best flavor, marinate the salmon for at least 1 hour. This allows the marinade to penetrate deeper into the fish.
- Crispy Texture: Tossing the salmon in cornstarch before air frying creates a crispy exterior, enhancing the overall texture of the dish.
- Even Cooking: Arrange the salmon bites in a single layer in the air fryer basket to ensure even cooking and prevent steaming.
- Garnish for Presentation: Garnish with extra sesame seeds and green onions just before serving for a vibrant and appealing presentation.
Tips & Tricks
Achieving the Perfect Texture
To get a great texture, use cornstarch. This thin coating helps make the salmon crispy. Before air frying, toss the salmon cubes in cornstarch. It gives them a nice crunch. Also, make sure the salmon pieces are not crowded in the air fryer. This helps them cook evenly and become golden brown.
Enhancing Flavor
Longer marinating times bring deeper flavors. I recommend marinating the salmon for at least 30 minutes. If you have time, let it sit for up to 2 hours. This way, the marinade seeps into the fish. You can also adjust the seasoning to suit your taste. If you like it sweeter, add more honey. For more tang, increase the rice vinegar.
Presentation Ideas
Serve your teriyaki salmon bites on a beautiful plate. Pair them with steamed rice and pickled vegetables for a lovely meal. For garnish, sprinkle sesame seeds on top. Add sliced green onions for a pop of color. These small details make your dish look inviting and tasty.

Variations
Alternative Sauces
You can switch up the teriyaki sauce to add your own twist. Try making a honey mustard sauce or a spicy chili sauce. Both options give a new flair to the salmon bites. You can also mix soy sauce with orange juice for a citrusy punch. Each sauce changes the taste, so feel free to experiment!
Different Proteins
If you want a change from salmon, you can use chicken or tofu. Chicken thighs work well and stay juicy. For tofu, choose firm or extra-firm tofu. Cut them into bite-sized pieces like the salmon. Cooking times will differ. Chicken takes about 12-15 minutes, while tofu needs around 10-12 minutes in the air fryer.
Serving Styles
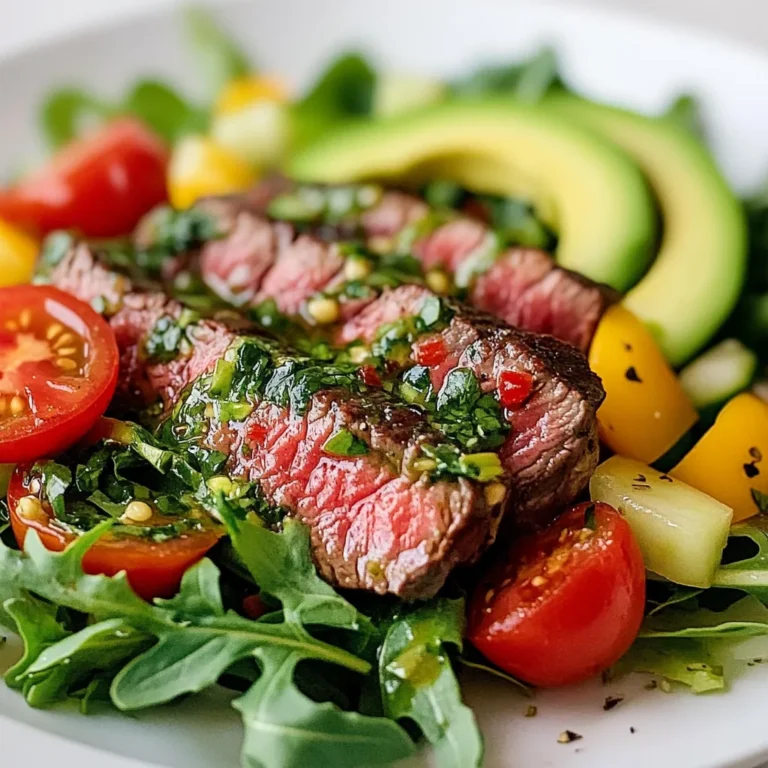
You can serve these salmon bites as appetizers or main courses. For a fun appetizer, place them on skewers with veggies. For a meal, try adding them to rice bowls or salads. Toss them with fresh greens, avocado, and a drizzle of sauce. This adds a nice crunch and makes for a colorful dish.
Storage Info
Refrigeration Guidelines
Store leftover salmon bites in an airtight container. They keep well in the fridge for 2-3 days. To maintain freshness, place a paper towel inside the container. This will absorb extra moisture and help keep the salmon bites crispy. Always let the salmon cool down before sealing the container.
Freezing Instructions
You can freeze salmon bites for later use. Place the cooled bites in a single layer on a baking sheet. Freeze them for about an hour, then transfer them to a freezer bag. Remove as much air as possible to prevent freezer burn. They will stay fresh for up to 2 months.
When you’re ready to enjoy them, thaw the salmon bites overnight in the fridge. This method helps them retain their flavor and texture.
Reheating Recommendations
The best method for reheating salmon bites is in the air fryer. Preheat the air fryer to 350°F (175°C). Place the bites in a single layer and heat them for about 5-7 minutes. This keeps them crispy and delicious.
To avoid dry salmon, consider adding a splash of water to the air fryer. This will create steam and help keep the salmon moist. You can also brush a little olive oil on the bites before reheating for extra flavor.
FAQs
How long should I marinate the salmon?
I recommend marinating the salmon for at least 30 minutes. This time allows the flavors to soak in. For a richer taste, you can marinate it for up to 2 hours. The longer you marinate, the better the flavor. Just be careful not to go too long, as the salmon can become too salty.
Can I use frozen salmon for this recipe?
Yes, you can use frozen salmon. Just make sure to thaw it properly first. The best way is to leave it in the fridge overnight. If you’re in a hurry, you can also use cold water to thaw it. Place the salmon in a sealed bag and submerge it in cold water for about an hour. Once thawed, you can follow the same marinating steps.
What dipping sauces go well with teriyaki salmon bites?
There are many sauces that pair well with teriyaki salmon bites. Here are some great options:
- Soy sauce
- Spicy mayo
- Sweet chili sauce
- Wasabi aioli
- Ginger dipping sauce
These sauces add extra flavor and can make your meal even more exciting. You can also serve the salmon with a side of steamed rice and pickled vegetables for a complete dish.
In this article, we explored how to make tasty teriyaki salmon bites. You learned about the key ingredients, marinating, and air frying steps. We shared tips for achieving great texture and enhancing flavors. Don’t forget to try different proteins and sauces for variety. Proper storage and reheating are also key to keeping your bites fresh. Experiment with these ideas, and enjoy your cooking. You’ll impress everyone with your skills!

Air Fryer Teriyaki Salmon Bites
Ingredients
1 lb salmon fillet, skin removed and cut into bite-sized cubes
1/4 cup soy sauce (or tamari for gluten-free)
2 tablespoons honey or maple syrup
1 tablespoon sesame oil
1 tablespoon rice vinegar
1 teaspoon fresh ginger, grated
2 cloves garlic, minced
1 tablespoon cornstarch
1 tablespoon sesame seeds (for garnish)
2 green onions, sliced (for garnish)
Instructions
In a medium-sized mixing bowl, whisk together the soy sauce, honey (or maple syrup), sesame oil, rice vinegar, grated ginger, and minced garlic until fully combined.
Add the salmon cubes to the marinade, ensuring they are well-coated. Cover the bowl with plastic wrap and let it marinate in the refrigerator for at least 30 minutes (or up to 2 hours for deeper flavor).
After marinating, remove the salmon from the bowl and lightly toss it in cornstarch to create a thin coating. This will help achieve a crispy texture when air-frying.
Preheat the air fryer to 400°F (200°C) for about 5 minutes.
Place the salmon bites in a single layer in the air fryer basket. Make sure they aren’t overcrowded, as this will help them cook evenly.
Air fry the salmon for 8-10 minutes, shaking the basket halfway through to ensure even cooking. The salmon should be cooked through and slightly crispy on the outside.
Once done, carefully remove the salmon bites from the air fryer and transfer them to a serving platter.
Drizzle any remaining marinade from the bowl over the top if desired.
Garnish with sesame seeds and sliced green onions before serving.
Prep Time: 10 minutes | Total Time: 50 minutes | Servings: 4
– Presentation Tips: Serve the teriyaki salmon bites on a decorative plate with a side of steamed rice and pickled vegetables for an authentic Japanese touch.
Air Fryer Teriyaki Salmon Bites
Ingredients
- 1 lb salmon fillet, skin removed and cut into bite-sized cubes
- 0.25 cup soy sauce (or tamari for gluten-free)
- 2 tablespoons honey or maple syrup
- 1 tablespoon sesame oil
- 1 tablespoon rice vinegar
- 1 teaspoon fresh ginger, grated
- 2 cloves garlic, minced
- 1 tablespoon cornstarch
- 1 tablespoon sesame seeds (for garnish)
- 2 green onions sliced (for garnish)
Instructions
- In a medium-sized mixing bowl, whisk together the soy sauce, honey (or maple syrup), sesame oil, rice vinegar, grated ginger, and minced garlic until fully combined.
- Add the salmon cubes to the marinade, ensuring they are well-coated. Cover the bowl with plastic wrap and let it marinate in the refrigerator for at least 30 minutes (or up to 2 hours for deeper flavor).
- After marinating, remove the salmon from the bowl and lightly toss it in cornstarch to create a thin coating. This will help achieve a crispy texture when air-frying.
- Preheat the air fryer to 400°F (200°C) for about 5 minutes.
- Place the salmon bites in a single layer in the air fryer basket. Make sure they aren’t overcrowded, as this will help them cook evenly.
- Air fry the salmon for 8-10 minutes, shaking the basket halfway through to ensure even cooking. The salmon should be cooked through and slightly crispy on the outside.
- Once done, carefully remove the salmon bites from the air fryer and transfer them to a serving platter.
- Drizzle any remaining marinade from the bowl over the top if desired.
- Garnish with sesame seeds and sliced green onions before serving.

![- 1 pound Italian sausage (spicy or sweet) - 9 oz cheese tortellini (fresh or frozen) - 1 medium onion, finely chopped - 3 cloves garlic, minced (about 1 tablespoon) - 3 medium carrots, diced into small pieces - 2 celery stalks, diced - 6 cups chicken broth (low-sodium for a healthier option) - 1 can (14 oz) diced tomatoes, undrained - 2 cups fresh spinach, roughly chopped - 1 teaspoon Italian seasoning (or to taste) - Salt and pepper to taste - 2 tablespoons olive oil I love using Italian sausage in this soup. You can choose spicy for a bold taste or sweet for a milder flavor. The cheese tortellini adds a nice touch. I prefer fresh tortellini, but frozen works well too. The veggies bring color and taste to the soup. I use onion, garlic, carrots, and celery. These give a lovely base. I always add diced tomatoes and chicken broth. They create a rich, tasty broth. Spinach adds a fresh finish and a pop of green. - Fresh basil leaves - Grated Parmesan cheese Garnishes make this soup special. Fresh basil leaves add a fresh burst of flavor. Grated Parmesan cheese gives a salty finish. You can sprinkle them on top before serving. - Different types of sausage - Additional vegetables (e.g., bell peppers, zucchini) - Seasoning alternatives You can change this soup to fit your taste. Try different sausages for a new twist. Adding bell peppers or zucchini boosts the veggie count. For seasoning, feel free to mix it up. A dash of red pepper flakes can add heat. For the complete instructions, check out the Full Recipe. First, we need to prep our veggies. Start by chopping: - 1 medium onion - 3 medium carrots - 2 celery stalks - 3 cloves garlic Chop the onion and carrots into small pieces. Dice the celery into small bits. For the garlic, mince it finely. Set these aside. Next, let’s prepare the sausage. Remove the casing from 1 pound of Italian sausage. Crumble the sausage into small pieces. This will help it cook evenly. Now, let’s cook! In a large pot, heat 2 tablespoons of olive oil over medium heat. Add the chopped onion, diced carrots, and celery. Sauté these for about 5 minutes. You want them soft, and the onion should look clear. After that, add the minced garlic. Cook for about 1 minute. Keep stirring until the garlic smells great. Next, add the crumbled sausage to the pot. Brown the sausage for 7-8 minutes. Stir it often, so it cooks evenly and gets nice color. Once the sausage is browned, it’s time to add the broth. Pour in 6 cups of chicken broth and 1 can of diced tomatoes (don’t drain them). Add 1 teaspoon of Italian seasoning. Mix everything well and bring it to a boil. When it boils, lower the heat to medium-low. Carefully add 9 ounces of cheese tortellini to the pot. Let it simmer for 5-7 minutes until the tortellini is al dente. Next, gently stir in 2 cups of chopped fresh spinach. Cook until the spinach wilts, which takes about 2 minutes. Taste the soup and season with salt and pepper as you like. Serve this warm in bowls. You can add fresh basil leaves and sprinkle some grated Parmesan cheese on top for extra flavor. For the full recipe, check out the details above! To avoid overcooking the tortellini, add it to the pot only when the soup reaches a boil. This helps keep the pasta firm. Cook the tortellini for about 5 to 7 minutes, just until it's tender but still has a bit of bite. Stir it gently to avoid sticking. To ensure the flavors meld together, let the soup simmer for a few minutes after adding the tortellini. This allows the spices and ingredients to blend nicely. Taste the soup before serving. Adjust salt and pepper to make the flavors pop. Pair your soup with warm, crusty bread for a hearty meal. A simple side salad adds freshness to the table. If you serve a larger group, consider making a double batch. Soup is easy to share, and it tastes even better the next day. For a lighter option, use low-sodium broth. This helps control the salt without losing flavor. Swap out regular sausage for lean sausage or turkey sausage. This small change cuts down on fat while keeping the dish satisfying. {{image_4}} For a spicy kick, you can try spicy sausage tortellini soup. Use spicy Italian sausage instead of sweet. This adds a nice warmth to the dish. You can also add red pepper flakes for more heat. Adjust the amount to your taste. If you want a lighter option, consider a vegetarian tortellini soup. Replace the sausage with mushrooms or lentils for protein. You can use vegetable broth instead of chicken broth. This keeps the soup flavorful and satisfying. Incorporating seasonal vegetables can enhance the soup's taste. In spring, add fresh peas or asparagus. In summer, try zucchini or bell peppers. Fall brings great choices like diced butternut squash or sweet potatoes. In winter, root vegetables add heartiness. For different occasions, you can adjust the soup. For a cozy night, keep it simple. For a festive meal, add a splash of cream. This makes the soup rich and creamy for special gatherings. If you need gluten-free options, look for gluten-free tortellini. Many brands offer great choices. You can also use rice or quinoa instead of tortellini. This keeps the meal filling while meeting dietary needs. For vegan substitutes, swap the sausage for plant-based alternatives. Use vegetable broth and skip the cheese. Adding beans or lentils can boost protein. You still get a hearty soup without animal products. For the full recipe and more cooking tips, check the [Full Recipe]. To store your Sausage Tortellini Soup, first let it cool down. - Place the soup in an airtight container. - Store it in the refrigerator if you plan to eat it soon. The soup stays fresh for about 3 to 4 days in the fridge. If you want to save it for later, freezing is a great option. - Pour the cooled soup into freezer-safe bags or containers. - Make sure to leave some space for expansion. Frozen soup can last for up to 3 months. Reheating the soup properly keeps its flavor intact. - The best ways to reheat are on the stove or in the microwave. - If using the stove, heat it in a pot over medium heat. Stir it often to ensure even heating. - If using a microwave, heat it in short bursts. - Stir in between to avoid hot spots. For storage containers, use glass or BPA-free plastic. These types resist stains and are safe for reheating. The soup lasts about 3 to 4 days in the fridge. To maximize freshness, store it properly. - Keep the soup sealed tightly to prevent air exposure. - This helps avoid spoilage and keeps flavors strong. If you notice any off smell or change in color, it's best to discard it. By following these tips, you can enjoy your Sausage Tortellini Soup even days later. You can swap tortellini for different types of pasta, like penne or shell pasta. Rice is another option. Both will work well in this soup. Just adjust cooking times based on what you choose. Yes, you can make this soup ahead of time. Cook it fully, then cool it down. Store it in an airtight container. Place it in the fridge for up to three days. Reheat it on the stove or microwave when ready to eat. Sausage Tortellini Soup lasts about three to four days in the fridge. To keep it fresh, store it in an airtight container. Check for any signs of spoilage before you eat it. Yes, you can use frozen vegetables in this soup. They are quick and easy. Just add them at the same time as the tortellini. Frozen veggies cook fast, so keep an eye on them. This soup is freezer-friendly! Let it cool completely before freezing. Store it in a freezer-safe container. When ready to eat, thaw it in the fridge overnight. Reheat on the stove or microwave without losing flavor. Enjoy this tasty meal anytime! For the full recipe, check out the link! In this article, we explored how to make a hearty Sausage Tortellini Soup. We covered the key ingredients, including Italian sausage, fresh tortellini, and common vegetables. I shared tips on preparation, cooking, and serving. You also learned about variations for flavor, dietary needs, and storage. Remember, this soup is versatile and simple to make. You can customize it to fit your taste and dietary goals. Enjoy your cooking and the delightful taste of this comforting dish!](https://dailydishlab.com/wp-content/uploads/2025/06/6131aa1e-cc84-4164-90dd-a9e6e2f2c232-768x768.webp)
![Let’s dive into the simple ingredients that make this dish shine. Each element plays a role in creating a tasty and healthy meal. Here’s what you need: - 4 cod fillets (about 6 oz each) - 2 tablespoons olive oil - 2 lemons (one for zest and juice, one for slices) - 3 cloves garlic, minced - 1 teaspoon dried oregano - 1 teaspoon dried thyme - 1 teaspoon paprika - Salt and pepper to taste - Fresh parsley, chopped (for garnish) Cod fillets are the star here. They have a mild taste that works well with the bright lemon and herbs. Olive oil adds richness and helps the fish stay moist. Garlic brings a punch of flavor, and the herbs add freshness. Using fresh lemons is key. You’ll use one for zest and juice, which brightens up the dish. The other lemon gets sliced and placed on top of the cod for extra flavor and a nice look. Dried oregano and thyme give depth to the dish. Paprika adds a hint of warmth. Finally, a sprinkle of salt and pepper rounds it all out. These ingredients come together to create a dish that is both light and satisfying. If you want to see how these ingredients blend, check out the Full Recipe for step-by-step instructions. 1. Preheat the oven: Start by setting your oven to 400°F (200°C). This ensures even cooking for our cod. 2. Prepare the marinade: In a small bowl, mix 2 tablespoons of olive oil, 3 minced garlic cloves, the zest of one lemon, and the juice from that same lemon. Add 1 teaspoon each of dried oregano, thyme, and paprika. Finally, season with salt and pepper to taste. Stir it well. 3. Coat the cod fillets: Place your 4 cod fillets in a baking dish. Pour the lemon herb marinade over each fillet. Make sure they are all well coated in that tasty mix. 1. Arrange lemon slices: Take the other lemon and slice it. Place the lemon slices on top of each cod fillet. This adds a fresh, zesty kick while baking. 2. Baking time and temperatures: Slide the baking dish into your preheated oven. Bake for 15-20 minutes. The cod is ready when it turns opaque and flakes easily with a fork. 1. Rest and garnish before serving: Once the cod is done, take it out and let it rest for a couple of minutes. This helps the juices settle. Before serving, sprinkle freshly chopped parsley on top. It adds color and a fresh taste. Feel free to check the [Full Recipe] for more details! Choosing the best cod is key to a tasty dish. Look for cod fillets that are firm and moist. They should have a clean, ocean-like smell. Freshness matters. If you can, buy wild-caught cod for the best flavor. Fresh herbs and citrus add bright notes. Use fresh parsley, thyme, and oregano when possible. They bring out the lemon's zest. Always choose lemons that feel heavy for their size. Juicy lemons will boost your dish. To ensure moist fillets, don’t overcook the cod. Bake just until it is opaque and flakes easily. Set a timer for 15 minutes, then check. If it needs more time, add a few minutes. Adjusting seasoning levels is easy. Taste the marinade before adding it to the cod. If it feels bland, add a pinch more salt or pepper. You can always adjust to match your palate. Pair this dish with sides that complement its light flavors. Roasted vegetables work nicely. Try asparagus or green beans for a fresh touch. A light sauce can elevate the meal. Consider a yogurt dill sauce for creaminess. It adds a nice contrast to the cod. For a bit of crunch, add a side salad. For the full recipe, see the details above. {{image_2}} You can try other white fish instead of cod. Fish like tilapia or haddock work well. They will soak up the lemon and herb flavors nicely. If you want a richer taste, you can substitute cod with salmon. Salmon has more fat, so it stays moist when cooked. The lemon still brightens the dish, making it fresh and tasty. Adding spices can take your baked lemon herb cod to the next level. You might want to try adding cumin or dill to the mix. These spices pair well with lemon, enhancing the dish's flavor. If you love heat, consider making a spicy version. Add chili flakes or fresh jalapeños to the marinade. This twist creates a fun kick that many will enjoy. While baking is easy, you can also grill or pan-sear your cod. Grilling adds a smoky flavor that many people love. Just be sure to keep an eye on it so it doesn't dry out. Air-frying is another great option. It cooks the fish quickly and gives it a nice crust. Each method offers a unique taste and texture, so feel free to experiment. To store leftover cod, let it cool first. Place the cod in an airtight container. Cover it tightly to keep it fresh. You can store it in the fridge for up to three days. Make sure to check for any off smells or changes in texture before eating. If you want to keep cod longer, freezing is a great option. Wrap the cod tightly in plastic wrap or foil. You can also use a freezer-safe bag. This helps prevent freezer burn. Cod can last up to three months in the freezer. When you are ready to use it, remember to thaw it slowly. Place it in the fridge overnight for the best results. To reheat your baked cod, use the oven or a skillet. If you use the oven, preheat it to 350°F (175°C). Place the cod on a baking sheet for about 10 minutes. This keeps it moist and tasty. If you choose a skillet, heat it over medium heat. Add a splash of olive oil and gently warm the cod for about 5 minutes. Avoid high heat to keep the texture nice. Enjoy your flavorful meal again! What can I substitute for cod in this recipe? You can use halibut, haddock, or tilapia as substitutes for cod. Each fish has a mild flavor and similar texture. This ensures your dish remains light and flaky. How do I know when cod is fully cooked? Cod is fully cooked when it turns opaque and flakes easily with a fork. This usually takes 15 to 20 minutes at 400°F. A food thermometer can help; the internal temperature should reach 145°F. Can I prepare the marinade in advance? Yes, you can prepare the marinade a day ahead. Store it in the fridge until you are ready to use it. This allows the flavors to blend nicely. Caloric values per serving Each serving of Baked Lemon Herb Cod contains about 250 calories. This is a healthy option for a balanced meal. Key vitamins and minerals in the dish This dish is rich in protein, vitamin C, and omega-3 fatty acids. Cod provides important nutrients for heart health and overall well-being. Making it gluten-free This recipe is naturally gluten-free. Use gluten-free seasoning blends if you want to add extra flavors without worry. Adjusting for low-sodium diets For a low-sodium version, skip the added salt. Use fresh herbs and lemon juice for flavor without extra salt. This keeps your meal healthy and tasty. This article covered how to make delicious baked cod. You learned about the right ingredients, like fresh cod and herbs. I shared step-by-step instructions for preparing, baking, and serving. We also explored tips for ingredient selection and cooking methods. Remember, cooking should be fun and simple. Experiment with flavors and cooking styles. Whether you stick to cod or try other fish, enjoy the process. Keep these tips in mind for tasty meals every time. Happy cooking!](https://dailydishlab.com/wp-content/uploads/2025/07/2716cd61-27b0-42e4-83ae-f5907d1cee06-768x768.webp)
![- Fresh okra - Cherry tomatoes - Olive oil - Spices and seasonings - Lemon zest - Fresh basil To make this dish, you need fresh ingredients. Start with 1 pound of fresh okra. Trim and halve them for even cooking. Next, grab 2 cups of cherry tomatoes. Halve these as well to help them roast nicely. You will also need 3 tablespoons of olive oil. This oil helps the veggies get crispy and adds great flavor. For spices, use 1 teaspoon of smoked paprika, 1 teaspoon of garlic powder, and ½ teaspoon of onion powder. Add ½ teaspoon of crushed red pepper flakes if you like some heat. Season with salt and pepper to taste. Don't forget the zest of 1 lemon. It adds a bright taste at the end. Lastly, have some fresh basil on hand. This herb adds color and a fresh touch to your dish. For the complete recipe, check out the [Full Recipe]. - Preheat the oven Start by preheating your oven to 425°F (220°C). This high heat helps the vegetables roast perfectly. - Prepare the vegetables Take 1 pound of fresh okra, trim the ends, and cut it in half. Next, halve 2 cups of cherry tomatoes. This mix gives great flavor and color. - Seasoning combinations In a large bowl, add the okra and tomatoes. Drizzle with 3 tablespoons of olive oil. Then, sprinkle in 1 teaspoon of smoked paprika, 1 teaspoon of garlic powder, ½ teaspoon of onion powder, and red pepper flakes to taste. Don’t forget salt and pepper! Toss until everything is well coated. - Spreading on the baking sheet Line a baking sheet with parchment paper. Spread the seasoned vegetables in a single layer. This helps them roast evenly. - Roasting details Place the baking sheet in the preheated oven. Roast for about 25-30 minutes. The okra should be tender and slightly crispy, while the tomatoes blister beautifully. - Final touches Once done, take the tray out of the oven. Sprinkle the zest of 1 lemon over the hot veggies. This adds a fresh zing. Toss gently and let it cool for a minute. Serve warm, topped with fresh basil leaves for extra flavor and color. For the full recipe, check out the Zesty Roasted Okra & Tomato Medley. To make your roasted okra and tomatoes burst with flavor, start with spices. I love using smoked paprika, garlic powder, and onion powder. These spices add depth and warmth to each bite. Olive oil is key too. It helps the spices stick and enhances the dish's richness. Don't forget red pepper flakes! They add heat. You can adjust the amount to suit your taste. Temperature matters when roasting. Set your oven to 425°F (220°C) for the best results. Use a sturdy baking sheet for even cooking. A parchment-lined sheet helps prevent sticking and makes cleanup easy. Check the doneness of your vegetables. Okra should be tender with crispy edges, while tomatoes should be blistered and juicy. Fresh herbs brighten the dish. I recommend using basil for a lovely touch. A squeeze of lemon juice adds a zesty kick. For serving, pile the roasted vegetables on a plate and sprinkle with lemon zest. This makes for a beautiful presentation. You can enjoy them as a side dish or toss them into a salad for extra flair. For the full recipe, check out the Zesty Roasted Okra & Tomato Medley. {{image_2}} You can change up the veggies in this dish. Try using zucchini, bell peppers, or eggplant. Each adds a unique taste and texture. If you want a creamy touch, add cheese like feta or goat cheese. It pairs well with the roasted flavors. For a twist, consider swapping spices. Instead of smoked paprika, use Italian seasoning or curry powder for a new flavor profile. You can also add a splash of balsamic vinegar for extra depth. If you want a smoky flavor, grill the okra and tomatoes instead of roasting. Just toss them on the grill for about 10-15 minutes. The char adds a nice touch. You can also use an air fryer. Set it to 400°F and cook for about 15 minutes. This method gives you a crispy finish without much oil. Another option is sautéing on the stovetop. Heat some olive oil in a pan. Add the okra and tomatoes, cooking them for about 10 minutes, stirring often. This keeps the veggies tender while still flavorful. Roasted okra and tomatoes go great with proteins. Serve it alongside grilled chicken or fish for a complete meal. You can also use this dish in salads or wraps. Add some grains like quinoa or brown rice for a hearty option. This medley of flavors and textures makes it a versatile side dish. You can enjoy it in many ways, making every meal special. For the full recipe, check out Zesty Roasted Okra & Tomato Medley. To keep your roasted okra and tomatoes fresh, start by cooling down any leftovers. This step is key. Allow the dish to sit for about 30 minutes at room temperature before storing. Next, place the cooled vegetables in an airtight container. This helps keep moisture in and prevents them from drying out. In the fridge, your roasted okra and tomatoes can last for about three to four days. For the best taste, eat them within this time. When you’re ready to enjoy your leftovers, the best way to reheat them is in the oven. Set it to 350°F (175°C) and heat for about 10-15 minutes. This helps restore their crispy texture. If you plan to keep the dish longer, freezing is a great option. Pack the cooled vegetables in a freezer-safe container. They can last for up to three months in the freezer. When you want to eat them, thaw them in the fridge overnight before reheating. Enjoy the flavors and textures just like they were fresh out of the oven! Can I use frozen okra? Yes, you can use frozen okra. However, fresh okra gives the best flavor. If you use frozen okra, thaw it first. Pat it dry to remove excess moisture before roasting. What can I substitute for cherry tomatoes? If you don’t have cherry tomatoes, use regular tomatoes. Cut them into small pieces. You can also use grape tomatoes or sun-dried tomatoes. Each option adds a unique flavor. How do I know when the okra is cooked properly? Okra is done cooking when it is tender and slightly crispy. You want it to have a nice texture. The tomatoes should be blistered and softened. Check around the 25-minute mark. Can I make this vegan? Yes, this dish is already vegan! It contains no animal products. Enjoy it as is or add your favorite vegan protein for a heartier meal. How do I add protein to this dish? You can add protein by mixing in chickpeas or black beans. Grilled chicken or shrimp also works well. Just add them to the mix before roasting. What are some gluten-free options? This recipe is gluten-free! All the ingredients are safe for those avoiding gluten. Enjoy this dish with no worries. Nutritional value of okra and tomatoes Okra is low in calories and rich in vitamins. It contains fiber, vitamin C, and folate. Tomatoes are also nutritious, packed with vitamins A and K. Together, they make a healthy pair. Health advantages of roasting vegetables Roasting enhances the natural flavors of vegetables. It also helps retain nutrients. This cooking method makes veggies more enjoyable and encourages healthy eating. Possible allergens in the recipe This recipe is generally safe. However, check for any allergies to spices or olive oil. If you have specific allergies, adjust the ingredients as needed. Roasting fresh okra and cherry tomatoes brings out their great flavors. I shared essential ingredients, step-by-step tips, and variations to enhance your dish. Remember, choosing the right spices and olive oil is key for taste. Explore cooking methods like grilling or sautéing for new twists. Proper storage keeps leftovers fresh. With this guide, you can enjoy delicious, healthy meals any day. Embrace your creativity in the kitchen, and enjoy the process!](https://dailydishlab.com/wp-content/uploads/2025/07/82f1db9d-d538-4cbd-a935-2876753fc949-768x768.webp)