One-Pot Creamy Vegetable Pot Pie Pasta Delight
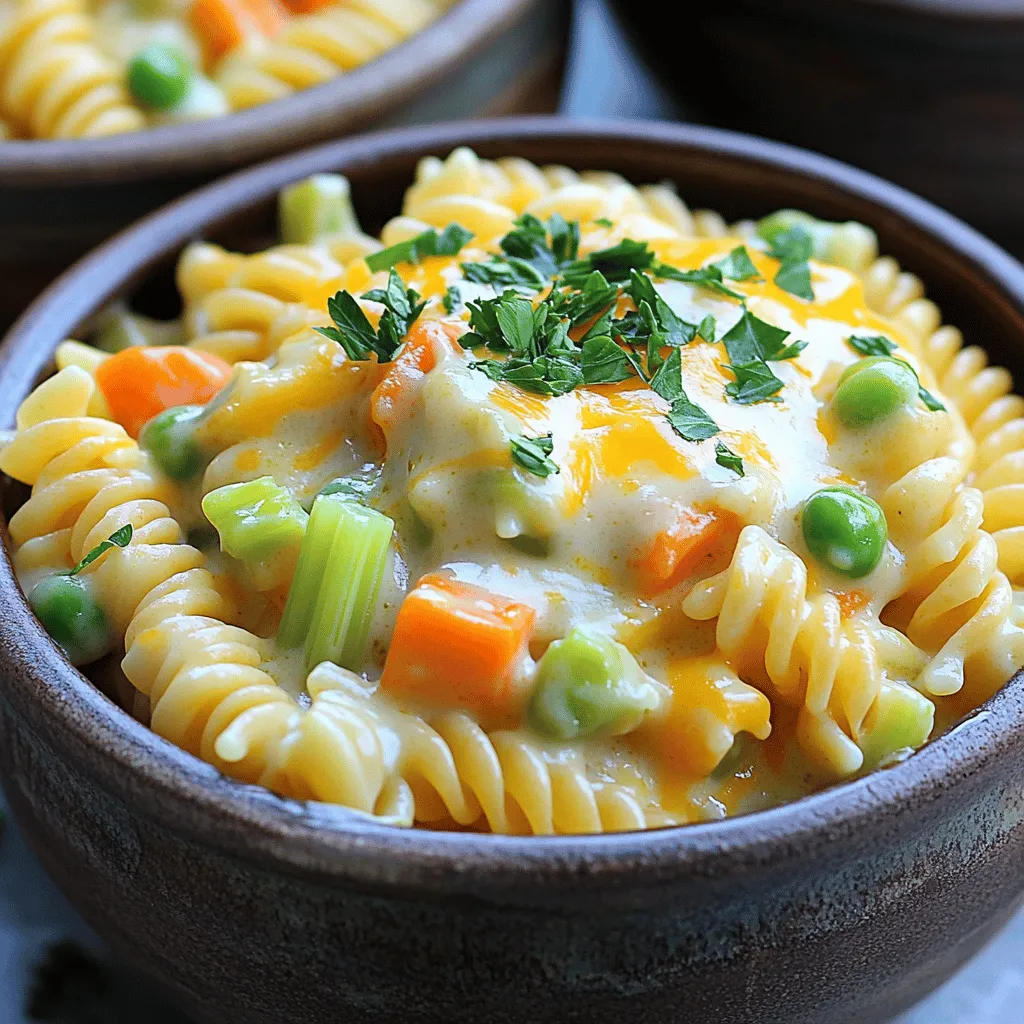
Welcome to a cozy culinary adventure! Today, I’m sharing a delightful recipe that combines comfort and convenience: One-Pot Creamy Vegetable Pot Pie Pasta. This dish requires just one pot and packs in flavors and nutrients. Get ready to enjoy creamy pasta filled with fresh veggies and herbs. Whether you’re a busy parent or just love easy meals, this is perfect for you. Let’s dive into the ingredients and get cooking!
Why I Love This Recipe
- Comforting and Creamy: This dish combines the warmth of a pot pie with the heartiness of pasta, making it a perfect comfort food for any occasion.
- One-Pot Wonder: With everything cooked in one pot, cleanup is a breeze, allowing you to enjoy your meal without the hassle of multiple dishes.
- Customizable: This recipe is versatile; you can easily swap in your favorite vegetables or add proteins to make it your own.
- Quick and Easy: Ready in just 30 minutes, this recipe is ideal for busy weeknights when you want a delicious meal without spending hours in the kitchen.
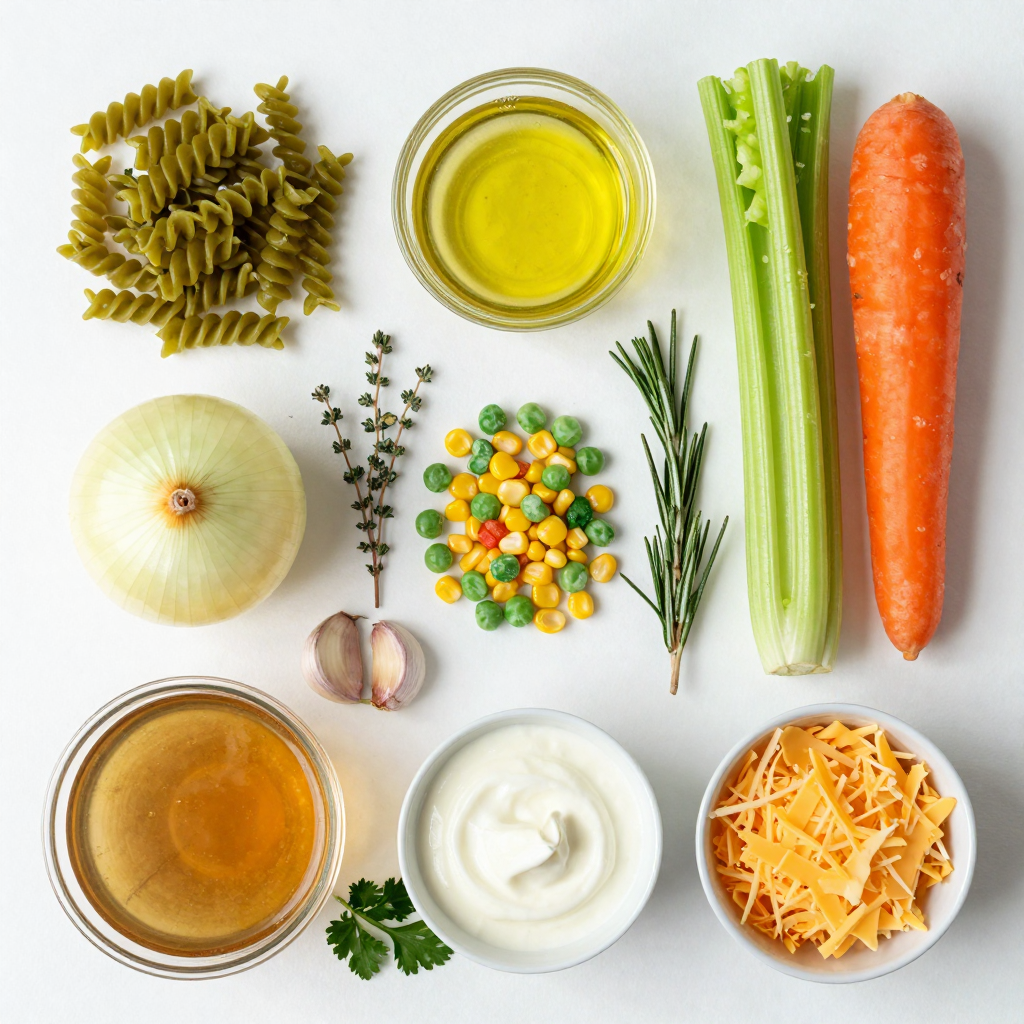
Ingredients
Main Ingredients
- 8 ounces of pasta (fusilli or rotini)
- 1 tablespoon olive oil
- 1 onion, diced
- 2 carrots, diced
- 2 celery stalks, diced
Additional Ingredients
- 2 cloves garlic, minced
- 1 cup frozen mixed vegetables (peas, corn, green beans)
- 1 teaspoon dried thyme
- 1 teaspoon dried rosemary
- 4 cups vegetable broth
Creamy Components
- 1 cup heavy cream or plant-based alternative
- 1 cup shredded cheddar cheese (optional)
- Salt and pepper to taste
- Fresh parsley for garnish
The main ingredients form the base of this dish. The pasta brings a hearty texture. I love using fusilli or rotini because they hold the sauce well. Olive oil adds richness and helps cook the veggies. Diced onion, carrots, and celery give a sweet and savory flavor.
The additional ingredients enhance this dish. Garlic adds a nice aroma. Frozen mixed vegetables give color and nutrients. Thyme and rosemary bring herbal notes. Vegetable broth adds depth and helps cook the pasta.
For the creamy components, heavy cream creates a rich sauce. You can use a plant-based option if you prefer. Shredded cheddar cheese adds flavor and creaminess, but it is optional. You can season with salt and pepper to your taste. Finally, fresh parsley makes a lovely garnish and adds a pop of color.
All these ingredients come together to make a warm and comforting meal.
Step-by-Step Instructions
Preparing the Vegetables
- Heat 1 tablespoon of olive oil in a large pot over medium heat.
- Add 1 diced onion, 2 diced carrots, and 2 diced celery stalks.
- Sauté these vegetables for about 5 minutes. You want the onion to turn soft and clear.
Adding Flavor
- Next, stir in 2 minced garlic cloves. Cook this for 1 more minute.
- Add 1 cup of frozen mixed vegetables, 1 teaspoon of dried thyme, and 1 teaspoon of dried rosemary. Mix everything well to combine the flavors.
Cooking the Pasta
- Pour in 4 cups of vegetable broth and bring it to a boil.
- When it starts to boil, add 8 ounces of pasta, like fusilli or rotini.
- Cover the pot and reduce the heat to low. Let it simmer for 10 to 12 minutes. Stir occasionally to keep the pasta from sticking.
Finishing Touches
- After cooking, remove the pot from heat.
- Stir in 1 cup of heavy cream and 1 cup of shredded cheddar cheese, if you want.
- Season with salt and pepper to taste. Let it sit for a few minutes to thicken before serving.
Pro Tips
- Use Fresh Herbs: Fresh herbs can elevate the flavor of your dish. If you have fresh thyme or rosemary, use them instead of dried for a more vibrant taste.
- Adjust Creaminess: For a lighter version, substitute heavy cream with a plant-based milk or yogurt. This will maintain creaminess while reducing calories.
- Customize Vegetables: Feel free to swap in your favorite vegetables or whatever you have on hand. Broccoli, bell peppers, or spinach can be great additions.
- Leftover Storage: This dish stores well in the fridge for up to three days. Reheat on the stovetop with a splash of broth to bring back the creamy texture.
Tips & Tricks
Achieving the Perfect Consistency
To get the right texture in your One-Pot Creamy Vegetable Pot Pie Pasta, let it sit for a few minutes after cooking. This time helps the dish thicken. You can also adjust the creaminess. If you want it richer, add more heavy cream. If you prefer it lighter, use less.
Preventing Sticking
Pasta can stick to the pot if you’re not careful. Stir it occasionally while it cooks. This simple act helps keep the pasta moving and prevents sticking. Also, make sure there is enough liquid in the pot. If the pasta absorbs too much broth, it may clump together.
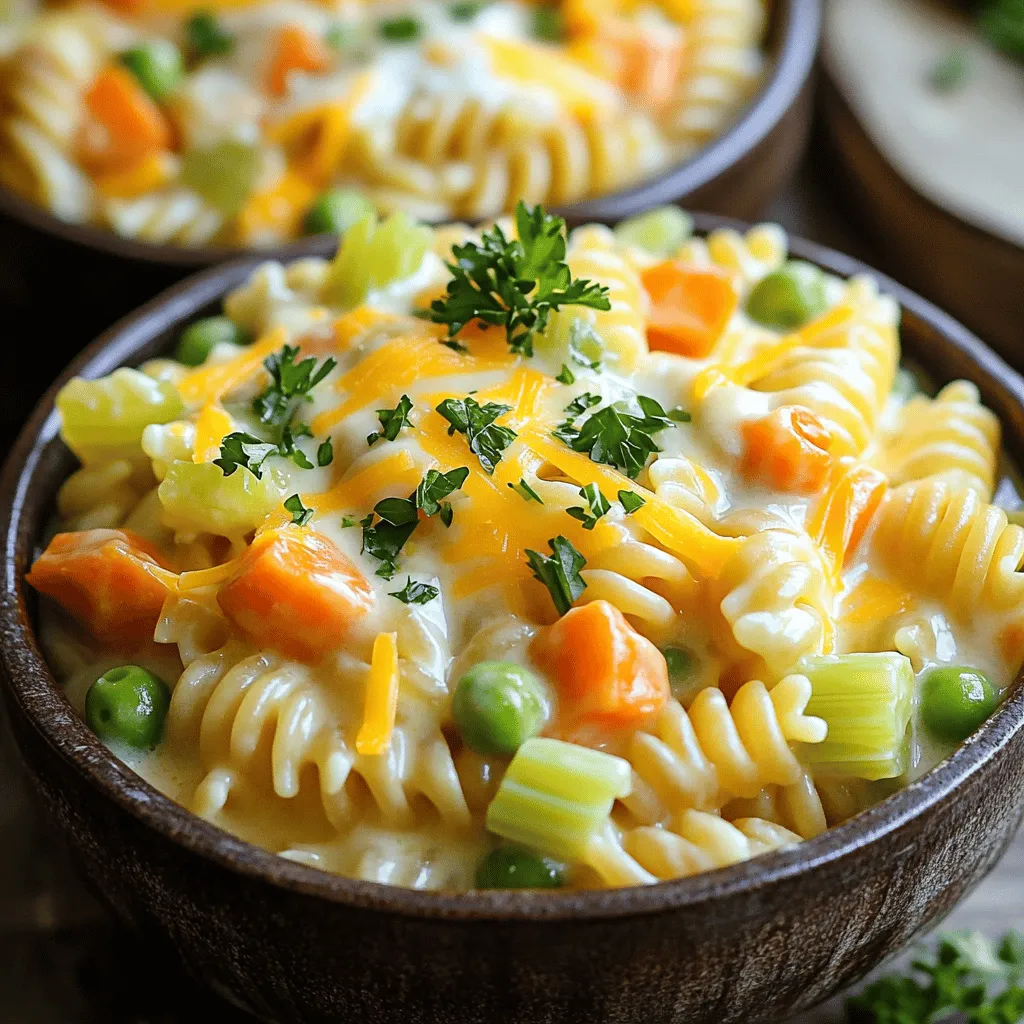
Serving Suggestions
For the best presentation, serve the pasta in deep bowls. This makes it look more inviting. You can enhance the dish’s appeal by garnishing it with fresh parsley. A sprinkle of extra cheese on top also adds a nice touch. These small details can turn a simple meal into a delightful dish.
Variations
Different Pasta Options
You can change your pasta type for fun. Swap fusilli or rotini for penne or shells. Each shape brings a new texture. Try whole grain or gluten-free pasta too. This keeps the dish fresh and exciting.
Protein Additions
Want to add protein? Cooked chicken or tofu works great. Chicken adds a hearty bite. Tofu makes it plant-based and filling. You can also use beans or lentils for extra protein. Just mix them in with the vegetables.
Seasonal Vegetable Swaps
Use fresh or seasonal veggies based on what you find. Carrots, peas, or zucchini all taste great. You can even add spinach or bell peppers. This keeps the dish colorful and packed with nutrients. Look at your local market for ideas.
Storage Info
Refrigeration
To keep your One-Pot Creamy Vegetable Pot Pie Pasta fresh, store leftovers in an airtight container. Make sure to let the dish cool down before sealing it up. This method helps lock in moisture and flavor. You can safely refrigerate it for up to three days.
Freezing Guidelines
If you want to freeze this creamy pasta dish, portion it into freezer-safe containers. Leave some space at the top for expansion. This dish can last in the freezer for up to three months. When you’re ready to enjoy it again, thaw it overnight in the fridge for best results.
Reheating Instructions
To reheat the pasta, warm it gently on the stove over low heat. Add a splash of vegetable broth or cream to help maintain its creaminess. Stir often to prevent sticking. You can also use the microwave, but cover it to keep moisture in. Heat in short bursts, stirring in between, until hot. Enjoy your creamy pasta as if it was just made!
FAQs
Can I make this recipe vegan?
Yes, you can make this dish vegan. To do this, swap heavy cream with a plant-based cream. There are many options like coconut or almond cream. You can also replace cheddar cheese with vegan cheese. This way, you keep the creamy taste without using dairy.
What if I don’t have specific vegetables on hand?
If you don’t have the exact vegetables, don’t worry! You can use any fresh or frozen veggies you like. Zucchini, bell peppers, or even spinach work well. You can also skip the mixed vegetables entirely. The pasta will still taste great. Just be sure to keep the flavors with herbs.
How long does this dish last in the fridge?
This creamy vegetable pot pie pasta lasts about three to four days in the fridge. Store it in an airtight container to keep it fresh. When you’re ready to eat, just reheat it on the stove or in the microwave. You may need to add a splash of broth or cream to restore the creamy texture.
This creamy pasta dish combines simple ingredients for a big flavor. You start with sautéed vegetables, then add broth and pasta for a comforting meal. Finish it with cream and cheese for richness. Remember to adjust the cream for your perfect consistency. Feel free to swap ingredients or add protein. Store leftovers properly so they stay fresh. With these tips, you can enjoy this dish any time. Make it your own and share it with others for a wonderful experience.

One-Pot Creamy Vegetable Pot Pie Pasta
Ingredients
8 ounces of pasta (fusilli or rotini work well)
1 tablespoon olive oil
1 onion, diced
2 carrots, diced
2 celery stalks, diced
2 cloves garlic, minced
1 cup frozen mixed vegetables (peas, corn, green beans)
1 teaspoon dried thyme
1 teaspoon dried rosemary
4 cups vegetable broth
1 cup heavy cream or a plant-based alternative
1 cup shredded cheddar cheese (optional)
Salt and pepper to taste
Fresh parsley for garnish
Instructions
In a large pot, heat the olive oil over medium heat. Add the diced onion, carrots, and celery. Sauté for about 5 minutes until the vegetables are soft and the onion becomes translucent.
Stir in the minced garlic and cook for an additional 1 minute until fragrant.
Add the frozen mixed vegetables, dried thyme, and dried rosemary. Stir to combine.
Pour in the vegetable broth and bring the mixture to a boil.
Once boiling, add the pasta to the pot. Reduce the heat to low, cover, and simmer for about 10-12 minutes, or until the pasta is al dente and has absorbed most of the liquid. Stir occasionally to prevent sticking.
Remove the pot from the heat and stir in the heavy cream and cheddar cheese (if using) until melted and well combined. Season with salt and pepper to taste.
Let it sit for a few minutes to thicken before serving.
Prep Time: 10 minutes | Total Time: 30 minutes | Servings: 4
– Presentation Tips: Serve the pasta in deep bowls and garnish with freshly chopped parsley for a pop of color. Consider adding a sprinkle of extra cheese or a dash of black pepper on top for additional flavor.
One-Pot Creamy Vegetable Pot Pie Pasta
Ingredients
- 8 ounces pasta (fusilli or rotini)
- 1 tablespoon olive oil
- 1 medium onion, diced
- 2 medium carrots, diced
- 2 stalks celery, diced
- 2 cloves garlic, minced
- 1 cup frozen mixed vegetables (peas, corn, green beans)
- 1 teaspoon dried thyme
- 1 teaspoon dried rosemary
- 4 cups vegetable broth
- 1 cup heavy cream or a plant-based alternative
- 1 cup shredded cheddar cheese (optional)
- to taste salt
- to taste pepper
- for garnish fresh parsley
Instructions
- In a large pot, heat the olive oil over medium heat. Add the diced onion, carrots, and celery. Sauté for about 5 minutes until the vegetables are soft and the onion becomes translucent.
- Stir in the minced garlic and cook for an additional 1 minute until fragrant.
- Add the frozen mixed vegetables, dried thyme, and dried rosemary. Stir to combine.
- Pour in the vegetable broth and bring the mixture to a boil.
- Once boiling, add the pasta to the pot. Reduce the heat to low, cover, and simmer for about 10-12 minutes, or until the pasta is al dente and has absorbed most of the liquid. Stir occasionally to prevent sticking.
- Remove the pot from the heat and stir in the heavy cream and cheddar cheese (if using) until melted and well combined. Season with salt and pepper to taste.
- Let it sit for a few minutes to thicken before serving.
- Presentation Tips: Serve the pasta in deep bowls and garnish with freshly chopped parsley for a pop of color. Consider adding a sprinkle of extra cheese or a dash of black pepper on top for additional flavor.

![To make black bean stuffed peppers, you need fresh, wholesome items. Here is what you'll need: - 4 large bell peppers (any color) - 1 can (15 oz) black beans, rinsed and drained - 1 cup cooked quinoa - 1 cup corn kernels (fresh or frozen) - 1 cup diced tomatoes (canned or fresh) - ½ cup diced red onion - 1 teaspoon cumin - 1 teaspoon smoked paprika - ½ teaspoon garlic powder - ½ teaspoon chili powder - Salt and pepper to taste - 1 cup shredded cheese (cheddar or pepper jack) - Fresh cilantro, chopped (for garnish) These ingredients blend to create a tasty and filling meal. The black beans offer protein and fiber. The quinoa adds more nutrients, while the peppers provide color and crunch. This recipe serves four people. Each stuffed pepper is a complete meal. You can pair them with a salad or bread for a larger dinner. If you want leftovers, consider making extra peppers. They keep well in the fridge for a few days. I often choose fresh ingredients when I can. Fresh bell peppers taste better and add more nutrition. However, canned items make cooking easier. For example, canned black beans save time. Rinse them well to reduce sodium. Use fresh corn when it’s in season for the best flavor. For tomatoes, choose canned or fresh based on your preference. Both work well in this dish. Start by preheating your oven to 375°F (190°C). Take your bell peppers and cut off the tops. Be careful not to cut too much. Remove the seeds and membranes inside. Keep the peppers whole. They will hold the filling. You can use any color you like. Red, yellow, or green all work well. Set them aside while you prepare the filling. In a large bowl, mix together the following ingredients: - 1 can (15 oz) black beans, rinsed and drained - 1 cup cooked quinoa - 1 cup corn kernels (fresh or frozen) - 1 cup diced tomatoes (canned or fresh) - ½ cup diced red onion - 1 teaspoon cumin - 1 teaspoon smoked paprika - ½ teaspoon garlic powder - ½ teaspoon chili powder - Salt and pepper to taste Stir everything until well combined. The mixture should be colorful and fragrant. This filling is packed with flavor and nutrition. You can taste it to check the seasoning. Adjust with more salt or spices if needed. Spoon the filling into each bell pepper. Fill them generously, but don’t overfill. Place the stuffed peppers upright in a baking dish. If they seem wobbly, you can add a little water to the dish. This helps steam the peppers as they cook. Cover the dish with aluminum foil. Bake for 30 minutes. After that, remove the foil and sprinkle cheese on top. Use about 1 cup of shredded cheese, like cheddar or pepper jack. Bake for another 10-15 minutes. You want the cheese to melt and bubble. Once done, take them out and let cool for a few minutes. Garnish with fresh cilantro for a pop of color. Enjoy your tasty Black Bean Stuffed Peppers! For the full recipe, click [Full Recipe]. To keep your peppers firm, avoid overcooking them. Pre-baking the peppers for just 10 minutes helps. This gives them a head start without making them mushy. If you want extra crunch, skip the water in the baking dish. Instead, bake the peppers dry. The filling will steam them nicely. Taste your filling before you stuff the peppers. If it needs more flavor, add spices. You can increase the garlic powder or chili powder for a kick. For a fresh flavor, try adding lime juice. It brightens the dish and makes each bite pop. Don’t forget to adjust the salt to your liking! Cheese adds creaminess and flavor. I love using shredded cheddar or pepper jack. If you want a twist, try crumbled feta or goat cheese. For a crunchy topping, sprinkle crushed tortilla chips before serving. Fresh cilantro adds color and taste. You can also drizzle some avocado or sour cream on top for extra goodness. For the full recipe, check out the Black Bean Fiesta Stuffed Peppers. {{image_2}} You can easily add meat to your stuffed peppers. Ground beef or turkey works well. Just brown the meat in a pan before mixing it with the other filling ingredients. This adds more protein and flavor. If you like, you can also use shredded chicken or pulled pork. These options make the dish heartier. They can balance the beans and grains nicely. If you want to change the grain, quinoa is not the only option. You can use brown rice, farro, or even couscous. Each grain gives a different taste and texture. Brown rice is chewier, while couscous cooks faster and is fluffier. Farro has a nutty flavor that adds depth. Feel free to mix it up based on what you have at home. For those who enjoy heat, you can spice things up easily. Add fresh jalapeños or red pepper flakes to the filling. You can also use hotter chili powders. If you prefer a milder dish, reduce the chili powder and cumin. Adding a dollop of sour cream or yogurt on top also cools the heat. Adjust the spices to match your taste and enjoy a perfect meal. Check out the Full Recipe for details on making these tasty stuffed peppers! After you enjoy your Black Bean Stuffed Peppers, store leftovers in an airtight container. Make sure they cool down to room temperature first. Place a layer of plastic wrap or parchment paper between layers if stacking. This keeps them fresh and prevents sticking. Stored this way, they last for up to four days in the fridge. Want to save some for later? You can freeze these stuffed peppers! Let them cool completely. Wrap each pepper in plastic wrap, then in foil. This method prevents freezer burn. You can also place them in a freezer-safe bag. They will stay good for about three months. When you're ready to eat, thaw them in the fridge overnight. To reheat, remove the peppers from the fridge or freezer. If frozen, let them thaw first. Preheat your oven to 350°F (175°C). Place the peppers in a baking dish. Cover with foil to keep them moist. Bake for 20-25 minutes until heated through. You can also microwave them for 2-3 minutes, but the oven keeps them crispy. Enjoy your meal again! For the full recipe, check the [Full Recipe]. Yes, you can make these peppers ahead. Prepare the filling and stuff the peppers. Then, cover and refrigerate them. Bake them later when you are ready to eat. This saves time and makes dinner easy. You can use pinto beans or kidney beans instead. Chickpeas are also a great choice. If you prefer a meat option, ground turkey works well too. Each choice brings a different taste, but all can make your dish delightful. Yes, you can cook stuffed peppers on the stovetop. Use a large skillet with a lid. Add a little water or broth to the skillet. Place the stuffed peppers in the pan, cover, and cook on low heat. This method takes about 25 to 30 minutes. Check them often to avoid burning. In this blog post, we covered all about stuffed peppers. We reviewed ingredients, portions, and the choice between fresh and canned. Next, I shared step-by-step instructions for prepping and baking. I shared tips to avoid soggy peppers and enhance flavors. You learned variations like adding meat or grains and how to store leftovers. Stuffed peppers are not just tasty but also easy to prepare. Enjoy your cooking and make it your own!](https://dailydishlab.com/wp-content/uploads/2025/07/2ade4988-b5b7-4125-b2de-b7911ae6a9e2-768x768.webp)