
No-Bake Strawberry Cheesecake Bars Easy and Delicious
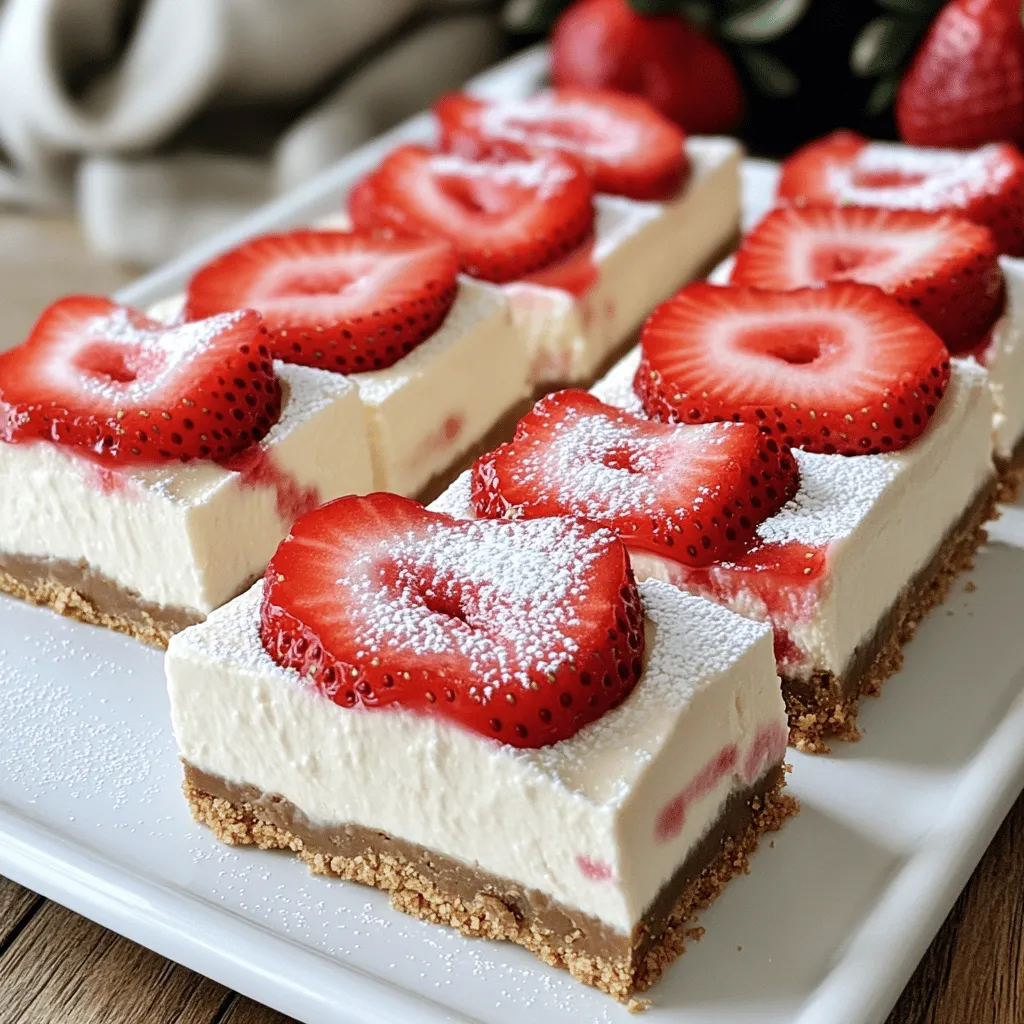
Craving a sweet treat that’s both easy and delicious? Look no further! No-bake strawberry cheesecake bars are simple to make and bursting with fresh flavor. With a few key ingredients, you can whip up this delightful dessert in no time. Whether you’re planning a picnic, a party, or just a fun family night, these bars are sure to impress. Let’s dive into the recipe and make something special!
Why I Love This Recipe
- Effortless Delight: These no-bake strawberry cheesecake bars are incredibly easy to make, requiring minimal effort while delivering maximum flavor.
- Fresh Ingredients: The use of fresh strawberries adds a burst of natural sweetness and vibrant color to the dessert, making it visually appealing.
- Creamy Texture: The combination of cream cheese and whipped cream creates a rich, creamy filling that melts in your mouth with every bite.
- Perfect for Any Occasion: These cheesecake bars are versatile enough to serve at parties, picnics, or just as a sweet treat at home, making them a go-to dessert.
Ingredients
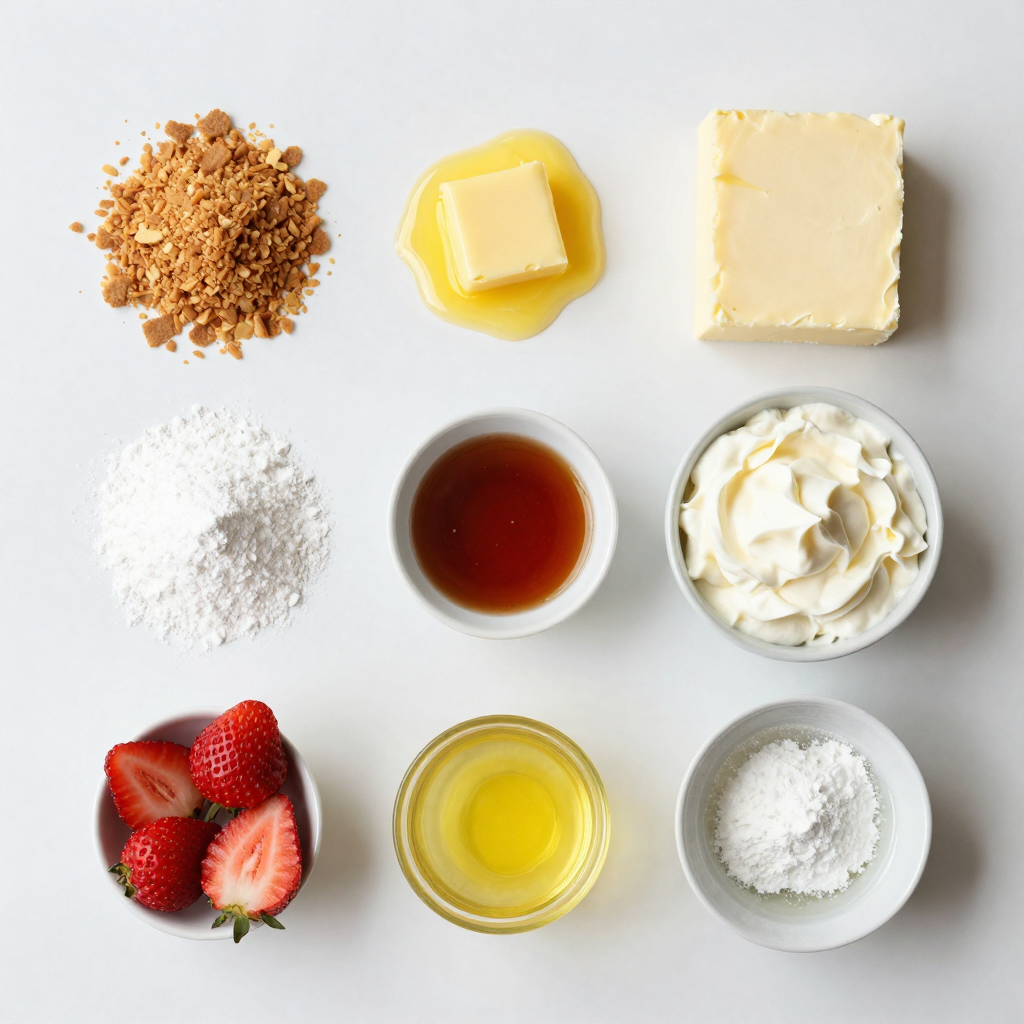
List of Ingredients for No-Bake Strawberry Cheesecake Bars
- 1 ½ cups graham cracker crumbs
- ½ cup unsalted butter, melted
- 2 cups cream cheese, softened
- 1 cup powdered sugar
- 1 teaspoon vanilla extract
- 1 cup heavy whipping cream
- 2 cups fresh strawberries, hulled and sliced
- 2 tablespoons lemon juice
- 1 tablespoon gelatin powder (optional, for extra firmness)
- 2 tablespoons water (for gelatin)
Making No-Bake Strawberry Cheesecake Bars starts with gathering fresh, quality ingredients. I always choose the best strawberries for sweet flavor. The cream cheese must be softened well, so it blends smoothly. The graham cracker crumbs create a delicious crust.
Using unsalted butter helps control the salt in the dish. Powdered sugar provides the right sweetness and mixes easily into the cream cheese. Vanilla extract adds a warm note that enhances the flavors. Heavy whipping cream gives the filling a light, airy texture, making each bite melt in your mouth.
If you want a firmer filling, consider using gelatin powder. It helps the bars hold their shape better. Just remember to mix it with warm water to dissolve it properly.
Before you start, make sure you have all the ingredients ready. This will make your cooking process smooth and easy.
Step-by-Step Instructions
Preparing the Crust
To start, grab a mixing bowl. Combine 1 ½ cups of graham cracker crumbs with ½ cup of melted unsalted butter. Mix it well until it looks like wet sand. Next, take a 9×9 inch baking dish lined with parchment paper. Press the graham cracker mix firmly into the bottom. This forms your crust. Now, refrigerate it while you move on to the filling.
Making the Cheesecake Filling
In a large bowl, beat 2 cups of softened cream cheese using an electric mixer. Keep mixing until it is smooth and creamy. Gradually add 1 cup of powdered sugar and 1 teaspoon of vanilla extract. Mix until everything is blended well. Now, in a separate bowl, whip 1 cup of heavy whipping cream until it forms stiff peaks. Gently fold this whipped cream into the cream cheese mixture. This step gives your filling a light texture.
Assembling and Setting the Bars
If you want a firmer filling, prepare the gelatin. Dissolve 1 tablespoon of gelatin powder in 2 tablespoons of warm water. Mix this well. Then, add the gelatin to the cream cheese mixture. Next, fold in 2 cups of hulled and sliced fresh strawberries along with 2 tablespoons of lemon juice. Pour this lovely filling over the chilled crust. Spread it evenly with a spatula. Cover the dish with plastic wrap and refrigerate for at least 4 to 6 hours until set. Once set, lift the bars out using the parchment paper and cut them into squares or rectangles. Enjoy your tasty creation!
Pro Tips
- Chill Your Tools: Before whipping the cream, chill your mixing bowl and beaters for a few minutes. This helps the cream whip up faster and achieve stiff peaks more easily.
- Use Fresh Strawberries: For the best flavor and texture, always opt for fresh strawberries. Frozen strawberries can make the filling watery and less vibrant.
- Make Ahead: These cheesecake bars can be made a day in advance. They actually taste better after sitting in the fridge overnight, allowing the flavors to meld beautifully.
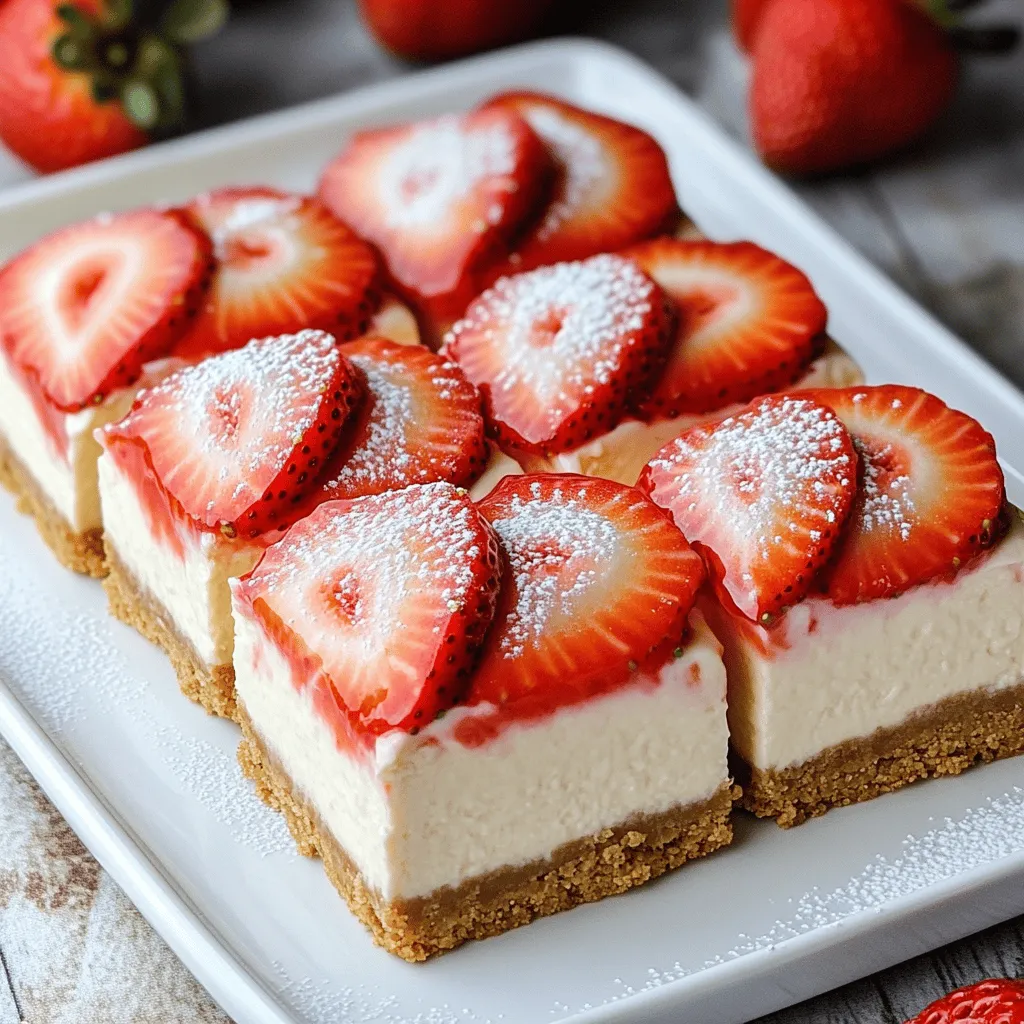
- Presentation Matters: Take the time to garnish the bars with fresh strawberry slices and a dusting of powdered sugar just before serving for an appealing presentation.
Tips & Tricks
Tips for Perfect No-Bake Bars
- Ensuring a firm crust: To get a firm crust, use enough melted butter. It helps bind the crumbs well. Press the mixture down hard into the pan. This creates a solid base. Let it chill in the fridge for at least 15 minutes before adding the filling.
- How to fold ingredients without deflating whipped cream: When you fold the whipped cream into the cream cheese mix, use a spatula. Start from the bottom and lift gently. Turn the bowl as you fold. This keeps the air in the whipped cream, making your bars light and fluffy.
Serving Suggestions
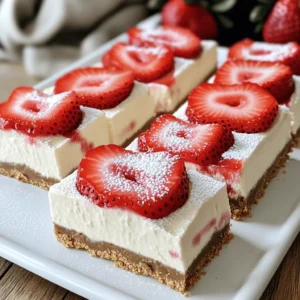
- Presentation tips for serving: To make your bars look great, cut them neatly into squares. Place them on a nice platter. Add fresh strawberries on top. A light dusting of powdered sugar adds a nice touch. Serve them chilled for the best taste.
- Pairing ideas with beverages or toppings: These cheesecake bars pair well with lemonade or iced tea. For toppings, try whipped cream or chocolate sauce. A scoop of vanilla ice cream on the side also works great!
Variations
Flavor Variations
You can have fun with flavors in your no-bake strawberry cheesecake bars. Here are some ideas:
- Different Fruits: Swap strawberries with blueberries or raspberries. You can use one fruit or mix them. Each fruit gives a new taste and look. Blueberries add a sweet and tangy flavor, while raspberries bring a tart kick.
- Alternative Flavorings: Add lemon zest for a bright, fresh taste. This will make the filling pop with flavor. You can also try vanilla bean paste for an extra touch of richness. It adds a little crunch from the seeds too.
Dietary Modifications
You can adjust these bars to fit your diet. Here are some easy swaps:
- Gluten-Free Options: Use gluten-free graham crackers for the crust. They work just as well and taste great. You can also blend nuts and dates for a no-bake crust that is gluten-free.
- Dairy-Free Substitutions: If you want a dairy-free option, try using coconut cream in place of cream cheese. It gives a creamy texture and a hint of coconut flavor. You can also use a dairy-free whipped topping for the filling. This way, everyone can enjoy these tasty bars!
Storage Info
How to Store Leftovers
To keep your strawberry cheesecake bars fresh, store them in the fridge. Place them in an airtight container. If you have leftovers, they will last for up to five days. If you want to save them for later, freezing is a great option. Cut the bars into squares and wrap each piece in plastic wrap. Then, place them in a freezer-safe bag or container. They can stay frozen for up to three months.
Tips for Thawing and Serving
When you want to enjoy your frozen cheesecake bars, take them out of the freezer. Leave them in the fridge for a few hours to thaw. You can also thaw them at room temperature for about 30 minutes. If the bars feel too soft, you can place them back in the fridge to firm up. Before serving, dust them with powdered sugar or add fresh strawberries for a lovely touch.
FAQs
Common Questions About No-Bake Strawberry Cheesecake Bars
How long do the cheesecake bars last in the fridge?
The cheesecake bars will last about 5 days in the fridge. Make sure to store them in an airtight container. This helps keep them fresh and tasty.
Can I use frozen strawberries instead of fresh?
Yes, you can use frozen strawberries. Just thaw them and drain excess liquid. This keeps your bars from getting too watery. Frozen strawberries can work well, but fresh ones give a better taste and texture.
What can I replace gelatin with if I want it to be vegetarian?
If you want a vegetarian option, try using agar-agar or carrageenan. These are good substitutes for gelatin. They help your cheesecake bars set without using animal products. Just follow the package instructions for the right amount.
You now know how to make tasty no-bake strawberry cheesecake bars. We discussed the key ingredients, like cream cheese and fresh strawberries, and went through easy steps to prepare the crust and filling. I shared tips for perfect bars, fun flavor swaps, and how to store leftovers well. Whether you’re enjoying them at a gathering or just for a treat, these bars are a winner. You can easily customize them too. Now, grab your ingredients and start creating this delicious dessert!
No-Bake Strawberry Cheesecake Bars
Ingredients
1 ½ cups graham cracker crumbs
½ cup unsalted butter, melted
2 cups cream cheese, softened
1 cup powdered sugar
1 teaspoon vanilla extract
1 cup heavy whipping cream
2 cups fresh strawberries, hulled and sliced
2 tablespoons lemon juice
1 tablespoon gelatin powder (optional, for extra firmness)
2 tablespoons water (for gelatin)
Instructions
In a mixing bowl, combine graham cracker crumbs and melted butter. Mix until well combined and the mixture resembles wet sand.
Press the graham cracker mixture firmly into the bottom of a parchment-lined 9×9 inch baking dish to form the crust. Refrigerate while preparing the filling.
In a large bowl, beat the softened cream cheese with an electric mixer until smooth and creamy.
Gradually add the powdered sugar and vanilla extract, mixing until combined.
In a separate bowl, whip the heavy cream until stiff peaks form. Gently fold this whipped cream into the cream cheese mixture until well blended.
If using gelatin, dissolve the gelatin powder in 2 tablespoons of warm water and mix thoroughly. Add it to the filling mixture along with the sliced strawberries and lemon juice, folding gently to incorporate.
Pour the strawberry cheesecake filling over the chilled crust in the baking dish, spreading it evenly with a spatula.
Cover the dish with plastic wrap and refrigerate for at least 4–6 hours or until set.
Once set, lift the bars out of the dish using the parchment paper and cut into squares or rectangles.
Prep Time: 20 mins | Total Time: 6 hrs | Servings: 12
– Presentation Tips: Arrange the cheesecake bars on a serving platter, garnished with additional fresh strawberries and a dusting of powdered sugar.
No-Bake Strawberry Cheesecake Bars
Ingredients
- 1.5 cups graham cracker crumbs
- 0.5 cups unsalted butter, melted
- 2 cups cream cheese, softened
- 1 cups powdered sugar
- 1 teaspoon vanilla extract
- 1 cups heavy whipping cream
- 2 cups fresh strawberries, hulled and sliced
- 2 tablespoons lemon juice
- 1 tablespoon gelatin powder (optional, for extra firmness)
- 2 tablespoons water (for gelatin)
Instructions
- In a mixing bowl, combine graham cracker crumbs and melted butter. Mix until well combined and the mixture resembles wet sand.
- Press the graham cracker mixture firmly into the bottom of a parchment-lined 9x9 inch baking dish to form the crust. Refrigerate while preparing the filling.
- In a large bowl, beat the softened cream cheese with an electric mixer until smooth and creamy.
- Gradually add the powdered sugar and vanilla extract, mixing until combined.
- In a separate bowl, whip the heavy cream until stiff peaks form. Gently fold this whipped cream into the cream cheese mixture until well blended.
- If using gelatin, dissolve the gelatin powder in 2 tablespoons of warm water and mix thoroughly. Add it to the filling mixture along with the sliced strawberries and lemon juice, folding gently to incorporate.
- Pour the strawberry cheesecake filling over the chilled crust in the baking dish, spreading it evenly with a spatula.
- Cover the dish with plastic wrap and refrigerate for at least 4–6 hours or until set.
- Once set, lift the bars out of the dish using the parchment paper and cut into squares or rectangles.
![- 1 cup ricotta cheese - 2 large eggs - 1/4 cup granulated sugar - Zest of 1 lemon - 1/4 cup fresh lemon juice I love using ricotta cheese in these pancakes. It makes them soft and creamy. The eggs add richness and help the pancakes rise. Granulated sugar gives just the right hint of sweetness. Zest and juice from the lemon bring a bright, fresh flavor. - 1 cup all-purpose flour - 2 teaspoons baking powder - 1/4 teaspoon salt All-purpose flour gives the pancakes structure. Baking powder lifts the batter and keeps it light. A pinch of salt balances the sweetness and enhances the lemon's flavor. - 1/4 cup milk (or a dairy-free alternative) - Butter or oil for cooking Milk helps adjust the batter's consistency. You can use dairy-free milk if you prefer. Butter or oil is essential for cooking the pancakes. It prevents sticking and adds a nice golden color. For the full recipe, check out the details above. To start, grab a large mixing bowl. Add 1 cup of ricotta cheese, 2 large eggs, and 1/4 cup of granulated sugar. Use a whisk to mix these until smooth. It's important to blend well so your pancakes turn out fluffy. Next, add the zest of 1 lemon and 1/4 cup of fresh lemon juice. The zest gives a bright flavor, while the juice adds a nice tang. Mix again until everything is well combined. Now, take another bowl for the dry mix. Combine 1 cup of all-purpose flour, 2 teaspoons of baking powder, and 1/4 teaspoon of salt. Stir until it looks even. This blend helps the pancakes rise and stay light. Gradually add the dry mix to the wet mix. Use a spatula to fold the ingredients together. Be careful not to over-mix; some lumps are okay. If the batter seems too thick, pour in 1/4 cup of milk. This will help reach the right consistency for pouring. It's time to cook! Preheat a non-stick skillet over medium heat. Lightly grease it with butter or oil. Pour about 1/4 cup of batter for each pancake onto the skillet. Cook for 2-3 minutes. You'll see small bubbles form on the surface when they're ready to flip. Carefully turn the pancakes and cook for another 2-3 minutes until golden brown and fluffy. Repeat this with the remaining batter. Enjoy your Lemon Ricotta Pancakes warm! For the full recipe, check the section above. To make the best Lemon Ricotta Pancakes, start with the right skillet temperature. Preheat your non-stick skillet over medium heat. This helps the pancakes cook evenly and become fluffy. If the skillet is too hot, the pancakes can burn on the outside while staying raw inside. Next, avoid over-mixing your batter. Gently fold the wet and dry ingredients together until just combined. A few lumps are okay. Over-mixing can make the pancakes tough instead of light and airy. When it comes to toppings, get creative! Fresh fruit like berries or sliced bananas pairs well with the zesty lemon flavor. You can also drizzle maple syrup or honey on top for added sweetness. For an appealing look, stack the pancakes high on a plate. Add a dollop of whipped cream and sprinkle powdered sugar on top. This adds a nice touch and makes them even more tempting. If you need a gluten-free option, swap out the all-purpose flour for a gluten-free blend. Many brands offer good alternatives that work just as well. For a dairy-free version, use a plant-based ricotta and a non-dairy milk. Almond or oat milk works great here. These changes still keep the pancakes tasty and fluffy. For the full recipe, check the previous section. {{image_2}} You can make these pancakes even better with some fun additions. Try adding blueberries or chocolate chips to the batter before cooking. This small change adds bursts of flavor and sweetness to each bite. Another option is to switch up the citrus flavor. Instead of lemon, you can use orange zest. This will give your pancakes a bright and fresh taste, perfect for a sunny breakfast. Garnishing your pancakes can take them to the next level. Fresh fruits like strawberries, bananas, or raspberries pair nicely. Just slice them up and place them on top for a colorful look. Drizzling maple syrup or honey adds a nice touch of sweetness. You can also add a dollop of whipped cream for some extra creaminess. It makes your pancakes look fancy and taste even better. You can serve these pancakes in different ways. Stacking them high on a plate looks impressive and makes for a fun meal. Don’t forget to add your favorite toppings! If you want to try something new, consider a pancake waffle hybrid. Use the batter in a waffle maker instead. This gives you a crispy outside and fluffy inside, making for a great breakfast treat. For the full recipe, check out the detailed steps above. Enjoy these tasty lemon ricotta pancakes! To keep your pancakes fresh, follow these steps: - Refrigeration: Place leftover pancakes in an airtight container. They stay good for 3-4 days in the fridge. You can also stack them with parchment paper between layers to prevent sticking. - Freezer Tips: For long-term storage, freeze pancakes in a single layer first. Then, transfer them to a freezer bag or container. They can last up to 2 months. Label the bag with the date for easy tracking. You have a couple of options for reheating: - Microwave: This method is quick. Just place a pancake on a microwave-safe plate. Heat for 20-30 seconds. Add a damp paper towel on top to keep them moist. - Stovetop Reheating: This keeps the texture better. Heat a skillet over low heat. Add a small amount of butter or oil, then place the pancake in the skillet. Heat for about 1-2 minutes on each side until warm. To maintain the fluffy texture, avoid overheating. Check often to prevent drying out. Enjoy your pancakes warm! To make Lemon Ricotta Pancakes from scratch, you need simple ingredients. Here’s what you need: - 1 cup ricotta cheese - 2 large eggs - 1/4 cup granulated sugar - 1 teaspoon vanilla extract - Zest of 1 lemon - 1/4 cup fresh lemon juice - 1 cup all-purpose flour - 2 teaspoons baking powder - 1/4 teaspoon salt - 1/4 cup milk (or a dairy-free alternative) - Butter or oil for the skillet Start by whisking the ricotta, eggs, sugar, vanilla, lemon zest, and juice until smooth. In another bowl, mix the flour, baking powder, and salt. Combine the wet and dry ingredients gently to keep the batter light. If the batter is thick, add milk until it feels right. For the cooking, heat a skillet, pour the batter, and cook until fluffy. Check the [Full Recipe] for exact steps! Yes, you can substitute ricotta cheese. Some good options include: - Cottage cheese (blend for a smoother texture) - Cream cheese (soften it first) - Greek yogurt (adds protein and tang) These alternatives will change the flavor slightly but can still taste great. You can make Lemon Ricotta Pancakes even better with fun mix-ins and toppings. Consider these ideas: - Fresh blueberries or raspberries - Chocolate chips for sweetness - Chopped nuts for crunch - Honey or maple syrup for drizzling You can also top them with whipped cream, fresh fruit, or a sprinkle of powdered sugar. To keep your pancakes fluffy, follow these tips: - Avoid over-mixing the batter; lumps are okay. - Use a light hand when folding in the dry ingredients. - Ensure your skillet is at the right temperature; too hot can burn them. - Let the batter rest for a few minutes before cooking. These steps will help you achieve fluffy and light pancakes every time. In this post, we covered how to make delicious Lemon Ricotta Pancakes. You learned about the key ingredients, like ricotta, eggs, and sugar, and how to prepare them. I shared tips on cooking, serving, and even storing leftover pancakes. You can mix in fruits or switch up flavors to make them your own. Remember, with the right cooking methods, you can create light and fluffy pancakes every time. Enjoy your cooking adventure; these pancakes are sure to impress!](https://dailydishlab.com/wp-content/uploads/2025/06/08a6d73f-3236-4643-afc4-ab19070334e6-768x768.webp)


![To make the best ever blueberry pancakes, you'll need some simple and fresh ingredients. Each one plays an important role in making these pancakes fluffy and delicious. - Overview of fresh blueberries Fresh blueberries are the star of this dish. They add natural sweetness and a lovely burst of flavor. Look for plump, firm berries without any wrinkles. Rinse them gently before using. - Essential dry ingredients You will need: - 1 cup all-purpose flour - 2 tablespoons sugar - 2 teaspoons baking powder - 1/2 teaspoon baking soda - 1/4 teaspoon salt These ingredients help create the perfect pancake base. The baking powder and baking soda give the pancakes their light, airy texture. - Important wet ingredients The wet ingredients are just as crucial: - 1 cup buttermilk (you can use milk with vinegar as a substitute) - 1 large egg - 2 tablespoons melted butter (plus some for cooking) - Zest of 1 lemon - 1 teaspoon vanilla extract These help bind the mixture and add flavor. Buttermilk makes the pancakes tender and rich. You can find the full recipe at the end of this article. Enjoy making these delightful pancakes! 1. Mixing dry ingredients: Start by sifting together the flour, sugar, baking powder, baking soda, and salt in a large bowl. This step helps to break up any lumps and ensures the ingredients blend well. 2. Combining wet ingredients: In a separate bowl, whisk the buttermilk, egg, melted butter, lemon zest, and vanilla extract. Whisk until everything is smooth and well-mixed. The lemon zest adds a fresh taste. 3. Folding in blueberries: Pour the wet mix into the dry mix. Gently fold the two together. Remember, do not overmix! A few lumps are okay. Now, fold in the fresh blueberries. Save a few for garnishing later. 1. Heating the pan: Heat a non-stick skillet or griddle over medium heat. Add a little melted butter to coat the surface. This helps the pancakes cook evenly and prevents sticking. 2. Pouring the batter: Use a 1/4 cup measure to pour the batter onto the skillet. Space them out to give each pancake room to spread as they cook. 3. Checking for doneness: Cook the pancakes until bubbles form on the surface, about 2-3 minutes. Flip them and cook for another 1-2 minutes until golden brown. This ensures a fluffy inside and a nice crust outside. 1. Plating the pancakes: Stack the pancakes neatly on a plate. A tall stack looks impressive and inviting. 2. Topping ideas: Top with additional blueberries, a drizzle of maple syrup, or a dollop of whipped cream. These toppings add flavor and make the dish more fun. 3. Presentation tips: For a beautiful finish, sprinkle some lemon zest on top. It adds color and a lovely aroma. Enjoy your best ever blueberry pancakes! Check the [Full Recipe] for more details. When you pick blueberries, fresh is best. Fresh blueberries are plump and juicy. They burst with flavor in each bite. Frozen blueberries can work too, but they may be mushy. If you want the best taste, choose fresh. To find ripe blueberries, look for a deep blue color. Avoid any that are red or green. Check for firmness; soft berries may be overripe. Smell them too, as ripe blueberries have a sweet scent. Store your blueberries in the fridge. Keep them in their original container. This helps them stay fresh for longer. If you wash them, dry them well before storing. Mixing the batter is key for fluffy pancakes. Avoid overmixing. Stir just enough to combine the wet and dry ingredients. Some lumps are okay! Overmixing makes pancakes tough, not fluffy. For fluffier pancakes, use buttermilk. The acidity helps create air bubbles. You can also add baking powder for extra lift. After mixing, let the batter rest for about 5 minutes. This allows the ingredients to hydrate. Resting makes your pancakes rise better. Choose a non-stick skillet or griddle for cooking. These surfaces help prevent sticking. Make sure to heat it over medium heat. Too hot can burn your pancakes, while too low can make them soggy. Use a little melted butter on the pan to coat it. This adds flavor and helps with browning. Watch for common pitfalls. Don’t flip too soon; wait for bubbles to form. If you flip too early, your pancakes may be raw inside. Flip only once for the best texture. {{image_2}} To make your blueberry pancakes even better, try adding some spices. A pinch of cinnamon or nutmeg can warm up the flavor. You can also add lemon or orange zest for a bright, fresh taste. Using different extracts like almond or coconut can add a unique twist too. These small changes can change your pancake game completely. For those who need to avoid gluten, you can use gluten-free flour options. These flours work well and keep the pancakes fluffy. If you want to make your pancakes vegan, use substitutes like flax eggs and plant-based milk. You can also reduce sugar by using mashed bananas or applesauce. These swaps keep your pancakes tasty while meeting dietary needs. Pancakes are fun to serve in many ways. Stack them high with a colorful fruit compote on top. You can add nuts or even chocolate chips for extra flavor. If you want something different, try savory pancake variations. Adding cheese or herbs can turn your sweet pancakes into a hearty meal. Enjoy exploring all these tasty options! To keep your pancakes fresh, store them properly. Place leftover pancakes in an airtight container. If you plan to eat them soon, refrigerate them. - Refrigeration: Leftover pancakes last up to 3 days in the fridge. Make sure they are cool before sealing the container. This helps prevent sogginess. - Freezing Guidelines: For longer storage, freeze pancakes. Stack them with parchment paper in between each one. Use a freezer-safe bag or container. They can last up to 2 months in the freezer. When you’re ready to enjoy your pancakes again, reheating is simple. Here are the best methods: - Best Methods for Reheating: Use a microwave or a skillet. For the microwave, heat on medium power for 20-30 seconds. If using a skillet, warm them on low heat for a few minutes until hot. - Tips for Maintaining Texture: To keep pancakes fluffy, cover them with a damp paper towel in the microwave. This helps steam them. If using a skillet, add a little butter before reheating. Knowing how long your pancakes last ensures you enjoy them at their best. - Shelf Life in the Fridge: Pancakes keep well for up to 3 days in the fridge. After that, they may dry out or lose flavor. - Shelf Life in the Freezer: In the freezer, pancakes last up to 2 months. For best taste, eat them within the first month. To make blueberry pancakes from scratch, follow these steps: 1. Mix Dry Ingredients: Start by sifting together 1 cup of all-purpose flour, 2 tablespoons of sugar, 2 teaspoons of baking powder, 1/2 teaspoon of baking soda, and 1/4 teaspoon of salt in a large bowl. 2. Combine Wet Ingredients: In another bowl, whisk together 1 cup of buttermilk, 1 large egg, 2 tablespoons of melted butter, the zest of 1 lemon, and 1 teaspoon of vanilla extract until smooth. 3. Combine Mixtures: Pour the wet ingredients into the dry mixture. Gently fold until just mixed. A few lumps are fine, so don't overdo it. 4. Add Blueberries: Carefully fold in 1 cup of fresh blueberries. Save some for the top later. 5. Heat the Pan: Heat a non-stick skillet over medium heat. Add a bit of melted butter to coat it. 6. Cook Pancakes: Pour 1/4 cup of batter for each pancake. Cook until bubbles form, then flip and cook until golden. 7. Serve: Stack the pancakes, add more blueberries, and drizzle with maple syrup or honey. Yes, you can use frozen blueberries. Here are some tips: - Do not thaw the blueberries before using them. This helps keep them intact during cooking. - Add them directly to the batter. This way, they will stay cold and firm. - You might need to cook the pancakes a little longer to ensure they are done. Pancakes stick for a few reasons: - The pan may not be hot enough. Make sure your skillet is at medium heat. - You might not be using enough butter. Add more butter to the pan before cooking. - Using a non-stick pan is key. If your pan isn’t non-stick, consider switching. Here are some tasty ideas to serve with pancakes: - Maple syrup is a classic choice. - Fresh fruit like sliced bananas or strawberries adds color. - A dollop of whipped cream makes it extra special. - You can also try yogurt for a creamy texture. Yes, you can adapt this recipe for gluten-free pancakes. Use gluten-free flour blends that substitute for all-purpose flour. - Look for blends that include xanthan gum for better texture. - You can also use almond flour or coconut flour with some adjustments to liquid. To keep your pancakes light and fluffy, follow these tips: - Avoid overmixing the batter; mix until just combined. - Let the batter rest for a few minutes. This helps with texture. - Ensure you use fresh baking powder for the best rise. This blog post covered everything you need for perfect blueberry pancakes. We explored key ingredients, step-by-step instructions, and tips for the best texture. You learned how to enhance flavors and adapt the recipe for dietary needs. We also discussed storing and reheating leftover pancakes. With these insights, you can create fluffy, delicious pancakes that everyone will love. Enjoy making them again and again!](https://dailydishlab.com/wp-content/uploads/2025/06/88cf7048-30d4-446e-9952-44c38fb788a9-768x768.webp)