Maple Pecan Cheesecake Cups No Bake Delightful Treat
Looking for a sweet treat that’s simple and delicious? These Maple Pecan Cheesecake Cups will delight your taste buds without the need for baking. Perfect for any occasion, this no-bake dessert features creamy cheesecake layered with a crunchy crust and rich maple flavor. In this article, I’ll guide you through easy steps, helpful tips, and variations to make this treat your own. Let’s dive into this delightful recipe!
Why I Love This Recipe
- Easy Preparation: This no-bake cheesecake cups recipe requires minimal effort while delivering maximum flavor, making it perfect for any occasion.
- Delicious Flavor Combination: The blend of creamy cheesecake, rich maple syrup, and crunchy pecans creates a delightful taste that is hard to resist.
- Perfect for Make-Ahead: These cheesecake cups can be made in advance and refrigerated, allowing you to enjoy stress-free entertaining.
- Customizable Presentation: With the option to garnish with extra pecans and maple syrup, each cup can be uniquely styled for an impressive dessert display.
Ingredients
Detailed Ingredient List
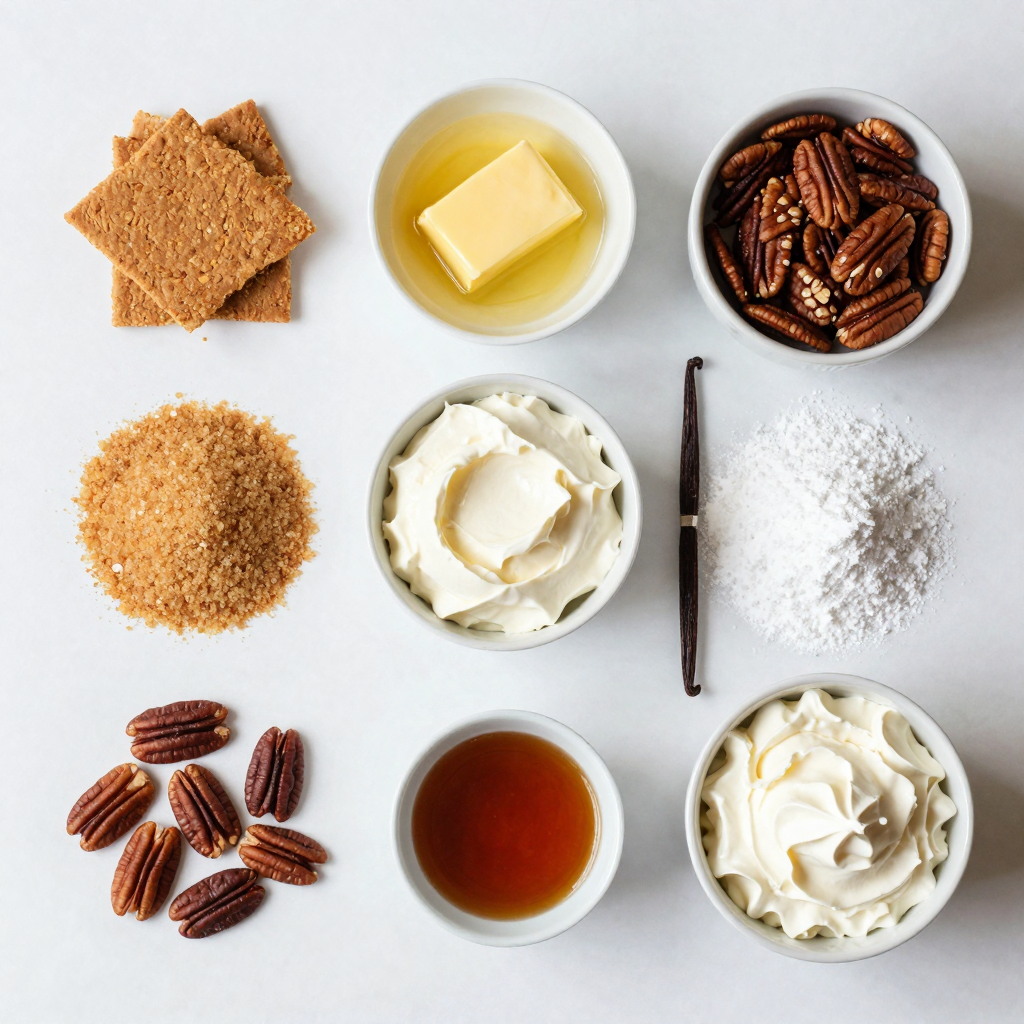
To make Maple Pecan Cheesecake Cups, you will need:
- 1 cup crushed graham crackers
- 1/2 cup unsalted butter, melted
- 2 tablespoons brown sugar
- 1 cup cream cheese, softened
- 1/2 cup powdered sugar
- 1/2 cup maple syrup
- 1 teaspoon vanilla extract
- 1 cup heavy whipping cream
- 1/2 cup chopped pecans, lightly toasted
- Additional pecan pieces and maple syrup for topping
Ingredient Notes for Quality
Using high-quality ingredients makes a difference. Look for pure maple syrup for the best flavor. Choose unsalted butter to control the salt level in your dessert. Softened cream cheese is key; let it sit out to soften. Heavy cream should be fresh for the best whipping results. Lightly toasting the pecans brings out their flavor and adds crunch.
Substitutions and Alternatives
You can adjust ingredients based on your needs:
- Use gluten-free graham crackers if needed.
- Swap cream cheese for mascarpone for a rich twist.
- For a dairy-free version, try nut cream cheese and coconut whipped cream.
- Maple syrup can be replaced with honey or agave syrup for a different taste.
- Pecans can be substituted with walnuts or almonds if desired.
Step-by-Step Instructions
Preparation of the Crust
First, gather your ingredients. You need 1 cup of crushed graham crackers, 1/2 cup of melted unsalted butter, and 2 tablespoons of brown sugar. In a mixing bowl, combine these three ingredients. Mix them until they look like wet sand. This mixture will make a tasty base for our cheesecake cups.
Next, take small dessert cups or jars. Spoon about 2 tablespoons of the crust mix into each cup. Press down firmly to form a solid layer. This step is key for a good crust. Set these cups aside while you make the filling.
Making the Cheesecake Filling
Now, let’s create the creamy filling. In another bowl, beat 1 cup of softened cream cheese until it’s smooth. Gradually add 1/2 cup of powdered sugar, 1/2 cup of maple syrup, and 1 teaspoon of vanilla extract. Mix until everything is well combined and creamy.
In a different bowl, whip 1 cup of heavy cream. Keep whipping until stiff peaks form. This will add fluffiness to your cheesecake. Gently fold the whipped cream into the cream cheese mix. Do this until no white streaks remain. Finally, stir in 1/2 cup of lightly toasted pecans, saving some for later.
Assembling the Cheesecake Cups
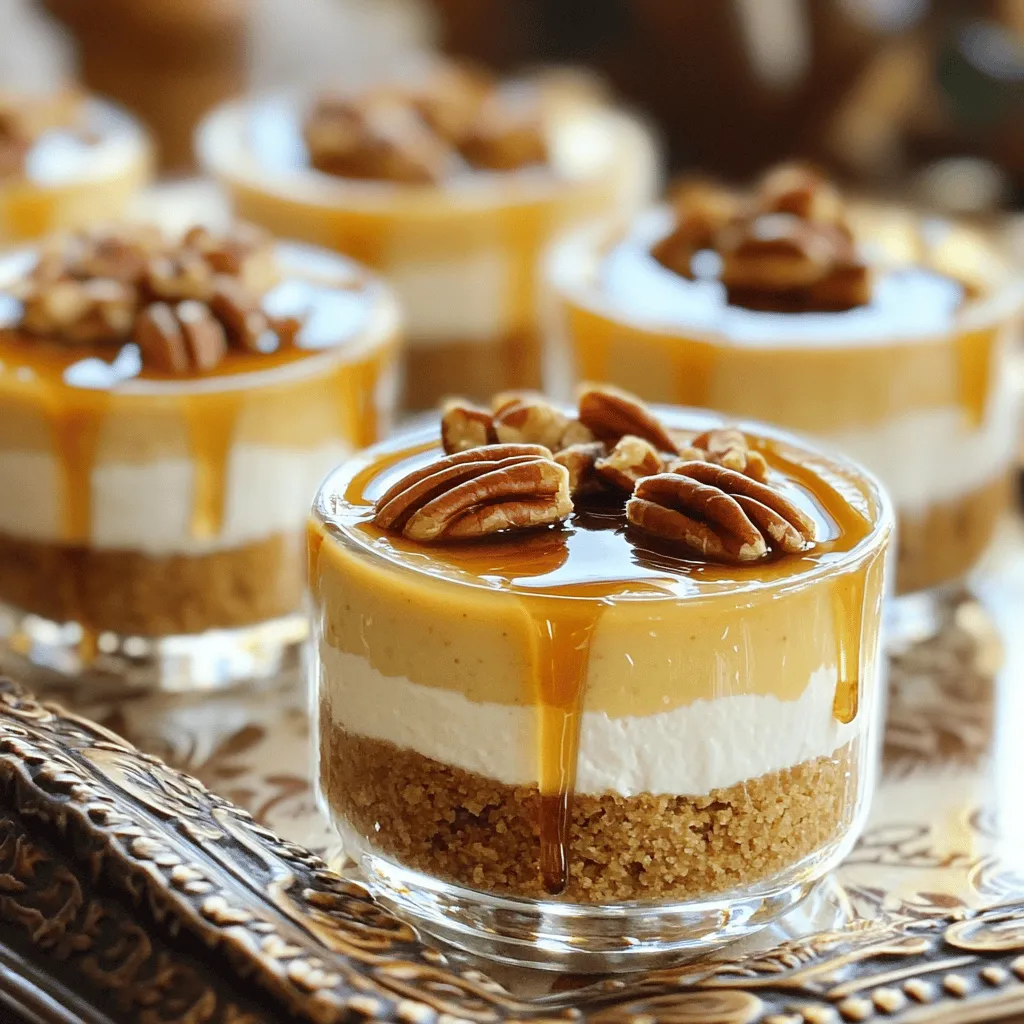
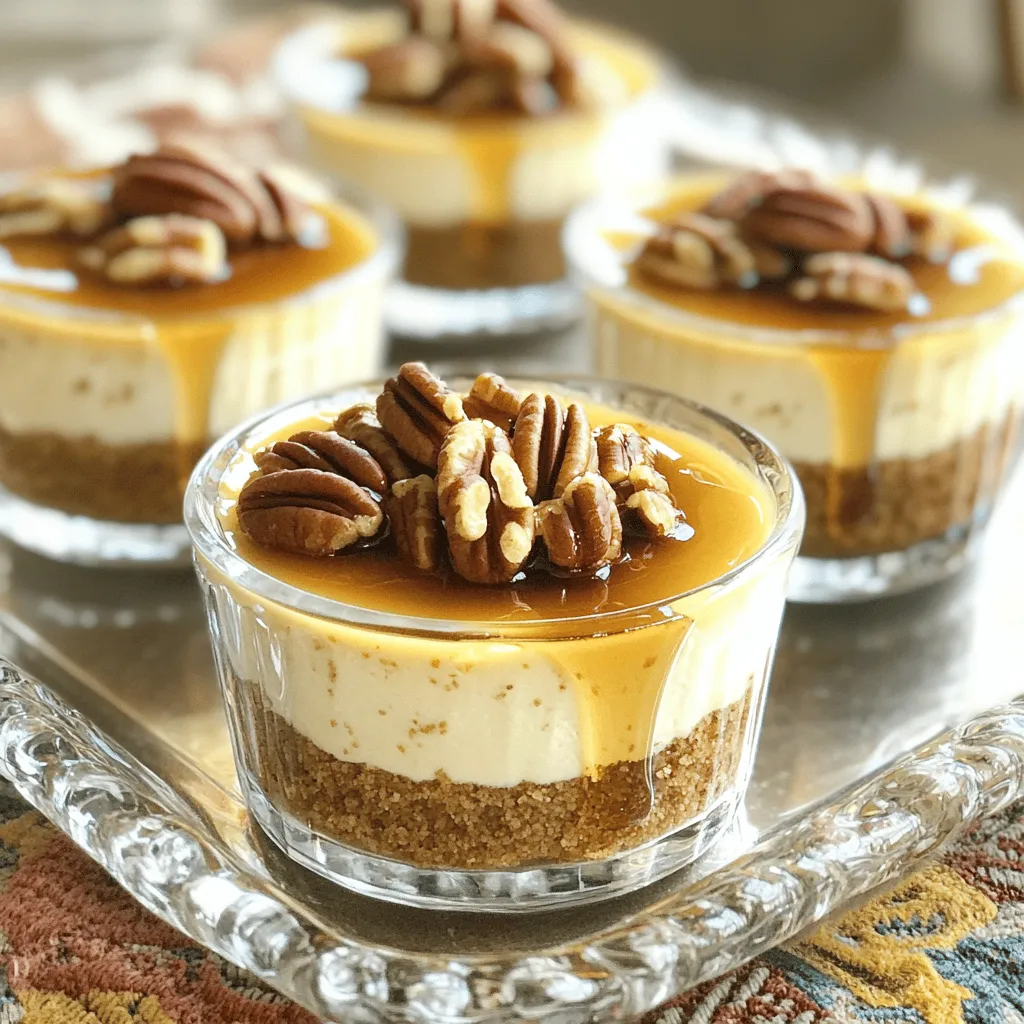
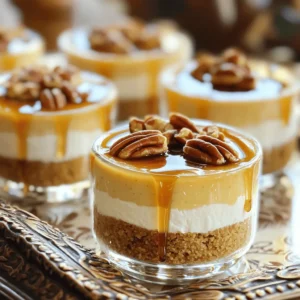
Now it’s time to layer the cups. Spoon the cheesecake mixture over the crust in each cup. Smooth the tops with a spatula for a nice finish. Once all cups are filled, cover them with plastic wrap. Refrigerate for at least 4 hours, or until set.
Before serving, drizzle extra maple syrup over each cup. Sprinkle the reserved pecans on top for crunch. This adds a lovely touch and makes them look great!
Pro Tips
- Use Fresh Ingredients: Always opt for fresh cream cheese and heavy whipping cream to achieve the best flavor and texture in your cheesecake cups.
- Chill Thoroughly: Allow the cheesecake cups to set in the refrigerator for at least 4 hours to ensure a firm texture that’s easy to serve.
- Customize Your Toppings: Get creative with your toppings! Consider adding chocolate shavings or a sprinkle of sea salt for a unique twist.
- Make Ahead: These cheesecake cups can be made a day in advance, making them a perfect dessert for parties or gatherings.
Tips & Tricks
How to Achieve the Best Texture
To get the best texture for your Maple Pecan Cheesecake Cups, focus on the cream cheese. Make sure it is soft. Let the cream cheese sit at room temperature before mixing. This helps it blend smoothly. When you whip the cream, beat it until you see stiff peaks. This adds lightness to your filling. Gently fold it into the cream cheese mix. Be careful not to deflate the whipped cream. This keeps your cheesecake fluffy and airy.
Common Mistakes to Avoid
One common mistake is overmixing the cream cheese. This can make your cheesecake dense. Always mix until smooth, but don’t go too far. Another mistake is skipping the chilling time. If you don’t chill the cups long enough, they won’t set properly. Also, be sure to toast your pecans lightly. Raw pecans can taste bitter and affect the flavor. Lastly, remember to measure your ingredients accurately. This ensures your cheesecake turns out just right.
Serving Suggestions for Presentation
For a beautiful presentation, serve the cheesecake cups on a decorative tray. Add a sprig of mint on top for a pop of color. You can also drizzle extra maple syrup over the cups. This adds charm and sweetness. Use a few additional pecan pieces for crunch. This makes each cup look inviting and delicious. Consider pairing with seasonal fruits for extra flavor and color. Enjoy the delightful treat with friends and family!
Variations
Flavor Variations
You can change the flavor of your cheesecake cups easily. For a chocolate twist, add cocoa powder to the cream cheese mixture. Start with 1/4 cup and adjust to your taste. If you love berries, mix in some pureed strawberries or raspberries. This will give your cups a fresh and fruity taste. You can also layer the berry puree between the crust and the cheesecake for a fun look.
Dietary Modifications
Want to make these cheesecake cups gluten-free? Use gluten-free graham crackers or ground nuts for the crust. For a vegan option, swap the cream cheese for a vegan cream cheese alternative. Use coconut cream instead of heavy cream. You can also replace maple syrup with agave syrup. Check labels to ensure all ingredients fit your needs.
Seasonal Additions
In fall, add pumpkin spice to your cheesecake mix for a cozy flavor. Use 1 teaspoon of pumpkin spice and mix it in with the cream cheese. In winter, try adding crushed peppermint candies on top. This adds a festive crunch and flavor. For spring, fresh mint leaves can brighten up your cheesecake. Just chop them finely and fold them into the mix.
Storage Info
Best Practices for Storing
To keep your Maple Pecan Cheesecake Cups fresh, store them in the fridge. Use airtight containers or cover them tightly with plastic wrap. This keeps moisture out and flavors in. If you like, you can keep the extra pecans and syrup in separate containers. This way, they stay crunchy and fresh until you are ready to serve.
How Long It Keeps
These cheesecake cups can last for about three to four days in the fridge. After that, they may lose their creamy texture and flavor. If you want the best taste, enjoy them within that time. Always check for any changes in smell or color before eating. Fresh is best!
Reheating and Serving After Refrigeration
Since these cheesecake cups are served cold, there is no need to reheat them. Take them out of the fridge about ten minutes before serving. This helps to bring out the rich flavors. Add the extra maple syrup and pecans right before serving for added crunch and sweetness. Enjoy every bite!
FAQs
Can I make these ahead of time?
Yes, you can make these cheesecake cups ahead of time. In fact, they taste better after chilling! Prepare them a day before your event. Just keep them in the fridge until you are ready to serve. This way, the flavors blend well, and the texture becomes perfect.
How can I make the cheesecake mixture thicker?
To make the cheesecake mixture thicker, use more cream cheese. You can also beat the cream cheese for longer. This helps it become smooth and creamy. Another trick is to fold in whipped cream more gently. Avoid over-mixing, which can add air and make it lighter.
What can I use instead of pecans?
If you want to swap out pecans, try walnuts or almonds. Both add a nice crunch and flavor. You can even use a mix of nuts for added texture. If you prefer a nut-free option, use crushed cookies or granola for that perfect crunch.
This blog post explored the best way to make cheesecake cups. We covered ingredients, providing a detailed list, notes on quality, and alternatives. You learned step-by-step instructions for the crust and filling assembly. Tips and tricks helped you avoid common mistakes, and we discussed flavor variations too.
In conclusion, you can make tasty cheesecake cups that fit your needs. Experiment with different flavors and enjoy serving them at your next gathering. Remember, practice makes perfect!
Maple Pecan Cheesecake Cups No Bake
Ingredients
1 cup crushed graham crackers
1/2 cup unsalted butter, melted
2 tablespoons brown sugar
1 cup cream cheese, softened
1/2 cup powdered sugar
1/2 cup maple syrup
1 teaspoon vanilla extract
1 cup heavy whipping cream
1/2 cup chopped pecans, lightly toasted
Additional pecan pieces and maple syrup for topping
Instructions
In a mixing bowl, combine the crushed graham crackers, melted butter, and brown sugar; mix until well combined and the mixture resembles wet sand.
Spoon about 2 tablespoons of the mixture into the bottom of small dessert cups or jars, pressing down firmly to create a crust layer. Set aside.
In another bowl, beat the cream cheese until smooth and creamy. Gradually add the powdered sugar, maple syrup, and vanilla extract, mixing until fully incorporated and smooth.
In a separate bowl, whip the heavy cream until it forms stiff peaks. Gently fold the whipped cream into the cream cheese mixture until no white streaks remain.
Stir in the toasted pecans, reserving a handful for topping later.
Spoon the cheesecake mixture over the graham cracker crusts in each cup, smoothing the tops with a spatula.
Refrigerate the cheesecake cups for at least 4 hours or until set.
Before serving, drizzle with extra maple syrup and sprinkle the reserved pecans on top for added crunch.
Prep Time: 20 minutes | Total Time: 4 hours 20 minutes | Servings: 6 cups
– Presentation Tips: Serve the cheesecake cups on a decorative tray and garnish each cup with a small sprig of mint for a touch of color.
Maple Pecan Cheesecake Cups No Bake
Ingredients
- 1 cup crushed graham crackers
- 1/2 cup unsalted butter, melted
- 2 tablespoons brown sugar
- 1 cup cream cheese, softened
- 1/2 cup powdered sugar
- 1/2 cup maple syrup
- 1 teaspoon vanilla extract
- 1 cup heavy whipping cream
- 1/2 cup chopped pecans, lightly toasted
- to taste additional pecan pieces and maple syrup for topping
Instructions
- In a mixing bowl, combine the crushed graham crackers, melted butter, and brown sugar; mix until well combined and the mixture resembles wet sand.
- Spoon about 2 tablespoons of the mixture into the bottom of small dessert cups or jars, pressing down firmly to create a crust layer. Set aside.
- In another bowl, beat the cream cheese until smooth and creamy. Gradually add the powdered sugar, maple syrup, and vanilla extract, mixing until fully incorporated and smooth.
- In a separate bowl, whip the heavy cream until it forms stiff peaks. Gently fold the whipped cream into the cream cheese mixture until no white streaks remain.
- Stir in the toasted pecans, reserving a handful for topping later.
- Spoon the cheesecake mixture over the graham cracker crusts in each cup, smoothing the tops with a spatula.
- Refrigerate the cheesecake cups for at least 4 hours or until set.
- Before serving, drizzle with extra maple syrup and sprinkle the reserved pecans on top for added crunch.