Lemon Raspberry Yogurt Cake Delightful and Moist Treat
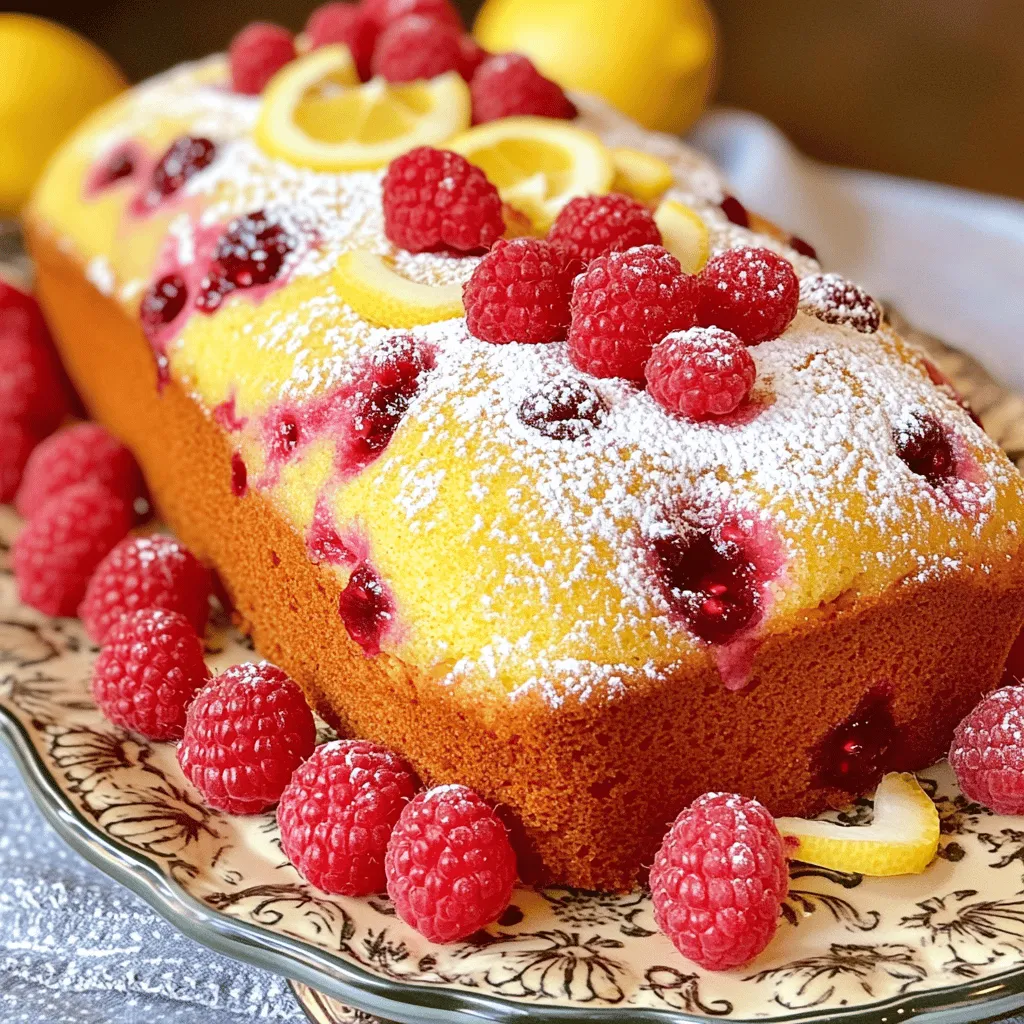
If you’re craving a sweet and tangy treat, you’ve landed in the right place! My Lemon Raspberry Yogurt Cake is not just a dessert; it’s a delight bursting with flavor and moisture. This cake is simple and perfect for any occasion. Join me as I share easy steps, handy tips, and creative variations to make this cake your own. Let’s get started on baking something amazing together!
Why I Love This Recipe
- Bright and Refreshing Flavor: The combination of lemon and raspberry creates a delightful balance of tartness and sweetness that is perfect for any occasion.
- Easy to Make: This recipe comes together quickly, making it ideal for both novice bakers and those in a hurry to whip up a delicious treat.
- Moist and Tender Texture: Thanks to the yogurt, this cake remains wonderfully moist, ensuring that each slice is soft and enjoyable.
- Versatile Serving Options: Whether served plain, dusted with powdered sugar, or paired with fresh fruit, this cake is versatile enough to suit any dessert table.
Ingredients
Key Ingredients for Lemon Raspberry Yogurt Cake
To make this cake, you’ll need some simple yet vital ingredients. Here’s what you should gather:
- 1 cup plain yogurt (Greek or regular)
- 1/2 cup vegetable oil
- 1 cup granulated sugar
- 3 large eggs
- Zest of 2 lemons
- 1/4 cup fresh lemon juice
- 1 1/2 cups all-purpose flour
- 2 teaspoons baking powder
- 1/2 teaspoon baking soda
- 1/4 teaspoon salt
- 1 cup fresh raspberries (or frozen, thawed and drained)
- 1 teaspoon vanilla extract
- Powdered sugar for dusting (optional)
These ingredients come together to create a moist and flavorful cake. The yogurt keeps the cake tender, while the raspberries add a burst of sweetness.
Optional Ingredients for Garnishing
For that extra touch, you might want to garnish your cake. Here are some fun options:
- Fresh raspberries
- Lemon slices
- Mint leaves
These garnishes not only make the cake look lovely, but they also add more flavor and freshness.
Substitutions for Dietary Needs (Gluten-Free, Dairy-Free)
You can easily adapt this recipe for specific dietary needs. Here are some ideas:
- Gluten-Free: Use a gluten-free flour blend instead of all-purpose flour.
- Dairy-Free: Swap plain yogurt for a dairy-free yogurt. Coconut yogurt works well.
These substitutions keep the cake delicious while meeting your dietary preferences.

Step-by-Step Instructions
Preparation Steps for the Cake Batter
To start, you need to gather your ingredients. This is key to making a great lemon raspberry yogurt cake. Here’s what you need:
- 1 cup plain yogurt (Greek or regular)
- 1/2 cup vegetable oil
- 1 cup granulated sugar
- 3 large eggs
- Zest of 2 lemons
- 1/4 cup fresh lemon juice
- 1 1/2 cups all-purpose flour
- 2 teaspoons baking powder
- 1/2 teaspoon baking soda
- 1/4 teaspoon salt
- 1 cup fresh raspberries (or frozen, thawed and drained)
- 1 teaspoon vanilla extract
- Powdered sugar for dusting (optional)
Begin by preheating your oven to 350°F (175°C). Grease and flour a 9×5-inch loaf pan. You can also line it with parchment paper. This helps with easy removal later.
In a large bowl, whisk together the yogurt, vegetable oil, and sugar. Make sure it is well mixed. Next, add the eggs, lemon zest, lemon juice, and vanilla. Mix until the batter is smooth.
In a separate bowl, sift the flour, baking powder, baking soda, and salt. Slowly add this to your wet mixture. Stir gently until no large flour pockets remain. Be careful; you don’t want a dense cake!
Now, gently fold in the raspberries. Aim to keep them whole for bursts of flavor in each slice.
Baking Directions and Timing
Pour the batter into your prepared loaf pan. Smooth the top with a spatula. Place the pan in your preheated oven. Bake for 50-60 minutes. Check if it’s done by inserting a toothpick in the center. If it comes out clean, the cake is ready!
Cooling and Serving Recommendations
Once baked, remove the cake from the oven. Let it cool in the pan for 10 minutes. After that, transfer it to a wire rack to cool completely.
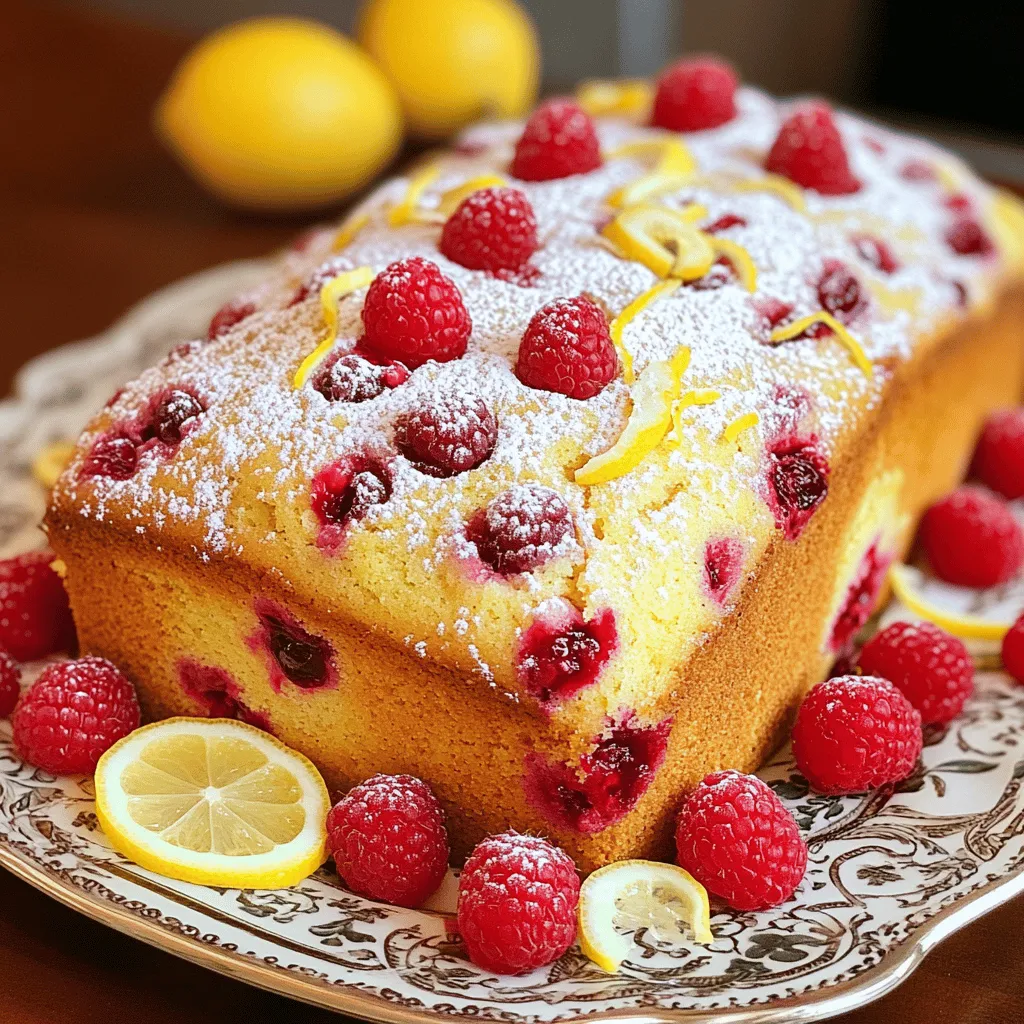
When the cake is cool, you can dust the top with powdered sugar, if you like. For a pretty presentation, serve slices on a decorative plate. Add fresh raspberries and lemon slices for a bright touch. Enjoy your cake!
Pro Tips
- Use Room Temperature Ingredients: Make sure your eggs and yogurt are at room temperature before mixing. This helps to create a smoother batter and a lighter cake.
- Don’t Overmix the Batter: Mix the wet and dry ingredients just until combined. Overmixing can lead to a dense cake texture.
- Fresh vs. Frozen Raspberries: If using frozen raspberries, ensure they are thawed and drained to prevent excess moisture in the batter, which can affect the cake’s structure.
- Check for Doneness: Start checking for doneness a few minutes before the recommended baking time to avoid overbaking, which can dry out the cake.
Tips & Tricks
Tips to Ensure a Moist Cake
To keep your lemon raspberry yogurt cake moist, follow these tips:
- Use yogurt: The yogurt adds moisture and tang to the cake.
- Don’t over-mix: Mix until the dry ingredients disappear. Over-mixing can make it dense.
- Check the oven temperature: An oven too hot can dry out the cake. Use an oven thermometer to be sure.
- Add raspberries gently: Fold them in carefully to avoid breaking them. Whole raspberries hold moisture better.
Common Mistakes to Avoid
Avoid these common mistakes for the best results:
- Skipping the zest: Lemon zest gives your cake flavor. Don’t leave it out!
- Not using fresh ingredients: Raspberries should be fresh or properly thawed. Frozen, unthawed berries can add too much liquid.
- Not cooling properly: Let the cake cool in the pan before moving it. This prevents it from breaking apart.
How to Achieve the Perfect Texture
A light and airy texture is key. Here’s how to get it:
- Room temperature ingredients: Use eggs and yogurt at room temperature. This helps them mix better.
- Sift dry ingredients: Sifting flour, baking powder, and baking soda adds air. This makes the cake fluffy.
- Watch baking time: Every oven is different. Start checking your cake at 50 minutes. A toothpick should come out clean.
Using these tips, your lemon raspberry yogurt cake will be delightful and moist every time!
Variations
Flavor Variations (Adding other fruits or citrus)
You can switch things up with this cake. Try adding fresh blueberries, diced strawberries, or even chopped peaches. Each fruit brings its own taste and texture. You can also use citrus. Try orange or lime zest in place of lemon zest. This will give your cake a fun twist. Mix and match your favorite fruits for a unique flavor every time.
Alternative Frosting or Glazing Options
While the cake is great on its own, adding a glaze can make it special. A simple lemon glaze can enhance the bright flavor. Mix powdered sugar with lemon juice to get the right consistency. You can also try a cream cheese frosting. Just blend cream cheese, butter, and sugar until smooth. Spread it on top or pipe it for a pretty look. Both options add extra creaminess and sweetness to your cake.
Mini Cake or Cupcake Adaptations
If you love mini treats, this cake works perfectly as cupcakes. Just pour the batter into cupcake liners. Bake for about 20-25 minutes. Keep an eye on them, so they don’t overbake. You can also make a mini cake. Use a smaller pan, like a 6-inch round. Reduce the baking time to about 30-35 minutes. These options are fun for parties or just a sweet snack.
Storage Info
Best Practices for Storing the Cake
To keep your Lemon Raspberry Yogurt Cake fresh, wrap it well. You can use plastic wrap or foil. Store it in an airtight container. This helps lock in moisture and flavor. Keep it at room temperature for up to three days. If you want to keep it longer, consider freezing.
How to Freeze for Longer Shelf Life
Freezing the cake is easy. First, let it cool completely. Wrap the cake tightly in plastic wrap. Then, place it in a freezer-safe bag or container. Label the bag with the date. You can freeze it for up to three months. To thaw, move it to the fridge overnight. This will keep it moist and tasty.
Reheating Instructions for Leftovers
If you have leftovers, reheating is simple. You can use the microwave for quick warming. Place a slice on a microwave-safe plate. Heat it for about 10-15 seconds. Check it to avoid overheating. If you prefer, you can warm it in the oven. Preheat the oven to 350°F (175°C). Wrap the cake in foil and heat for 10-15 minutes. Enjoy your delightful cake warm!
FAQs
Can I use frozen raspberries in the recipe?
Yes, you can use frozen raspberries. Just make sure to thaw and drain them first. This helps keep the batter from being too wet. Frozen berries may break apart more than fresh ones, so be gentle when folding them in.
What kind of yogurt is best for this cake?
I recommend using plain yogurt. Both Greek and regular work well. Greek yogurt gives a thicker texture, while regular yogurt makes the cake light. Both options add moisture and tang to the cake.
How can I tell when the cake is done baking?
To check if your cake is done, insert a toothpick into the center. If it comes out clean, the cake is ready. It should also feel firm to the touch. A light golden color on top also shows it is baked well.
You learned how to make a tasty lemon raspberry yogurt cake. We covered key ingredients and options for dietary needs. The step-by-step guide gave you clear baking and cooling instructions. I shared tips to keep your cake moist and avoid common mistakes. You can also explore fun variations and storage tips to enjoy your cake longer. Remember, each small change can lead to a delightful twist. With all this, you’re now ready to bake your perfect cake! Enjoy every bite!

Lemon Raspberry Yogurt Cake
Ingredients
1 cup plain yogurt (Greek or regular)
1/2 cup vegetable oil
1 cup granulated sugar
3 large eggs
Zest of 2 lemons
1/4 cup fresh lemon juice
1 1/2 cups all-purpose flour
2 teaspoons baking powder
1/2 teaspoon baking soda
1/4 teaspoon salt
1 cup fresh raspberries (or frozen, thawed and drained)
1 teaspoon vanilla extract
Powdered sugar for dusting (optional)
Instructions
Preheat your oven to 350°F (175°C). Grease and flour a 9×5-inch loaf pan or line it with parchment paper for easy removal.
In a large mixing bowl, whisk together the yogurt, vegetable oil, and granulated sugar until well combined.
Add in the eggs, lemon zest, lemon juice, and vanilla extract. Mix until smooth.
In a separate bowl, sift together the flour, baking powder, baking soda, and salt.
Gradually add the dry ingredients to the wet ingredients, mixing just until no large flour pockets remain. Be careful not to over-mix as it can make the cake dense.
Gently fold in the raspberries, being cautious not to break them up too much.
Pour the batter into the prepared loaf pan and smooth out the top with a spatula.
Bake in the preheated oven for 50-60 minutes or until a toothpick inserted into the center comes out clean.
Once baked, remove from the oven and let it cool in the pan for 10 minutes. Then transfer to a wire rack to cool completely.
If desired, once completely cooled, dust the top of the cake with powdered sugar before slicing and serving.
Prep Time: 15 mins | Total Time: 1 hr 10 mins | Servings: 8
– Presentation Tips: Serve slices of the cake on a decorative plate, garnished with additional raspberries and lemon slices for a vibrant touch.
Lemon Raspberry Yogurt Cake
Ingredients
- 1 cup plain yogurt (Greek or regular)
- 1 2 cup vegetable oil
- 1 cup granulated sugar
- 3 large eggs
- 2 zest lemons
- 1 4 cup fresh lemon juice
- 1 1/2 cups all-purpose flour
- 2 teaspoons baking powder
- 1 2 teaspoon baking soda
- 1 4 teaspoon salt
- 1 cup fresh raspberries (or frozen, thawed and drained)
- 1 teaspoon vanilla extract
- optional Powdered sugar for dusting
Instructions
- Preheat your oven to 350°F (175°C). Grease and flour a 9x5-inch loaf pan or line it with parchment paper for easy removal.
- In a large mixing bowl, whisk together the yogurt, vegetable oil, and granulated sugar until well combined.
- Add in the eggs, lemon zest, lemon juice, and vanilla extract. Mix until smooth.
- In a separate bowl, sift together the flour, baking powder, baking soda, and salt.
- Gradually add the dry ingredients to the wet ingredients, mixing just until no large flour pockets remain. Be careful not to over-mix as it can make the cake dense.
- Gently fold in the raspberries, being cautious not to break them up too much.
- Pour the batter into the prepared loaf pan and smooth out the top with a spatula.
- Bake in the preheated oven for 50-60 minutes or until a toothpick inserted into the center comes out clean.
- Once baked, remove from the oven and let it cool in the pan for 10 minutes. Then transfer to a wire rack to cool completely.
- If desired, once completely cooled, dust the top of the cake with powdered sugar before slicing and serving.