Chocolate Peanut Butter Banana Bread Deliciously Simple

Are you ready to elevate your banana bread game? This Chocolate Peanut Butter Banana Bread is not only delicious, but it’s also incredibly easy to make. With simple ingredients—like ripe bananas and creamy peanut butter—you can whip up a treat that’s rich, moist, and packed with flavor. Join me as I share the step-by-step process, tips, and even some fun variations. Let’s bake something amazing together!
Why I Love This Recipe
- Delicious Flavor Combination: The rich chocolate pairs perfectly with the creamy peanut butter and sweet bananas, creating a mouthwatering treat.
- Healthy Ingredients: Using ripe bananas and applesauce keeps the bread moist while reducing the need for added fats.
- Easy to Make: This recipe requires simple mixing and minimal prep, making it perfect for bakers of all skill levels.
- Customizable: Feel free to add your favorite nuts or substitute the chocolate chips for dried fruit to make it your own!
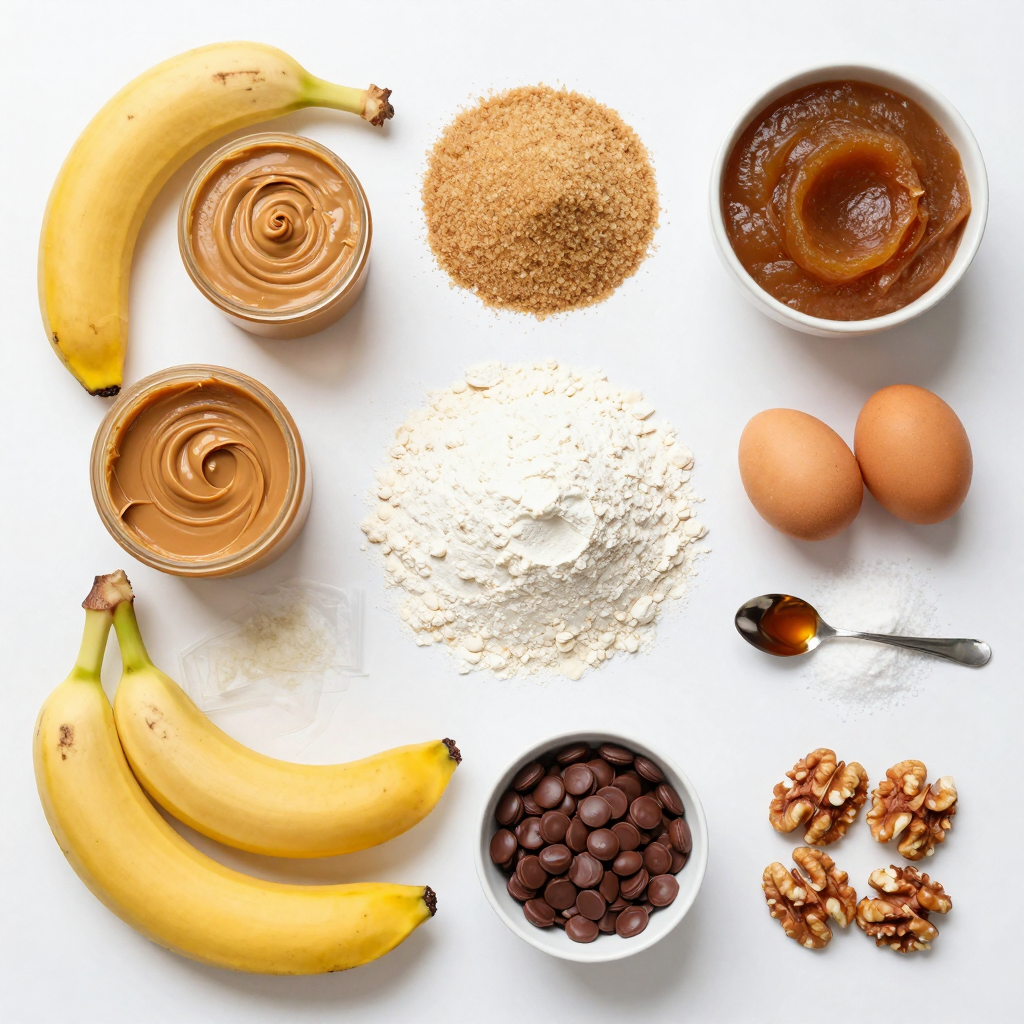
Ingredients
Gather these simple ingredients to make your delicious chocolate peanut butter banana bread:
- 3 ripe bananas, mashed
- 1/2 cup creamy peanut butter
- 1/2 cup granulated sugar
- 1/4 cup brown sugar, packed
- 1/4 cup unsweetened applesauce
- 2 large eggs
- 1 teaspoon vanilla extract
- 1 1/2 cups all-purpose flour
- 1/2 teaspoon baking soda
- 1/2 teaspoon baking powder
- 1/4 teaspoon salt
- 1/2 cup chocolate chips (dark or semi-sweet)
- 1/4 cup chopped walnuts (optional)
This mix of ingredients creates a soft, moist bread. The ripe bananas bring natural sweetness and moisture. The creamy peanut butter adds a rich, nutty flavor. The sugars balance the taste, while applesauce keeps it light. Eggs help bind everything together.
You can also switch out the chocolate chips for your favorite mix-ins. Try butterscotch or white chocolate for a twist. Walnuts add crunch, but feel free to skip them if you prefer. This bread is easy and fun to make, perfect for sharing or enjoying alone!
Step-by-Step Instructions
Preparation Steps
1. Preheat the oven and prepare the loaf pan. Set your oven to 350°F (175°C). Grease a 9×5-inch loaf pan or use parchment paper.
2. Mix mashed bananas and peanut butter. In a large bowl, mash three ripe bananas. Add half a cup of creamy peanut butter. Stir until the mixture is smooth.
3. Combine wet ingredients and mix thoroughly. To the banana and peanut butter mix, add half a cup of granulated sugar, a quarter cup of brown sugar, a quarter cup of unsweetened applesauce, two large eggs, and one teaspoon of vanilla extract. Whisk until everything blends well.
4. Prepare dry ingredients separately. In another bowl, mix one and a half cups of all-purpose flour, half a teaspoon of baking soda, half a teaspoon of baking powder, and a quarter teaspoon of salt. Make sure it’s mixed evenly.
Combining Ingredients
1. Gradually mix dry ingredients into wet mixture. Slowly add the dry mix into the wet mixture. Stir gently until just combined. Be careful not to over-mix, as this can affect the texture.
2. Fold in chocolate chips and walnuts. Add half a cup of chocolate chips and, if you like, a quarter cup of chopped walnuts. Fold them in gently to ensure they are spread throughout the batter.
Baking Instructions
1. Pour batter into prepared loaf pan. Carefully pour the batter into the greased loaf pan. Use a spatula to smooth the top.
2. Baking time and doneness check. Bake for 60 to 65 minutes. To check, insert a toothpick into the center. It should come out clean, or with a few moist crumbs.
Pro Tips
- Use Overripe Bananas: The riper the bananas, the sweeter and more flavorful your banana bread will be. Look for bananas with lots of brown spots or even black peels for the best results.
- Don’t Overmix the Batter: When combining the wet and dry ingredients, mix gently until just combined. Overmixing can result in a dense and tough bread.
- Customize Your Add-Ins: Feel free to experiment with different mix-ins like nuts, dried fruits, or even a scoop of protein powder for added nutrition.
- Store Properly: To keep your banana bread moist, wrap it tightly in plastic wrap or store it in an airtight container at room temperature for up to 3 days, or refrigerate for up to a week.
Tips & Tricks
Baking Tips
To get the best texture in your banana bread, use ripe bananas. They should be soft and speckled. This gives a sweet flavor and moistness. When mixing, stop as soon as the dry and wet ingredients blend. Over-mixing makes the bread dense instead of light.
Ingredient Substitutions
If you need a peanut butter alternative, try almond butter or sunflower seed butter. Both give a nice flavor. For sugar, you can use honey or maple syrup. These options make your bread a bit healthier while keeping it sweet.
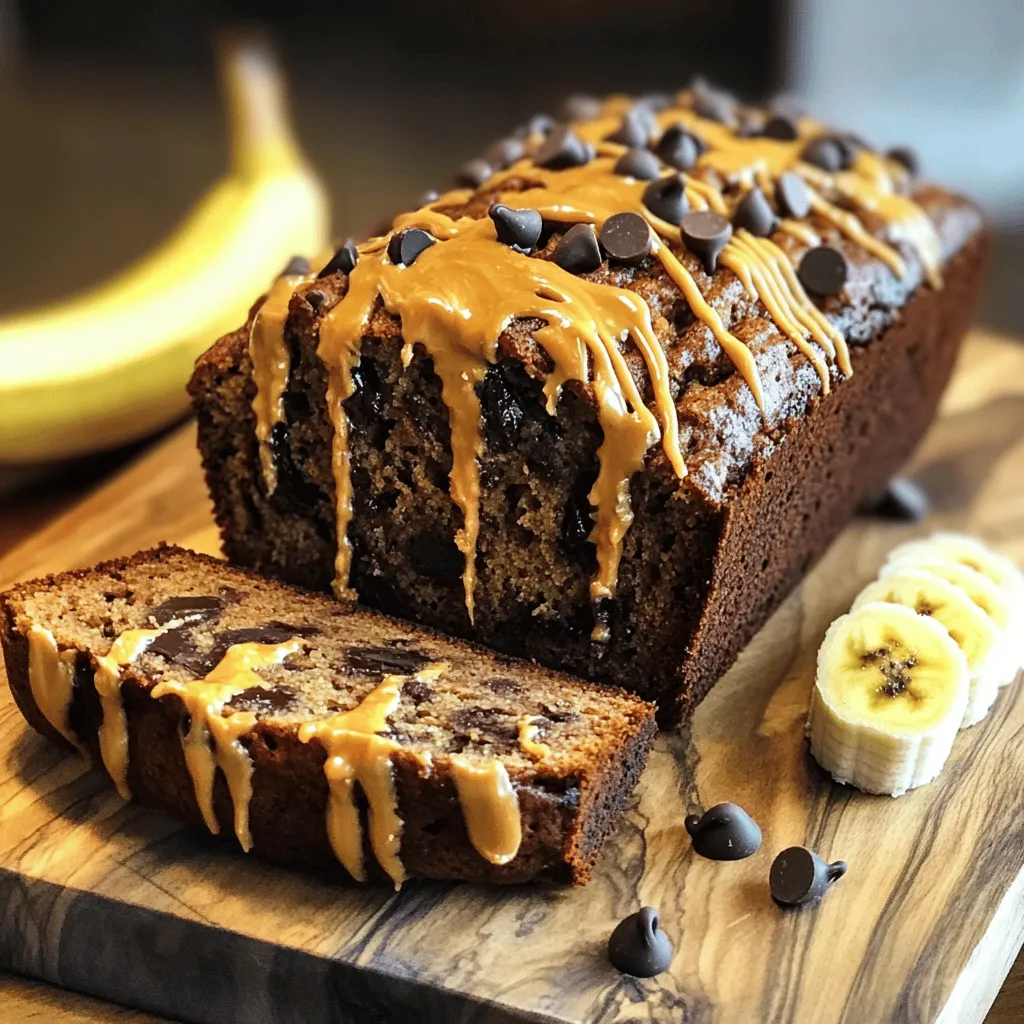
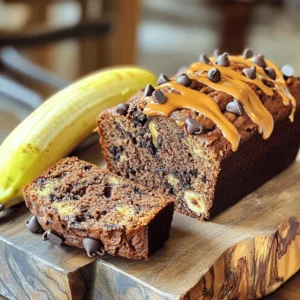
Presentation Tips
To make your banana bread look great, slice it and place it on a wooden board. Drizzle some extra peanut butter on top. This adds a nice shine. Sprinkle a few chocolate chips for an extra touch of sweetness. Add a fresh banana on the side for color and fun!
Variations
Flavor Variations
You can change up the flavor of your chocolate peanut butter banana bread. One easy way is to add spices. A dash of cinnamon gives warmth. Nutmeg adds a nice twist too. Just a little can make a big difference.
You can also add nuts. Chopped walnuts give a nice crunch. If you want more chocolate, try using chocolate chunks or even white chocolate chips. Each choice brings a new taste. Experiment to find what you love best.
Dietary Variations
If you need gluten-free options, use gluten-free flour. Many brands work just like all-purpose flour. You won’t lose flavor or texture.
For vegan adaptations, swap eggs with flax eggs or applesauce. Use maple syrup instead of sugar. You can also use a nut or seed butter in place of peanut butter. This makes the recipe friendly for everyone. Enjoy your delicious banana bread, no matter your diet!
Storage Info
Storage Tips
To keep your chocolate peanut butter banana bread fresh, store it in a cool place. Wrap it tightly in plastic wrap or foil. This keeps moisture in and air out. You can also place it in an airtight container.
Here are some best practices to follow:
- Cool completely: Let the bread cool fully before wrapping it. This prevents steam from making it soggy.
- Room temperature: Store it at room temperature for up to four days.
- Check for mold: Always look for signs of spoilage before eating.
Freezing Instructions
Freezing is a great way to enjoy banana bread later. To freeze, follow these steps:
1. Slice the bread: Cut it into even slices for easy serving.
2. Wrap each slice: Use plastic wrap for each slice. This keeps them fresh.
3. Use freezer bags: Place wrapped slices in a freezer bag. Remove as much air as possible before sealing.
4. Label and date: Write the date on the bag. This helps you keep track of how long it has been frozen.
To thaw, simply take out a slice and leave it at room temperature. You can also microwave it for about 15-20 seconds for a warm treat. Enjoy your delicious banana bread anytime!
FAQs
Common Questions about Chocolate Peanut Butter Banana Bread
What can I do if my banana bread is too dense?
If your banana bread turns out dense, it may be from over-mixing. Mix the batter just until the dry ingredients blend in. Another tip is to check your bananas. If they are not very ripe, they may not add enough moisture.
How ripe should bananas be for baking?
Bananas should be very ripe for the best flavor. Look for bananas with lots of brown spots. These bananas are sweeter and will make your bread taste great. If your bananas are still yellow, leave them out a few days to ripen.
Can I make this recipe ahead of time?
Yes, you can make this banana bread ahead of time. It stays fresh for several days. Just store it in an airtight container at room temperature. You can also refrigerate it to keep it fresh longer.
How do I know when my banana bread is done baking?
You can test if your banana bread is done by inserting a toothpick in the center. If it comes out clean or with a few moist crumbs, it’s ready. If the toothpick has wet batter, bake it a bit longer.
Is it possible to make this banana bread without gluten?
Yes, you can make this banana bread gluten-free. Just use a gluten-free flour blend instead of all-purpose flour. Make sure the flour blend has a good mix of starches and proteins for the best texture.
This article covered all you need to know about making chocolate peanut butter banana bread. We walked through the ingredients, step-by-step instructions, and helpful tips for the perfect loaf. I shared ways to customize your recipe and store it for later enjoyment. Remember, you can adapt this recipe to fit your diet and taste preferences. Baking is all about fun and creativity, so go ahead and make this recipe your own! Enjoy your delicious creation and share it with loved ones.
Chocolate Peanut Butter Banana Bread
Ingredients
3 ripe bananas, mashed
1/2 cup creamy peanut butter
1/2 cup granulated sugar
1/4 cup brown sugar, packed
1/4 cup unsweetened applesauce
2 large eggs
1 teaspoon vanilla extract
1 1/2 cups all-purpose flour
1/2 teaspoon baking soda
1/2 teaspoon baking powder
1/4 teaspoon salt
1/2 cup chocolate chips (dark or semi-sweet)
1/4 cup chopped walnuts (optional)
Instructions
Preheat your oven to 350°F (175°C). Grease a 9×5-inch loaf pan or line it with parchment paper.
In a large bowl, combine the mashed bananas and peanut butter. Mix until smooth.
Add the granulated sugar, brown sugar, applesauce, eggs, and vanilla extract. Whisk together until everything is well incorporated.
In another bowl, mix the flour, baking soda, baking powder, and salt.
Gradually add the dry ingredients to the banana mixture, stirring gently until just combined. Avoid over-mixing.
Fold in the chocolate chips and walnuts if using, ensuring they’re evenly distributed throughout the batter.
Pour the batter into the prepared loaf pan and smooth the top with a spatula.
Bake for 60-65 minutes, or until a toothpick inserted into the center comes out clean with a few moist crumbs.
Allow the bread to cool in the pan for 10 minutes, then transfer it to a wire rack to cool completely.
Prep Time: 15 minutes | Total Time: 1 hour 15 minutes | Servings: 10 slices
– Presentation Tips: Slice the banana bread and serve it on a wooden board. Drizzle some extra peanut butter on top and sprinkle a few chocolate chips for an appealing look. Add a fresh banana on the side for decoration.
Chocolate Peanut Butter Banana Bread
Ingredients
- 3 pieces ripe bananas, mashed
- 1/2 cup creamy peanut butter
- 1/2 cup granulated sugar
- 1/4 cup brown sugar, packed
- 1/4 cup unsweetened applesauce
- 2 large eggs
- 1 teaspoon vanilla extract
- 1 1/2 cups all-purpose flour
- 1/2 teaspoon baking soda
- 1/2 teaspoon baking powder
- 1/4 teaspoon salt
- 1/2 cup chocolate chips (dark or semi-sweet)
- 1/4 cup chopped walnuts (optional)
Instructions
- Preheat your oven to 350°F (175°C). Grease a 9x5-inch loaf pan or line it with parchment paper.
- In a large bowl, combine the mashed bananas and peanut butter. Mix until smooth.
- Add the granulated sugar, brown sugar, applesauce, eggs, and vanilla extract. Whisk together until everything is well incorporated.
- In another bowl, mix the flour, baking soda, baking powder, and salt.
- Gradually add the dry ingredients to the banana mixture, stirring gently until just combined. Avoid over-mixing.
- Fold in the chocolate chips and walnuts if using, ensuring they’re evenly distributed throughout the batter.
- Pour the batter into the prepared loaf pan and smooth the top with a spatula.
- Bake for 60-65 minutes, or until a toothpick inserted into the center comes out clean with a few moist crumbs.
- Allow the bread to cool in the pan for 10 minutes, then transfer it to a wire rack to cool completely.
![- 1 cup canned pumpkin puree - 1/2 cup granulated sugar - 1/2 cup brown sugar - 2 large eggs - 1 cup all-purpose flour To create the Snickerdoodle Pumpkin Cobbler, you need some key ingredients. Canned pumpkin puree gives the dish its warm, earthy flavor. Both granulated and brown sugars add sweetness and depth. Two large eggs help bind everything together, while all-purpose flour forms the base. - 1/2 cup chopped walnuts or pecans - 2 tablespoons cinnamon-sugar mixture (for topping) You can add chopped walnuts or pecans for a nutty crunch. A sprinkle of cinnamon-sugar on top gives it a sweet finish. This step is all about personal touch and taste. - 1 teaspoon ground cinnamon - 1/2 teaspoon ground nutmeg - 1/4 teaspoon ground ginger - 1 teaspoon baking powder - 1/2 teaspoon baking soda - 1/4 teaspoon salt Spices are crucial for flavor. Ground cinnamon adds warmth. Nutmeg and ginger offer a hint of spice. Baking powder and baking soda help the cobbler rise. A pinch of salt balances the sweetness. For the full recipe, you can check the [Full Recipe]. First, preheat your oven to 350°F (175°C). Next, grease a 9x9-inch baking dish with non-stick spray or butter. This step is crucial to prevent sticking. In a large mixing bowl, combine the pumpkin puree, granulated sugar, brown sugar, and vanilla extract. Whisk them together until the mixture is smooth. This blend adds sweetness and a lovely flavor to your cobbler. In another bowl, mix the dry ingredients. Combine the cinnamon, nutmeg, ginger, baking powder, baking soda, salt, and flour. Stir them well to ensure even distribution of the spices. Gradually add the dry mix to the wet ingredients. Alternate with the milk as you mix. Be gentle here; over-mixing can make the cobbler tough. Once just combined, stir in the melted butter. If you like, add chopped walnuts or pecans for extra crunch. Pour the batter into your prepared baking dish. Spread it evenly for a consistent bake. Before placing it in the oven, sprinkle the top with the cinnamon-sugar mixture. This adds a sweet crust that contrasts nicely with the soft filling. Bake in the preheated oven for 30-35 minutes. Check for doneness by inserting a toothpick in the center. If it comes out clean, your cobbler is ready. Let it cool slightly before serving. Enjoy it warm for the best taste, especially with a scoop of ice cream. For the complete recipe, refer to the Full Recipe above. - Not measuring ingredients accurately: Always use dry measuring cups for flour and sugar. This helps keep the balance right. A kitchen scale is your best friend for precision. - Over-mixing the batter: Mix until just combined. Over-mixing makes the cobbler tough. You want it soft and fluffy, not dense. - Resting the batter before baking: Let your batter sit for a few minutes. This helps the flavors blend well. It can also improve the texture. - Adjusting spices to personal taste: Feel free to change up the spices! If you love nutmeg, add a bit more. If you want it spicier, increase the ginger. Make it yours! - Pairing with ice cream or whipped cream: Serve warm with a scoop of vanilla ice cream. The cold ice cream contrasts nicely with the warm cobbler. Whipped cream is a great choice too! - Presentation ideas for gatherings: Cut into squares and serve in bowls. Sprinkle some cinnamon on top for a pop of color. Add a dollop of whipped cream for a lovely finish. This makes your dessert look fancy! For the full recipe, check out the Snickerdoodle Pumpkin Cobbler section above. {{image_2}} You can change the nuts in this dish or skip them. If you like walnuts, use them. Pecans work great too. If you want a nut-free option, just leave them out. For sugar, swap granulated sugar for coconut sugar or honey. These options add a different flavor and sweetness. Coconut sugar gives a rich taste, while honey adds a nice touch. Want to jazz up your cobbler? Try adding chocolate chips or butterscotch chips. These sweet bites melt and blend with the pumpkin. You can also explore spices like allspice or cloves. These spices add warmth and depth to the cobbler. Don't be afraid to mix and match your favorites to create new flavors. For gluten-free friends, use gluten-free flour. Many brands work well and keep the taste great. If you need to avoid eggs, try flaxseed or applesauce as a substitute. Each option helps to keep the cobbler moist and tasty. You can enjoy the same warm dessert while meeting your dietary needs. For the full recipe, check the link above. After enjoying your Snickerdoodle Pumpkin Cobbler, let it cool down. Then, cover it with plastic wrap or keep it in an airtight container. Store it in the fridge for up to three days. The cobbler stays tasty and fresh when stored properly. To enjoy your cobbler warm, you can reheat it. The best way is to use an oven. Preheat the oven to 350°F (175°C) and place the cobbler in for about 10-15 minutes. This keeps the texture nice and soft. If you use a microwave, heat it in short bursts of 20 seconds. Check to avoid drying it out. If you want to save some for later, freezing works well. Cut the cobbler into squares first. Wrap each piece in plastic wrap, then place them in a freezer bag. This way, you can take only what you need. For the best taste, eat it within three months. When ready to enjoy, thaw it in the fridge overnight before reheating. - Prep time: 15 mins - Total time: 50 mins - Servings: 9 Yes, you can prepare this cobbler ahead of time. Mix the batter and pour it into the greased dish. Cover it tightly with plastic wrap and store it in the fridge for up to a day. When you're ready, bake it straight from the fridge. Just add a few extra minutes to the baking time. You can serve it with a scoop of vanilla ice cream or a dollop of whipped cream. A drizzle of caramel sauce adds a nice touch, too. Fresh whipped cream garnished with a sprinkle of cinnamon works great as well. Look for a golden-brown color on top. A toothpick inserted in the center should come out clean. If it comes out with wet batter, give it a few more minutes. The edges should be slightly puffed and firm to touch. Yes, fresh pumpkin can be used instead of canned pumpkin puree. To do this, cook the pumpkin until soft, then mash it. Make sure to drain any excess water. This will give your cobbler a fresh taste and a nice texture. In this blog post, you discovered how to make a delicious Snickerdoodle Pumpkin Cobbler. We talked about essential ingredients, like canned pumpkin and sugars, and shared optional ones to enhance flavor. I provided step-by-step instructions for preparation, baking, and common mistakes to watch out for. Remember to store leftovers properly to keep them fresh. This dessert is easy to make, fun to personalize, and perfect for gatherings. Enjoy baking this delightful treat that brings warmth and sweetness to any occasion!](https://dailydishlab.com/wp-content/uploads/2025/07/2d25911d-0f51-4f98-ae6a-a9dc8136342e-768x768.webp)