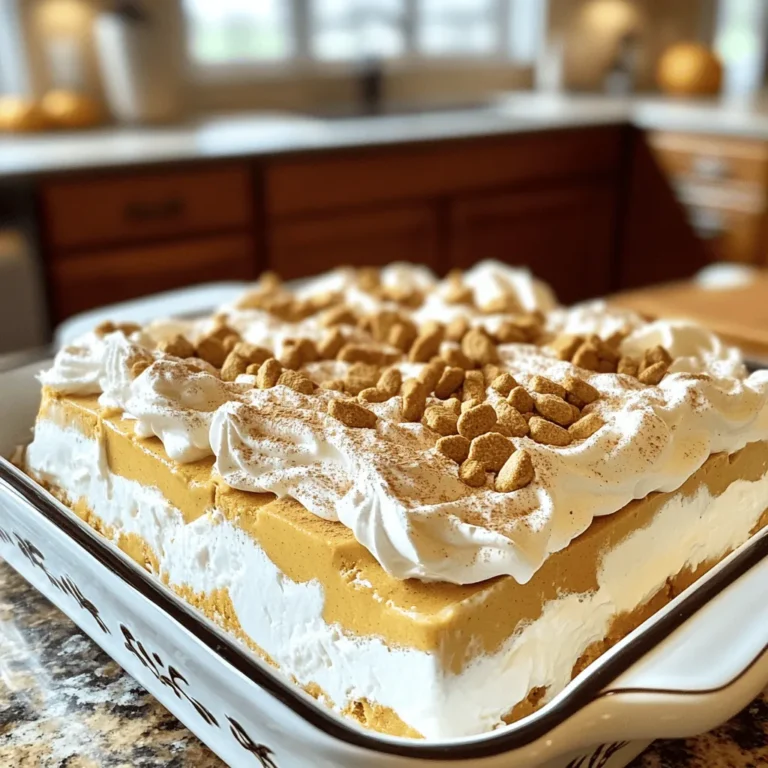
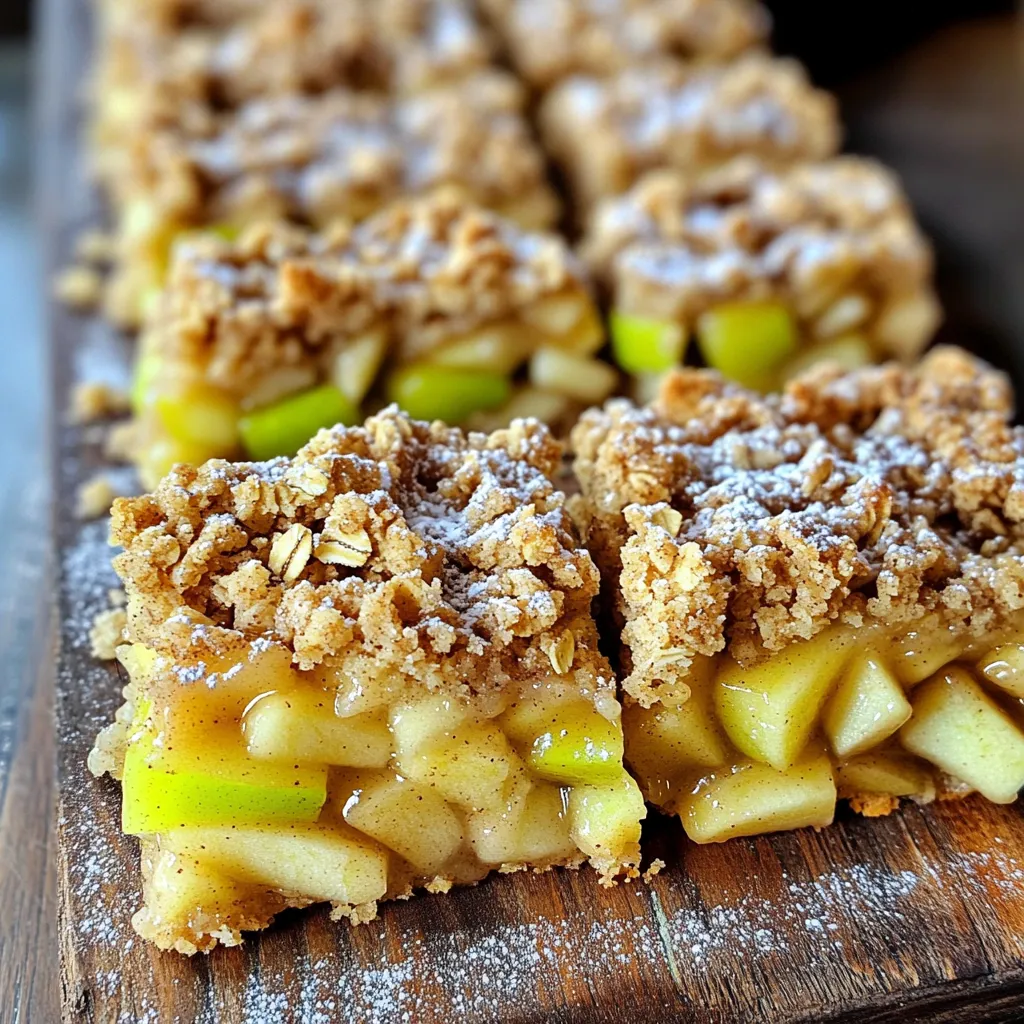
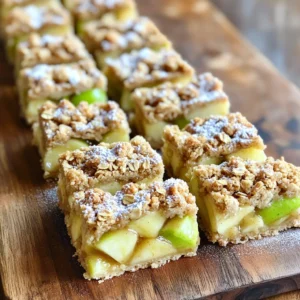
Cinnamon Apple Crumble Bars Easy and Tasty Treat
Craving a sweet treat that’s easy to make? You’re in luck! These Cinnamon Apple Crumble Bars are simple, tasty, and perfect for any occasion. I’ll share step-by-step instructions that anyone can follow. Plus, you’ll learn tips on selecting the best apples and achieving the perfect crumble texture. Let’s start baking this delicious dessert that will wow your family and friends!
Why I Love This Recipe
- Delicious Flavor Combination: The blend of sweet apples with warm spices like cinnamon and nutmeg creates a comforting and delightful flavor that is perfect for any occasion.
- Easy to Make: This recipe requires minimal effort and uses simple ingredients, making it accessible for bakers of all skill levels.
- Perfect for Sharing: These crumble bars are easy to cut into portions, making them ideal for sharing at gatherings, potlucks, or family dessert nights.
- Customizable: You can easily adapt this recipe by adding nuts, raisins, or different spices to suit your taste preferences.
Ingredients
List of Ingredients
To make these Cinnamon Apple Crumble Bars, you will need:
- 2 large apples, peeled and diced
- 1 tablespoon lemon juice
- 1 teaspoon cinnamon
- 1/4 teaspoon nutmeg
- 1/2 cup brown sugar
- 1/4 cup granulated sugar
- 1 cup all-purpose flour
- 1 cup rolled oats
- 1/2 cup unsalted butter, softened
- 1/2 teaspoon baking powder
- Pinch of salt
- 1/2 teaspoon vanilla extract
Substitutions for Ingredients
You can swap ingredients if needed. Here are some ideas:
- Use any sweet apple type, like Gala or Fuji, instead of large apples.
- Replace lemon juice with apple cider vinegar for a different twist.
- If you want less sugar, try using honey or maple syrup instead.
- For a gluten-free option, use gluten-free flour and oats.
- Use coconut oil instead of butter for a dairy-free treat.
Tips for Selecting the Best Apples
Choosing the right apples makes a big difference. Here’s how to pick the best ones:
- Look for firm apples with smooth skin. They should feel heavy for their size.
- Avoid apples with bruises or soft spots. These may spoil quickly.
- Choose apples with a sweet and fragrant smell. This means they are fresh.
- Popular choices for baking include Granny Smith, Honeycrisp, and Braeburn.
- Consider local varieties for the best taste and freshness.

Step-by-Step Instructions
Preparation Process
To start, gather your ingredients. You need two large apples, lemon juice, cinnamon, nutmeg, brown sugar, granulated sugar, all-purpose flour, rolled oats, unsalted butter, baking powder, salt, and vanilla extract.
1. Preheat your oven to 350°F (175°C). Grease a 9×9 inch baking pan or use parchment paper. This will help you remove the bars easily later.
2. In a medium bowl, mix the diced apples with lemon juice, cinnamon, nutmeg, brown sugar, and a pinch of salt. Toss the apples well. This makes them sweet and tasty. Set this bowl aside.
Baking Instructions
Next, we prepare the crumble base and topping.
1. In a large mixing bowl, combine flour, oats, granulated sugar, baking powder, and softened butter. Use your fingers or a pastry cutter to mix until it looks crumbly, like coarse crumbs.
2. Save 1 cup of this crumble mixture for the topping. Press the rest firmly into the bottom of your prepared baking pan. This forms a strong base.
3. Spread the apple mixture evenly on top of the pressed crust. Make sure to cover it well.
4. Finally, sprinkle the reserved crumble mixture over the apple layer.
5. Bake in the preheated oven for 25-30 minutes. Look for a golden brown top and bubbling apples.
Cooling and Serving Tips
After baking, it’s time to cool the bars.
1. Take the pan out of the oven and let it cool for 10-15 minutes. This helps the layers set.
2. Once slightly cool, lift the bars out using the parchment paper. This makes cutting easier.
3. Allow the bars to cool completely on a wire rack. This step is key for the best texture.
4. If you like, dust the top with powdered sugar before serving. This adds a sweet touch. Enjoy your delicious Cinnamon Apple Crumble Bars!
Pro Tips
- Use tart apples: For a balanced flavor, choose tart apples like Granny Smith, as they help counteract the sweetness of the sugars.
- Chill the butter: For a flakier texture, consider chilling your butter before mixing it with the dry ingredients.
- Add nuts for crunch: Incorporate chopped nuts like walnuts or pecans into the crumble topping for added texture and flavor.
- Serve warm: These bars are delicious served warm, especially when paired with a scoop of vanilla ice cream.
Tips & Tricks
Achieving the Perfect Crumble Texture
To make the best crumble, mix your ingredients well. Use your fingers or a pastry cutter to combine flour, oats, and butter. You want it to look like coarse crumbs. If it’s too wet, add a bit more flour. If it’s too dry, add a touch of melted butter. The right texture gives you that nice crunch.
Using Fresh vs. Canned Apples
Fresh apples give your bars a crisp bite. They also add bright flavor. Choose firm apples, like Granny Smith or Honeycrisp. If you use canned apples, drain them well. Canned apples can be mushy and might change the texture. Always taste your apples before mixing them into the batter.
Common Mistakes to Avoid
Avoid overmixing your crumble. This can make it tough instead of crumbly. Also, don’t skip the lemon juice. It brightens the apple flavor and keeps them fresh. One mistake is not letting the bars cool enough before cutting. They need time to set up, or they may fall apart.
Variations
Add-ins (Nuts, Dried Fruits, etc.)
You can add nuts or dried fruits to your crumble bars. Walnuts or pecans give a nice crunch. Almonds work well too. For dried fruits, consider raisins or cranberries. These add sweetness and texture to the bars. Just mix them in with the apples before baking. You can adjust the amount based on your taste.
Alternative Spices to Enhance Flavor
Try using different spices for added flavor. Ginger adds warmth and a bit of zing. Cloves give a rich, aromatic touch. You can also mix in some cardamom for a unique twist. Just use a pinch so it doesn’t overpower the apples. Feel free to experiment until you find your favorite spice blend.
Gluten-Free or Vegan Options
If you need gluten-free options, swap the all-purpose flour for almond or oat flour. Make sure to check that your oats are gluten-free too. For vegan options, replace the butter with coconut oil or vegan butter. You can use maple syrup instead of brown sugar for a sweet touch. These swaps keep the bars tasty and inclusive for all diets.
Storage Info
How to Store Cinnamon Apple Crumble Bars
After making these tasty bars, you want to store them right. Let the bars cool completely first. Place them in an airtight container. This keeps them fresh for 3 to 5 days. If you use parchment paper, it helps prevent sticking. You can also cover the pan with plastic wrap for easy storage.
Freezing Instructions
Freezing these bars is simple. Cut them into squares before freezing. Wrap each square in plastic wrap. Then, put them in a freezer bag. They can stay in the freezer for up to 3 months. When you’re ready to eat, thaw them in the fridge overnight. You can also heat them in the microwave for a quick treat.
Best Practices for Reheating
To reheat your bars, preheat your oven to 350°F (175°C). Place the bars on a baking sheet. Heat them for about 10 to 15 minutes. This keeps them warm and makes the crumble nice and crisp. You can also use the microwave. Heat for 20 to 30 seconds, but be careful not to overdo it. Enjoy your warm Cinnamon Apple Crumble Bars!
FAQs
Can I use different fruit instead of apples?
Yes, you can use different fruits. Pears, peaches, or berries work well. Each fruit gives its own unique taste. Just remember to adjust the sugar based on the sweetness of the fruit. For example, berries often need less sugar than apples.
How do I know when the bars are done baking?
You can tell the bars are done when the top is golden brown. The apples should be bubbling through the crumble. A toothpick inserted in the center should come out clean. If it comes out sticky, bake for a few more minutes.
Can I make these bars ahead of time?
Yes, making these bars ahead is easy. You can bake them a day before you plan to serve. Just store them in an airtight container. For best taste, eat them within three days. You can also freeze them for longer storage. Just thaw before serving.
You learned about making delicious cinnamon apple crumble bars. We covered the best ingredients, helpful tips, and step-by-step instructions. I shared tricks for texture and ideas for tasty variations. Remember to store your bars right and how to freeze them for later. With these tips, you’ll avoid common mistakes and impress your friends. Enjoy your baking journey and savor each bite of these delightful bars. They’re sure to be a hit!
Cinnamon Apple Crumble Bars
Ingredients
2 large apples, peeled and diced
1 tablespoon lemon juice
1 teaspoon cinnamon
1/4 teaspoon nutmeg
1/2 cup brown sugar
1/4 cup granulated sugar
1 cup all-purpose flour
1 cup rolled oats
1/2 cup unsalted butter, softened
1/2 teaspoon baking powder
Pinch of salt
1/2 teaspoon vanilla extract
Instructions
Preheat the oven to 350°F (175°C). Grease a 9×9 inch baking pan or line it with parchment paper for easy removal.
In a medium bowl, combine the diced apples, lemon juice, cinnamon, nutmeg, brown sugar, and a pinch of salt. Toss until the apples are evenly coated. Set aside.
In a large mixing bowl, combine the flour, oats, granulated sugar, baking powder, and softened butter. Use your fingers or a pastry cutter to mix until you achieve a crumbly texture that resembles coarse crumbs.
Reserve 1 cup of this crumble mixture for the topping. Press the remaining mixture firmly into the bottom of the prepared baking pan to form an even base layer.
Spread the apple mixture evenly over the pressed crust, making sure to distribute the apples well.
Sprinkle the reserved crumble mixture on top of the apple layer.
Bake in the preheated oven for 25-30 minutes or until the top is golden brown and the apples are bubbling.
Remove from the oven and let it cool in the pan for about 10-15 minutes. Once slightly cooled, lift the bars out using the parchment paper and allow to cool completely on a wire rack before slicing.
Optionally, dust with powdered sugar before serving for an extra touch of sweetness.
Prep Time: 15 mins | Total Time: 45 mins | Servings: 9 bars
Cinnamon Apple Crumble Bars
Ingredients
- 2 large apples, peeled and diced
- 1 tablespoon lemon juice
- 1 teaspoon cinnamon
- 0.25 teaspoon nutmeg
- 0.5 cup brown sugar
- 0.25 cup granulated sugar
- 1 cup all-purpose flour
- 1 cup rolled oats
- 0.5 cup unsalted butter, softened
- 0.5 teaspoon baking powder
- 1 pinch salt
- 0.5 teaspoon vanilla extract
Instructions
- Preheat the oven to 350°F (175°C). Grease a 9x9 inch baking pan or line it with parchment paper for easy removal.
- In a medium bowl, combine the diced apples, lemon juice, cinnamon, nutmeg, brown sugar, and a pinch of salt. Toss until the apples are evenly coated. Set aside.
- In a large mixing bowl, combine the flour, oats, granulated sugar, baking powder, and softened butter. Use your fingers or a pastry cutter to mix until you achieve a crumbly texture that resembles coarse crumbs.
- Reserve 1 cup of this crumble mixture for the topping. Press the remaining mixture firmly into the bottom of the prepared baking pan to form an even base layer.
- Spread the apple mixture evenly over the pressed crust, making sure to distribute the apples well.
- Sprinkle the reserved crumble mixture on top of the apple layer.
- Bake in the preheated oven for 25-30 minutes or until the top is golden brown and the apples are bubbling.
- Remove from the oven and let it cool in the pan for about 10-15 minutes. Once slightly cooled, lift the bars out using the parchment paper and allow to cool completely on a wire rack before slicing.
- Optionally, dust with powdered sugar before serving for an extra touch of sweetness.
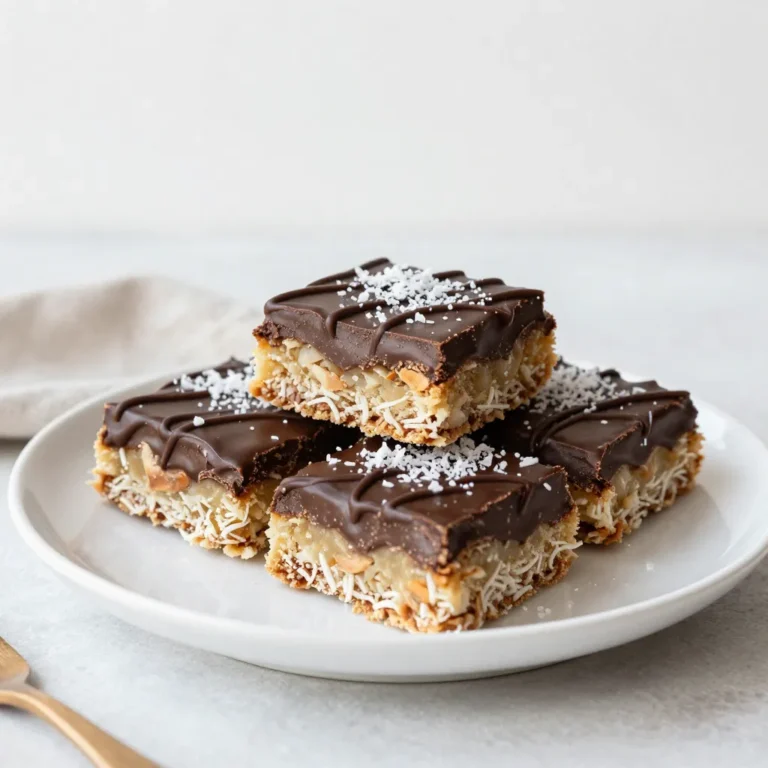
![- 1 cup coconut milk - 1/2 cup chia seeds - 1 ripe mango, diced - 2 tablespoons maple syrup or honey (adjust to taste) - 1 teaspoon vanilla extract - Pinch of salt - Toasted coconut flakes for garnish (optional) - Fresh mint leaves for garnish (optional) Coconut milk offers healthy fats that boost energy. It also helps with digestion. Chia seeds are full of fiber, which aids in digestion and keeps you full longer. Mango is rich in vitamins A and C, which support your immune system and skin. Maple syrup or honey adds natural sweetness and contains antioxidants. Vanilla extract gives flavor and may help reduce stress. Salt enhances taste and can help balance fluids in your body. Toasted coconut flakes add crunch and fiber, while mint adds freshness and aids digestion. If you don't have coconut milk, use almond or oat milk for a different taste. For chia seeds, you can use ground flaxseeds, but the texture will change. Any ripe fruit can replace mango, like bananas or berries, for varied flavors. Maple syrup can be swapped with agave syrup or stevia for a lower-calorie option. If you want a sugar-free choice, skip the sweetener and let the fruit shine. You can use vanilla bean paste instead of extract for a richer flavor. This recipe for Mango Coconut Chia Pudding is simple and packed with flavor. To make Mango Coconut Chia Pudding, start with the coconut milk. In a mixing bowl, combine: - 1 cup coconut milk - 2 tablespoons maple syrup or honey - 1 teaspoon vanilla extract - A pinch of salt Whisk these ingredients until they blend well. Next, add the chia seeds. Gradually whisk in: - 1/2 cup chia seeds This step is key. Make sure the seeds spread evenly in the liquid. Cover the bowl, or move the mix to a container with a lid. Place it in the fridge for at least 4 hours. For best results, leave it overnight. This waiting time lets the chia seeds absorb the coconut milk. After chilling, check the pudding. Stir it well to break up clumps. Now it’s ready for serving! To get the right texture, use fresh chia seeds. Old seeds may not thicken well. If your pudding is too thick, add a bit more coconut milk. For a creamier texture, use full-fat coconut milk. Remember to stir well after chilling. This helps avoid clumps and ensures smoothness. For a beautiful presentation, layer the pudding in clear glasses. Start with a layer of chia pudding, then add: - Diced mango Repeat the layers until the glass is full. Finish with a sprinkle of toasted coconut flakes and fresh mint leaves. This adds color and flavor. Serve it cold for a refreshing treat. For the full recipe, check below! You can make this pudding your own. Here are my favorite tips: - Add spices: A sprinkle of cinnamon or nutmeg can bring warmth. - Mix fruits: Try adding berries or pineapple for a tropical twist. - Change sweeteners: Use agave nectar or stevia instead of maple syrup. - Include nuts: Chopped almonds or walnuts add crunch and nutrition. Watch out for these common errors to get the best pudding: - Not whisking well: Make sure to mix the chia seeds fully into the liquid. - Skipping the chill time: Let the pudding sit for at least four hours. - Using too much liquid: Stick to the recipe for the right balance. - Not stirring before serving: A quick stir helps mix any settled chia seeds. You can boost both flavor and texture with some easy tricks: - Layer with fruit: Diced mango between layers adds freshness and color. - Garnish well: Use toasted coconut and mint leaves for a beautiful finish. - Serve chilled: This pudding tastes best when cold and creamy. - Experiment with toppings: Yogurt, granola, or seeds can add fun textures. For the full recipe, check out the detailed instructions above! {{image_2}} You can change the mango in this pudding for other fruits. Pineapple, kiwi, or passion fruit work great. Each fruit adds its own flavor and texture. You might want to mix in diced fruit before chilling the pudding. This way, each spoonful has a burst of tropical taste. You can also top the pudding with extra fruit for a colorful look. Coconut milk is a star in this recipe. If you want to try something different, use almond or oat milk. Both options are dairy-free and still creamy. Just keep in mind that each milk will change the flavor a bit. If you want a thicker base, add more chia seeds. This will help you achieve that creamy texture you love. Maple syrup or honey gives sweetness to the pudding. If you want a sugar-free option, try stevia or agave syrup. Both are great for adding sweetness without calories. You can also use ripe bananas for natural sweetness. Just mash them well and mix them into the base. This adds a new flavor while keeping the pudding healthy. For the full recipe, you can check the earlier section. Enjoy these fun variations! To keep your mango coconut chia pudding fresh, store it in airtight containers. This helps prevent any unwanted odors or flavors from seeping in. Make sure to place the pudding in the fridge right after it cools. You can also layer it in small jars for easy serving later. Mango coconut chia pudding lasts about 5 days in the fridge. If you want to keep it longer, you can freeze it. Pour the pudding into ice cube trays for easy portions. Just remember to thaw it in the fridge before serving. Do not refreeze after thawing. If your pudding thickens too much in the fridge, simply add a splash of coconut milk. Stir well to achieve your desired consistency. You can also mix in fresh mango pieces for a flavor boost. Enjoy it cold or let it sit at room temperature for a few minutes before digging in. Chia pudding is a simple dish made from chia seeds and liquid. When you mix chia seeds with coconut milk, they absorb the liquid. This makes a thick, creamy texture. To make it, whisk coconut milk, maple syrup, vanilla, and salt. Then, stir in chia seeds. Cover and chill for at least four hours. This lets the seeds swell and form a pudding. Yes, you can use different types of milk. Almond, soy, or oat milk work well. Each type adds its own flavor. Coconut milk gives a rich, tropical taste. Try what you like best to find your favorite! Mango coconut chia pudding lasts about four to five days in the fridge. Store it in an airtight container to keep it fresh. If you notice any changes in smell or texture, it is best to throw it away. Yes, chia pudding is very healthy. Chia seeds are high in fiber and protein. They also contain omega-3 fatty acids. Coconut milk provides good fats and vitamins. This dish is great for breakfast or a snack. To make chia pudding without sugar, skip the sweeteners. Use ripe mango for natural sweetness. You can also add spices like cinnamon or nutmeg for flavor. This makes the pudding tasty without added sugar. Here’s how to make it: - 1 cup coconut milk - 1/2 cup chia seeds - 1 ripe mango, diced - 2 tablespoons maple syrup or honey (adjust to taste) - 1 teaspoon vanilla extract - Pinch of salt - Toasted coconut flakes for garnish (optional) - Fresh mint leaves for garnish (optional) Follow the [Full Recipe] for step-by-step details on how to prepare this delicious treat! Mango coconut chia pudding is simple and fun to make. We explored key ingredients, their health perks, and ways to swap them out. I provided clear steps to prepare the dish and serve it just right. We looked at tips to enhance flavors and avoid common mistakes. You can try tropical fruit variations and find dairy-free options too. Proper storage ensures your pudding stays fresh and tasty. With these insights, you can create a delicious treat that fits your tastes and lifestyle. Enjoy your chia pudding adventure!](https://dailydishlab.com/wp-content/uploads/2025/07/e4ad1822-a4f3-41e3-be5e-fabc0a8bd60a-768x768.webp)
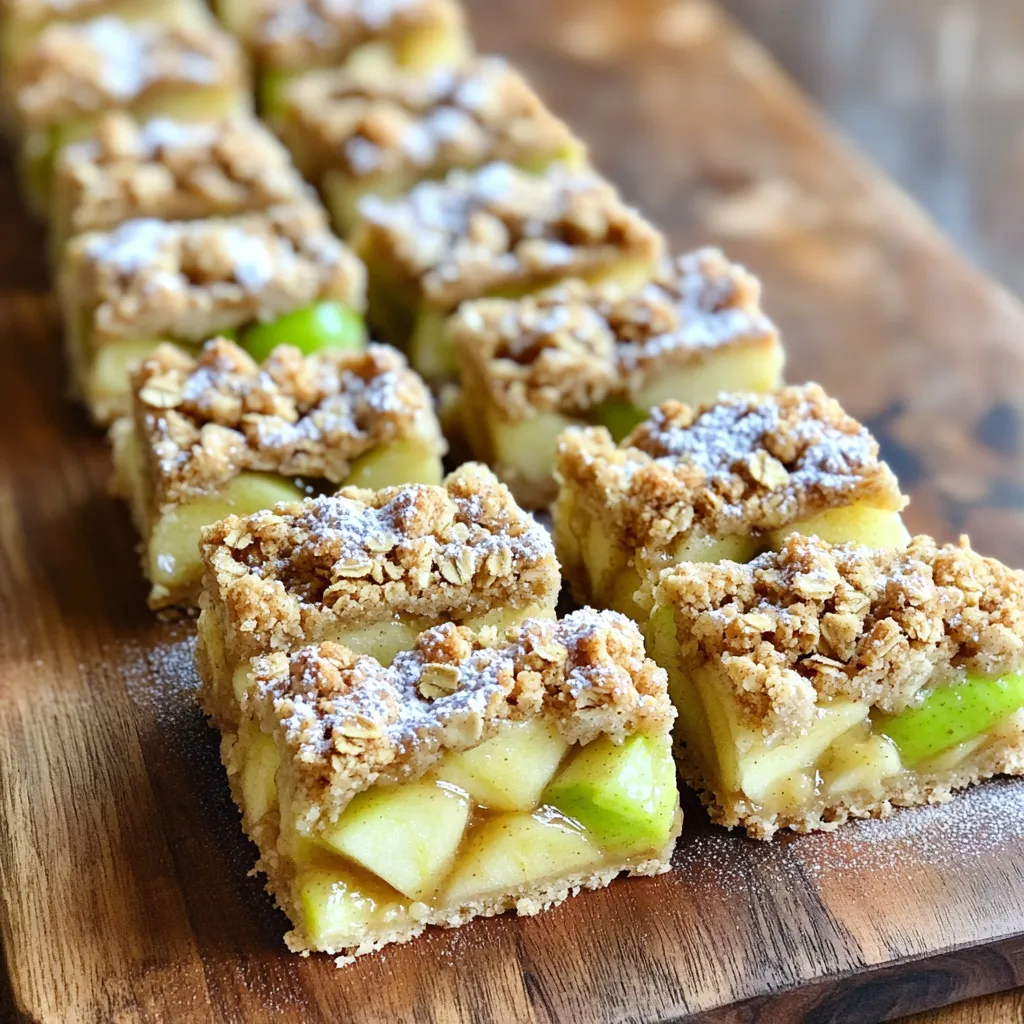
![To make these brownies, you need specific ingredients. Here’s what you’ll gather: - 1 cup unsalted butter (2 sticks) - 2 cups granulated sugar - 4 large eggs - 1 teaspoon vanilla extract - 1 cup all-purpose flour - 1 cup unsweetened cocoa powder - 1/2 teaspoon salt - 1 cup chopped pecans - 1 cup caramel sauce (store-bought or homemade) - 1/2 cup chocolate chips (semi-sweet or dark) - 1/4 teaspoon sea salt (for topping) Each ingredient plays a key role in creating the rich, fudgy texture and flavor you will love. While the essential ingredients are perfect, you can add more for extra flavor. Consider these options: - A dash of espresso powder can deepen the chocolate taste. - A splash of bourbon or rum brings warmth and complexity. - Use dark chocolate chips for a richer finish. - Add sea salt flakes on top for a contrast in taste. These optional ingredients can take your brownies to the next level. To make the process smooth, you'll need some tools. Here’s what I recommend: - A medium saucepan for melting butter. - A mixing bowl for combining wet ingredients. - A separate bowl for dry ingredients. - A whisk for mixing eggs and vanilla. - A spatula to fold in the nuts and chips. - A 9x13 inch baking pan lined with parchment paper. These tools help you create the perfect caramel pecan turtle brownies. For the full recipe, you can check the complete steps and tips. Enjoy your baking! To create your brownie batter, start with the basics. First, preheat your oven to 350°F (175°C). Next, grease a 9x13 inch baking pan and line the bottom with parchment paper. This step helps with easy removal later. In a medium saucepan, melt 1 cup of unsalted butter over low heat. Once it melts, add 2 cups of granulated sugar and stir until mixed well. Remove the saucepan from heat and let it cool for a few minutes. This cooling step is important to avoid cooking the eggs. Now, whisk in 4 large eggs, one at a time. Add 1 teaspoon of vanilla extract and mix until smooth. In another bowl, sift together 1 cup of all-purpose flour, 1 cup of unsweetened cocoa powder, and 1/2 teaspoon of salt. Gradually add the dry mix to the wet mix. Stir gently until just combined. Overmixing can lead to tough brownies. Fold in 1 cup of chopped pecans and 1/2 cup of chocolate chips, saving a few pecans for the topping. Now it’s time to layer your brownies. Pour half of the brownie batter into the prepared pan and spread it evenly. Drizzle half of the caramel sauce over this layer. Then spoon the rest of the batter on top and spread it gently. Drizzle the remaining caramel sauce over this layer. Sprinkle the reserved pecans on top and add a pinch of sea salt to enhance the flavor. Bake in your preheated oven for 30 to 35 minutes. To check for doneness, insert a toothpick in the center. It should come out with a few moist crumbs, not wet batter. After baking, remove the pan from the oven. Let the brownies cool in the pan for at least 30 minutes. Use the parchment paper to lift them out. Slice them into squares for serving. For a special touch, serve the brownies warm. Drizzle with extra caramel sauce and sprinkle with sea salt. This adds a lovely finishing touch that enhances the flavor. Enjoy your delicious creation! For the complete recipe, check out the [Full Recipe]. One big mistake is overmixing the batter. When you mix too much, it makes brownies tough. Mix until just combined for a softer bite. Another common error is not measuring ingredients well. Use dry measuring cups for flour and cocoa powder. Level the tops with a knife for accuracy. For that perfect chewy texture, use melted butter. This gives your brownies a rich flavor. Don't forget to let the batter rest for a few minutes before baking. It helps the ingredients meld together. Also, bake just until a toothpick shows a few moist crumbs. Too long makes them dry. Serve brownies warm to enjoy their gooey center. Drizzle extra caramel sauce on top for added sweetness. A sprinkle of sea salt can enhance the flavors. Pair with a scoop of vanilla ice cream for a delightful treat. Enjoy your Caramel Pecan Turtle Brownies with friends and family for a memorable dessert. Check out the Full Recipe for more tips! {{image_2}} If you want to change the taste, try other nuts. Almonds, walnuts, or hazelnuts can work well. Each nut gives a unique flavor. Almonds add a sweet crunch. Walnuts bring a rich, earthy taste. Hazelnuts give a hint of chocolate flavor. Just chop them as you would with pecans and mix them in. You can even toast the nuts lightly for extra flavor! Making your own caramel sauce is easy and fun. You need just sugar, butter, and cream. Start by melting sugar in a pan. Watch it closely so it doesn’t burn. Once it melts and turns golden, add butter and let it melt. Then, pour in heavy cream slowly and stir. Let it cool before using it in your brownies. This sauce adds a fresh taste that store-bought cannot match. Want to make these brownies gluten-free? Use gluten-free all-purpose flour instead of regular flour. Check that your caramel sauce is also gluten-free. Many brands are safe, but always read the label. This way, you can enjoy rich, gooey brownies without worry. The taste remains just as delightful, and your friends will never know the difference! Don't forget to check out the Full Recipe for all the details on making these sweet treats! To keep your caramel pecan turtle brownies fresh, store them in an airtight container. Place parchment paper between layers to avoid sticking. They can last up to a week at room temperature. For longer storage, put them in the fridge. This helps maintain their chewy texture and flavor. Freezing brownies is a great way to save some for later. First, allow them to cool completely. Then, cut them into squares. Wrap each piece tightly in plastic wrap. Put them in a freezer-safe bag or container. They can stay frozen for up to three months. When you’re ready to enjoy, just thaw them in the fridge overnight. To enjoy your brownies warm, reheat them in the microwave. Use a low power setting to avoid drying them out. Heat for about 10-15 seconds. You can also warm them in the oven. Set the oven to 350°F (175°C) and place the brownies in for about 5-10 minutes. This brings back that fresh-baked taste. For extra delight, drizzle some caramel sauce on top before serving. Turtle brownies get their name from the classic turtle candy. This candy has caramel, pecans, and chocolate. In our brownies, I mix these same flavors. The caramel adds sweetness, the pecans give a nice crunch, and the chocolate ties it all together. When you bite into these brownies, you taste the rich chocolate and gooey caramel. It's like a treat you can hold in your hand! Yes, you can. If you want to skip the eggs, you can use a few substitutes. Applesauce is a great choice. Use 1/4 cup of unsweetened applesauce for each egg. You can also use a flaxseed meal. Mix one tablespoon of flaxseed meal with three tablespoons of water. Let it sit for a few minutes until it gets thick. Both options work well and keep the brownies moist. These brownies stay fresh for about four to five days when stored properly. Keep them in an airtight container at room temperature. If you want them to last longer, you can freeze them. Just wrap them well in plastic wrap and place them in a freezer bag. They can last up to three months in the freezer. When you're ready to enjoy, just thaw them at room temperature or warm them in the microwave for a few seconds. Remember, for the full recipe, check our earlier section! In this post, we explored how to make delicious caramel pecan turtle brownies. We discussed essential and optional ingredients, the tools you need, and easy step-by-step instructions. I also shared useful tips to avoid common mistakes and achieve the perfect texture. Plus, we looked at variations, storage info, and common questions. Enjoying these brownies can be a fun baking adventure. I hope you try these tips and enjoy every bite!](https://dailydishlab.com/wp-content/uploads/2025/07/cd6252c4-9eb9-4ecc-b5d9-7ffc816e6e24-768x768.webp)