No-Bake Key Lime Pie Bars Refreshing and Easy Dessert
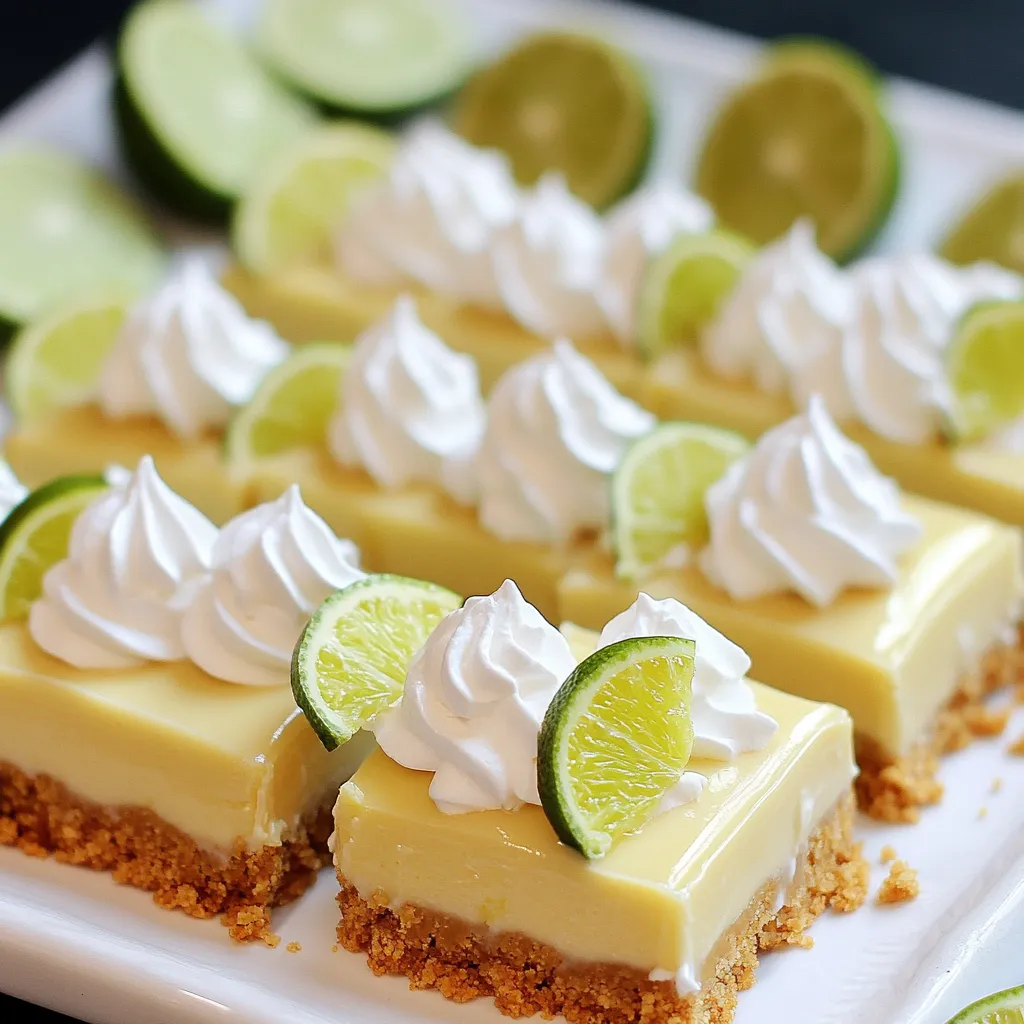
Looking for a refreshing dessert that requires no baking? You’ve come to the right place! My No-Bake Key Lime Pie Bars are easy to whip up and perfect for any occasion. With zesty lime flavor and a crunchy crust, these bars will impress your friends and family. In this guide, I’ll show you all the ingredients, steps, and tips to make this delicious treat. Get ready to enjoy a slice of sunshine!
Why I Love This Recipe
- Refreshing Flavor: The bright, tangy taste of key lime juice makes these bars a perfect treat for warm days.
- No-Bake Convenience: With no baking required, these bars are quick and easy to prepare, saving time in the kitchen.
- Creamy Texture: The fluffy whipped cream mixed into the filling creates a luscious, smooth texture that melts in your mouth.
- Perfect for Sharing: These bars cut easily into squares, making them a delightful dessert to share at gatherings and parties.
Ingredients
Essential Ingredients for No-Bake Key Lime Pie Bars
To make these delicious bars, you need some key ingredients. Here’s a simple list:
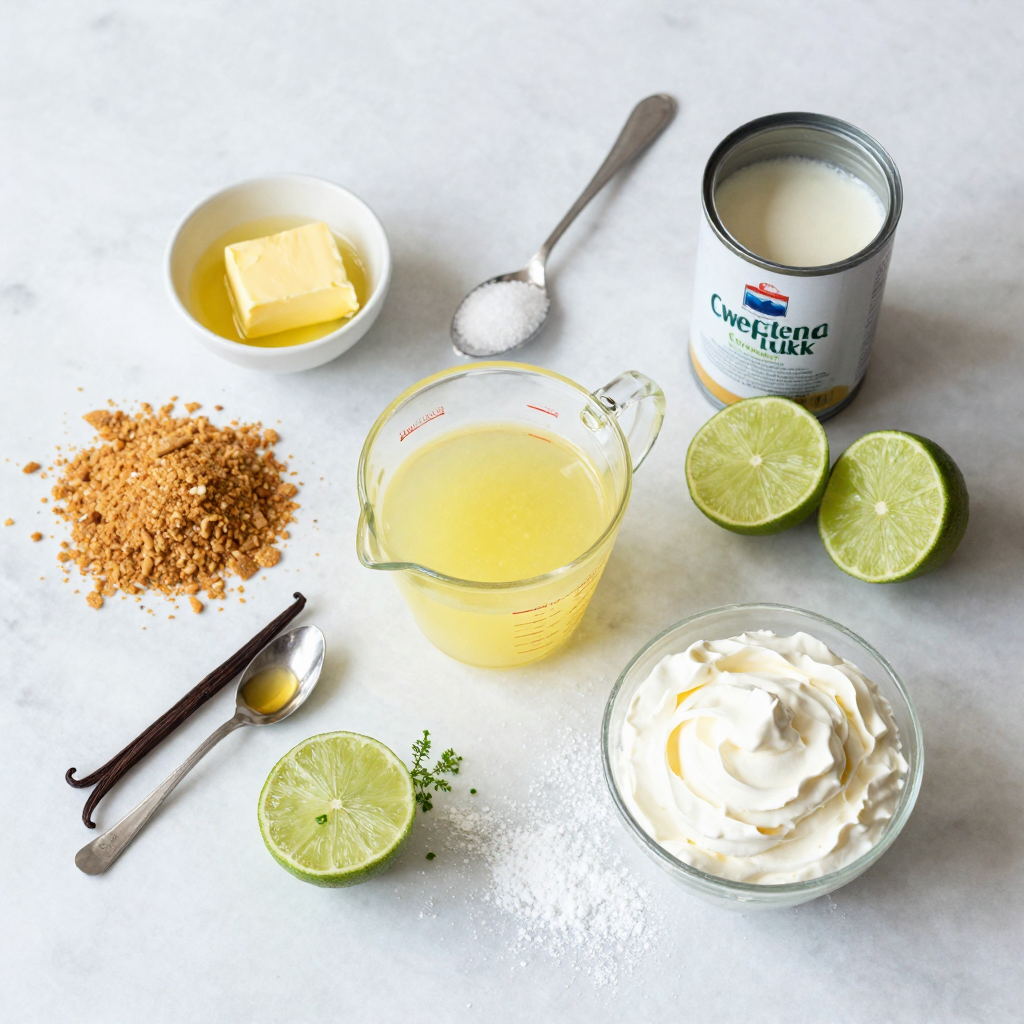
- 1 ½ cups graham cracker crumbs
- ½ cup unsalted butter, melted
- 1 tablespoon sugar
- 1 can (14 oz) sweetened condensed milk
- ½ cup fresh key lime juice (about 5-6 limes)
- Zest of 2 key limes
- 1 teaspoon vanilla extract
- 1 cup heavy whipping cream
- 2 tablespoons powdered sugar
These ingredients create a smooth and creamy filling with a crunchy crust. The fresh key lime juice gives it that bright, zesty flavor we all love.
Optional Garnishes and Toppings
While the bars taste amazing on their own, you can make them even better with a few garnishes. Here are some fun options:
- Key lime slices
- Whipped cream
These toppings add a nice touch and make your dessert look pretty. Plus, they enhance the tart flavor.
Ingredient Substitutions
If you don’t have all the ingredients, don’t worry! Here are a few swaps you can try:
- Use regular lime juice if you can’t find key limes.
- Swap melted butter with coconut oil for a different flavor.
- Substitute heavy cream with coconut cream for a dairy-free option.
These substitutions can still keep the taste close to the original while giving you a chance to try something new. Cooking is all about creativity!
Step-by-Step Instructions
Preparing the Graham Cracker Crust
To start, gather your ingredients. You need graham cracker crumbs, melted butter, and sugar. In a medium bowl, mix the crumbs, butter, and sugar. Keep mixing until it looks like wet sand. This is your crust. Next, take a 9×9-inch baking dish. Pour the crust mix into it. Press it down firmly. Use the back of a measuring cup for a smooth layer.
Making the Key Lime Filling
Now, let’s make the filling. Take a large bowl and add sweetened condensed milk. Squeeze in fresh key lime juice. You need about 5-6 limes for half a cup. Add the zest of 2 limes and vanilla extract. Whisk this mix until it’s smooth and creamy. In another bowl, whip the heavy cream with a mixer. Beat it until soft peaks form. Gradually add powdered sugar and keep whipping until the peaks are stiff.
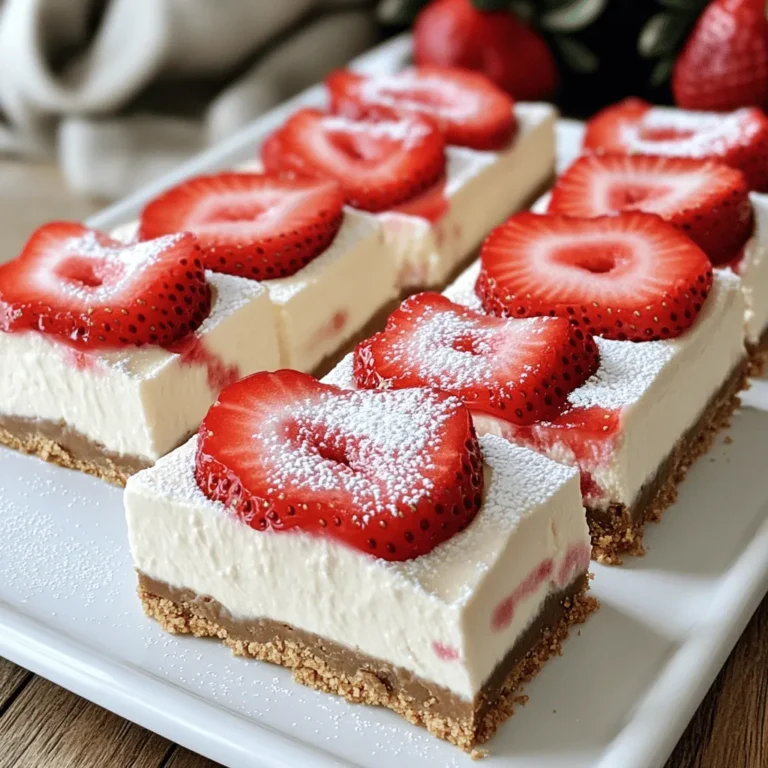
Assembling and Chilling the Bars
Gently fold the whipped cream into the key lime mixture. Make sure there are no streaks left. Now, pour this filling over the crust. Spread it evenly. Cover the dish with plastic wrap. Place it in the fridge for at least 4 hours. This helps the bars set. Once they are firm, slice them into squares. If you like, top each square with key lime slices and a dollop of whipped cream. Enjoy your refreshing dessert!
Pro Tips
- Use Fresh Limes: Always opt for fresh key limes instead of bottled juice for the best flavor.
- Chill Thoroughly: Ensure the pie bars are completely chilled and set before slicing for clean edges.
- Whip Cream to Stiff Peaks: Whipping the cream to stiff peaks provides a light and airy texture to the filling.
- Presentation Matters: Garnish with lime slices and whipped cream for an appealing presentation that enhances enjoyment.
Tips & Tricks
Perfecting the Graham Cracker Crust
To create a great graham cracker crust, you need the right texture. Start with 1 ½ cups of graham cracker crumbs. Mix this with ½ cup of melted unsalted butter and 1 tablespoon of sugar. The mix should feel like wet sand. Press it firmly into a 9×9-inch baking dish. Using the back of a measuring cup helps make it smooth. You want a crust that holds up well. Allow it to chill while you prepare the filling.
Achieving the Best Filling Texture
For the best filling, use a large mixing bowl. Combine one 14 oz can of sweetened condensed milk with ½ cup of fresh key lime juice. Add the zest of 2 key limes and 1 teaspoon of vanilla extract. Whisk these ingredients until smooth. The key is to blend well but not overmix. In another bowl, whip 1 cup of heavy cream until soft peaks form. Gradually add 2 tablespoons of powdered sugar. Then, whip until stiff peaks form. Gently fold the whipped cream into the key lime mixture. This will create a light and airy filling.
Serving Suggestions for Key Lime Bars
When ready to serve, slice the chilled bars into squares. For a fun touch, garnish with key lime slices and a dollop of whipped cream. Arrange the bars on a platter, with lime slices around the edges. This adds color and makes it look inviting. These bars are perfect for summer gatherings or any celebration. Enjoy the refreshing taste and share with friends!

Variations
Different Citrus Options
You can switch up the flavor by using other citrus fruits. Try lemon or orange juice for a different taste. Each option brings its own unique twist. Lemon gives a bright zing, while orange adds a sweet note. Feel free to mix and match to find your favorite.
Dairy-Free Alternatives
If you want a dairy-free version, there are great options. Use coconut cream instead of heavy cream for a rich texture. Substitute sweetened condensed milk with coconut condensed milk. This keeps the bars creamy and adds a hint of coconut flavor.
Other Add-Ins or Flavor Enhancements
Get creative with add-ins and enhance the flavor! You can mix in some shredded coconut for texture. Add a handful of crushed mint leaves for a fresh twist. Another great idea is to fold in some crushed berries for a fruity surprise. These tweaks make the bars even more fun and tasty!
Storage Info
Best Ways to Store No-Bake Key Lime Pie Bars
To keep your No-Bake Key Lime Pie Bars fresh, store them in the fridge. Place them in an airtight container. This helps to prevent them from absorbing any odors from the fridge. If you make a large batch, slice the bars before storing. This way, it’s easy to grab a piece when you want one.
How Long Can You Keep Them?
You can keep these bars in the fridge for up to five days. Make sure to check for any signs of spoilage. If you notice any changes, it’s best to toss them out. If you want to store them longer, freezing is a great option.
Tips for Freezing and Thawing
To freeze your No-Bake Key Lime Pie Bars, follow these steps:
- Wrap each slice: Use plastic wrap to cover each bar tightly.
- Place in a container: Put the wrapped bars in a freezer-safe container.
- Label and date: Write the date on the container so you know when you froze them.
You can freeze the bars for up to two months. When you are ready to eat them, take them out of the freezer. Let them thaw in the fridge for a few hours. This keeps them nice and creamy. Enjoy your delicious treat whenever you like!
FAQs
Can I use bottled key lime juice instead of fresh?
Yes, you can use bottled key lime juice. It saves time and adds flavor. However, fresh juice gives the best taste. Fresh key lime juice is more vibrant and tart. If you want pure flavor, go for fresh limes.
How do I know when the bars are set?
You can tell the bars are set when they are firm to the touch. After chilling for at least four hours, check the edges. If they feel solid, the bars are ready. You can also insert a knife; it should come out clean.
Can I make these bars ahead of time?
Absolutely! These bars are great for making in advance. You can prepare them up to two days ahead. Just store them in the fridge until you are ready to serve. This makes them perfect for parties or gatherings.
No-bake key lime pie bars are simple and delicious. We discussed essential ingredients, tips for the perfect crust, and how to make a creamy filling. You can switch up the flavors or add cool toppings to fit your taste. Proper storage keeps these treats fresh longer. Remember, using fresh key lime juice makes a big difference. Enjoy making these easy bars, and share them with friends for smiles all around!

No-Bake Key Lime Pie Bars
Ingredients
1 ½ cups graham cracker crumbs
½ cup unsalted butter, melted
1 tablespoon sugar
1 can (14 oz) sweetened condensed milk
½ cup fresh key lime juice (about 5-6 limes)
Zest of 2 key limes
1 teaspoon vanilla extract
1 cup heavy whipping cream
2 tablespoons powdered sugar
Key lime slices and whipped cream for topping (optional)
Instructions
Prepare the Crust: In a medium bowl, combine graham cracker crumbs, melted butter, and sugar. Mix until well combined, and the mixture resembles wet sand.
Press the Crust: Transfer the crust mixture to a 9×9-inch baking dish. Press it firmly into the bottom to create an even layer. Use the back of a measuring cup for a smooth finish.
Make the Filling: In a large mixing bowl, whisk together the sweetened condensed milk, key lime juice, lime zest, and vanilla extract until smooth and creamy.
Fold in Whipped Cream: In another bowl, whip the heavy cream with an electric mixer until soft peaks form. Gradually add the powdered sugar and continue to whip until stiff peaks form.
Combine Mixtures: Gently fold the whipped cream into the key lime mixture until no streaks remain.
Fill the Crust: Pour the key lime filling over the prepared crust and spread it evenly.
Chill: Cover the dish with plastic wrap and refrigerate for at least 4 hours, or until firm.
Slice and Serve: Once set, use a sharp knife to slice the bars into squares. Garnish with key lime slices and a dollop of whipped cream if desired.
Prep Time: 15 minutes | Total Time: 4 hours 15 minutes | Servings: 9 bars
– Presentation Tips: Serve bars on a platter with lime slices arranged around the edges for a vibrant look.
No-Bake Key Lime Pie Bars
Ingredients
- 1.5 cups graham cracker crumbs
- 0.5 cup unsalted butter, melted
- 1 tablespoon sugar
- 1 can (14 oz) sweetened condensed milk
- 0.5 cup fresh key lime juice
- 2 zest key limes
- 1 teaspoon vanilla extract
- 1 cup heavy whipping cream
- 2 tablespoons powdered sugar
- to taste key lime slices and whipped cream for topping
Instructions
- In a medium bowl, combine graham cracker crumbs, melted butter, and sugar. Mix until well combined, and the mixture resembles wet sand.
- Transfer the crust mixture to a 9x9-inch baking dish. Press it firmly into the bottom to create an even layer. Use the back of a measuring cup for a smooth finish.
- In a large mixing bowl, whisk together the sweetened condensed milk, key lime juice, lime zest, and vanilla extract until smooth and creamy.
- In another bowl, whip the heavy cream with an electric mixer until soft peaks form. Gradually add the powdered sugar and continue to whip until stiff peaks form.
- Gently fold the whipped cream into the key lime mixture until no streaks remain.
- Pour the key lime filling over the prepared crust and spread it evenly.
- Cover the dish with plastic wrap and refrigerate for at least 4 hours, or until firm.
- Once set, use a sharp knife to slice the bars into squares. Garnish with key lime slices and a dollop of whipped cream if desired.
- Serve bars on a platter with lime slices arranged around the edges for a vibrant look.
. Start by gathering your dry ingredients. In a large bowl, combine: - 1 cup rolled oats - 1/4 cup vanilla protein powder - 1 cup unsweetened shredded coconut - Pinch of sea salt Stir these ingredients well until they blend nicely. This mix forms a solid base for your protein bites. Next, make the binding mixture. In a separate bowl, blend together: - 1/2 cup almond butter (or your favorite nut butter) - 1/4 cup honey or maple syrup - 1 teaspoon vanilla extract Mix these until smooth and creamy. This mixture will help hold your bites together. Now comes the fun part! Pour the almond butter mixture over your dry ingredients. Mix everything well until they are fully combined. Carefully fold in: - 1 cup pitted and chopped fresh cherries Make sure the cherries are evenly spread throughout the mixture. Using your hands, shape the mixture into small balls, about 1 inch in size. If your mixture feels too sticky, wet your hands slightly. This will help you form the bites with ease. Place each formed bite on a parchment-lined baking sheet or plate. To let them set, refrigerate the bites for at least 30 minutes. This step firms them up, making them perfect for snacking. You can find the full recipe for these delicious Cherry Coconut Protein Bites to create your nutritious snack! To make your Cherry Coconut Protein Bites less sticky, you can try a few tricks. If the mixture is too wet, add more rolled oats or shredded coconut. This helps absorb extra moisture. When forming the bites, dampen your hands with a little water. This simple step prevents sticking and makes shaping easier. Also, if you chill the mixture for about 10 minutes before forming, it will firm up. This makes it easier to handle. When serving these bites, presentation matters! Arrange them on a colorful platter to make them pop. You can use fresh cherries and a sprinkle of shredded coconut as fun garnishes. Try placing the bites in neat rows or in a circular pattern. This adds a nice touch and invites people to enjoy them. A bright and cheerful display makes these bites even more appealing at parties or snack times. Cherries and coconut pack a nutritional punch. Cherries are rich in vitamins and antioxidants. They help reduce inflammation and support heart health. Coconut provides healthy fats that can boost energy. Plus, it may help improve digestion. Together, they make these bites not only tasty but also nutritious. With each bite, you enjoy flavor and health benefits. These bites are a smart snack choice for any time of day. For the full recipe, check out the earlier section. {{image_2}} You can change the taste of your Cherry Coconut Protein Bites easily. Swap out the cherries for other fruits. Dried cranberries or diced apples work great. You can also try different nut butters. Peanut butter or cashew butter add unique flavors. Instead of honey, use maple syrup or agave for sweetness. Each choice brings a new twist to the bites. Want to make these bites vegan? Just replace honey with maple syrup. Use a plant-based protein powder too. For a gluten-free option, choose gluten-free oats. This way, you keep the bites healthy and tasty for everyone. Feel free to add extras to your bites. Chia seeds or flaxseeds boost nutrition and texture. Dark chocolate chips add sweetness and richness. A pinch of cinnamon or nutmeg brings warmth to the flavor. You can mix and match based on what you like. Each variation makes these protein bites special and fun. Enjoy exploring different combinations with the full recipe! To keep your Cherry Coconut Protein Bites fresh, store them in an airtight container. This will help maintain their taste and texture. Make sure to place the container in the fridge. The cool temperature keeps the bites firm and safe to eat. Avoid leaving them at room temperature for too long. If they get warm, they may become too sticky. You can enjoy your homemade Cherry Coconut Protein Bites for up to one week. After a week, they might lose their flavor and texture. For the best taste, try to eat them fresh. If you notice any odd smells or changes in texture, it's best to toss them out. Freshness matters for both taste and health. Want to save some bites for later? You can freeze them! First, place the protein bites on a baking sheet in a single layer. Freeze them for about 2 hours, or until solid. Once frozen, transfer the bites to a freezer-safe bag or container. They can last up to three months in the freezer. When you want to enjoy them, take out the desired amount. Let them thaw in the fridge for a few hours or overnight. Enjoy your tasty snack anytime! For the full recipe, check out the details above. Cherry Coconut Protein Bites can last up to one week in the fridge. Keep them in an airtight container to keep them fresh. If you're like me and love to snack on these bites, you'll want to enjoy them within this time frame for the best flavor and texture. Yes, you can use frozen cherries! Just remember to thaw them first. This way, you will avoid excess moisture in your mixture. They will still offer that sweet, fruity taste you want in your protein bites. If you don’t have almond butter, feel free to use any nut or seed butter. Options like peanut butter or sunflower seed butter work great. Each choice will add a unique flavor while still binding your bites nicely. Absolutely! These protein bites are perfect for meal prep. You can make a big batch and store them for quick snacks during the week. They are easy to grab and are full of good energy, making them a smart choice for busy days. For the full recipe, check out the steps provided above. In this article, we explored how to make Cherry Coconut Protein Bites. We reviewed fresh and dry ingredients, such as cherries and oats. You learned the step-by-step process to create these tasty bites. Tips for texture and serving ideas helped enhance your experience. Don’t forget to customize your bites with your favorite flavors. Store them properly to keep them fresh. Enjoy the health benefits while satisfying your sweet tooth! These bites are simple, tasty, and perfect for any time.](https://dailydishlab.com/wp-content/uploads/2025/07/0dfc7ece-2245-4abb-9db4-f4477681fe67-768x768.webp)