
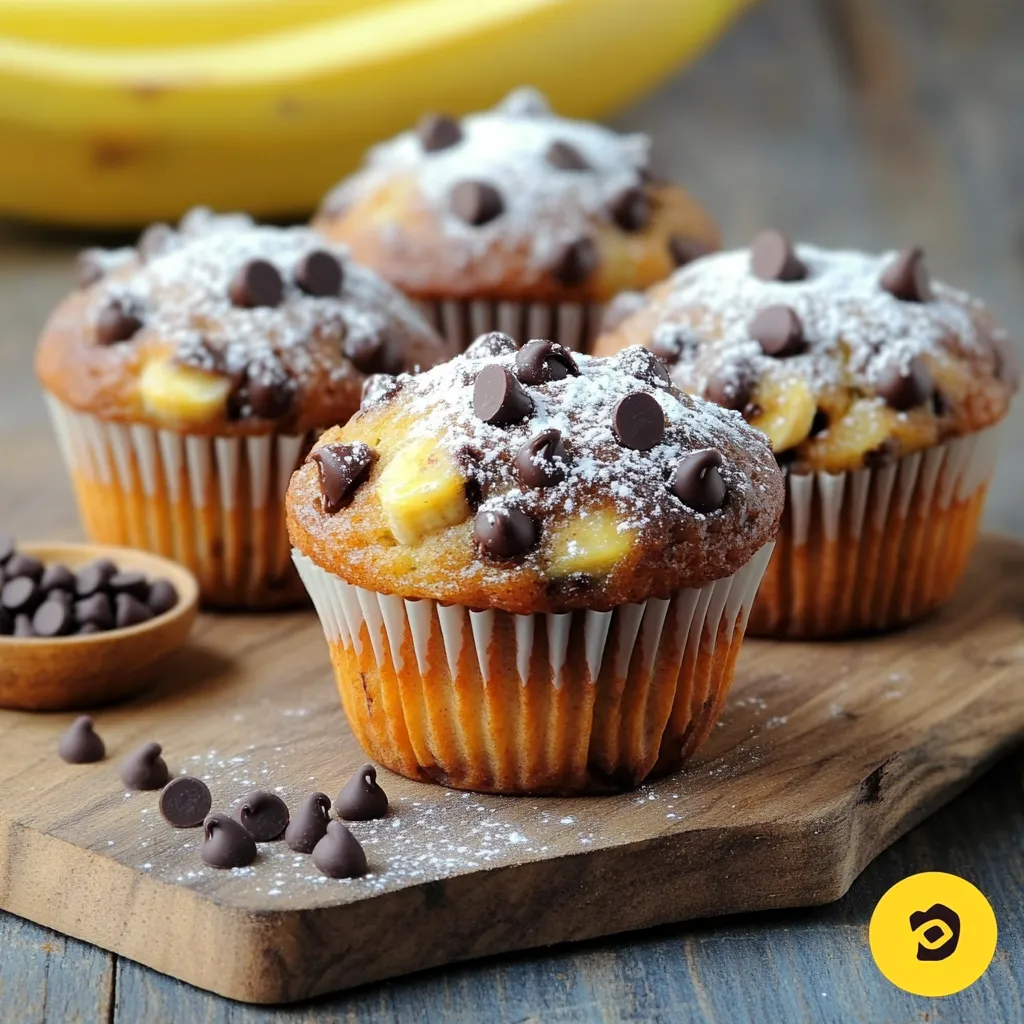
Chocolate Chip Banana Bread Muffins Delightful Treat
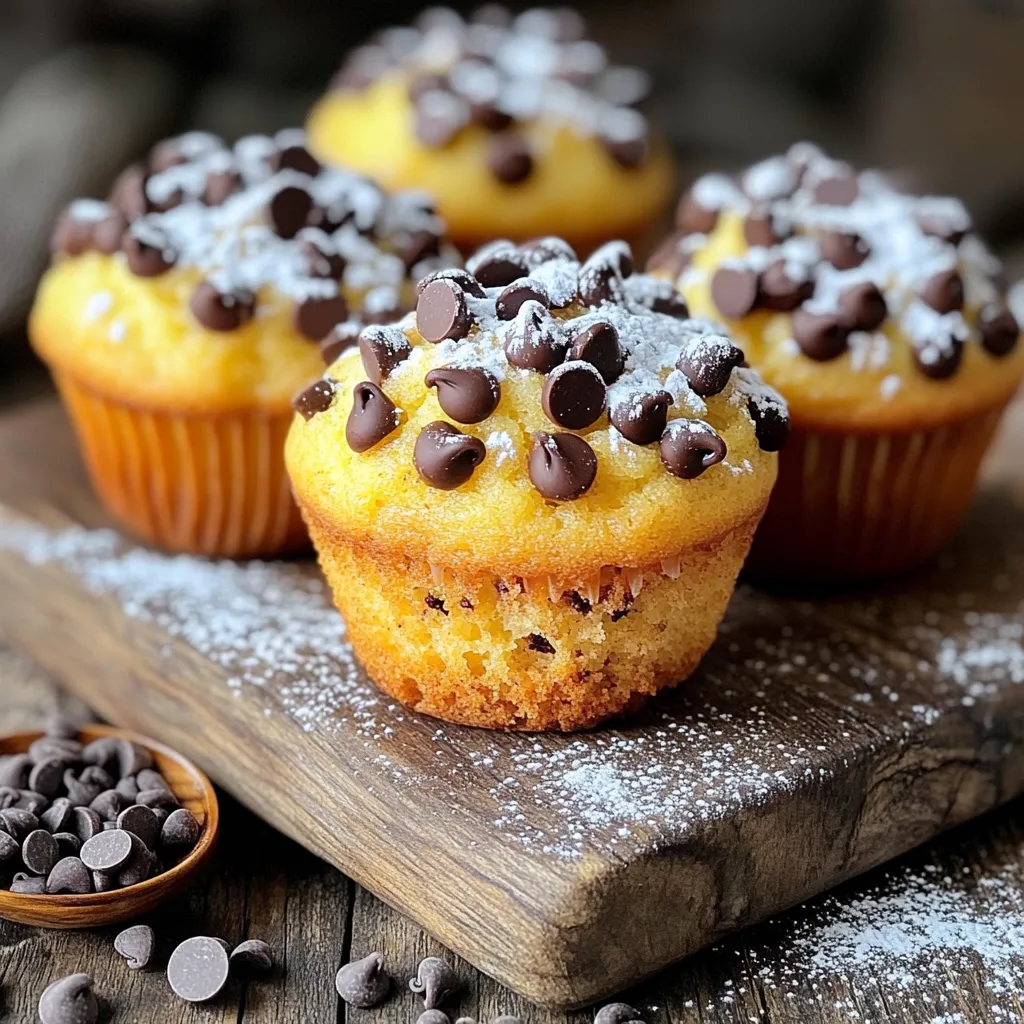
Craving a sweet treat that’s warm, fluffy, and oh-so-delicious? You’re in the right place! I’ll guide you through making Chocolate Chip Banana Bread Muffins that will satisfy your taste buds. With a few simple ingredients and easy steps, you’ll turn ripe bananas into a delightful batch of muffins. Let’s dive in and bake a yummy treat you’ll love to share!
Why I Love This Recipe
- Deliciously Moist: The ripe bananas ensure that these muffins are incredibly moist and flavorful, making each bite a treat.
- Quick and Easy: With a prep time of just 10 minutes, you can have these muffins ready to bake in no time!
- Chocolatey Goodness: The addition of chocolate chips brings a delightful sweetness that pairs perfectly with the banana flavor.
- Customizable: You can easily add nuts or swap in different types of chocolate, making this recipe versatile for any preference.
Ingredients
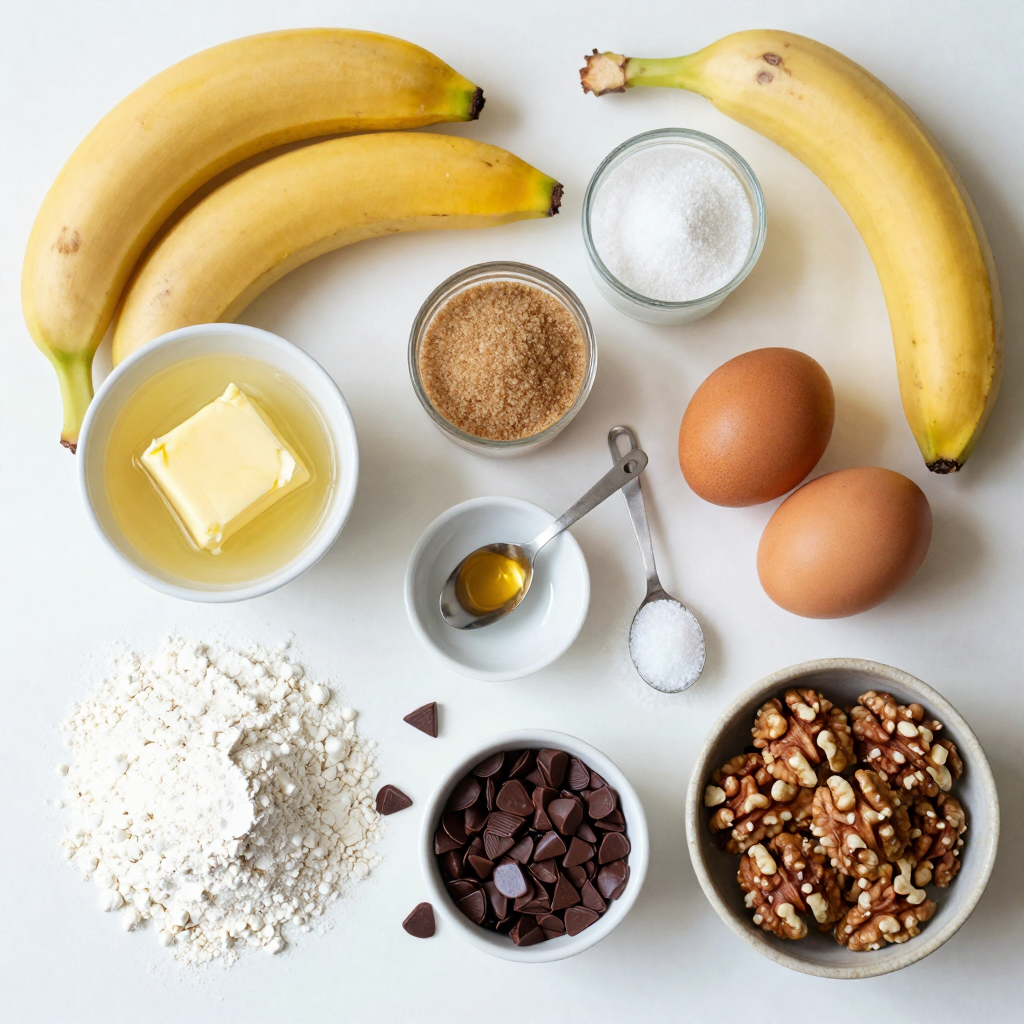
Key Ingredients for Chocolate Chip Banana Bread Muffins
To make these delicious muffins, you need a few key ingredients. Here’s what you will need:
- 3 ripe bananas, mashed
- 1/2 cup unsalted butter, melted
- 1/2 cup granulated sugar
- 1/4 cup brown sugar, packed
- 2 large eggs
- 1 teaspoon vanilla extract
- 1 teaspoon baking soda
- 1/2 teaspoon salt
- 1 1/2 cups all-purpose flour
- 1/2 cup chocolate chips (dark or semisweet)
Each ingredient plays a big role. The ripe bananas give natural sweetness. They also keep the muffins moist. The butter adds richness and flavor. The sugars help with browning and sweetness. The eggs bind everything together while adding some lift.
Optional: Enhancements with Walnuts
If you enjoy a little crunch, add walnuts! Walnuts bring great flavor and texture. They pair perfectly with the chocolate and banana. Use about 1/4 cup of chopped walnuts. You can mix them in with the chocolate chips. This step is totally optional, but I highly recommend it for that extra bite!
Ingredient Substitutions and Alternatives
Don’t have all the ingredients? No worries! Here are some easy swaps:
- Butter: You can use coconut oil or vegetable oil instead.
- Sugar: Try using brown sugar only or honey.
- Flour: Whole wheat flour can work too. Just remember, it may change the texture.
- Eggs: For a vegan option, replace eggs with flax eggs. Mix 1 tablespoon of flaxseed meal with 2.5 tablespoons of water.
These substitutions can help you customize the recipe to fit your needs. Don’t be afraid to experiment!
Step-by-Step Instructions
Preparing the Muffin Tin
First, set your oven to 350°F (175°C). This step is key for even baking. Next, grab a muffin tin. You can line it with paper liners or spray it with non-stick spray. This helps keep the muffins from sticking. Make sure you prepare the tin before mixing the batter. That way, you can bake right after mixing.
Mixing the Wet Ingredients
Start by mashing three ripe bananas in a large bowl. You want them soft and smooth. Then, add 1/2 cup of melted unsalted butter. Mix these two items well. Next, add in 1/2 cup of granulated sugar, 1/4 cup of brown sugar, and two large eggs. Don’t forget 1 teaspoon of vanilla extract! Beat this mixture until it looks smooth and creamy.
Incorporating Dry Ingredients and Adding Mix-ins
Now, sprinkle 1 teaspoon of baking soda and 1/2 teaspoon of salt over your wet mix. Stir it in well. Gradually add 1 1/2 cups of all-purpose flour. Stir gently until just combined. It’s okay if there are a few lumps. You don’t want to overmix. Finally, fold in 1/2 cup of chocolate chips and, if you like, 1/4 cup of chopped walnuts. These add great flavor and crunch.
Baking and Cooling Process
Scoop the batter into your prepared muffin tin. Fill each cup about 2/3 full to allow them to rise. Bake the muffins for 18-20 minutes. To check if they are done, insert a toothpick into the center of a muffin. If it comes out clean, they are ready! Remove the muffins from the oven and let them cool in the pan for 5 minutes. After that, transfer them to a wire rack to cool completely. Enjoy the delightful smell as they cool!
Pro Tips
- Use Very Ripe Bananas: The riper the bananas, the sweeter and more flavorful your muffins will be. Look for bananas with plenty of brown spots for the best results.
- Don’t Overmix the Batter: Mixing too much can lead to dense muffins. Stir just until the flour is incorporated for light and fluffy results.
- Experiment with Mix-Ins: Feel free to get creative! Try adding coconut flakes, dried fruit, or different types of nuts for a unique twist on your muffins.
- Cool Before Serving: Allow the muffins to cool on a wire rack to prevent them from becoming soggy. This will help maintain their texture and flavor.
Tips & Tricks
How to Perfect Your Muffin Texture
To get the best texture, mix just enough. Overmixing makes muffins tough. Use a spatula to blend the dry and wet ingredients gently. Stop mixing when you see the last streak of flour. The batter should be lumpy. This will help your muffins rise and become fluffy.
Adjusting Sweetness Levels
You can change how sweet your muffins are. If you like less sugar, cut the granulated sugar. Try using only brown sugar for a richer flavor. You can also add some honey or maple syrup. Taste the batter before baking. Remember, the bananas are sweet too!
Storage Tips for Freshness
To keep your muffins fresh, store them in an airtight container. They can last for up to three days at room temperature. For longer storage, freeze them. Wrap each muffin in plastic wrap, then place them in a freezer bag. When you want one, just thaw it overnight in the fridge. Enjoy fresh-baked taste anytime!
Variations
Healthier Alternatives: Whole Wheat and Natural Sweeteners
You can make these muffins a bit healthier. Use whole wheat flour instead of all-purpose flour. This change adds fiber and flavor. You can also swap out sugar for natural sweeteners. Honey or maple syrup works well. Just use less liquid in the recipe to balance it out.
Add-Ins: Nuts, Fruits, and Other Chocolates
You can boost the flavor and texture with fun add-ins. Chopped walnuts add nice crunch. For a fruity twist, add blueberries or raspberries. You can also mix in different chocolates. Try white chocolate chips or dark chocolate chunks for a flavor twist.
Seasonal Flavors: Cinnamon, Pumpkin Spice, etc.
Seasonal flavors make these muffins special. In fall, add pumpkin spice for warmth. Just a teaspoon can change everything. In winter, sprinkle in cinnamon for a cozy feel. These small touches make each muffin a bit different and fun for any time of year.
Storage Info
Best Practices for Storing Leftover Muffins
To keep your muffins fresh, store them in an airtight container. Place a paper towel inside to absorb moisture. This helps prevent sogginess. You can also wrap each muffin in plastic wrap. This keeps them soft and delicious. Store them at room temperature for up to three days. If you want to keep them longer, consider freezing.
Freezing Instructions for Long-Term Storage
To freeze your muffins, let them cool completely. Place each muffin in a freezer-safe bag. Squeeze out as much air as possible before sealing. Label the bag with the date. Your muffins will stay fresh for about three months in the freezer. When you’re ready to enjoy, you can thaw them overnight in the fridge.
Reheating Tips for Optimal Enjoyment
For the best flavor and texture, reheat your muffins before serving. You can use the microwave for quick reheating. Heat each muffin for about 10 to 15 seconds. If you prefer a crispier texture, use the oven. Preheat it to 350°F (175°C). Warm the muffins for about 5 to 10 minutes. Enjoy them warm for a truly delightful treat!
FAQs
Can I use frozen bananas for this recipe?
Yes, you can use frozen bananas. Just thaw them first. Frozen bananas work great in muffins. They add moisture and sweetness. Make sure to drain any excess liquid. Mash them well before mixing with the other ingredients.
How do I know when my muffins are done baking?
You can check if your muffins are done by using a toothpick. Insert it in the center of a muffin. If it comes out clean, they are ready. You can also look for a golden-brown color on top. The muffins should feel springy to the touch.
Can I make these muffins vegan?
Yes, you can make these muffins vegan. Substitute eggs with flax eggs or applesauce. Use a vegan butter alternative instead of regular butter. Make sure to use dairy-free chocolate chips. These swaps will keep your muffins delicious and plant-based.
This blog post covered everything you need to make chocolate chip banana bread muffins. We explored key ingredients and helpful substitutions. You learned step-by-step instructions for mixing and baking. Tips and tricks helped you perfect texture and sweetness. We discussed variations, storage tips, and some FAQs.
Now you have the tools to make delicious muffins that you can enjoy anytime. Happy baking!
Chocolate Chip Banana Bread Muffins
Ingredients
3 ripe bananas, mashed
1/2 cup unsalted butter, melted
1/2 cup granulated sugar
1/4 cup brown sugar, packed
2 large eggs
1 teaspoon vanilla extract
1 teaspoon baking soda
1/2 teaspoon salt
1 1/2 cups all-purpose flour
1/2 cup chocolate chips (dark or semisweet)
1/4 cup chopped walnuts (optional)
Instructions
Preheat your oven to 350°F (175°C) and line a muffin tin with paper liners or grease it with non-stick spray.
In a large mixing bowl, combine the mashed bananas and melted butter, mixing well together until smooth.
Add the granulated sugar, brown sugar, eggs, and vanilla extract to the banana mixture. Beat until well combined.
Sprinkle the baking soda and salt over the mixture, then mix again until fully incorporated.
Gradually add the all-purpose flour, stirring gently until just combined. Do not overmix.
Fold in the chocolate chips and chopped walnuts (if using) until evenly distributed throughout the batter.
Scoop the batter into the prepared muffin tin, filling each cup about 2/3 full.
Bake for 18-20 minutes or until a toothpick inserted into the center of a muffin comes out clean.
Remove from the oven and allow to cool in the pan for 5 minutes before transferring the muffins to a wire rack to cool completely.
Prep Time: 10 mins | Total Time: 30 mins | Servings: 12 muffins
– Presentation Tips: Serve the muffins warm with a light dusting of powdered sugar on top, and offer a small dish of extra chocolate chips for a delightful touch!
Chocolate Chip Banana Bread Muffins
Ingredients
- 3 pieces ripe bananas, mashed
- 0.5 cup unsalted butter, melted
- 0.5 cup granulated sugar
- 0.25 cup brown sugar, packed
- 2 large eggs
- 1 teaspoon vanilla extract
- 1 teaspoon baking soda
- 0.5 teaspoon salt
- 1.5 cups all-purpose flour
- 0.5 cup chocolate chips (dark or semisweet)
- 0.25 cup chopped walnuts (optional)
Instructions
- Preheat your oven to 350°F (175°C) and line a muffin tin with paper liners or grease it with non-stick spray.
- In a large mixing bowl, combine the mashed bananas and melted butter, mixing well together until smooth.
- Add the granulated sugar, brown sugar, eggs, and vanilla extract to the banana mixture. Beat until well combined.
- Sprinkle the baking soda and salt over the mixture, then mix again until fully incorporated.
- Gradually add the all-purpose flour, stirring gently until just combined. Do not overmix.
- Fold in the chocolate chips and chopped walnuts (if using) until evenly distributed throughout the batter.
- Scoop the batter into the prepared muffin tin, filling each cup about 2/3 full.
- Bake for 18-20 minutes or until a toothpick inserted into the center of a muffin comes out clean.
- Remove from the oven and allow to cool in the pan for 5 minutes before transferring the muffins to a wire rack to cool completely.


![- 1 cup canned pumpkin puree - 1/2 cup granulated sugar - 1/2 cup brown sugar - 2 large eggs - 1 cup all-purpose flour To create the Snickerdoodle Pumpkin Cobbler, you need some key ingredients. Canned pumpkin puree gives the dish its warm, earthy flavor. Both granulated and brown sugars add sweetness and depth. Two large eggs help bind everything together, while all-purpose flour forms the base. - 1/2 cup chopped walnuts or pecans - 2 tablespoons cinnamon-sugar mixture (for topping) You can add chopped walnuts or pecans for a nutty crunch. A sprinkle of cinnamon-sugar on top gives it a sweet finish. This step is all about personal touch and taste. - 1 teaspoon ground cinnamon - 1/2 teaspoon ground nutmeg - 1/4 teaspoon ground ginger - 1 teaspoon baking powder - 1/2 teaspoon baking soda - 1/4 teaspoon salt Spices are crucial for flavor. Ground cinnamon adds warmth. Nutmeg and ginger offer a hint of spice. Baking powder and baking soda help the cobbler rise. A pinch of salt balances the sweetness. For the full recipe, you can check the [Full Recipe]. First, preheat your oven to 350°F (175°C). Next, grease a 9x9-inch baking dish with non-stick spray or butter. This step is crucial to prevent sticking. In a large mixing bowl, combine the pumpkin puree, granulated sugar, brown sugar, and vanilla extract. Whisk them together until the mixture is smooth. This blend adds sweetness and a lovely flavor to your cobbler. In another bowl, mix the dry ingredients. Combine the cinnamon, nutmeg, ginger, baking powder, baking soda, salt, and flour. Stir them well to ensure even distribution of the spices. Gradually add the dry mix to the wet ingredients. Alternate with the milk as you mix. Be gentle here; over-mixing can make the cobbler tough. Once just combined, stir in the melted butter. If you like, add chopped walnuts or pecans for extra crunch. Pour the batter into your prepared baking dish. Spread it evenly for a consistent bake. Before placing it in the oven, sprinkle the top with the cinnamon-sugar mixture. This adds a sweet crust that contrasts nicely with the soft filling. Bake in the preheated oven for 30-35 minutes. Check for doneness by inserting a toothpick in the center. If it comes out clean, your cobbler is ready. Let it cool slightly before serving. Enjoy it warm for the best taste, especially with a scoop of ice cream. For the complete recipe, refer to the Full Recipe above. - Not measuring ingredients accurately: Always use dry measuring cups for flour and sugar. This helps keep the balance right. A kitchen scale is your best friend for precision. - Over-mixing the batter: Mix until just combined. Over-mixing makes the cobbler tough. You want it soft and fluffy, not dense. - Resting the batter before baking: Let your batter sit for a few minutes. This helps the flavors blend well. It can also improve the texture. - Adjusting spices to personal taste: Feel free to change up the spices! If you love nutmeg, add a bit more. If you want it spicier, increase the ginger. Make it yours! - Pairing with ice cream or whipped cream: Serve warm with a scoop of vanilla ice cream. The cold ice cream contrasts nicely with the warm cobbler. Whipped cream is a great choice too! - Presentation ideas for gatherings: Cut into squares and serve in bowls. Sprinkle some cinnamon on top for a pop of color. Add a dollop of whipped cream for a lovely finish. This makes your dessert look fancy! For the full recipe, check out the Snickerdoodle Pumpkin Cobbler section above. {{image_2}} You can change the nuts in this dish or skip them. If you like walnuts, use them. Pecans work great too. If you want a nut-free option, just leave them out. For sugar, swap granulated sugar for coconut sugar or honey. These options add a different flavor and sweetness. Coconut sugar gives a rich taste, while honey adds a nice touch. Want to jazz up your cobbler? Try adding chocolate chips or butterscotch chips. These sweet bites melt and blend with the pumpkin. You can also explore spices like allspice or cloves. These spices add warmth and depth to the cobbler. Don't be afraid to mix and match your favorites to create new flavors. For gluten-free friends, use gluten-free flour. Many brands work well and keep the taste great. If you need to avoid eggs, try flaxseed or applesauce as a substitute. Each option helps to keep the cobbler moist and tasty. You can enjoy the same warm dessert while meeting your dietary needs. For the full recipe, check the link above. After enjoying your Snickerdoodle Pumpkin Cobbler, let it cool down. Then, cover it with plastic wrap or keep it in an airtight container. Store it in the fridge for up to three days. The cobbler stays tasty and fresh when stored properly. To enjoy your cobbler warm, you can reheat it. The best way is to use an oven. Preheat the oven to 350°F (175°C) and place the cobbler in for about 10-15 minutes. This keeps the texture nice and soft. If you use a microwave, heat it in short bursts of 20 seconds. Check to avoid drying it out. If you want to save some for later, freezing works well. Cut the cobbler into squares first. Wrap each piece in plastic wrap, then place them in a freezer bag. This way, you can take only what you need. For the best taste, eat it within three months. When ready to enjoy, thaw it in the fridge overnight before reheating. - Prep time: 15 mins - Total time: 50 mins - Servings: 9 Yes, you can prepare this cobbler ahead of time. Mix the batter and pour it into the greased dish. Cover it tightly with plastic wrap and store it in the fridge for up to a day. When you're ready, bake it straight from the fridge. Just add a few extra minutes to the baking time. You can serve it with a scoop of vanilla ice cream or a dollop of whipped cream. A drizzle of caramel sauce adds a nice touch, too. Fresh whipped cream garnished with a sprinkle of cinnamon works great as well. Look for a golden-brown color on top. A toothpick inserted in the center should come out clean. If it comes out with wet batter, give it a few more minutes. The edges should be slightly puffed and firm to touch. Yes, fresh pumpkin can be used instead of canned pumpkin puree. To do this, cook the pumpkin until soft, then mash it. Make sure to drain any excess water. This will give your cobbler a fresh taste and a nice texture. In this blog post, you discovered how to make a delicious Snickerdoodle Pumpkin Cobbler. We talked about essential ingredients, like canned pumpkin and sugars, and shared optional ones to enhance flavor. I provided step-by-step instructions for preparation, baking, and common mistakes to watch out for. Remember to store leftovers properly to keep them fresh. This dessert is easy to make, fun to personalize, and perfect for gatherings. Enjoy baking this delightful treat that brings warmth and sweetness to any occasion!](https://dailydishlab.com/wp-content/uploads/2025/07/2d25911d-0f51-4f98-ae6a-a9dc8136342e-768x768.webp)
