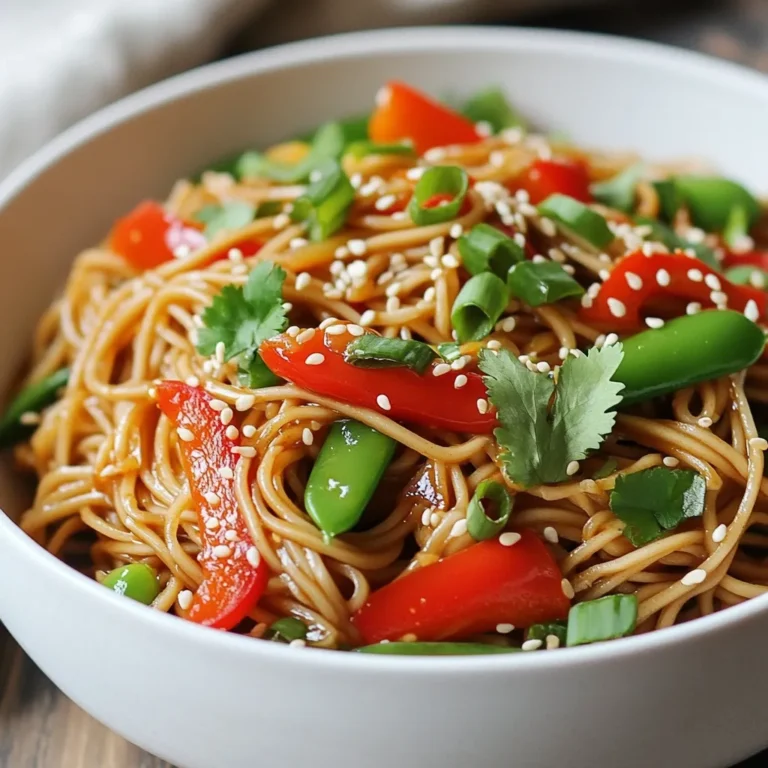
Minute Thai Peanut Zucchini Noodles Quick and Easy Meal
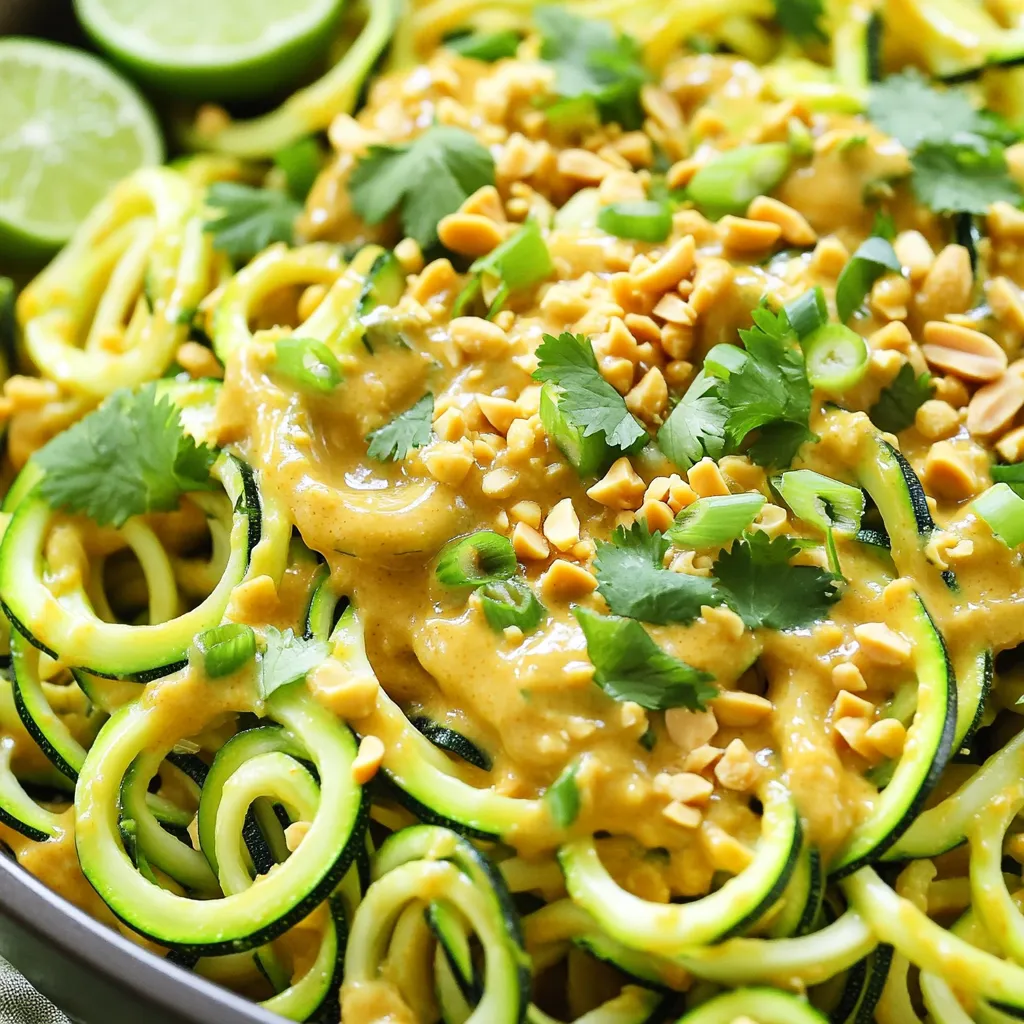
Looking for a quick and delicious meal? You’ll love these Minute Thai Peanut Zucchini Noodles! This easy recipe packs bold flavors in just a few minutes. With simple ingredients like zucchini, peanut butter, and fresh herbs, you can whip up a tasty dish anyone will enjoy. Whether you’re busy or just want something healthy, this meal is perfect. Let’s dive into how to make your day better with these yummy noodles!
Why I Love This Recipe
- Quick and Easy: This recipe takes just 10 minutes to prepare, making it perfect for busy weeknights.
- Deliciously Creamy: The peanut sauce is rich and flavorful, perfectly complementing the fresh zucchini noodles.
- Customizable Spice Level: You can adjust the amount of sriracha to suit your taste, whether you like it mild or spicy.
- Healthy and Nutritious: With fresh veggies and wholesome ingredients, this dish is packed with nutrients and flavor.
Ingredients
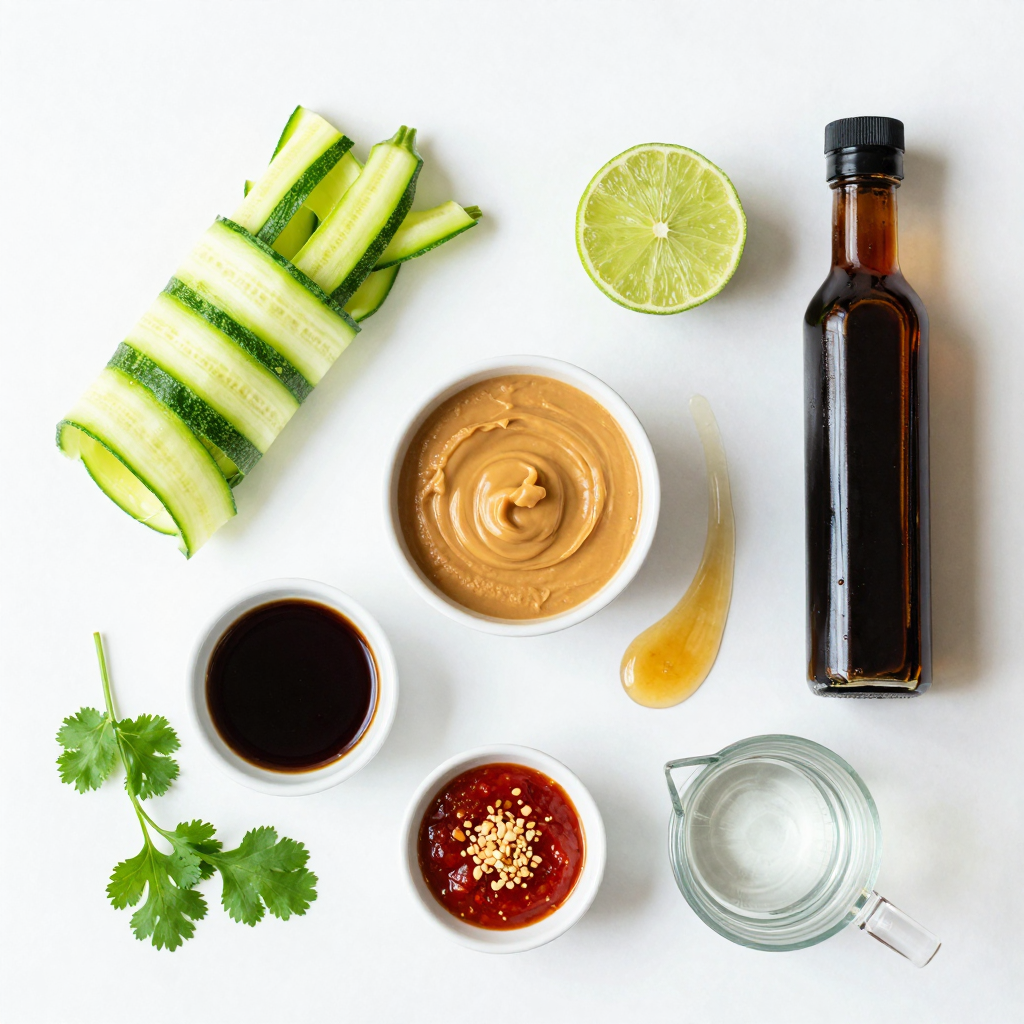
Main Ingredients
- 2 medium zucchinis, spiralized
- 1 cup crunchy peanut butter
- 1 tablespoon soy sauce (or tamari for gluten-free)
- 1 tablespoon maple syrup
- 1 tablespoon lime juice
- 1 teaspoon sesame oil
- 1 tablespoon sriracha (adjust to spice preference)
- 1/4 cup water (to thin the sauce)
These main ingredients create a fresh and tasty dish. Zucchini is the star, acting as the noodles. It’s low in calories and full of nutrients. The peanut butter gives richness, while soy sauce adds saltiness. Maple syrup brings a touch of sweetness, balancing the flavors. Lime juice adds brightness, and sesame oil gives depth. Sriracha adds heat, making it fun and exciting. Adjust the spice to your liking by adding more or less sriracha.
Garnishes
- Fresh cilantro
- Green onions
- Crushed peanuts
Garnishes take this dish to the next level. Fresh cilantro adds a burst of flavor and color. Green onions bring a mild onion taste. Crushed peanuts give a nice crunch, enhancing the texture. These toppings not only look great but also add layers of flavor. Feel free to add more garnishes if you like!
Step-by-Step Instructions
Preparing the Zucchini
To make zucchini noodles, you can spiralize them. This tool creates long, thin noodles that mimic pasta. If you don’t have a spiralizer, you can julienne the zucchinis. Just cut them into thin strips. Both methods work well, so choose what you have.
Making the Peanut Sauce
In a medium bowl, start mixing your peanut butter, soy sauce, maple syrup, lime juice, sesame oil, and sriracha. Use a whisk to blend these ingredients until they are smooth. If the sauce is too thick, add water a little at a time. This helps you reach a nice, creamy consistency. You want it just thin enough to coat the noodles.
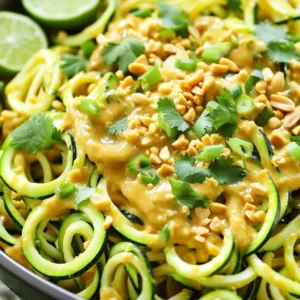
Combining and Serving
Once your zucchini noodles are ready, add them to a large mixing bowl. Pour the peanut sauce over the noodles. Toss everything together until the noodles are fully coated. Then, fold in the chopped cilantro and green onions for some fresh flavor. Finally, serve your dish right away. Top with crushed peanuts for a crunchy finish. Enjoy your meal!
Pro Tips
- Use Fresh Zucchini: Choose firm, fresh zucchinis for the best texture and flavor in your noodles.
- Adjust Sauce Consistency: Add water gradually to the peanut sauce until it reaches your desired thickness for coating the noodles.
- Customize Your Heat: Modify the amount of sriracha according to your spice preference, or substitute with a milder sauce if desired.
- Garnish for Flavor: Don’t skip the crushed peanuts as they add an essential crunch and flavor contrast to the dish.
Tips & Tricks
Perfecting the Peanut Sauce
To make the best peanut sauce, focus on the thickness. Start with crunchy peanut butter for texture. Whisk in soy sauce, maple syrup, lime juice, sesame oil, and sriracha. Slowly add water until it coats the noodles well. You want it smooth but not too runny. If you like heat, add more sriracha for spice.
Best Spiralizing Techniques
A spiralizer is my go-to tool for making zucchini noodles. It creates long, thin strands quickly. I recommend using a simple handheld spiralizer. If you don’t have one, slice the zucchini into thin strips with a knife. Julienne cuts work well, too.
Serving Suggestions
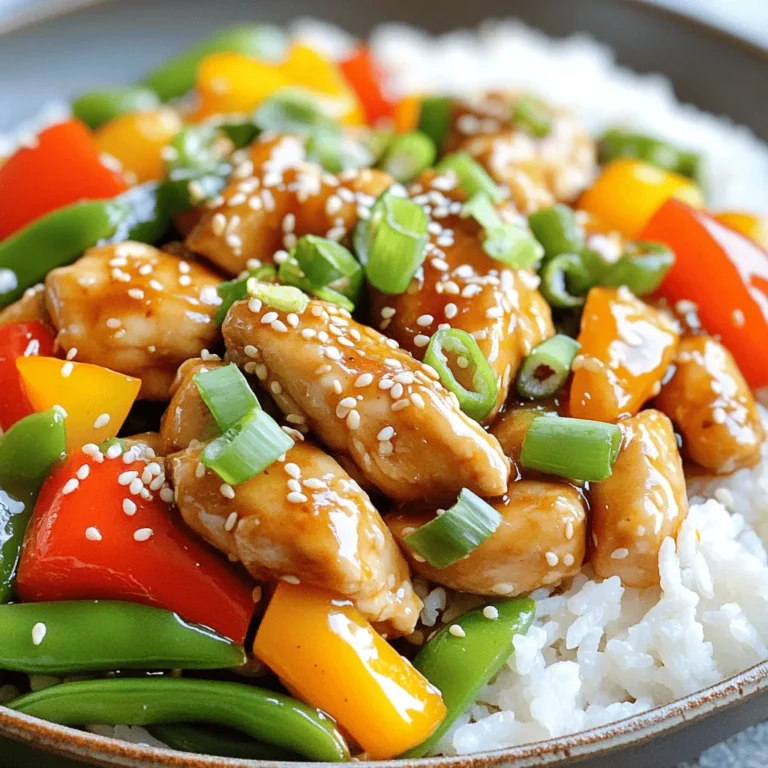
These noodles shine on their own but pair well with grilled chicken or shrimp. They also work great as a side dish. This meal is fantastic for meal prep. You can store the noodles and sauce separately. Just toss them together before serving for a fresh meal.

Variations
Gluten-Free Adaptations
You can easily make this dish gluten-free by using tamari instead of soy sauce. Tamari tastes great and keeps your meal safe for those with gluten issues. It still brings that salty kick that pairs well with peanut butter. Just swap it in and enjoy your noodles with no worries.
Nut-Free Alternatives
If you need a nut-free version, try using sunflower seed butter or tahini. Both can mimic the creamy texture of peanut butter. You can also use a soy-based sauce for flavor. This way, you keep the taste enjoyable while avoiding nuts.
Adding Protein
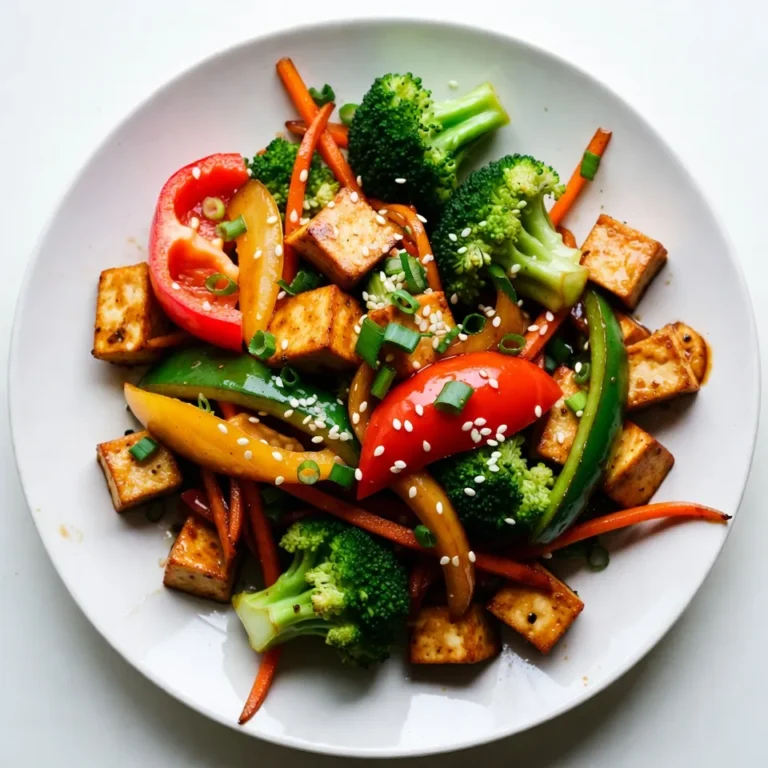
Want to boost your meal? Adding protein is a great option. You can toss in cooked chicken, tofu, or shrimp. Cook your protein separately and mix it into the noodles before serving. This makes your dish hearty and satisfying. Plus, it adds more flavor to your Thai peanut zucchini noodles!
Storage Info
Storing Leftovers
Store any extra Thai peanut zucchini noodles in an air-tight container. This keeps them fresh. Make sure to seal the lid tightly. You can use glass or plastic containers. Glass is great for easy cleaning. If you have a lot of leftovers, separate them into smaller portions. This makes it easy to grab a quick meal later.
Reheating Tips
To warm up your noodles, I recommend using a pan. Heat it on low. Add a splash of water to help them steam. Stir gently until they are warm. This keeps the noodles from getting mushy. You can also use a microwave. Place the noodles in a bowl and cover them loosely. Heat in short bursts, checking often to avoid overheating.
Freshness Duration
These noodles stay fresh for about three days in the fridge. After that, they may lose their texture and flavor. If you see any signs of spoilage, like a sour smell, it’s best to toss them. Always trust your senses. Enjoy your meal while it’s at its best!
FAQs
Can I make this dish in advance?
Yes, you can make this dish in advance. However, I suggest you keep the noodles and sauce separate. When you mix them together, the noodles can get soggy. Store the sauce in an airtight container in the fridge. Then, when you’re ready to eat, just toss the noodles with the sauce. It will taste fresh and delicious!
What can I substitute for peanut butter?
If you need a substitute for peanut butter, try almond butter or sunbutter. Both options give a creamy texture. You can also use tahini for a nut-free choice. Just remember that each swap will change the flavor a bit. Adjust the other ingredients to fit your taste.
Is this recipe suitable for a vegan diet?
Yes, this recipe is vegan! All the ingredients, like zucchini and peanut butter, fit a vegan diet. Just use tamari instead of soy sauce if you are gluten-free. Feel free to enjoy this healthy dish without any worries!
How do I make it less spicy?
To make it less spicy, reduce the amount of sriracha in the sauce. Start with just a teaspoon and taste it. You can always add more if you want. Another tip is to add more peanut butter or maple syrup. This will balance the heat and give you a milder flavor.
Can zucchini noodles be frozen?
I do not recommend freezing zucchini noodles. They can become watery when thawed. Instead, make them fresh and eat them right away. If you have leftovers, store them in the fridge and enjoy them within a few days.
In this blog post, we explored a delicious zucchini noodle dish made with peanut sauce. We covered the main ingredients, including zucchini, peanut butter, and soy sauce. You learned how to prepare, mix, and serve the dish with great garnishes.
Remember, you can customize the sauce for spice and enjoy various protein options. This recipe works well for meal prep and stays fresh in the fridge. Try making it your own, and enjoy the tasty results!
Minute Thai Peanut Zucchini Noodles
Ingredients
2 medium zucchinis, spiralized
1 cup crunchy peanut butter
1 tablespoon soy sauce (or tamari for gluten-free)
1 tablespoon maple syrup
1 tablespoon lime juice
1 teaspoon sesame oil
1 tablespoon sriracha (adjust to spice preference)
1/4 cup water (to thin the sauce)
1/4 cup chopped fresh cilantro
1/4 cup chopped green onions
Crushed peanuts for garnish
Instructions
Start by spiralizing the zucchinis to create “noodles.” If you don’t have a spiralizer, you can also julienne them into thin strips.
In a medium bowl, combine the creamy peanut butter, soy sauce, maple syrup, lime juice, sesame oil, and sriracha.
Whisk these ingredients together until smooth. Slowly add water a tablespoon at a time until you reach a desired sauce consistency that can easily coat the zucchini noodles.
In a large mixing bowl, add the spiralized zucchini noodles. Pour the peanut sauce over the noodles.
Toss the noodles well until they are evenly coated with the sauce.
Finally, fold in the chopped cilantro and green onions for added freshness.
Serve immediately, garnished with crushed peanuts on top for an extra crunch.
Prep Time: 10 minutes | Total Time: 10 minutes | Servings: 2
Minute Thai Peanut Zucchini Noodles
Ingredients
- 2 medium zucchinis, spiralized
- 1 cup crunchy peanut butter
- 1 tablespoon soy sauce (or tamari for gluten-free)
- 1 tablespoon maple syrup
- 1 tablespoon lime juice
- 1 teaspoon sesame oil
- 1 tablespoon sriracha
- 1 quarter cup water (to thin the sauce)
- 1 quarter cup chopped fresh cilantro
- 1 quarter cup chopped green onions
- Crushed peanuts for garnish
Instructions
- Start by spiralizing the zucchinis to create 'noodles.' If you don’t have a spiralizer, you can also julienne them into thin strips.
- In a medium bowl, combine the creamy peanut butter, soy sauce, maple syrup, lime juice, sesame oil, and sriracha.
- Whisk these ingredients together until smooth. Slowly add water a tablespoon at a time until you reach a desired sauce consistency that can easily coat the zucchini noodles.
- In a large mixing bowl, add the spiralized zucchini noodles. Pour the peanut sauce over the noodles.
- Toss the noodles well until they are evenly coated with the sauce.
- Finally, fold in the chopped cilantro and green onions for added freshness.
- Serve immediately, garnished with crushed peanuts on top for an extra crunch.

![- Ground beef - Breadcrumbs - Parmesan cheese - Egg - Garlic The main ingredients create the base of your sweet and sour meatballs. Ground beef gives the meatballs their hearty flavor. Breadcrumbs add texture, while Parmesan cheese gives a rich taste. An egg binds everything together, making the meatballs easy to shape. Garlic adds a lovely aroma and enhances the flavor. - Sugar - Apple cider vinegar - Ketchup - Soy sauce - Pineapple chunks The sweet and sour sauce brings the dish to life. Sugar balances the tangy apple cider vinegar. Ketchup adds a nice tomato base, while soy sauce gives a savory depth. Pineapple chunks add a burst of sweetness and texture, making the sauce even more enjoyable. - Cornstarch (for thickening) - Water (for thickening) - Bell peppers You can make your sauce thicker by using cornstarch and water. This gives the sauce a nice consistency that clings to the meatballs. Adding bell peppers not only adds color but also gives extra crunch and flavor. For the full recipe, check out the details above! First, take a large bowl and combine the following ingredients: - 500g ground beef - 1/2 cup breadcrumbs - 1/4 cup grated Parmesan cheese - 1 egg - 2 cloves garlic, minced - 1 teaspoon onion powder - 1 teaspoon dried oregano - Salt and pepper to taste Mix these ingredients gently until they come together. You don’t want to overmix. Next, form the mixture into small meatballs, about 1 inch in size. This size helps them cook evenly. Place your meatballs on a baking sheet lined with parchment paper. Now, preheat your oven to 200°C (400°F). This step ensures that your meatballs cook properly. Once the oven is hot, put your baking sheet with the meatballs inside. Bake them for 20 to 25 minutes. They should turn a nice brown color and be cooked through. While the meatballs bake, let’s make the sweet and sour sauce. In a saucepan, combine: - 1/2 cup sugar - 1/2 cup apple cider vinegar - 1/4 cup ketchup - 1 teaspoon soy sauce Stir these ingredients on medium heat until the sugar dissolves. Then, add in: - 1 cup pineapple chunks - 1/2 cup diced red bell pepper - 1/2 cup diced green bell pepper Bring the mixture to a gentle simmer. If you want a thicker sauce, mix 1 tablespoon cornstarch with 2 tablespoons water to make a slurry. Stir this into the sauce and cook for an extra 2 to 3 minutes. Once the meatballs are done, you can coat them in the sweet and sour sauce or serve the sauce on the side. Enjoy your meal with rice or noodles for a fun and tasty dinner! For the complete recipe, check the [Full Recipe]. - Ideal meatball size: Aim for meatballs about 1 inch wide. This size cooks evenly and is easy to eat. If you make them too big, they may not cook through. If too small, they may dry out. - Ensuring moisture retention: To keep meatballs moist, do not overmix the meat mixture. Mix just until combined. Adding breadcrumbs helps absorb moisture, making them juicy. You can also use milk to soak the breadcrumbs for extra softness. - Balance of sweet and sour flavors: The key to great sauce is balance. Aim for equal parts sugar and vinegar. This gives you that classic sweet and sour taste. Use fresh pineapple for a bright flavor. You can adjust sugar for sweetness and vinegar for tanginess based on your taste. - Tips for thickening: If you want a thicker sauce, mix cornstarch with a bit of water to form a slurry. Stir this into the sauce while it simmers. It will thicken quickly, giving you a rich and glossy finish. - Ideal side dishes: Serve sweet and sour meatballs over rice or noodles. They soak up the sauce well. Steamed vegetables, like broccoli or carrots, make a great side too. You can also try serving with a fresh salad for crunch. - Garnishing options: Add chopped green onions or sesame seeds on top. This adds color and a nice crunch. You can also sprinkle fresh herbs like cilantro for a fresh twist. Garnishes make your dish look bright and inviting. For the complete recipe, check the Full Recipe section. {{image_2}} You can swap ground beef for ground turkey or chicken. These lean meats provide a lighter taste. Ground turkey may require a bit more seasoning since it has less flavor. Chicken works well too and stays juicy when cooked right. For a vegetarian option, consider using lentils or chickpeas. These add protein while being tasty and fun. You can mash them up and mix in the same ingredients as the meatballs. Want to spice things up? Add red pepper flakes or cayenne to the sauce. This gives a nice kick that balances the sweetness. You can also swap the sugar for honey or maple syrup for a twist. If you want a healthier option, reduce the sugar and use a sugar substitute. For a tangier sauce, add more vinegar or some fresh lime juice. Add vegetables to your meatballs for extra flavor and nutrition. Chopped spinach or grated carrots blend well into the mix. You can also serve the meatballs over different carbs. Rice is classic, but try noodles or even quinoa for a fresh take. These choices bring variety and make each meal feel special. After you enjoy the sweet and sour meatballs, store any leftovers in the fridge. Place them in an airtight container. This keeps them fresh and tasty. Meatballs can last about three to four days in the fridge. For longer storage, freeze the meatballs and sauce together. Use freezer-safe containers or bags. This way, they can last up to three months. Just remember to label them with the date. When it's time to eat leftovers, you can reheat them in two main ways. The oven is best for even heat. Preheat the oven to 180°C (350°F). Place the meatballs in a baking dish, cover with foil, and heat for about 15-20 minutes. The microwave works too, but it can make them a bit soggy. If using the microwave, heat for 1-2 minutes at a time. Check often to avoid overcooking. Keep the flavors and textures intact by not overheating them. Cooked meatballs can stay safe in the fridge for about three to four days. If frozen, they can last for up to three months. Sweet and sour sauce lasts longer. It can stay fresh in the fridge for about one week. If you freeze the sauce, it can last for up to six months. Always check for any off smells or changes before using them. These tips will help keep your sweet and sour meatballs tasty for longer! You can use gluten-free breadcrumbs. They work just like regular ones. You can also use ground oats or crushed rice crackers. If you want to skip the breadcrumbs, try ground nuts. They add a nice flavor, too. Yes, you can use ground turkey or chicken instead of beef. Both options give a lighter taste. If you want a vegetarian dish, try using lentils or chickpeas. These options are healthy and delicious. These meatballs pair well with rice or noodles. You can also serve them with steamed veggies. A fresh salad adds a nice crunch. Feel free to get creative with your sides. To add more heat, you can include red pepper flakes or hot sauce. Just a little goes a long way. You can also add minced jalapeños for a fresh kick. Adjust the spice level to match your taste. Sweet and sour meatballs are a fun, tasty dish. We covered key ingredients, from meat to sauce. I shared steps for making perfect meatballs and sauce. Remember to balance flavors for the best taste. Feel free to try different meats and sauces to suit your taste. With this guide, your sweet and sour meatballs will impress everyone. Enjoy cooking and sharing this meal with loved ones.](https://dailydishlab.com/wp-content/uploads/2025/07/6a38a525-ac29-43e7-bdf8-6ebffeec64fd-768x768.webp)