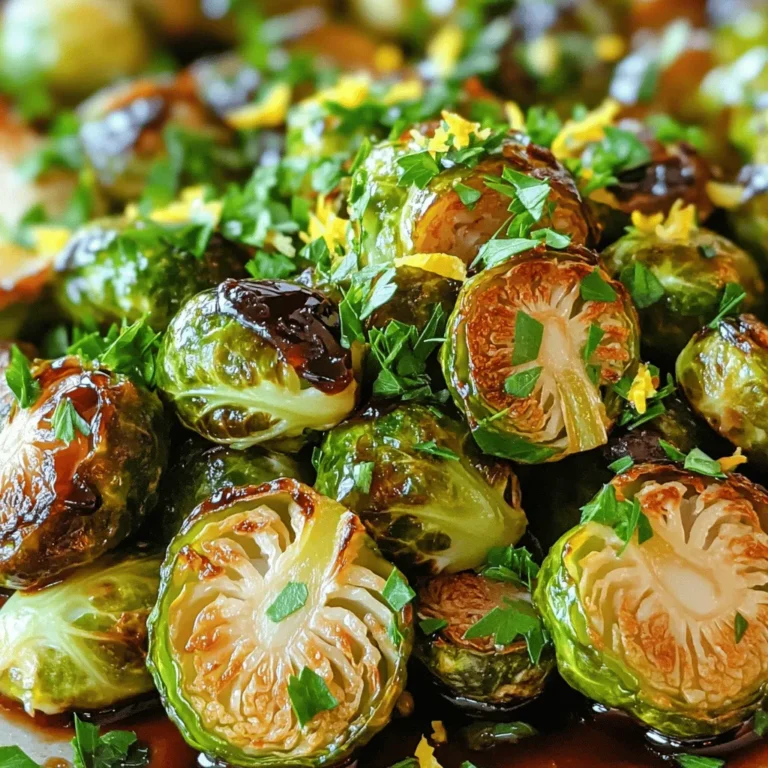
Crispy Air Fryer Falafel Bites Simple and Flavorful Snack
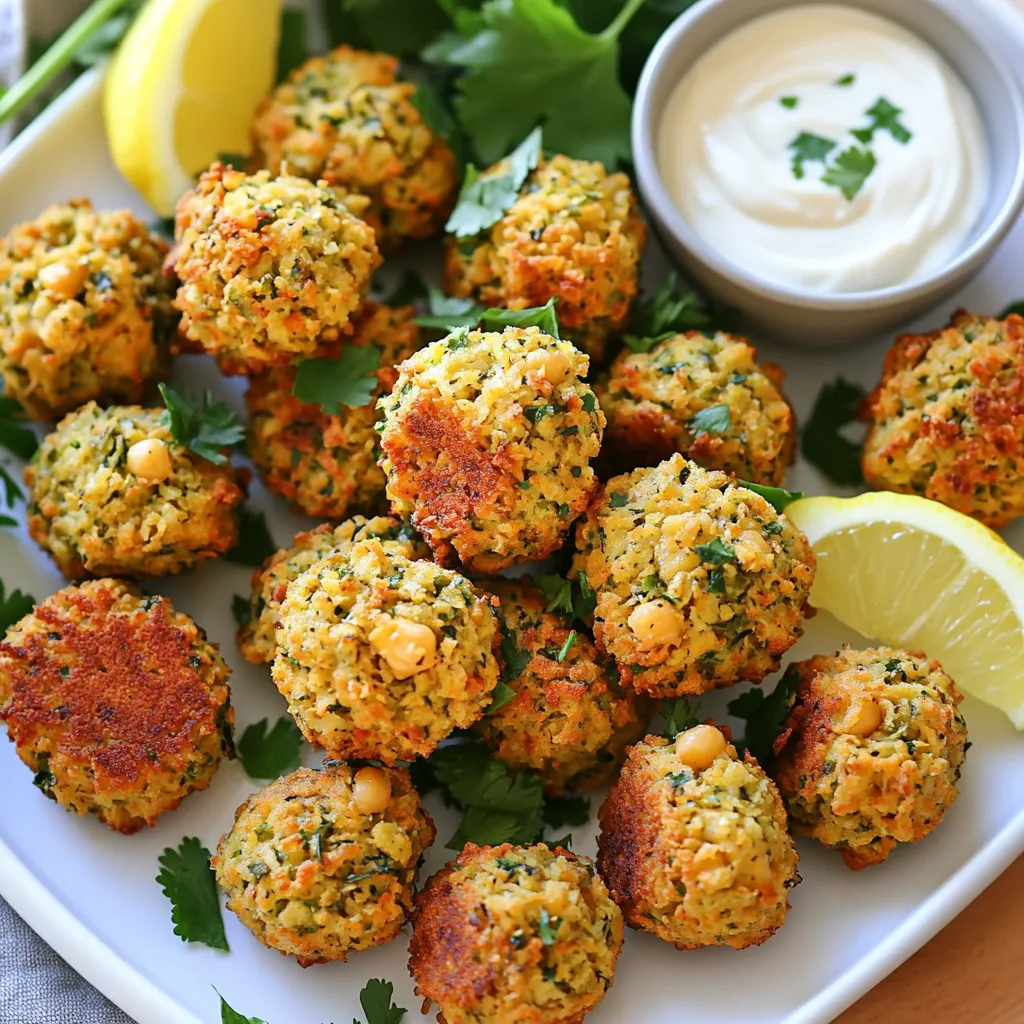

Are you craving a crunchy, flavor-packed snack? Look no further! These Crispy Air Fryer Falafel Bites are easy to make and bursting with taste. Using simple ingredients like chickpeas, fresh herbs, and flavorful spices, you can whip up a delicious treat in no time. Whether you enjoy them as a snack, in a wrap, or with your favorite dip, this recipe will satisfy your taste buds. Let’s dive in and get started!
Why I Love This Recipe
- Healthy and Nutritious: These falafel bites are packed with protein and fiber from chickpeas, making them a wholesome option for any meal.
- Quick and Easy: This recipe comes together in just 15 minutes of prep time, perfect for a quick weeknight dinner or snack.
- Versatile Serving Options: Serve them with tahini or tzatziki, and pair with fresh veggies for a delicious and satisfying meal.
- Air Fryer Convenience: Cooking in the air fryer gives you crispy bites without the need for deep frying, making them lighter and healthier.
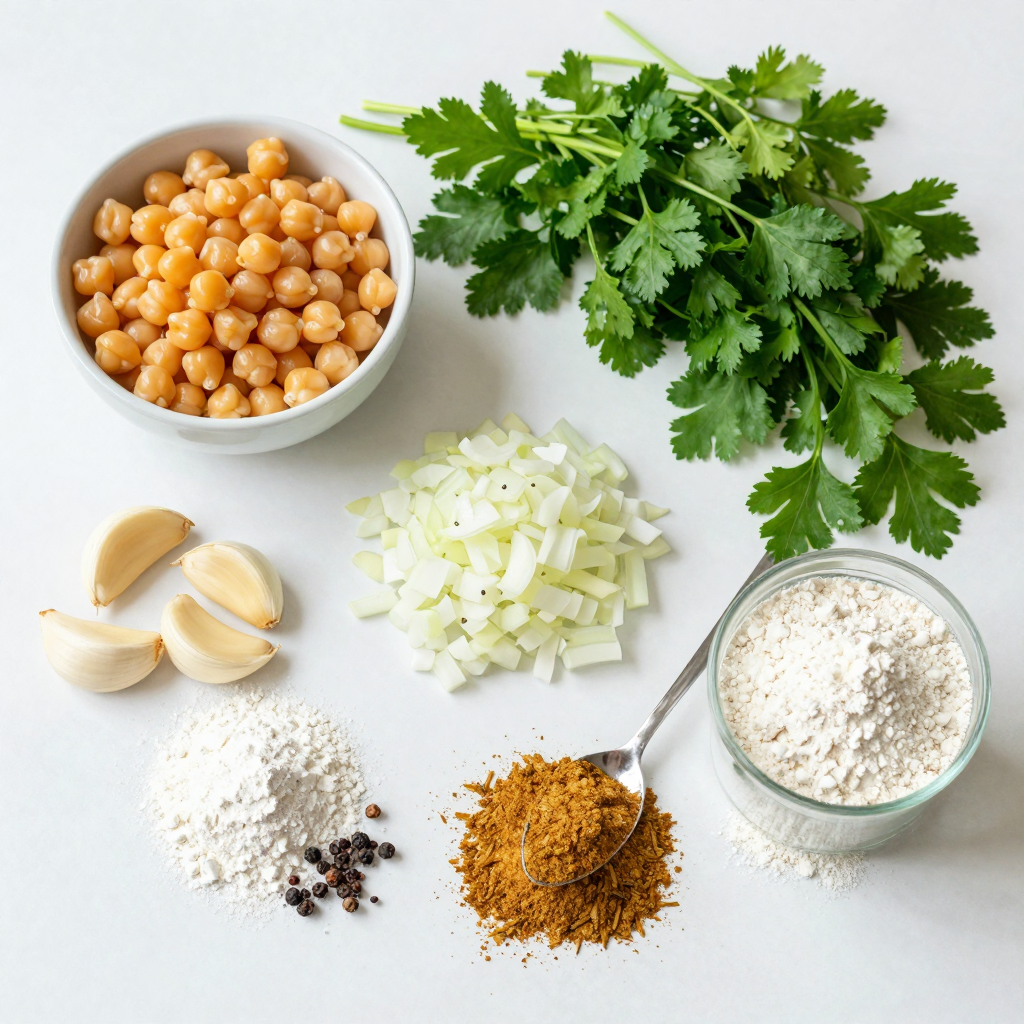
Ingredients
Required Ingredients for Crispy Air Fryer Falafel Bites
- 1 can (15 oz) chickpeas, drained and rinsed
- 1/2 cup fresh parsley, chopped
- 1/4 cup fresh cilantro, chopped
- 1 small onion, roughly chopped
- 2 cloves garlic, minced
- 1 teaspoon ground cumin
- 1 teaspoon ground coriander
- 1/2 teaspoon baking powder
- 1/4 teaspoon cayenne pepper (optional for heat)
- Salt and pepper to taste
- 1/4 cup all-purpose flour (or chickpea flour for gluten-free)
- Olive oil spray
Optional Ingredients and Substitutes
You can change up these recipes with some fun options. If you need gluten-free, use chickpea flour instead of all-purpose flour. You can also add more spices if you want a bolder taste. Other herbs like mint or dill can give your falafel a fresh twist. Try adding paprika or garlic powder for extra flavor.
Step-by-Step Instructions
Preparing the Falafel Mixture
To make the falafel, start with a food processor. Add the chickpeas, parsley, cilantro, onion, and garlic. Next, sprinkle in cumin, coriander, baking powder, cayenne pepper, salt, and pepper. Pulse this mix until it is coarsely blended, but not smooth. You want bits of herbs and chickpeas to remain. This keeps the texture nice and crunchy.
After that, transfer the mixture to a bowl. Add flour, which helps bind everything. Mix well until the falafel holds together when you form a ball. If it crumbles, add a bit more flour.
Shaping and Cooking
Now it’s time to shape the falafel. Take small amounts of the mixture and roll them into balls or patties, about 1.5 inches wide. You can also use a cookie scoop for even sizes. This helps them cook evenly.
Before cooking, preheat your air fryer to 375°F (190°C). This step is crucial for getting that crispy texture. Lightly spray the fryer basket with olive oil. Place the falafel in a single layer to avoid overcrowding. Give the tops a quick spray with olive oil for extra crispiness.
Cooking Process
Cook the falafel bites for 10-12 minutes. Halfway through, flip them to ensure even browning. You’ll know they are done when they are golden brown and crispy. If you like them extra crispy, you can add a minute or two to the cooking time.
Once cooked, remove the bites and keep them warm. Repeat the process with any remaining mixture. Enjoy your crispy air fryer falafel bites!
Pro Tips
- Fresh Herbs Matter: Always use fresh parsley and cilantro for the best flavor in your falafel. Dried herbs will not provide the same vibrant taste.
- Texture is Key: Don’t over-process the chickpea mixture. It should be coarse enough to hold together but still have some texture for a better bite.
- Adjust the Spice: Feel free to adjust the cayenne pepper based on your heat preference. You can also add more spices like paprika or turmeric for extra flavor.
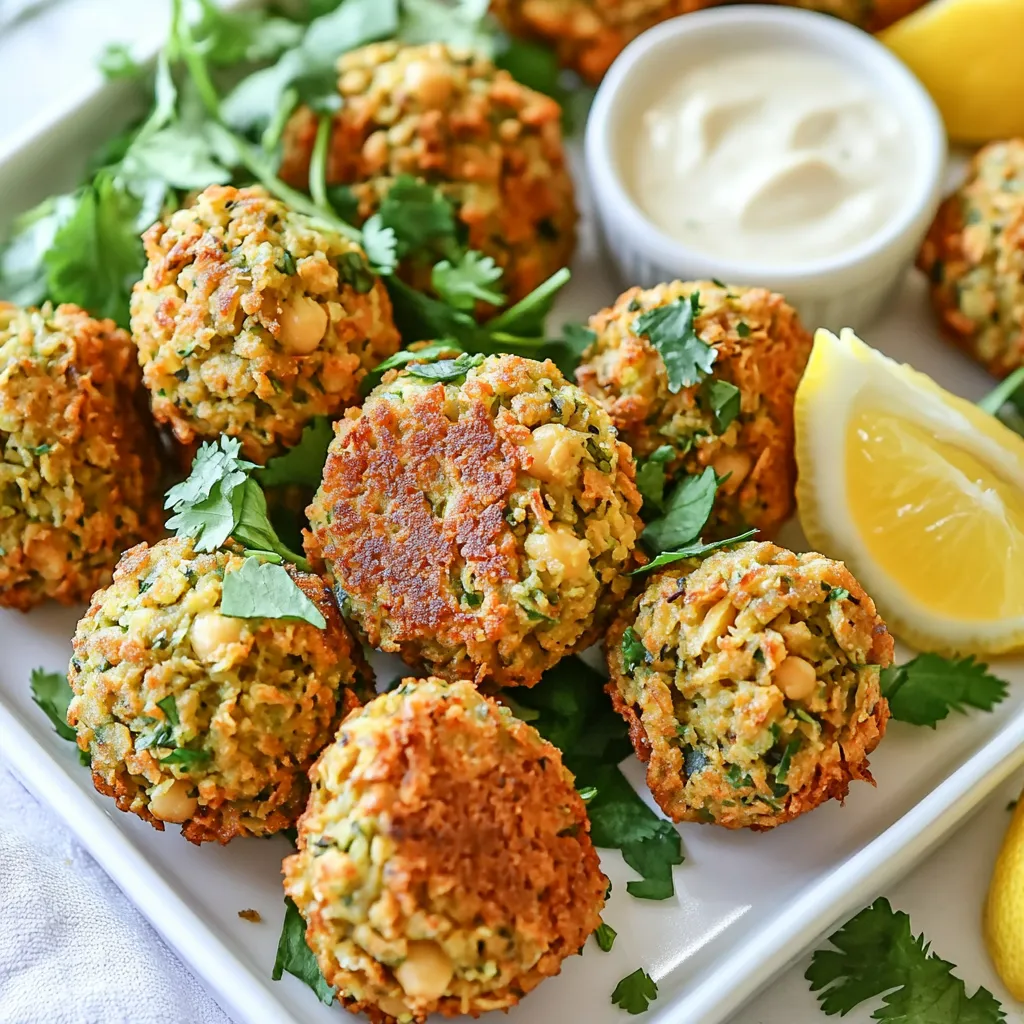
- Serve with Style: Present your falafel bites with a colorful array of dips and garnishes like tahini, tzatziki, fresh herbs, and lemon wedges for an appealing platter.
Tips & Tricks
Achieving the Perfect Crispy Texture
To get that crispy texture, air circulation is key. The hot air in your air fryer cooks evenly. Make sure to layer the falafel bites without crowding. This gives each piece room to breathe and crisp up. A light spray of olive oil helps too. Spray the tops after placing them in the basket.
Serving Suggestions
Falafel bites taste great with sauces like tahini or tzatziki. These dips add creamy flavor and balance. For a beautiful presentation, garnish your plate with fresh herbs and lemon wedges. They make your dish pop visually and add extra zest.
Common Mistakes to Avoid
One common mistake is overcrowding the air fryer. This can lead to uneven cooking and soggy bites. Keep them in a single layer. Another mistake is having the wrong mixture consistency. If it’s too wet, your bites won’t hold shape. Aim for a texture that sticks together when formed into balls.
Variations
Flavor Variations
You can spice up your falafel bites easily. For a spicy version, add cayenne pepper to the mix. Start with 1/4 teaspoon, then increase it if you like more heat. This gives a nice kick that pairs well with creamy dips.
You can also create Mediterranean-inspired flavors. Try adding sun-dried tomatoes, olives, or even feta cheese. These ingredients will bring a new depth to the dish. The fresh herbs like parsley and cilantro will still shine through.
Different Cooking Methods
If you want to explore other cooking methods, try oven-baked falafel. Preheat your oven to 400°F (200°C). Place the shaped falafel on a baking sheet lined with parchment paper. Bake for about 20-25 minutes, flipping halfway through. This method gives a different texture but is still tasty.
You can also compare traditional frying with air frying. Frying gives a rich flavor but adds more fat. Air frying uses less oil and still achieves a crispy texture. It’s a great option for a healthier snack.
Serving Variations
Falafel bites are great on their own, but you can make them even better. Serve them on a salad for a fresh meal. They also work well in wraps. Use pita or flatbreads and add your favorite veggies.
Don’t forget about dips! Serve your falafel with tahini or tzatziki for a creamy touch. You can even try a spicy harissa sauce for extra flavor. These creative dips will make your falafel bites shine.
Storage Info
How to Store Leftover Falafel Bites
To keep your falafel bites fresh, use these simple tips:
- Refrigeration: Place leftover falafel in an airtight container. They last about 3-5 days in the fridge. Make sure they cool down before sealing.
- Freezing: For longer storage, freeze the falafel bites. Use a freezer-safe bag or container. They can stay good for up to 3 months. To freeze, arrange them in a single layer first. Once frozen solid, transfer them to a bag.
Reheating Instructions
When it’s time to enjoy your leftover falafel, follow these steps:
- Air Fryer: Preheat your air fryer to 375°F (190°C). Place the falafel bites in a single layer. Heat for about 5-7 minutes. Flip them halfway to ensure crispiness.
- Oven: Preheat your oven to 400°F (200°C). Spread the falafel on a baking sheet. Bake for 10-12 minutes. This method also keeps them crispy.
To maintain that crunchy texture, avoid using the microwave. It can make them soggy. Enjoy your tasty snack!
FAQs
What are the best dips to serve with falafel?
You can enjoy falafel with many tasty dips. Here are some great choices:
- Tahini Sauce: A creamy sesame dip that adds a nutty flavor.
- Tzatziki Sauce: A cool yogurt dip with cucumber and garlic.
- Hummus: A classic chickpea dip that pairs well with falafel.
- Spicy Harissa: A bold chili paste for those who love heat.
- Sriracha: A sweet and spicy sauce that adds a kick.
Each dip brings out the flavors of the falafel and makes your snack even better.
Can I freeze falafel before cooking?
Yes, you can freeze falafel before cooking. This is a great way to prep ahead. Here’s how:
- Shape the falafel into balls or patties.
- Place them on a baking sheet in a single layer.
- Freeze until solid, then transfer to a freezer bag.
To cook from frozen, just add a few extra minutes to your air fryer time. This keeps them crispy and delicious.
How do I know when falafel is done cooking?
You can tell falafel is done by looking for a few signs:
- They should be golden brown and crispy on the outside.
- When you press them lightly, they should feel firm.
- A toothpick inserted should come out clean.
These signs mean you have perfectly cooked falafel bites. Enjoy them hot for the best taste!
Crispy air fryer falafel bites are easy and tasty. We covered the key ingredients, like chickpeas and fresh herbs, and shared tips for the perfect texture. You learned to shape, cook, and serve these bites with fun dips. Remember common mistakes, like not overcrowding the fryer. Feel free to explore variations and enjoy leftovers. With these tips, you can create delicious falafel at home. Enjoy your cooking journey!

Crispy Air Fryer Falafel Bites
Ingredients
1 can (15 oz) chickpeas, drained and rinsed
1/2 cup fresh parsley, chopped
1/4 cup fresh cilantro, chopped
1 small onion, roughly chopped
2 cloves garlic, minced
1 teaspoon ground cumin
1 teaspoon ground coriander
1/2 teaspoon baking powder
1/4 teaspoon cayenne pepper (optional for heat)
Salt and pepper to taste
1/4 cup all-purpose flour (or chickpea flour for gluten-free)
Olive oil spray
Instructions
In a food processor, combine the drained chickpeas, parsley, cilantro, onion, garlic, cumin, coriander, baking powder, cayenne pepper, salt, and pepper. Pulse until the mixture is coarsely blended but not pureed.
Transfer the mixture to a bowl and add the flour. Mix well until the ingredients are combined and hold together when formed into a ball.
Preheat your air fryer to 375°F (190°C).
Using your hands, shape the mixture into small balls or patties, about 1.5 inches in diameter.
Lightly spray the air fryer basket with olive oil spray. Place the falafel bites in the basket in a single layer, ensuring they are not overcrowded. Lightly spray the tops with olive oil.
Cook in the air fryer for 10-12 minutes, flipping halfway through, until golden brown and crispy.
Once cooked, remove the falafel bites and keep warm while you repeat the process with any remaining mixture.
Prep Time, Total Time, Servings: 15 mins | 25 mins | 4 servings
– Presentation Tips: Serve the crispy falafel bites on a platter with a side of tahini or tzatziki sauce for dipping and garnish with extra fresh herbs and lemon wedges.
Crispy Air Fryer Falafel Bites
Ingredients
- 1 can (15 oz) chickpeas, drained and rinsed
- 0.5 cup fresh parsley, chopped
- 0.25 cup fresh cilantro, chopped
- 1 small onion, roughly chopped
- 2 cloves garlic, minced
- 1 teaspoon ground cumin
- 1 teaspoon ground coriander
- 0.5 teaspoon baking powder
- 0.25 teaspoon cayenne pepper (optional for heat)
- to taste salt and pepper
- 0.25 cup all-purpose flour (or chickpea flour for gluten-free)
- Olive oil spray
Instructions
- In a food processor, combine the drained chickpeas, parsley, cilantro, onion, garlic, cumin, coriander, baking powder, cayenne pepper, salt, and pepper. Pulse until the mixture is coarsely blended but not pureed.
- Transfer the mixture to a bowl and add the flour. Mix well until the ingredients are combined and hold together when formed into a ball.
- Preheat your air fryer to 375°F (190°C).
- Using your hands, shape the mixture into small balls or patties, about 1.5 inches in diameter.
- Lightly spray the air fryer basket with olive oil spray. Place the falafel bites in the basket in a single layer, ensuring they are not overcrowded. Lightly spray the tops with olive oil.
- Cook in the air fryer for 10-12 minutes, flipping halfway through, until golden brown and crispy.
- Once cooked, remove the falafel bites and keep warm while you repeat the process with any remaining mixture.
. This blog post covered how to make a refreshing cucumber melon salad. You learned about fresh ingredients like cucumbers, cantaloupe, and mint. I explained how to make a simple dressing with lemon juice and honey. I also shared tips for perfect texture and flavor. In closing, this salad is easy to make and tastes great. It’s perfect for warm days or gatherings. Experiment with different melons, nuts, or dressings. Enjoy your fresh salad today!](https://dailydishlab.com/wp-content/uploads/2025/06/ed53bf68-b888-45dc-b451-2bcae5e86f09-768x768.webp)

![To make Lemon Herb Grilled Shrimp Skewers, you need fresh and simple ingredients. Here’s what you will need: - 1 pound large shrimp, peeled and deveined - 2 tablespoons olive oil - 2 tablespoons fresh lemon juice - Zest of 1 lemon - 3 cloves garlic, minced - 1 tablespoon fresh parsley, chopped - 1 tablespoon fresh basil, chopped - 1 teaspoon dried oregano - Salt and pepper to taste - Lemon wedges and fresh herbs for garnish These ingredients are easy to find. Fresh shrimp is key for a great flavor. The olive oil helps the shrimp stay juicy while grilling. Lemon juice and zest add a bright taste. Garlic, parsley, basil, and oregano bring a nice herb flavor. The salt and pepper help enhance all these wonderful tastes. For garnish, lemon wedges and fresh herbs make your dish look pretty and inviting. You can find the complete Lemon Herb Grilled Shrimp Skewers recipe within this article. Enjoy preparing this delicious dish! To make the marinade, start by grabbing a large bowl. Add the following ingredients: - 2 tablespoons olive oil - 2 tablespoons fresh lemon juice - Zest of 1 lemon - 3 cloves garlic, minced - 1 tablespoon fresh parsley, chopped - 1 tablespoon fresh basil, chopped - 1 teaspoon dried oregano - Salt and pepper to taste Mix all these ingredients well. You want a smooth and uniform blend. This marinade will give the shrimp a bright, fresh flavor that shines through when you grill them. Now, it’s time to add the shrimp. Use 1 pound of large shrimp that are peeled and deveined. Toss the shrimp in the marinade until they are fully coated. Cover the bowl and put it in the fridge. Let it sit for at least 30 minutes. If you have time, marinating for up to 2 hours will enhance the flavor even more. Before grilling, preheat your grill to medium-high heat. If you use wooden skewers, soak them in water for about 30 minutes. This helps prevent them from burning. Next, prepare the skewers. Thread about 5-6 shrimp onto each skewer. Make sure to leave space between them for even cooking. Place the skewers on the grill and cook for 2-3 minutes on each side. The shrimp will turn opaque when they are fully cooked. Be careful not to overcook them, as this can make them dry. Once cooked, take the skewers off the grill and let them rest for a minute. This will help keep them juicy. Serve them with lemon wedges and fresh herbs for a lovely touch. For the complete recipe, check the full recipe section. To know when shrimp are done cooking, watch for their color. Cooked shrimp turn from gray to pink and become opaque. You want them to curl slightly but not tightly. If they curl too much, they may overcook. To keep shrimp juicy, avoid cooking them too long. Cook them for just 2-3 minutes on each side over medium-high heat. The key is to remove them from the grill as soon as they change color. For extra flavor, try adding more herbs or spices. Fresh dill or cilantro can bring a fresh twist. You might also add a pinch of red pepper flakes for heat. Marinating shrimp is crucial for flavor absorption. Let them soak in the marinade for at least 30 minutes. For even bolder taste, marinate for up to 2 hours. Ensure every shrimp gets coated well in the mix. For the full recipe, check the [Full Recipe]. {{image_2}} You can swap shrimp for chicken or tofu. Chicken thighs work great. Cut them into bite-sized pieces. Marinate just like the shrimp. Grill until fully cooked. Tofu gives a nice twist too. Use firm tofu for the best results. Press it first to remove excess water. This helps the tofu soak up all that tasty marinade. Want to spice things up? Add some red pepper flakes or a dash of hot sauce. You can also try different citrus. Lime or orange juice can bring new life to the dish. For a Mediterranean vibe, use olives and feta cheese. Add sun-dried tomatoes for an extra kick. If you lean towards Asian flavors, try soy sauce and sesame oil. These simple changes can make your shrimp skewers a whole new experience. Explore the [Full Recipe] for more ideas and details. To keep your Lemon Herb Grilled Shrimp Skewers fresh, store them in an airtight container. Place a paper towel at the bottom to absorb moisture. This helps to keep the shrimp firm. You can refrigerate them for up to 3 days. If you want to store them for longer, freeze the skewers. Wrap them tightly in plastic wrap and then put them in a freezer bag. This method can keep them fresh for about 2 months. When you’re ready to eat, just thaw them in the fridge overnight. To reheat grilled shrimp skewers, avoid the microwave if possible. It can make the shrimp rubbery. Instead, use a skillet on low heat. Add a splash of olive oil to keep them moist. Heat for about 2-3 minutes, flipping often. You can also reheat them in the oven. Preheat your oven to 350°F (175°C). Place the skewers on a baking sheet and cover with foil. Heat for about 5-7 minutes. This method helps maintain their flavor and juiciness. For more details on how to make these delicious shrimp skewers, check the Full Recipe. Yes, you can still enjoy shrimp skewers without a grill. Use a stovetop grill pan or broiler. Both methods work well to give you that nice char and flavor. If you use a grill pan, heat it over medium-high heat. Lightly oil the pan before adding your skewers. If using a broiler, place the skewers on a baking sheet and keep them close to the heat source. Rotate the skewers halfway through cooking for even results. Fresh shrimp have a clean, briny smell. Look for shrimp that are firm and have a translucent appearance. Their shells should be shiny, not dull or slimy. If the shrimp have black spots or a strong odor, they are likely not fresh. Always check the sell-by date and buy from a trusted source. You can serve Lemon Herb Grilled Shrimp Skewers with various sides. A fresh green salad pairs nicely, adding crunch and brightness. Grilled vegetables, like zucchini and bell peppers, also complement the shrimp's flavor. For a starch, consider serving rice or couscous. These will soak up the delicious marinade and juices. For the complete Lemon Herb Grilled Shrimp Skewers recipe, click [Full Recipe]. This blog post covered everything you need to know for perfect Lemon Herb Grilled Shrimp Skewers. I shared the ingredients, step-by-step instructions, and tips for storing and reheating. Whether you grill or try different proteins, you can make a tasty dish. Remember, the key is to not overcook the shrimp and to experiment with flavors. Enjoy your cooking adventure, and impress your friends and family with your new skills. Happy grilling!](https://dailydishlab.com/wp-content/uploads/2025/07/43bf45d0-0185-44b0-8263-e73ce7d0c6d7-768x768.webp)