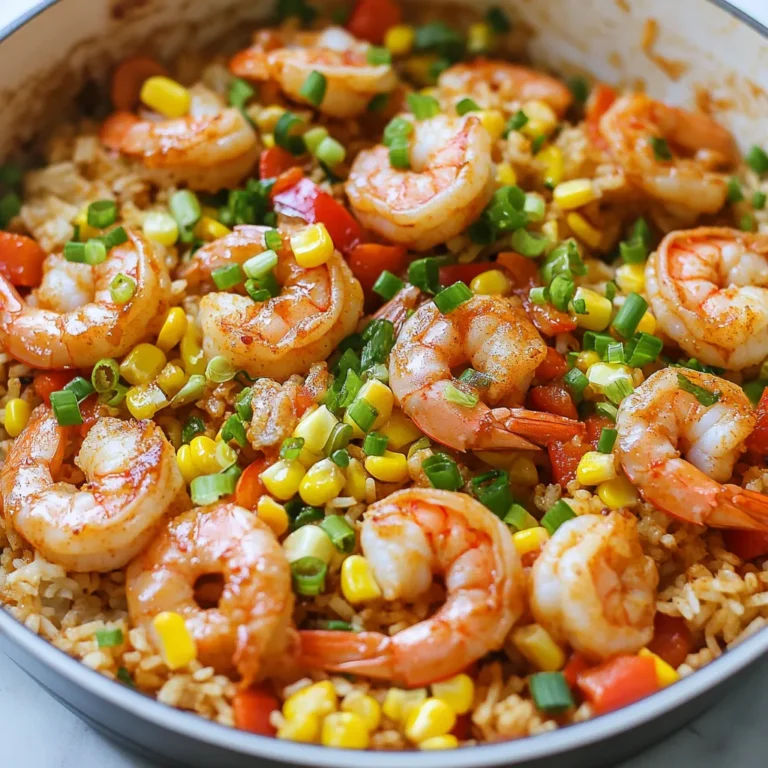
Savory Sweet Potato Kale Soup Easy and Nourishing Dish


If you’re looking for a warm, easy, and nourishing meal, you’ll love this Savory Sweet Potato Kale Soup. Packed with healthy ingredients, this soup is perfect for any season. I’ll guide you through easy steps to whip up a bowl of comfort. You’ll discover the benefits of sweet potatoes and kale and learn how to make this dish flavorful and satisfying. Let’s dive in and create something delicious together!
Why I Love This Recipe
- Comforting and Nutritious: This soup is a perfect blend of sweetness from the sweet potatoes and the wholesome goodness of kale, making it both comforting and nourishing.
- Easy to Make:
- Versatile Flavor Profile: The combination of cumin and smoked paprika adds depth and complexity, making every spoonful exciting and flavorful.
- Perfect for Meal Prep: This soup stores well in the fridge or freezer, making it a great option for meal prepping and enjoying later.
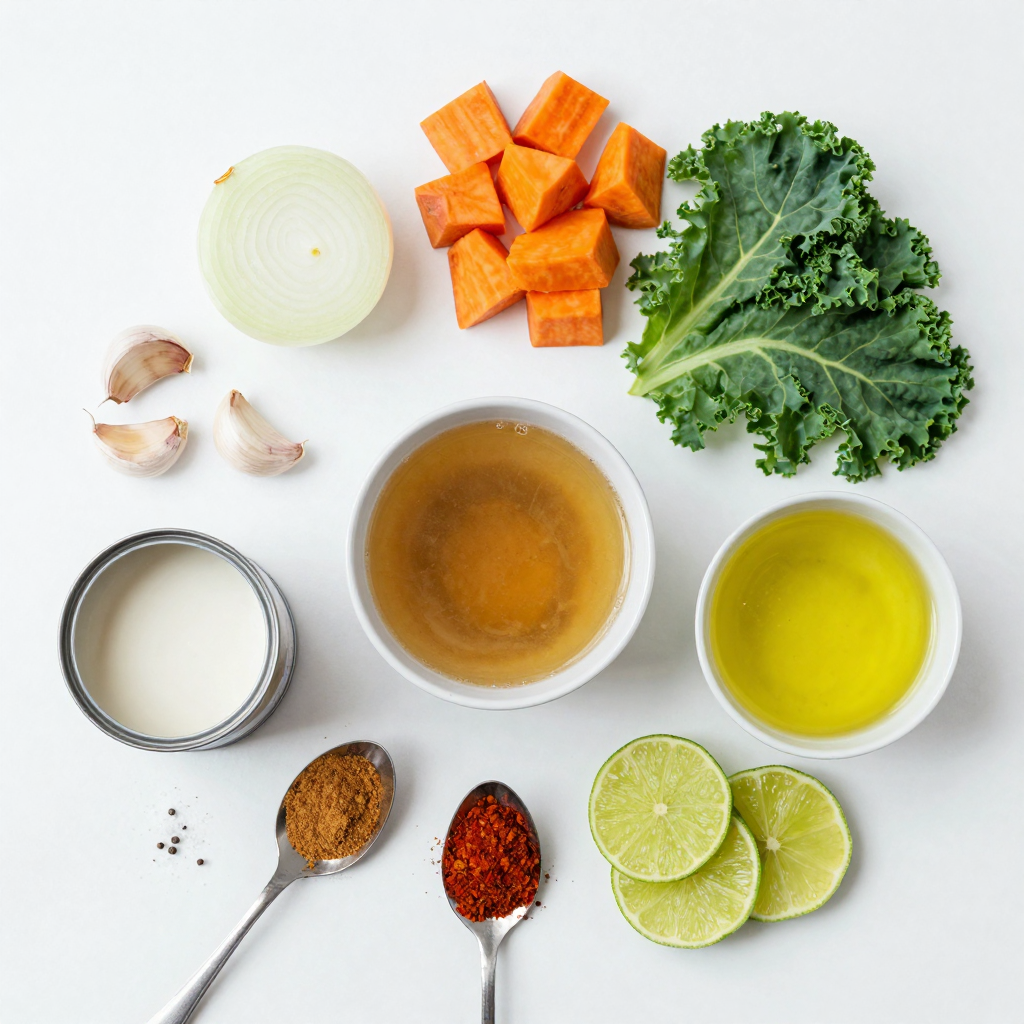
Ingredients
List of Ingredients for Sweet Potato Kale Soup
- 2 large sweet potatoes, peeled and cubed
- 1 bunch kale, torn into bite-sized pieces (stems removed)
- 1 medium onion, diced
- 2 cloves garlic, minced
- 4 cups vegetable broth
- 1 can (14 ounces) coconut milk
- 1 teaspoon ground cumin
- 1 teaspoon smoked paprika
- 1 tablespoon olive oil
- Salt and pepper to taste
- Juice of 1 lime
Nutritional Benefits of Key Ingredients
Sweet potatoes are rich in vitamins A and C. They boost your immune system. Kale is full of antioxidants and fiber. It helps improve digestion. Onion adds flavor and contains quercetin, which fights inflammation. Garlic has many health benefits, such as supporting heart health. Coconut milk provides healthy fats and a creamy texture. Using vegetable broth makes this soup plant-based and full of flavor.
Substitutions for Ingredients
If you don’t have sweet potatoes, try using butternut squash instead. Spinach is a great substitute for kale if you prefer something milder. You can swap coconut milk for almond milk for a lighter version. Use chicken broth instead of vegetable broth if you want a non-vegetarian option. If you can’t find ground cumin, smoked paprika can add a nice flavor too.
Step-by-Step Instructions
Preparation Steps
To start, gather your ingredients. You will need:
- 2 large sweet potatoes, peeled and cubed
- 1 bunch kale, torn into bite-sized pieces
- 1 medium onion, diced
- 2 cloves garlic, minced
- 4 cups vegetable broth
- 1 can (14 ounces) coconut milk
- 1 teaspoon ground cumin
- 1 teaspoon smoked paprika
- 1 tablespoon olive oil
- Salt and pepper to taste
- Juice of 1 lime
First, peel and cube the sweet potatoes. Next, tear the kale into small pieces. Remove the tough stems. Dice the onion and mince the garlic.
Cooking Process
In a large pot, heat the olive oil over medium heat. Add the diced onion and sauté for about 5 minutes. Cook until the onion turns translucent. This adds a nice base flavor.
Next, stir in the minced garlic, ground cumin, and smoked paprika. Sauté for another minute until the kitchen fills with a lovely aroma.
Now, add the cubed sweet potatoes to the pot. Pour in the vegetable broth and bring it to a boil. Reduce the heat and let it simmer for about 15 minutes. You want the sweet potatoes to be tender.
After that, use an immersion blender to puree the soup. If you don’t have one, carefully transfer the soup to a countertop blender in batches. Blend until smooth.
Return the blended soup to low heat. Stir in the coconut milk and mix until well combined.
Finally, add the kale pieces. Cook for an additional 5 minutes. This lets the kale wilt but still keeps some texture.
Tips for Perfecting the Soup Texture
For the best texture, blend the soup really well. You want it creamy and smooth. If you like some chunks, blend only half.
When you add the coconut milk, do it slowly. This helps it mix in better. If the soup is too thick, add more broth. If it’s too thin, simmer a bit longer.
Remember to season with salt, pepper, and fresh lime juice. This brings out the flavors. Taste and adjust as needed. Enjoy your savory sweet potato kale soup!
Pro Tips
- Perfectly Cooked Sweet Potatoes: To ensure your sweet potatoes are tender and creamy, cut them into even-sized cubes. This will help them cook uniformly.
- Enhancing Flavor: For an added depth of flavor, consider roasting the sweet potatoes in the oven before adding them to the soup. This caramelization enhances their natural sweetness.
- Texture Variation: If you prefer a chunkier soup, reserve some cooked sweet potato cubes and stir them back into the pureed soup for added texture.
- Freshness Boost: Adding a handful of fresh herbs like cilantro or parsley before serving can brighten the flavors and add a fresh touch to your soup.
Tips & Tricks
Enhancing Flavor with Herbs and Spices
To make your soup burst with flavor, try adding fresh herbs. Cilantro or parsley adds bright notes. You can also use fresh thyme for a warm touch. For spice lovers, a pinch of red pepper flakes gives a nice kick. Adjust these herbs based on your taste. Always taste the soup as you go. This helps you find the perfect balance of flavors.
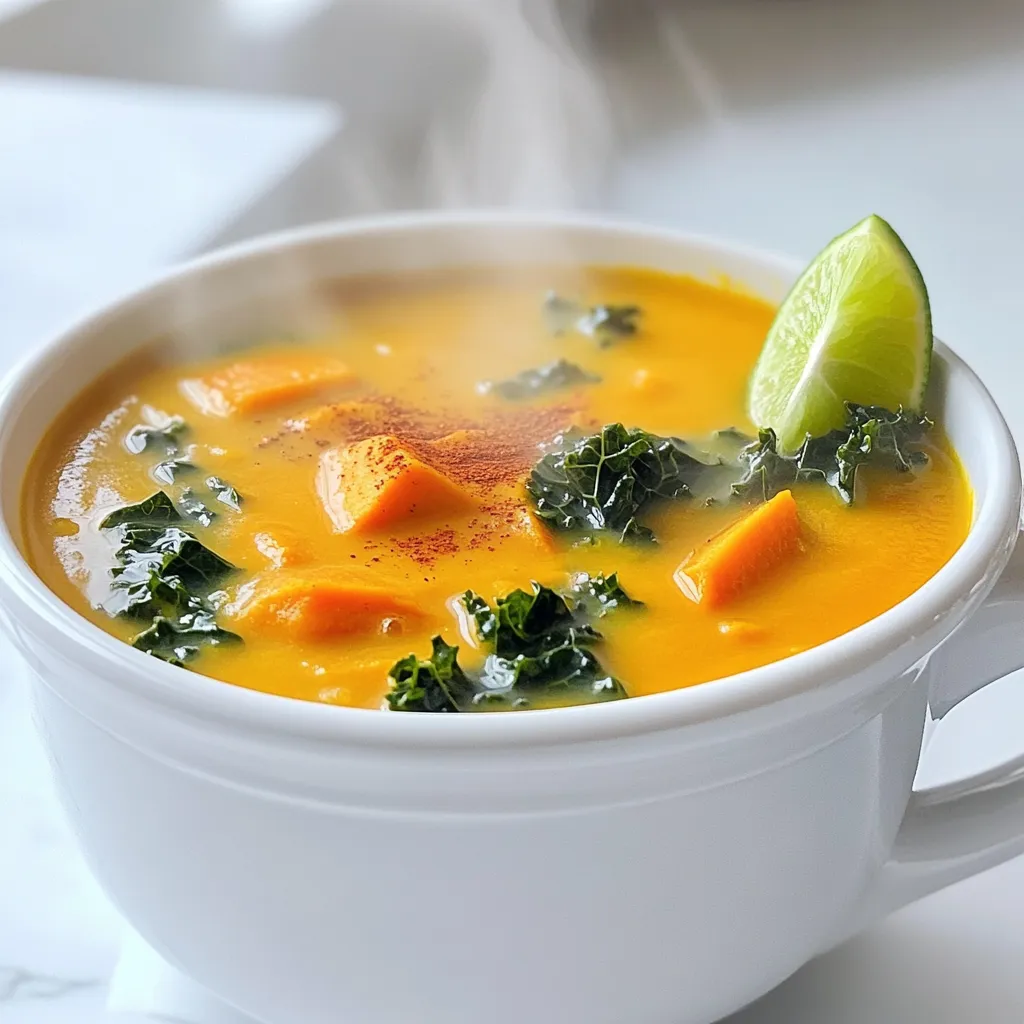
Best Serving Suggestions
Serve the soup hot for the best experience. A sprinkle of smoked paprika on top adds color and flavor. You can also add a squeeze of lime juice for brightness. For extra creaminess, top with a dollop of sour cream or yogurt. If you want a heartier meal, serve the soup with a side salad. This gives you a healthy mix of flavors and textures.
Pairing with Bread or Toppings
Bread is a great side for this soup. A crusty baguette or warm pita works well. You can also try cornbread for a fun twist. Toppings can include croutons for crunch or seeds for a nutty flavor. If you like, add avocado slices for creaminess. Experiment with different pairings to find your favorite match!
Variations
Adding Protein Options (e.g., Beans or Chicken)
You can boost the protein in your sweet potato kale soup easily. For a vegan option, add canned beans like black beans or chickpeas. They add great texture and flavor. If you prefer meat, shredded chicken works well. Just stir it in after blending the soup. This adds heartiness and makes the dish more filling.
Vegan and Gluten-Free Adaptations
This soup is already vegan and gluten-free! You can keep it that way by using vegetable broth and coconut milk. Make sure to check labels on any canned goods. Some brands add gluten. This soup fits many diets while still being tasty and rich.
Seasonal Variations with Other Vegetables
You can change this soup based on what is fresh. In spring, add peas or asparagus for a new twist. In fall, try pumpkin or butternut squash. These vegetables mix well with sweet potatoes and keep the soup creamy. You can also add carrots or celery for added crunch. Using seasonal vegetables gives the soup different flavors and colors.
Storage Info
How to Store Leftovers
To keep your sweet potato kale soup fresh, let it cool first. Once cool, pour the soup into an airtight container. Make sure to seal it tightly. Store it in the fridge for up to five days. This soup tastes even better after a day in the fridge as the flavors blend.
Reheating Tips
When you’re ready to enjoy your soup again, reheat it gently. Pour the soup into a pot and warm it over medium heat. Stir often to avoid sticking. You can also use a microwave. Heat in 30-second bursts, stirring in between, until warm.
Freezing for Future Meals
If you want to save some soup for later, freezing is a great option. Use freezer-safe containers or resealable bags. Leave some space at the top, as soup expands when frozen. It will stay good for up to three months. To thaw, place it in the fridge overnight. Then, reheat as mentioned above for a warm meal.
FAQs
Can I use fresh sweet potatoes instead of canned?
Yes, you can use fresh sweet potatoes. In fact, I recommend it! Fresh sweet potatoes give the soup a rich, natural sweetness. Just peel and cube them as the recipe states. They add great texture and nutrients. When you cook them, they will blend perfectly.
How long will the soup last in the refrigerator?
The soup will last about 3 to 5 days in the fridge. Make sure to store it in an airtight container. This helps keep it fresh. If you want it to last longer, consider freezing some. Just remember to let it cool before putting it away.
Can I make this soup in a slow cooker?
Absolutely! A slow cooker is perfect for this soup. Just add all the ingredients and set it on low. Let it cook for about 6 to 8 hours. At the end, use an immersion blender to puree it. This method makes the flavors mingle even better.
What can I substitute for coconut milk?
If you need a substitute for coconut milk, try almond milk or oat milk. Both will work well and give a nice creamy texture. For a richer taste, you can use heavy cream. Just remember, it may change the flavor a bit, but it will still be delicious!
In this post, we explored how to make Sweet Potato Kale Soup. We covered the main ingredients, their health benefits, and smart substitutions. You learned step-by-step cooking instructions and tips for great texture. We shared ways to enhance flavor and the best serving options. Variations let you add protein or adapt for dietary needs. Lastly, we discussed how to store and reheat leftovers.
I hope you feel ready to make this soup your own and enjoy a delicious meal!

Sweet Potato Kale Soup
Ingredients
2 large sweet potatoes, peeled and cubed
1 bunch kale, torn into bite-sized pieces (stems removed)
1 medium onion, diced
2 cloves garlic, minced
4 cups vegetable broth
1 can (14 ounces) coconut milk
1 teaspoon ground cumin
1 teaspoon smoked paprika
1 tablespoon olive oil
Salt and pepper to taste
Juice of 1 lime
Instructions
In a large pot, heat the olive oil over medium heat. Add the diced onion and sauté for about 5 minutes or until translucent.
Stir in the minced garlic, ground cumin, and smoked paprika. Sauté for another minute until fragrant.
Add the cubed sweet potatoes to the pot and pour in the vegetable broth. Bring to a boil, then reduce the heat to a simmer. Cook for about 15 minutes or until the sweet potatoes are tender.
Use an immersion blender to puree the soup until smooth, or carefully transfer to a countertop blender in batches.
Once pureed, return the soup to low heat and stir in the coconut milk until well combined.
Add the kale pieces and cook for an additional 5 minutes, allowing the kale to wilt but still retaining some texture.
Season with salt, pepper, and fresh lime juice to taste. Stir well before serving.
Prep Time: 10 minutes | Total Time: 30 minutes | Servings: 4-6 servings
– Presentation Tips: Ladle the soup into bowls and garnish with a sprinkle of smoked paprika and a lime wedge on the side for an extra pop of color.
Sweet Potato Kale Soup
Ingredients
- 2 large sweet potatoes, peeled and cubed
- 1 bunch kale, torn into bite-sized pieces (stems removed)
- 1 medium onion, diced
- 2 cloves garlic, minced
- 4 cups vegetable broth
- 14 ounces coconut milk
- 1 teaspoon ground cumin
- 1 teaspoon smoked paprika
- 1 tablespoon olive oil
- to taste salt and pepper
- 1 lime juice of
Instructions
- In a large pot, heat the olive oil over medium heat. Add the diced onion and sauté for about 5 minutes or until translucent.
- Stir in the minced garlic, ground cumin, and smoked paprika. Sauté for another minute until fragrant.
- Add the cubed sweet potatoes to the pot and pour in the vegetable broth. Bring to a boil, then reduce the heat to a simmer. Cook for about 15 minutes or until the sweet potatoes are tender.
- Use an immersion blender to puree the soup until smooth, or carefully transfer to a countertop blender in batches.
- Once pureed, return the soup to low heat and stir in the coconut milk until well combined.
- Add the kale pieces and cook for an additional 5 minutes, allowing the kale to wilt but still retaining some texture.
- Season with salt, pepper, and fresh lime juice to taste. Stir well before serving.
![- 1 lb boneless, skinless chicken breasts, sliced into thin strips - 2 tablespoons olive oil - 1 tablespoon lime juice - 1 teaspoon ground cumin - 1 teaspoon chili powder - 1 teaspoon garlic powder - 1 teaspoon onion powder - Salt and pepper to taste - 1 red bell pepper, sliced - 1 green bell pepper, sliced - 1 medium onion, sliced - 4 small flour tortillas For a great chicken fajita, the main ingredients matter. Start with fresh chicken. You want boneless, skinless breasts. Slice them thin for quick cooking. The next star is the bell peppers. I love a mix of red and green. They add color and crunch. Don't forget the onion. It adds sweetness when cooked. Seasonings make the fajitas pop. Ground cumin gives warmth. Chili powder adds a nice kick. Garlic and onion powders boost the flavor. A splash of lime juice brightens everything up. Always use salt and pepper to taste. - Fresh cilantro - Sour cream - Guacamole Garnishes can elevate your meal. Fresh cilantro adds a burst of freshness. Sour cream brings creaminess and coolness. Guacamole adds richness. You can mix and match these sides for a fun twist. - Skillet or cast-iron pan - Mixing bowl - Tongs You don't need fancy tools to make fajitas. A good skillet or cast-iron pan heats evenly. A mixing bowl works well for marinating chicken. Tongs help flip the chicken and veggies easily. With these basics, you're ready for a tasty night! For the full recipe, check out the link provided. Marinating the chicken Start by slicing 1 pound of boneless, skinless chicken breasts into thin strips. In a large bowl, mix the chicken with 2 tablespoons of olive oil, 1 tablespoon of lime juice, 1 teaspoon of ground cumin, 1 teaspoon of chili powder, 1 teaspoon of garlic powder, 1 teaspoon of onion powder, and salt and pepper. Stir until the chicken is well coated. Let it marinate for at least 15 minutes. This step adds flavor and keeps the chicken juicy. Cooking the chicken Preheat a large skillet or cast-iron pan over medium-high heat. Once hot, add the marinated chicken to the skillet. Cook the chicken for about 5 to 7 minutes. Stir it occasionally until the chicken is cooked through and lightly browned. Remove the chicken from the skillet and set it aside on a plate. Preparing bell peppers and onions While the chicken cools, slice 1 red bell pepper, 1 green bell pepper, and 1 medium onion. These veggies will add color and crunch to your fajitas. Cooking the vegetables In the same skillet, add the sliced bell peppers and onion. Sauté them for about 3 to 4 minutes. You want them tender but still crisp. The leftover flavor from the chicken will enhance the veggies. Tossing chicken and vegetables together After the vegetables are cooked, add the chicken back into the skillet. Toss everything together for another 2 minutes to heat it all through. This step mixes the flavors perfectly. Heating the tortillas Warm 4 small flour tortillas in a separate dry skillet or microwave for a few seconds. This makes them soft and easy to fold. Now you are ready to serve your chicken fajitas! Enjoy this simple yet tasty dish with fresh cilantro, sour cream, and guacamole. For the full recipe, check the details above. Marinating the chicken is key for great taste. It allows flavors to soak in well. I recommend marinating for at least 30 minutes. If you have time, longer is better. Use these seasonings for a tasty mix: - 1 teaspoon ground cumin - 1 teaspoon chili powder - 1 teaspoon garlic powder - 1 teaspoon onion powder - Salt and pepper to taste These spices add warmth and depth. They make the chicken truly delicious. To get the best results, heat your skillet to medium-high. A hot skillet helps brown the chicken. Stir the chicken often while cooking. This keeps it from sticking and helps it cook evenly. Cook for 5-7 minutes until the chicken is done. The edges should look golden brown. When cooking the veggies, sauté them for about 3-4 minutes. You want them tender but still crisp. This gives a nice texture to your fajitas. Serving fajitas is fun and easy! Start by placing a warm tortilla on a plate. Add a generous scoop of the chicken and veggie mix in the center. Top it off with fresh cilantro for color and flavor. You can also serve sour cream and guacamole on the side. This adds creaminess and richness to each bite. For a colorful plate, think about adding lime wedges too. They add a bright touch and a zesty kick. Enjoy your meal! {{image_2}} If you want to switch up the protein in your chicken fajitas, you have great options. You can use beef or shrimp for a different taste. Beef fajitas are juicy and rich. Shrimp cooks fast and adds a seafood twist. For those who prefer no meat, try using firm tofu or portobello mushrooms. These vegetarian options soak up spices well and taste great. The spice level is key to making fajitas your own. You can keep them mild, go for medium, or make them hot. To add heat, use jalapeños or serrano peppers. You can also add hot sauce or chili flakes. Start with small amounts and taste as you go. This way, you can find that perfect balance you love. Choosing the right tortilla can change your fajitas. Flour tortillas are soft and chewy, while corn tortillas are more traditional with a nice crunch. If you need gluten-free options, there are great corn tortillas available. You can also find gluten-free flour tortillas. Each choice will give your dish a different feel and flavor. For the full recipe, click [Full Recipe]. To keep your chicken fajitas fresh, store them in the fridge. Use an airtight container. Make sure to cool them first. They stay good for about 3 to 4 days. If you want to keep them longer, freeze your fajitas. Place them in a freezer-safe bag. They can last up to 3 months in the freezer. Reheating your fajitas can be easy. Use a skillet over medium heat for the best results. This method keeps the chicken and veggies nice and warm. You can also use a microwave. Just heat in short bursts. Stir in between to avoid hot spots. To keep your fajitas from getting soggy, don't cover them tightly while reheating. Chicken fajitas are safe to eat for 3 to 4 days in the fridge. If you freeze them, they last up to 3 months. Check for signs of spoilage before eating. Look for any off smells or changes in color. If they seem odd, it’s best to toss them. Enjoy your meal safely! For the full recipe, check out [Full Recipe]. To make chicken fajitas from scratch, follow these steps: 1. Marinate the Chicken: In a bowl, mix sliced chicken with olive oil, lime juice, cumin, chili powder, garlic powder, onion powder, salt, and pepper. Ensure each piece is well coated. 2. Cook the Chicken: Heat a skillet over medium-high heat. Add the marinated chicken and cook for 5-7 minutes. Stir until it turns golden brown and is cooked through. 3. Sauté the Veggies: Remove the chicken and set it aside. In the same skillet, add sliced bell peppers and onion. Cook for about 3-4 minutes until they are tender yet crisp. 4. Combine: Return the chicken to the skillet. Toss everything together for 2 more minutes to blend flavors. 5. Warm Tortillas: Heat flour tortillas in a dry skillet or microwave for a few seconds. 6. Serve: Place the chicken and veggies in the center of each tortilla. Add fresh cilantro, and serve with sour cream and guacamole. For the full recipe, check out the complete guide. Yes, you can use frozen chicken for fajitas. However, there are a few things to consider: - Thawing: Thaw the chicken in the fridge overnight or use the defrost setting on your microwave. - Cooking Time: Frozen chicken may take longer to cook. Ensure it reaches an internal temperature of 165°F. - Flavor: Fresh chicken may absorb marinades better than frozen. If using frozen, marinate it after thawing for better flavor. Toppings can enhance your chicken fajitas. Here are popular choices: - Fresh Cilantro: Adds brightness to each bite. - Sour Cream: Provides a creamy texture and coolness. - Guacamole: Offers rich flavor and creaminess. - Shredded Cheese: Adds a savory touch. - Salsa: Brings extra zest and freshness. - Lime Wedges: A squeeze of lime can brighten the dish. Feel free to mix and match to find your perfect topping combination! In this article, we explored classic chicken fajitas, from ingredients to cooking steps. You learned about marinating chicken, sautéing veggies, and the best serving tips. I also shared ways to customize flavors and storage info. Remember, a good fajita needs quality ingredients and care. Enjoy experimenting with different proteins and spice levels! Fajitas are fun and easy, so get cooking and share your delicious results.](https://dailydishlab.com/wp-content/uploads/2025/06/66375333-28c8-40a4-a8c4-3c36aa5b429f-768x768.webp)
![Here’s what you need for a tasty Baked Potato Chicken Broccoli Casserole: - 4 medium-sized potatoes, peeled and diced - 2 cups cooked chicken, shredded - 2 cups fresh broccoli florets - 1 cup shredded cheddar cheese - 1 cup sour cream - 1/2 cup milk - Spices: garlic powder, onion powder, salt, and pepper - Topping: 1/2 cup breadcrumbs and 1/4 cup grated Parmesan cheese - 2 tablespoons olive oil Each ingredient plays a role in the final dish. The potatoes provide a hearty base. Chicken adds protein and flavor. Fresh broccoli brings in a nice crunch and color. The cheddar cheese gives it that creamy, cheesy goodness. Sour cream and milk keep it moist. Don’t forget the spices; they boost the taste. Lastly, the breadcrumbs and Parmesan create a crunchy topping that everyone loves. You can find the full recipe for this delicious casserole in the [Full Recipe] section. Enjoy cooking! 1. Preheat the oven to 375°F (190°C). This ensures even cooking. 2. Boil the diced potatoes in salted water until they are fork-tender. This takes about 10-15 minutes. Drain the potatoes and let them cool slightly. 3. In a large bowl, mix the shredded chicken, boiled potatoes, fresh broccoli, shredded cheddar cheese, sour cream, milk, garlic powder, onion powder, and a pinch of salt and pepper. Stir until all ingredients are well combined. 1. Drizzle olive oil over the mixture and stir again to mix it well. 2. Transfer the mixture to a greased 9x13 inch casserole dish. Spread it out evenly for even baking. 3. In a small bowl, combine breadcrumbs and grated Parmesan cheese. Sprinkle this mixture evenly on top of the casserole. 1. Bake the casserole in the preheated oven for 25-30 minutes, or until the top is golden brown and bubbly. 2. Once baked, remove it from the oven and let it cool for about 5 minutes. This helps the casserole set before serving. For the full recipe, check out the details above. Enjoy your delicious meal! - Use rotisserie chicken for convenience. - Adjust liquid ingredients based on desired creaminess. Using rotisserie chicken saves time and adds great flavor. It’s tender and juicy, making your casserole richer. If you want a creamy texture, add more sour cream or milk. If you prefer a thicker mix, use less liquid. This way, you can customize to your taste. - Overcooking the potatoes. - Not seasoning adequately. Be careful not to overcook the potatoes. They should be fork-tender but not mushy. If they cook too long, your casserole will turn out soggy. Also, don’t skimp on seasoning. Salt and pepper are key to bringing out all the flavors in the dish. - Garnish with parsley. - Pair with a crisp side salad for balance. Garnish your casserole with fresh parsley for color and taste. This small touch makes it look fancy! Pairing it with a crisp side salad adds freshness. The salad balances the creamy casserole and makes the meal complete. For the full recipe, check the main sections above! {{image_4}} You can change the recipe to fit your taste. For a twist, substitute broccoli with fresh spinach or tender asparagus. Both options add a nice touch and keep the dish colorful. You can also use different cheese varieties. Try mozzarella for a mild flavor or pepper jack for a spicy kick. Each cheese brings its own charm to the casserole. If you want a lighter version, replace sour cream with Greek yogurt. It adds creaminess while cutting calories. You can also switch out regular potatoes for sweet potatoes. Sweet potatoes bring a hint of sweetness and more nutrients. Both swaps keep the dish tasty and satisfying. To give your casserole a fun twist, think about adding spices. A sprinkle of cumin and chili powder can create a Tex-Mex vibe. For an Italian touch, mix in dried oregano and basil. These spices can turn a simple casserole into something special and unique. Remember, small changes can lead to big flavors! You can keep your baked potato chicken broccoli casserole in the fridge. Store it in an airtight container. It will stay fresh for 3-4 days. Before you put it in the fridge, let it cool down. This helps keep the texture nice. For longer storage, you can freeze your casserole. I recommend freezing it in individual portions. This makes it easy to reheat later. Use freezer-safe containers or bags to avoid freezer burn. Label each bag or container with the date to track freshness. When it's time to enjoy your leftovers, reheating is key. For the best texture, reheat in the oven. Preheat the oven to 350°F (175°C) and heat for about 20 minutes. The oven will keep the top crunchy. Microwaving is quick, but it might change the texture. If you use the microwave, heat in short intervals and stir between to warm evenly. For the full recipe, you can refer to the Baked Potato Chicken Broccoli Casserole section above. Yes, prepare the casserole and refrigerate it before baking. This saves time on busy days. You can make it in the morning and bake it later. Just be sure to cover it tightly. A crisp side salad or steamed vegetables complement it well. The freshness of a salad balances the creamy casserole. Try adding some cherry tomatoes or cucumbers for crunch. Look for a golden brown top and bubbling edges. It should smell amazing, too! If you see this, it is ready to eat. A meat thermometer can help, aiming for 165°F in the center ensures safety. It can be made gluten-free by using gluten-free breadcrumbs. Many brands offer great options. This way, everyone can enjoy the dish without worry. Plus, it can still be delicious and crunchy! This baked potato chicken broccoli casserole combines simple ingredients for a wholesome meal. We covered the easy steps to prepare, assemble, and bake your dish perfectly. Remember to adjust for creaminess and avoid overcooking the potatoes. Try variations to suit your taste and enjoy leftovers with proper storage. This dish is not just tasty; it’s customizable and convenient. Have fun creating your delicious version!](https://dailydishlab.com/wp-content/uploads/2025/06/48777e9c-67aa-4801-bf00-58215c9964ff-768x768.webp)