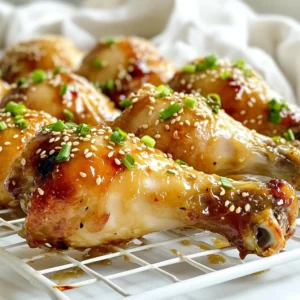
Honey Garlic Chicken Drumsticks Easy Recipe to Enjoy


If you’re ready for a dinner that sings with flavor, look no further than honey garlic chicken drumsticks! This easy recipe combines sweet and savory tastes, making it a hit for all ages. With a few simple ingredients and step-by-step instructions, you’ll impress your family with a dish that’s not only tasty but also fun to make. Let’s dive into the details and get cooking!
Why I Love This Recipe
- Flavorful Marinade: The combination of honey, soy sauce, and garlic creates a deliciously sticky and savory glaze that elevates the chicken to a new level of taste.
- Easy Preparation: This recipe requires minimal prep time and only a few ingredients, making it perfect for busy weeknights or special occasions.
- Customizable Spice: You can easily adjust the level of heat by adding or omitting the red pepper flakes, catering to your family’s preferences.
- A Crowd-Pleaser: These honey garlic drumsticks are always a hit with guests, making them a great choice for dinner parties or gatherings.
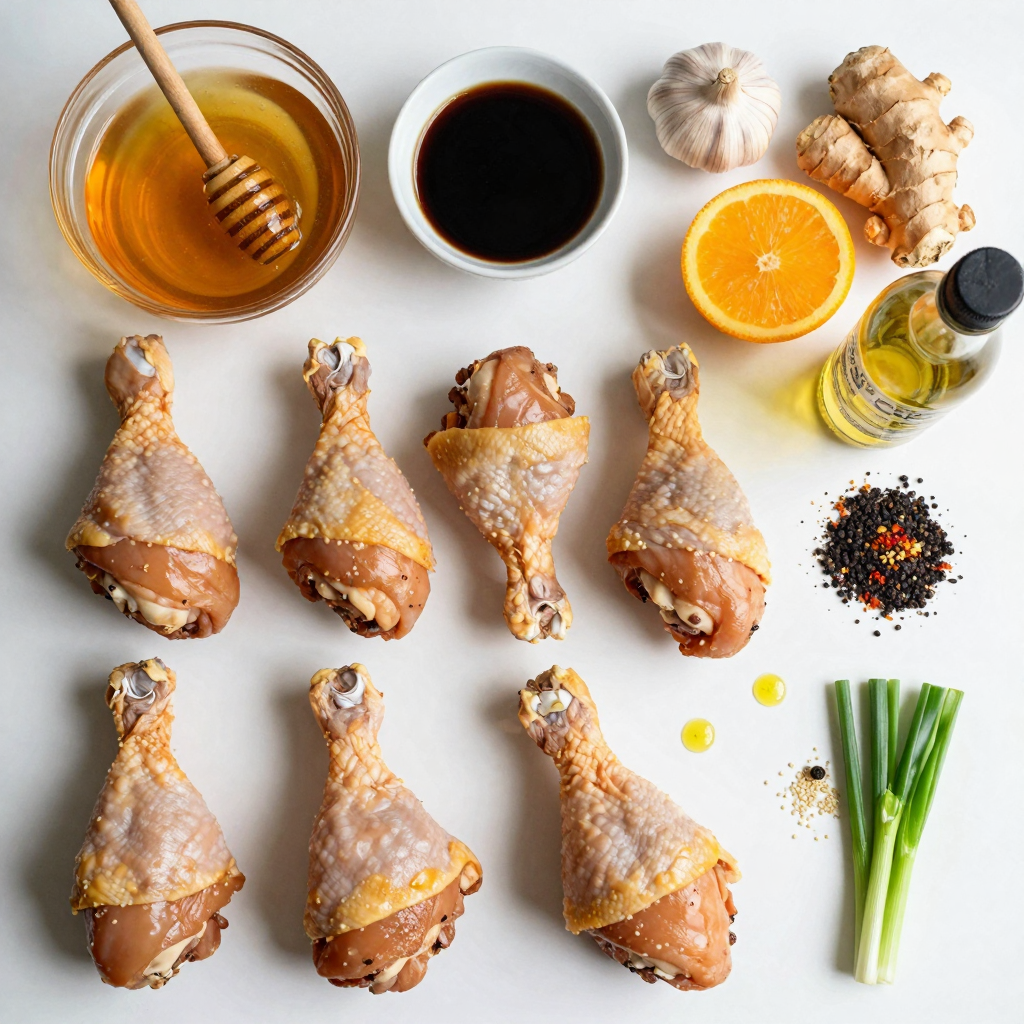
Ingredients
List of Ingredients
- 8 chicken drumsticks
- 1/3 cup honey
- 1/4 cup soy sauce (low sodium)
- 4 cloves garlic, minced
- 1 tablespoon fresh ginger, grated
- 1 tablespoon apple cider vinegar
- 1 teaspoon sesame oil
- 1/2 teaspoon black pepper
- 1/4 teaspoon red pepper flakes (optional for spice)
- 2 green onions, chopped (for garnish)
- Sesame seeds (for garnish)
Measurements
- Chicken drumsticks: 8 pieces
- Honey: 1/3 cup (about 113 grams)
- Soy sauce: 1/4 cup (about 60 milliliters)
- Garlic: 4 cloves, minced
- Ginger: 1 tablespoon, grated
- Apple cider vinegar: 1 tablespoon (about 15 milliliters)
- Sesame oil: 1 teaspoon (about 5 milliliters)
- Black pepper: 1/2 teaspoon
- Red pepper flakes: 1/4 teaspoon (optional)
- Green onions: 2, chopped for garnish
- Sesame seeds: for garnish
Optional Ingredients
- Add more heat with extra red pepper flakes.
- Use honey garlic sauce instead of plain honey for a twist.
- Try fresh herbs like cilantro or parsley for extra flavor.
- Experiment with different vinegars, like rice or balsamic.
Step-by-Step Instructions
Prepping the Oven and Equipment
To start, preheat your oven to 400°F (200°C). This temperature helps the chicken cook just right. While the oven heats, line a baking sheet with aluminum foil. This makes cleanup quick and easy. Place a wire rack on top of the foil. The rack lets hot air flow around the chicken, making it cook evenly.
Preparing the Marinade
Now, let’s mix the marinade. In a medium bowl, combine these ingredients:
- 1/3 cup honey
- 1/4 cup low sodium soy sauce
- 4 cloves garlic, minced
- 1 tablespoon fresh ginger, grated
- 1 tablespoon apple cider vinegar
- 1 teaspoon sesame oil
- 1/2 teaspoon black pepper
- 1/4 teaspoon red pepper flakes (optional)
Whisk everything together until it blends well. This mix gives the chicken a sweet and savory flavor.
Marinating the Drumsticks
Next, take 8 chicken drumsticks. Place them in a large resealable plastic bag or a bowl. Pour the marinade over the drumsticks, making sure each piece is coated well. Seal the bag or cover the bowl. Let them marinate in the fridge for at least 30 minutes. For more flavor, aim for 2 hours.
Cooking the Chicken
After marinating, take the drumsticks out. Remove them from the marinade and place them on the wire rack. Space them out so they cook evenly. Bake the drumsticks in your preheated oven for 35-40 minutes. Check that the internal temperature reaches 165°F (74°C). You want them golden brown and fully cooked.
Final Touches
While the chicken bakes, grab the leftover marinade. Pour it into a small saucepan and heat it over medium heat. Bring it to a boil, then let it simmer for about 5-7 minutes. This will thicken the sauce. In the last 10 minutes of baking, brush the thickened marinade over the chicken. This creates a sticky glaze. Once done, take out the drumsticks and let them rest for a few minutes. Serve them hot, garnished with chopped green onions and sesame seeds. Enjoy your meal!
Pro Tips
- Marinating Time: The longer you marinate the chicken, the more flavorful it will be. Aim for at least 2 hours for the best results.
- Even Cooking: Using a wire rack allows heat to circulate around the drumsticks, ensuring they cook evenly and get crispy.
- Thickening the Sauce: Simmering the reserved marinade not only thickens it but also kills any harmful bacteria, making it safe to use as a glaze.
- Garnishing: Adding green onions and sesame seeds as a garnish not only enhances the presentation but also adds a fresh crunch and additional flavor.
Tips & Tricks
Achieving the Perfect Glaze
To get a great glaze for your chicken, timing is key. Brush the thickened marinade on during the last ten minutes of baking. This step adds flavor and makes the chicken shiny. Make sure to coat them well. It helps create a sticky and delicious finish. Keep an eye on the drumsticks while they bake. You want them to be golden brown, not burnt.
Marination Tips
Marinating adds flavor and tenderness to the chicken. I suggest marinating for at least 30 minutes. However, for more flavor, marinate for up to two hours. The longer you marinate, the better the taste. Use a resealable bag or a bowl to coat the drumsticks well. Don’t forget to seal it tight or cover it to keep the flavors in.
Cooking Alternatives
If you want to grill or air fry, you can still enjoy this recipe. For grilling, preheat your grill to medium-high. Cook the drumsticks for about 25-30 minutes. Turn them often to get even cooking. If you choose air frying, set your air fryer to 380°F (193°C) and cook for 25-30 minutes. Check the internal temperature to ensure it reaches 165°F (74°C).

Variations
Spicy Honey Garlic Drumsticks
You can add heat to your honey garlic chicken drumsticks in a few ways. Start by using more red pepper flakes. This small change can bring big flavor. You can also add a splash of hot sauce to the marinade. If you love heat, try using chili garlic sauce instead of regular garlic. This will give your chicken a spicy kick.
Sweet and Tangy Version
For a sweet and tangy twist, swap out some honey for orange juice. This change adds a bright flavor. You can also mix in a bit of mustard for a unique taste. Using balsamic vinegar can create a deeper tang. These small changes will give your chicken a fun twist.
Herb-Infused Options
Herbs can take these drumsticks to the next level. Try adding fresh rosemary or thyme to your marinade. Chop them finely and mix them in. You can also use fresh parsley for a light flavor. Adding herbs not only boosts taste but also adds a lovely look to your dish.
Storage Info
Refrigeration
To store leftover honey garlic chicken drumsticks, first let them cool. Place them in an airtight container. This helps keep them fresh. You can also wrap them tightly in plastic wrap. Make sure to consume the leftovers within three days. This keeps the taste and quality good.
Freezing Instructions
To freeze the drumsticks, let them cool completely. Then, place them in a freezer-safe bag. Remove as much air as possible to avoid freezer burn. You can store them for up to three months. To reheat, thaw them in the fridge overnight. Then, bake them at 350°F (175°C) until heated through.
Shelf Life
Honey garlic chicken drumsticks can last in the fridge for up to three days. If you freeze them, they can stay good for about three months. Always check for any signs of spoilage before eating. If they smell off or look strange, it’s best to throw them away.
FAQs
Can I use chicken thighs instead of drumsticks?
Yes, you can use chicken thighs. They will be juicy and flavorful. Just adjust the cooking time. Thighs may take a bit longer to cook than drumsticks. Check that the internal temperature reaches 165°F (74°C).
What to serve with Honey Garlic Chicken Drumsticks?
These drumsticks pair well with many sides. Consider these tasty options:
- Steamed rice
- Roasted vegetables
- Mashed potatoes
- A fresh green salad
- Coleslaw
Each of these sides will add balance to your meal. They complement the sweet and savory notes of the chicken.
How long do I need to marinate the chicken?
Marinate the chicken for at least 30 minutes. For the best flavor, aim for 2 hours. If you have time, marinating overnight in the fridge works great, too. This helps the chicken soak up all the yummy flavors from the marinade.
In this article, we explored how to make delicious honey garlic chicken drumsticks. We covered the essential ingredients, preparation steps, and cooking methods. You learned how to achieve the perfect glaze and variations to suit your taste. Remember to store leftovers properly for the best shelf life.
With these tips in hand, you can enjoy tasty chicken drumsticks any time. Experiment with your favorite flavors and have fun cooking!
Honey Garlic Chicken Drumsticks
Ingredients
8 chicken drumsticks
1/3 cup honey
1/4 cup soy sauce (low sodium)
4 cloves garlic, minced
1 tablespoon fresh ginger, grated
1 tablespoon apple cider vinegar
1 teaspoon sesame oil
1/2 teaspoon black pepper
1/4 teaspoon red pepper flakes (optional for spice)
2 green onions, chopped (for garnish)
Sesame seeds (for garnish)
Instructions
Preheat the Oven: Preheat your oven to 400°F (200°C). Line a baking sheet with aluminum foil for easy cleanup and place a wire rack on top (this allows the chicken to cook evenly).
Prepare the Marinade: In a mixing bowl, combine honey, soy sauce, minced garlic, grated ginger, apple cider vinegar, sesame oil, black pepper, and red pepper flakes (if using). Whisk until well blended.
Marinate the Drumsticks: Place the chicken drumsticks in a large resealable plastic bag or a mixing bowl. Pour the marinade over the drumsticks, ensuring they are thoroughly coated. Seal the bag or cover the bowl and let it marinate in the refrigerator for at least 30 minutes to 2 hours for more flavor.
Arrange Drumsticks: After marinating, remove the drumsticks from the marinade (reserve the leftover marinade) and place them on the wire rack. Make sure they are evenly spaced for proper cooking.
Bake the Chicken: Bake the drumsticks in the preheated oven for 35-40 minutes, or until they are golden brown and cooked through (the internal temperature should reach 165°F or 74°C).
Glaze the Chicken: While the chicken is baking, pour the reserved marinade into a small saucepan and bring it to a boil over medium heat. Let it simmer for about 5-7 minutes to thicken slightly.
Coat with Sauce: In the last 10 minutes of baking, brush the thickened marinade over the chicken drumsticks to create a sticky glaze. Return them to the oven to finish cooking.
Serve: Once baked, remove the drumsticks from the oven and let them sit for a few minutes. Serve hot, garnished with chopped green onions and sesame seeds.
Prep Time: 10 min | Total Time: 1 hr 10 min | Servings: 4
Honey Garlic Chicken Drumsticks
Ingredients
- 8 pieces chicken drumsticks
- 1 third cup honey
- 1 quarter cup soy sauce (low sodium)
- 4 cloves garlic, minced
- 1 tablespoon fresh ginger, grated
- 1 tablespoon apple cider vinegar
- 1 teaspoon sesame oil
- 1 half teaspoon black pepper
- 1 quarter teaspoon red pepper flakes (optional for spice)
- 2 pieces green onions, chopped (for garnish)
- 1 tablespoon sesame seeds (for garnish)
Instructions
- Preheat your oven to 400°F (200°C). Line a baking sheet with aluminum foil for easy cleanup and place a wire rack on top.
- In a mixing bowl, combine honey, soy sauce, minced garlic, grated ginger, apple cider vinegar, sesame oil, black pepper, and red pepper flakes (if using). Whisk until well blended.
- Place the chicken drumsticks in a large resealable plastic bag or a mixing bowl. Pour the marinade over the drumsticks, ensuring they are thoroughly coated. Seal the bag or cover the bowl and let it marinate in the refrigerator for at least 30 minutes to 2 hours.
- After marinating, remove the drumsticks from the marinade (reserve the leftover marinade) and place them on the wire rack, evenly spaced.
- Bake the drumsticks in the preheated oven for 35-40 minutes, or until they are golden brown and cooked through (the internal temperature should reach 165°F or 74°C).
- While the chicken is baking, pour the reserved marinade into a small saucepan and bring it to a boil over medium heat. Let it simmer for about 5-7 minutes to thicken slightly.
- In the last 10 minutes of baking, brush the thickened marinade over the chicken drumsticks to create a sticky glaze. Return them to the oven to finish cooking.
- Once baked, remove the drumsticks from the oven and let them sit for a few minutes. Serve hot, garnished with chopped green onions and sesame seeds.
![- 2 large flatbreads (store-bought or homemade) - 1 cup cooked chicken breast, shredded - 1/2 cup BBQ sauce (your favorite brand) - 1 cup shredded mozzarella cheese - 1/2 red onion, thinly sliced - 1/4 cup fresh cilantro, chopped - 1/4 cup sliced jalapeños (optional for heat) - 1 tablespoon olive oil - Salt and pepper to taste It’s fun to create BBQ Chicken Flatbread Pizza with these simple ingredients. You can use store-bought flatbreads or make your own. I often choose the store-bought ones for quick meals. Shredded chicken is key. You can use leftover rotisserie chicken or cook it fresh. The BBQ sauce brings a sweet and tangy flavor. I love using my favorite brand, but feel free to explore. Mozzarella cheese adds creaminess and helps everything stick together. Red onion gives a nice crunch and flavor. Cilantro adds freshness, while jalapeños can bring some heat. I like to keep them optional because not everyone enjoys spicy food. Olive oil makes the flatbreads crispy and golden. Finally, remember to season with salt and pepper to enhance the flavors. - Calories per serving: Approximately 300-350 - Macronutrients: - Protein: 25g - Carbohydrates: 30g - Fats: 12g This dish is not only tasty but also filling. Each serving gives you a good amount of protein. The carbs come mainly from the flatbreads. The fats are from the cheese and olive oil. Enjoy this delightful meal while knowing it's also packed with nutrients. For the complete cooking steps, check the Full Recipe. 1. Start by preheating your oven to 450°F (230°C). This high heat will help create a crispy pizza base. 2. In a mixing bowl, combine 1 cup of shredded chicken with 1/4 cup of your favorite BBQ sauce. Mix well until the chicken is fully coated. This adds flavor and keeps the chicken moist. 1. Place the flatbreads on a baking sheet lined with parchment paper. This prevents sticking and makes cleanup easy. 2. Brush each flatbread lightly with 1 tablespoon of olive oil. This helps achieve a nice, crispy texture. 3. Spread the remaining BBQ sauce (about 1/4 cup) evenly over the flatbreads. Leave a small border around the edges for a perfect crust. 4. Evenly distribute the BBQ chicken mixture on top of the sauce on each flatbread. Make sure to cover it well for great flavor. 5. Sprinkle 1 cup of shredded mozzarella cheese generously on top of the chicken. This will melt into a gooey layer as it bakes. 6. Add sliced red onions and jalapeños (if using) on top for added crunch and heat. 1. Bake in the preheated oven for about 12-15 minutes. Watch closely until the cheese is melted and bubbly, and the edges of the flatbreads turn golden brown. 2. Once baked, remove the flatbreads from the oven. Let them cool for a couple of minutes before slicing. 3. Before serving, garnish with 1/4 cup of fresh chopped cilantro. This adds a pop of color and fresh flavor. Now, you're ready to enjoy your BBQ Chicken Flatbread Pizza! For the complete recipe, check the [Full Recipe]. To get crispy flatbreads, brush them lightly with olive oil. This helps create a nice crunch. Bake them at a high temperature, around 450°F (230°C), for the best results. For BBQ sauce, I recommend brands like Sweet Baby Ray's or Stubbs. These sauces add great flavor and a touch of sweetness. You can also make your own sauce for a personal touch. One common mistake is overloading the flatbreads with toppings. Too many toppings can make the flatbread soggy. Stick to a few key ingredients for the best taste and texture. Another mistake is not preheating the oven. Always preheat to ensure even cooking. If the oven is not hot enough, the flatbread won’t bake well. To pair with BBQ Chicken Flatbread Pizza, consider serving a fresh salad. A crunchy coleslaw or a Caesar salad works well. You can also try fresh veggies and dip for a side. For drinks, iced tea or lemonade can be refreshing. If you want something stronger, pair it with a light beer. These drinks complement the flavors nicely. For more details, check out the Full Recipe to make this dish at home! {{image_2}} You can switch up your BBQ chicken flatbread pizza with fun toppings. For a vegan option, use shredded jackfruit instead of chicken. It mimics the texture well. For cheese, try vegan mozzarella or cashew cheese. Both melt nicely and add flavor. You can also play with sauces. Instead of BBQ, drizzle ranch dressing for a creamy touch. Hot sauce brings heat if you love spice. Both options can change the feel of your pizza. Making your own flatbread can be easy and fun. Mix flour, water, salt, and olive oil for a simple dough. Roll it out, then cook it on a skillet until golden. This gives you a fresh base. If you need gluten-free options, use almond flour or chickpea flour. You can also find gluten-free flatbreads at many stores. They work just as well for this recipe. Add a twist of flavor by including fruits. Pineapple adds sweetness and pairs well with BBQ. Apples can bring a crisp bite, too. Slice them thin and scatter them on top. For an international flair, think beyond the usual. Try adding some Indian spices for a curry twist. You can also use Mexican flavors like black beans and corn. Don't be afraid to get creative! These variations keep your BBQ chicken flatbread pizza fresh and exciting. For the complete recipe, check out the Full Recipe. To keep your BBQ chicken flatbread pizza fresh, use these simple tips: - Refrigeration: Place leftover pizza in an airtight container. You can also wrap it tightly in plastic wrap or aluminum foil. This helps keep the moisture in and the pizza fresh for up to three days. - Freezing: For longer storage, freeze the flatbread pizza. Wrap each piece in plastic wrap, then place it in a freezer bag. Squeeze out as much air as possible. It will stay good for up to three months. Reheating flatbread pizza can be tricky, but I have some great methods to keep it tasty: - Best Practices: Preheat your oven to 350°F (175°C). Place the pizza on a baking sheet. Heat for about 10-15 minutes. This warms it up and keeps the crust crisp. - Avoiding Sogginess: To avoid a soggy pizza, do not use the microwave. It makes the flatbread soft. If you must use a microwave, heat it for a very short time, about 20 seconds, just to warm it slightly. To make BBQ Chicken Flatbread Pizza, you start with the flatbread. You can buy flatbread or make it. If you choose to make it, mix flour, water, yeast, and salt. Knead it well and let it rise for about an hour. Once it rises, roll it out to your desired shape. Then, bake it for a few minutes before adding toppings. Yes! You can use rotisserie chicken, grilled chicken, or even leftover chicken. Just shred the chicken and mix it with your BBQ sauce. Each type of chicken adds a unique flavor to your flatbread pizza. Choose what you like best or what you have on hand. If you want to avoid cheese, try using dairy-free cheese options. Some good choices are cashew cheese or almond cheese. You can also use goat cheese or feta for a tangy taste. These options will change the flavor but can still be delicious. BBQ Chicken Flatbread Pizza can be healthy, depending on your choices. Use whole grain flatbreads for more fiber. Opt for low-sugar BBQ sauce to cut calories. Add more veggies like peppers or spinach for extra nutrients. You can make it fit your diet by swapping some ingredients. Making BBQ Chicken Flatbread Pizza is fun and easy. We covered the key ingredients, step-by-step instructions, tips, and possible variations. This dish offers great flavor and is perfect for sharing. Remember to avoid common mistakes, like overloading toppings, to ensure the best results. Enjoy experimenting with different ingredients to make it your own. Whether for lunch or a cozy dinner, this recipe will impress your friends and family. Get ready to dive into flavor and creativity with your next flatbread pizza!](https://dailydishlab.com/wp-content/uploads/2025/07/4b21d134-1098-456f-bde0-d7ec0e969aee-768x768.webp)