
Crispy Air Fryer Orange Chicken Flavorful and Easy Meal
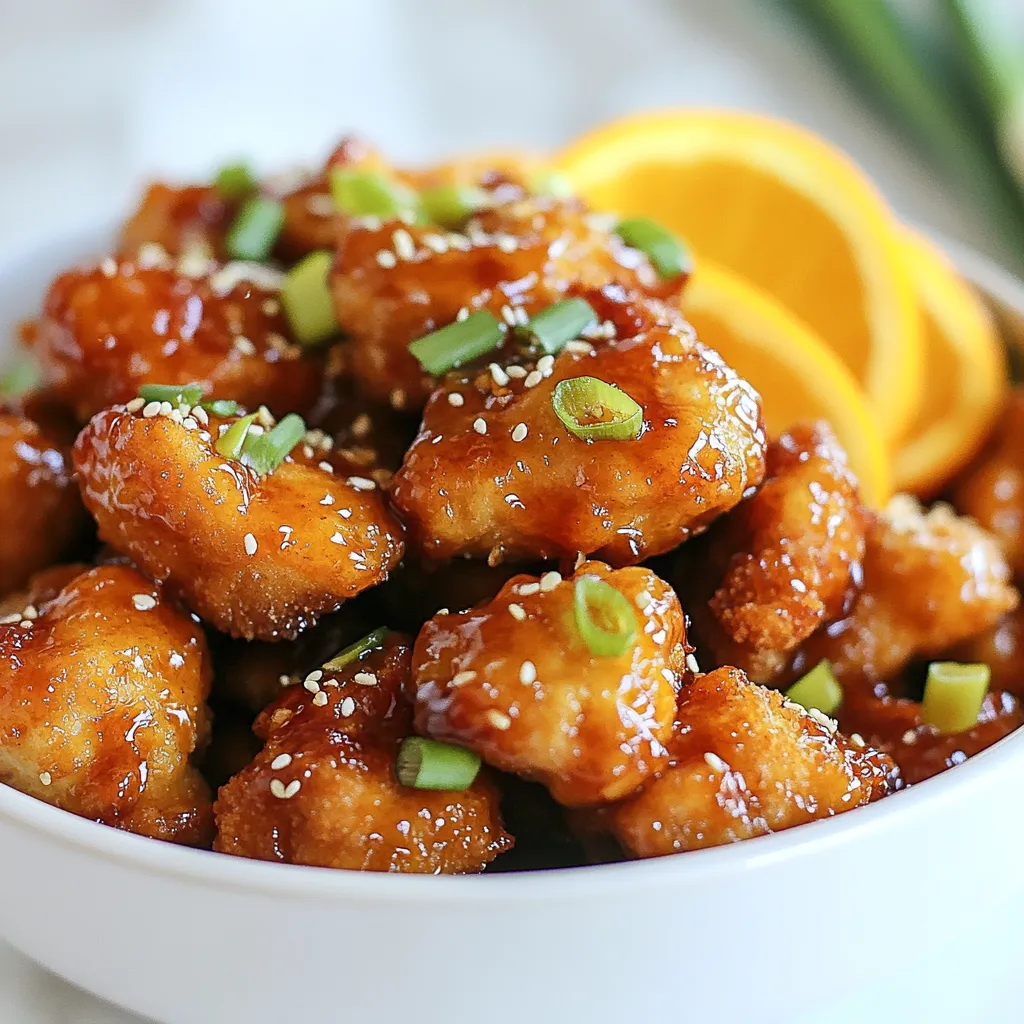

Are you ready to whip up a delicious meal with minimal effort? My Crispy Air Fryer Orange Chicken is just the dish you need! This easy recipe packs a punch of flavor and uses simple ingredients. Plus, thanks to the air fryer, you get that satisfying crunch without all the oil. Perfect for busy weeknights or impressing guests, this meal is sure to be a hit. Let’s dive into the details!
Why I Love This Recipe
- Delicious Flavor: This Orange Chicken is sweet, zesty, and packed with flavor, making it a delightful twist on a classic dish.
- Crispy Texture: The air fryer gives the chicken a perfectly crispy exterior while keeping the inside juicy and tender.
- Quick and Easy: With a total time of just 30 minutes, this recipe is perfect for a busy weeknight dinner.
- Healthy Alternative: Using the air fryer reduces the need for excess oil, making this dish a healthier choice without sacrificing taste.
Ingredients
Main Ingredients
- 1 lb boneless, skinless chicken thighs
- 1 cup all-purpose flour
- 1 large egg
- 1 cup panko breadcrumbs
Flavoring Ingredients
- 1 teaspoon garlic powder
- 1/2 teaspoon ginger powder
- 1/2 teaspoon salt
- 1/4 teaspoon black pepper
Orange Sauce Ingredients
- 1 cup orange juice
- 1/4 cup honey
- 1 tablespoon soy sauce
- 1 tablespoon rice vinegar
- 1 teaspoon cornstarch dissolved in water
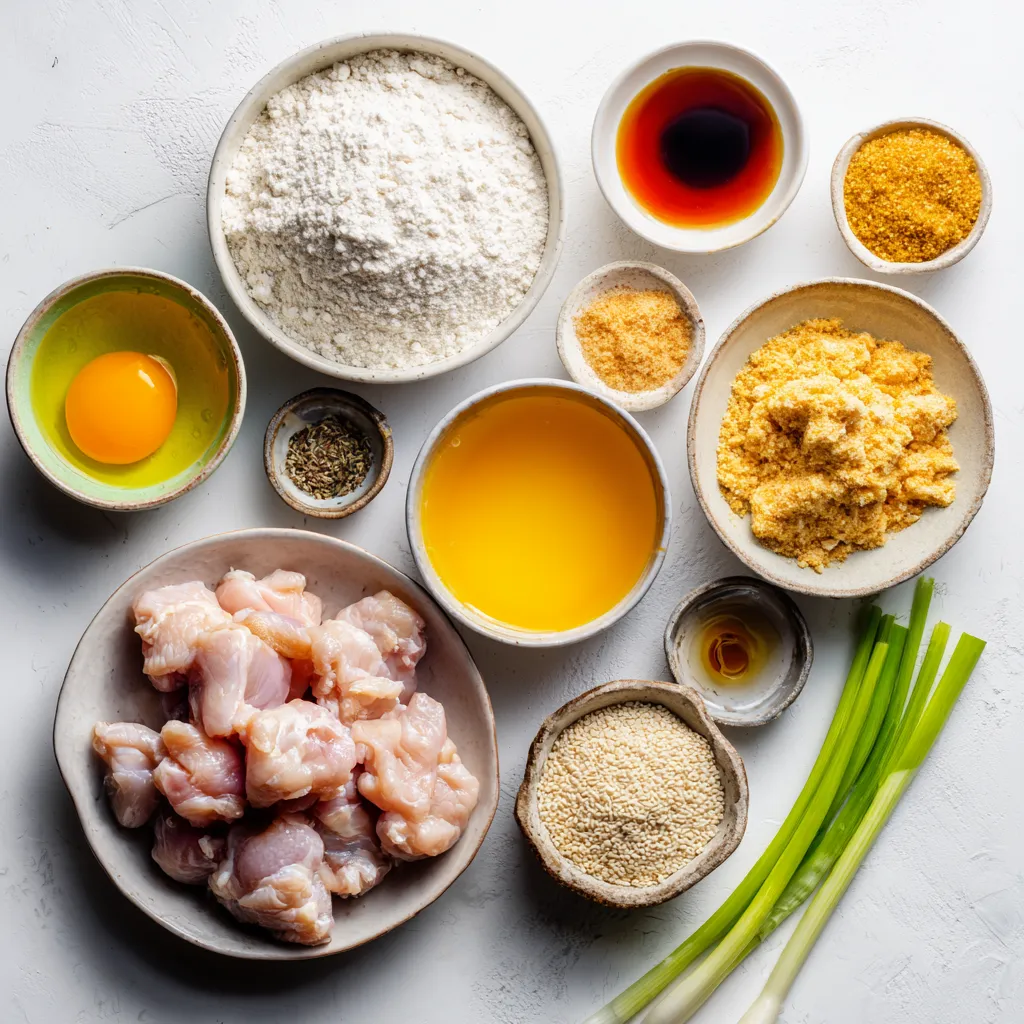
The heart of this crispy air fryer orange chicken lies in its simple yet flavorful ingredients. For the chicken, I prefer boneless, skinless thighs. They stay juicy and tender. You’ll need one pound, cut into small bite-sized pieces for even cooking.
Next, let’s talk about the breading. I use one cup of all-purpose flour to help create that crispy coating. The egg acts like glue, so beat one large egg and set it aside. Lastly, panko breadcrumbs give a unique crunch. Grab a cup of these little golden flakes for the best texture.
Now, for the flavor! I add garlic powder for depth and a touch of ginger powder for warmth. Use one teaspoon of garlic powder, half a teaspoon of ginger powder, half a teaspoon of salt, and a quarter teaspoon of black pepper. This mix will season the chicken just right.
The orange sauce is where the magic happens. You want one cup of orange juice, preferably fresh. Combine it with a quarter cup of honey for sweetness. It’s balanced with one tablespoon of low-sodium soy sauce and one tablespoon of rice vinegar for a touch of tang. Finally, mix a teaspoon of cornstarch with water to thicken your sauce.
These ingredients create an amazing dish that’s both crispy and bursting with flavor. Once you gather these items, you’re on your way to a delightful meal!
Step-by-Step Instructions
Prepping the Chicken
- Preheat your air fryer to 400°F (200°C). This step helps cook the chicken evenly.
- In a shallow dish, mix the flour, garlic powder, ginger powder, salt, and black pepper. This seasoning will give the chicken great flavor.
Breading Process
- Take each piece of chicken and dip it into the flour mix. Make sure to shake off any extra flour.
- Next, dip it into the beaten egg. This helps the breadcrumbs stick well.
- Finally, coat the chicken in panko breadcrumbs for that extra crunch.
- Arrange the breaded chicken pieces in a single layer in the air fryer basket. Lightly spray the chicken with cooking spray for a golden finish.
Cooking Instructions
- Air fry the chicken for 10 to 12 minutes. Shake the basket halfway through to ensure even cooking. You want the chicken to be golden brown and crispy.
- While the chicken cooks, prepare the orange sauce. In a saucepan over medium heat, combine the orange juice, honey, soy sauce, rice vinegar, and the cornstarch dissolved in water. Stir until the sauce thickens slightly, which takes about 3 to 5 minutes.
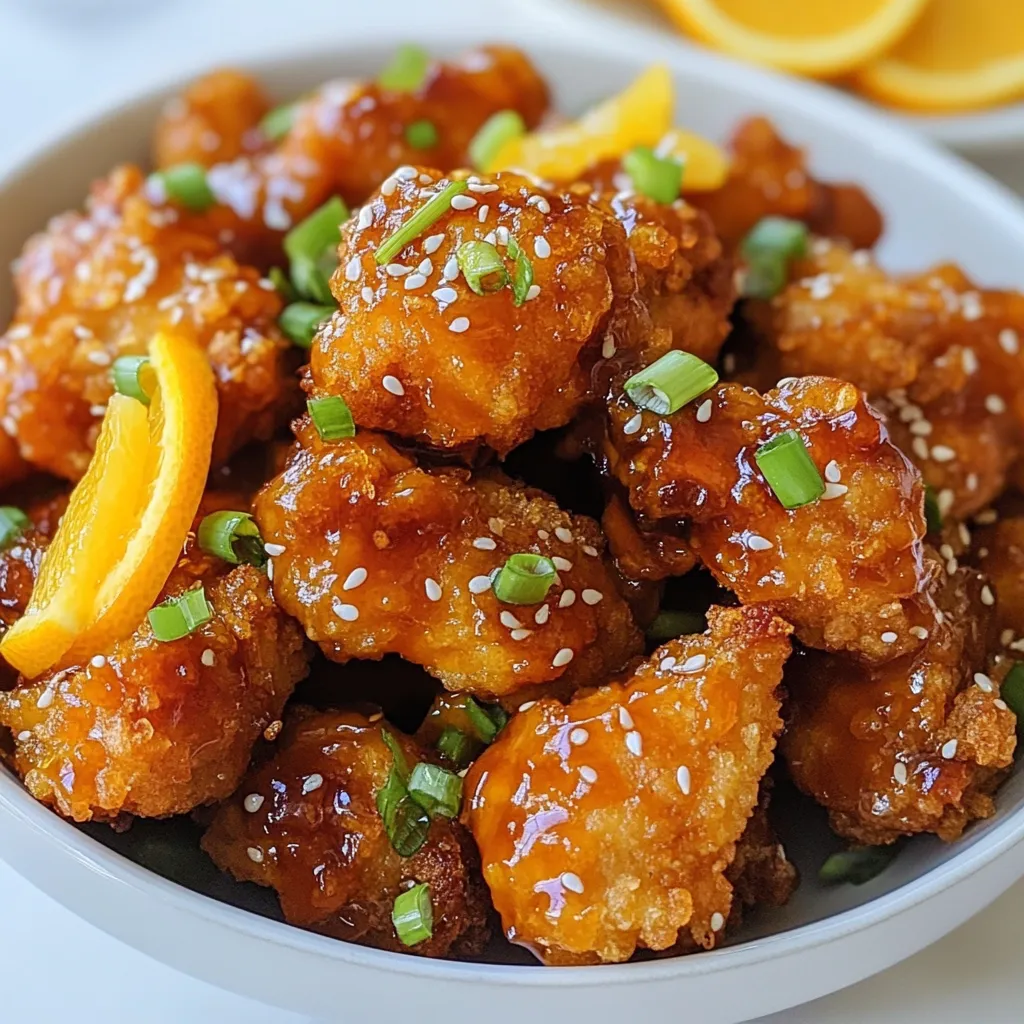
- Once the chicken is done, transfer it to a large bowl and pour the orange sauce over it. Toss gently to coat all the chicken pieces well.
Tips & Tricks
Achieving Crispy Texture
To make your air fryer orange chicken crispy, use panko breadcrumbs. They are light and crunchy, which gives your chicken that perfect bite. Regular breadcrumbs won’t deliver the same crispiness.
Use cooking spray when you air fry. A light spray helps the panko brown nicely. This step is key for getting that golden color and crunch.
Adjusting the Flavor
Want some heat? Add a pinch of red pepper flakes to the orange sauce. You can also use sriracha to give it a spicy kick.
If you want to switch up the taste, try different citrus juices. Lemon or lime work well. They add a fresh twist to the dish while keeping it zesty.
Pro Tips
- Use Fresh Ingredients: Freshly squeezed orange juice enhances the flavor of the sauce significantly compared to bottled juice.
- Don’t Overcrowd the Basket: Ensure the chicken pieces are in a single layer in the air fryer to achieve maximum crispiness.
- Adjust the Spice Level: For a kick of heat, add a pinch of red pepper flakes to the flour mixture or the sauce.
- Let It Rest: Allow the chicken to rest for a few minutes after air frying before tossing it in the sauce to maintain its crispiness.
Variations
Alternative Proteins
You can switch chicken for tofu or shrimp. Both options add unique flavors. For tofu, use firm or extra-firm. Cut it into cubes, and follow the same breading steps. Cook it for about 10-12 minutes in the air fryer. Tofu will get crispy and delicious. If using shrimp, peel and devein them first. Shrimp will cook faster, so air fry for about 6-8 minutes. Make sure they turn pink and curl up.
Sauce Modifications
Want some heat? Add sriracha to your orange sauce. Start with a teaspoon and taste. Add more if you like it spicy. You can also switch up the sauce. Swap the orange juice for teriyaki sauce for a sweet twist. Or, make a sweet and sour version by mixing in some vinegar and sugar. These changes keep your meal exciting and delicious.
Storage Info
Refrigeration
After making crispy air fryer orange chicken, let it cool first. Store leftovers in an airtight container. This helps keep the chicken fresh. You can keep it in the fridge for up to three days. When reheating, use an air fryer or oven. This keeps the chicken crispy. Heat at 350°F for about 5-7 minutes. You want it warm but not dried out.
Freezing Options
You can freeze both uncooked and cooked chicken. For uncooked chicken, bread it first, then freeze. Place it in a single layer on a baking sheet. Once frozen, transfer the pieces to a bag. This way, they won’t stick together. Cooked chicken can also be frozen. Store it in an airtight container. The shelf life for both is about three months. When ready to eat, defrost it in the fridge overnight. Reheat in the air fryer for best results.
FAQs
How Long to Cook Crispy Air Fryer Orange Chicken?
Cook time for crispy air fryer orange chicken is about 10-12 minutes. Your air fryer may vary a bit, so check for doneness. I recommend shaking the basket halfway through. This helps the chicken cook evenly. Always make sure the chicken is golden brown and crispy. If your air fryer runs hot, check it at 10 minutes. If it’s slower, it may take a bit longer.
Can I Use Chicken Breasts Instead of Thighs?
Yes, you can use chicken breasts. They will taste lighter but may be less juicy. Chicken thighs have a richer flavor and stay moist during cooking. Breasts cook faster, so watch them closely. If you choose breasts, cut them into smaller pieces to ensure they cook well. Use the same breading method for a great texture.
Is This Recipe Kid-Friendly?
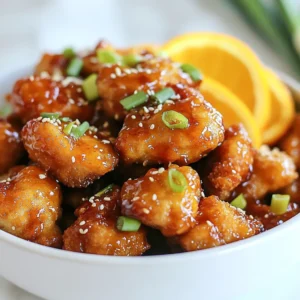
Absolutely! Kids usually love sweet flavors. The orange sauce adds a nice touch. To make it even better, serve with rice or noodles. You can also skip the black pepper for less heat. Add fun garnishes like sesame seeds or green onions. Kids love to see colorful food on their plates.
This blog post covered key steps to make crispy air fryer orange chicken. We listed the main and flavoring ingredients, shared simple instructions, and offered tips for the best texture. You can try different proteins or sauces for a fun twist. Remember to store leftovers properly to enjoy later. With these easy steps, you can impress your family or friends. Making this dish is not just about taste; it’s about making good memories in the kitchen. Enjoy your cooking adventur
Crispy Air Fryer Orange Chicken
Ingredients
- 1 lb boneless, skinless chicken thighs, cut into bite-sized pieces
- 1 cup all-purpose flour
- 1 large egg, beaten
- 1 cup panko breadcrumbs
- 1 teaspoon garlic powder
- 0.5 teaspoon ginger powder
- 0.5 teaspoon salt
- 0.25 teaspoon black pepper
- 1 cup orange juice (freshly squeezed, if possible)
- 0.25 cup honey
- 1 tablespoon soy sauce (low sodium)
- 1 tablespoon rice vinegar
- 1 teaspoon cornstarch dissolved in 1 tablespoon water
- 2 green onions sliced (for garnish)
- 1 tablespoon sesame seeds (for garnish)
Instructions
- Preheat your air fryer to 400°F (200°C).
- In a shallow dish, mix the flour, garlic powder, ginger powder, salt, and black pepper.
- Dip each piece of chicken into the flour mixture, shaking off any excess, then dip into the beaten egg, and finally coat in panko breadcrumbs.
- Arrange the breaded chicken pieces in a single layer in the air fryer basket. Spray lightly with cooking spray.
- Air fry for 10-12 minutes or until golden brown and crispy, shaking the basket halfway through cooking.
- While the chicken cooks, prepare the orange sauce: In a saucepan over medium heat, combine the orange juice, honey, soy sauce, rice vinegar, and dissolved cornstarch. Stir until the sauce thickens slightly (about 3-5 minutes).
- Once the chicken is done, transfer it to a large mixing bowl and pour the orange sauce over the crispy pieces. Toss gently to ensure all pieces are well-coated.
- Serve the chicken hot, garnished with sliced green onions and a sprinkle of sesame seeds.
. In this post, we explored how to make spicy garlic shrimp tacos. We covered key ingredients like shrimp, garlic, and spices. I shared step-by-step instructions for marinating, cooking, and assembling the tacos. We also discussed tips for perfect shrimp and different tortilla options. You can customize these tacos to your taste or use other proteins too. Don’t forget to check out the full recipe for quick reference. Enjoy creating and sharing this tasty meal with friends and family!](https://dailydishlab.com/wp-content/uploads/2025/06/f3f63153-6df6-4664-b699-490f731c66b6-768x768.webp)
![- 200g rice noodles - 1 tablespoon coconut oil - 1 onion, thinly sliced - 2 garlic cloves, minced - 1 tablespoon ginger, minced - 1 red bell pepper, sliced - 1 cup broccoli florets - 1 carrot, julienned - 1 can (400ml) coconut milk - 3 tablespoons red curry paste - 2 tablespoons soy sauce - 1 tablespoon lime juice - Fresh basil leaves for garnish - Salt and pepper to taste For this recipe, you can switch up the vegetables. Try adding snap peas or zucchini for a new twist. For the best flavor, I recommend brands like Thai Kitchen for red curry paste and Chaokoh for coconut milk. These brands offer great taste and consistency. If you want to make this meal even easier, use pre-chopped vegetables. They save time and still taste fresh. Explore your local market for seasonal veggies too! They add color and flavor to your dish. For the full recipe, check the instructions above to create your own Thai Red Curry Noodles. Enjoy the process and the flavors! Start by boiling water in a large pot. Add the rice noodles and cook them based on the package instructions. Usually, it takes about 4-6 minutes. Stir gently to keep them from sticking. To avoid sticky noodles, drain them right away. Rinse them under cold water to stop the cooking process. Toss them with a little coconut oil to keep them separate. This step makes a big difference! Slice your vegetables neatly for even cooking. Use a sharp knife for best results. For the onion, cut it thinly. Mince the garlic and ginger finely. Slice the red bell pepper and julienne the carrot. Cut the broccoli into small florets. Now, let’s talk about cooking times. Sauté the onion for about 2-3 minutes until it’s soft. Then add the garlic and ginger for one more minute. After that, toss in the bell pepper, broccoli, and carrot. Cook for about 5 minutes until they are tender but still crisp. In a large skillet or wok, pour in the coconut milk. Add the red curry paste and stir well. Mix until the paste is fully dissolved in the milk. This creates a rich, creamy sauce. Next, add the cooked rice noodles. Gently fold them into the sauce. Make sure every noodle gets coated. This is key for great flavor. Let everything simmer for 2-3 minutes to heat through. Serve hot, garnished with fresh basil leaves. This adds a lovely touch to your dish and makes it even more flavorful. Enjoy every bite! For the full recipe, see above. To get the best taste, always use fresh ingredients. Fresh vegetables and herbs boost flavors. Pre-packaged items often lack depth and freshness. When it comes to balancing flavors, think about these three key elements: - Spicy: Use more red curry paste for heat. - Sweet: A teaspoon of sugar can soften strong flavors. - Salty: Soy sauce adds a nice umami kick. Adjust these as needed for your taste. For cooking, I recommend using a wok. A wok heats evenly and helps stir-fry better. If you don't have one, a large skillet works well too. When adding protein, think about these options: - Chicken: Thinly slice for quick cooking. - Tofu: Use firm tofu, cut into cubes, and sauté until golden. - Shrimp: Add shrimp last to avoid overcooking. Cook protein separately, then mix it in at the end. Pair your Thai Red Curry Noodles with side dishes like: - Steamed jasmine rice - A fresh cucumber salad - Spring rolls for a crunchy touch For a nice presentation, serve in deep bowls. Garnish with fresh basil leaves and lime wedges. This adds color and freshness, making your meal look restaurant-quality. {{image_2}} You can easily make Thai Red Curry Noodles vegan or vegetarian. Start by swapping the coconut milk for a plant-based version. Use vegetable broth if you want a lighter taste. For protein, try tofu or tempeh. Both options soak up flavors well. Thai Red Curry Noodles change across Thailand. In the north, cooks add more herbs like cilantro and mint. In the south, seafood is common. You might see shrimp or fish added to the dish. Each region has unique flavors that make the dish special. Feel free to add local veggies, like eggplant or bamboo shoots, to your version. Get creative with your Thai Red Curry Noodles! Add fresh herbs, like basil or cilantro, for a burst of flavor. You can also try different spices. A pinch of cumin or coriander can enhance the taste. If you like heat, add chili flakes or fresh peppers. Change up the recipe by adding new veggies or proteins each time you make it. The options are endless! For the complete recipe, check the [Full Recipe]. After you enjoy your Thai Red Curry Noodles, let any leftovers cool first. Place them in an airtight container. This keeps the flavors fresh. You can store them in the fridge for up to three days. If you want to keep them longer, freeze them in a freezer-safe container. They can last for up to three months in the freezer. When you reheat, avoid using high heat. This helps keep the noodles from getting mushy. The best way is to use a skillet over medium heat. Add a splash of water to help steam the noodles. You can also pop them in the microwave. Just cover the bowl to keep moisture in. To refresh the dish, add fresh basil or a squeeze of lime juice right before serving. To make meals quicker, you can prep some ingredients ahead of time. Slice your veggies like bell peppers and carrots a day before. Cook the rice noodles in advance and store them separately. When you are ready to eat, simply combine the prepped ingredients with the sauce. This way, you can whip up your Thai Red Curry Noodles in no time on busy weekdays! What can I substitute for red curry paste? You can use yellow curry paste or green curry paste. These options have different flavors but still work well. You can also make a homemade version. Just blend some dried red chilies, garlic, and spices. It may taste a bit different but still delicious. Can I make Thai Red Curry Noodles gluten-free? Yes, you can easily make this dish gluten-free. Simply use gluten-free soy sauce or tamari instead of regular soy sauce. Make sure that the rice noodles are also gluten-free. Most rice noodles are naturally gluten-free. How to make this recipe nut-free To make this recipe nut-free, ensure you don't use any nut-based oils or sauces. Coconut oil is safe. Just check your red curry paste to ensure it doesn’t contain nuts. Caloric content and nutritional breakdown This dish is rich in flavor and nutrition. A serving has about 400 calories. It includes healthy fats from coconut milk and fiber from vegetables. The rice noodles provide energy from carbohydrates. What is the origin of Thai Red Curry Noodles? Thai Red Curry Noodles come from Thailand, where curry is a staple. This dish combines the bold flavors of red curry paste with rice noodles. It’s a favorite among locals and visitors. How does this dish differ from other Thai noodle dishes? Thai Red Curry Noodles are creamier and richer than others like Pad Thai. They use coconut milk and red curry paste, giving them a unique taste. Other dishes may focus more on soy sauce or tamarind for flavor. Thai Red Curry Noodles are a delicious and flexible dish. You can choose different veggies and proteins to fit your taste. I shared tips for cooking and serving, so your meal looks and tastes great. Remember to store leftovers well and reheat them with care. These simple steps will help you enjoy this dish again. Keep exploring flavors and making it your own. Happy cooking!](https://dailydishlab.com/wp-content/uploads/2025/07/3b703aa1-219d-4915-aa03-8b54d55df68d-768x768.webp)