Skip to content
About
Contact
Cookie Policy
Copyright Policy
Disclaimer
Search
Home
Dinner
Appetizer
Desserts
Drinks
About
Contact
Privacy Policy
Toggle Menu
Home
/
Appetizer
- Page 19
Appetizer
Zucchini Quiche Muffins Irresistible Savory Snack
Cheesy Zucchini Muffins Flavorful and Easy Bake Recipe
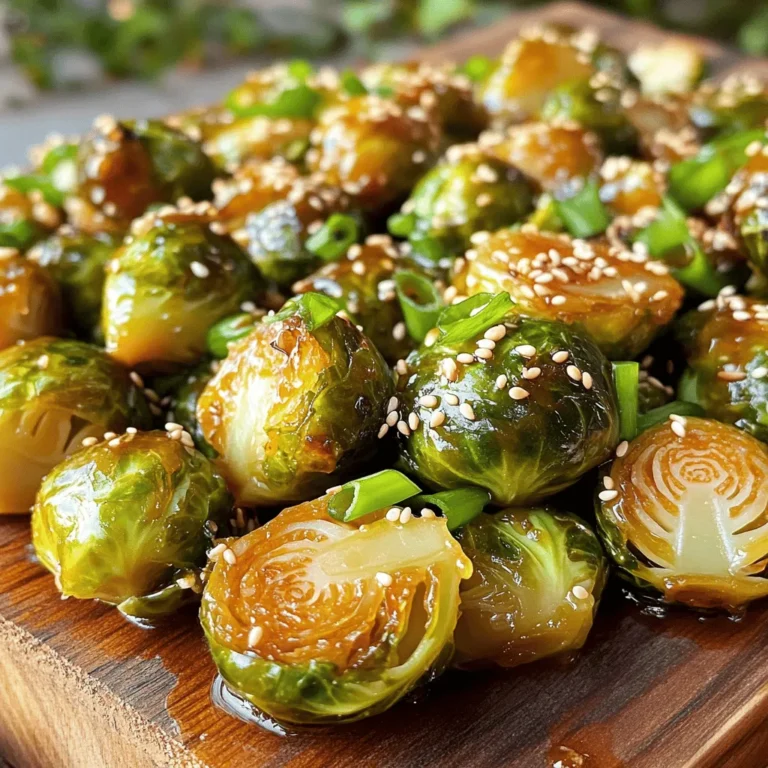
Honey Garlic Brussels Sprouts Tasty and Simple Dish
Baked Parmesan Zucchini Rounds Simple and Tasty Treat
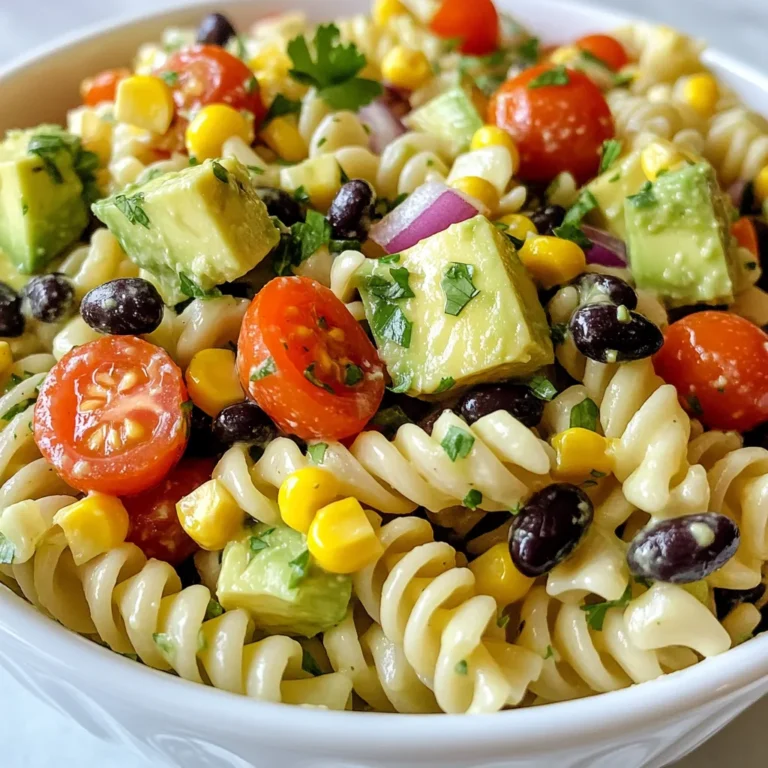
Avocado Ranch Pasta Salad Fresh and Flavorful Dish
Healthy Chicken Lettuce Wraps Quick and Flavorful Meal
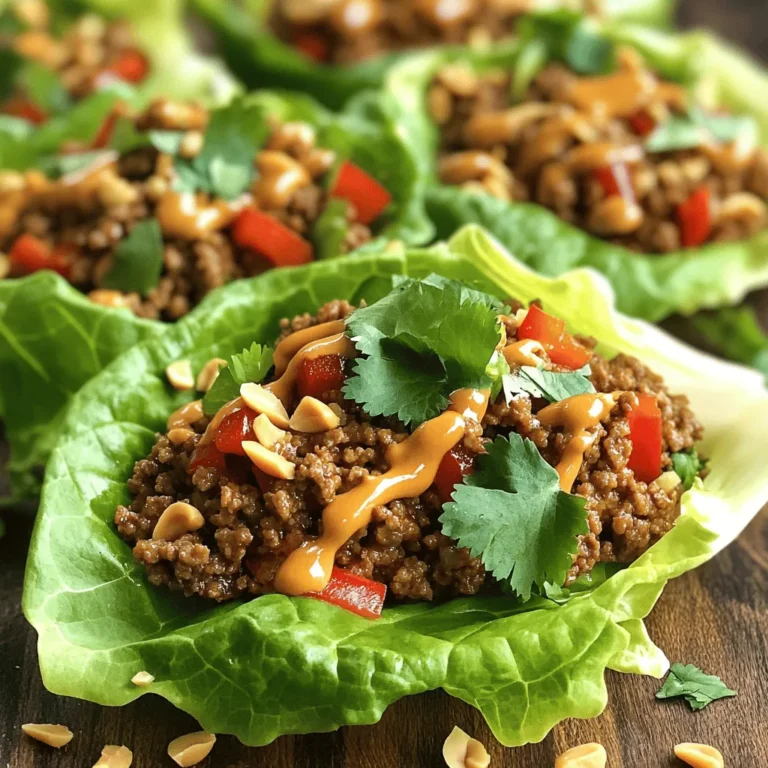
Spicy Beef Lettuce Wraps Flavorful and Satisfying Dish
Loaded Veggie Sheet Pan Nachos Flavorful and Fun Dish
Chipotle Lime Shrimp Skewers Flavorful Grilled Treat
Easy Chicken and Spinach Quesadillas Quick and Tasty
Page navigation
Previous Page
Previous
1
…
17
18
19
20
21
…
26
Next Page
Next
Home
Dinner
Appetizer
Desserts
Drinks
About
Contact
Privacy Policy
Toggle Menu Close
Search for:
Search

![For my Zucchini Quiche Muffins, I use these key ingredients: - 2 medium zucchinis, grated - 4 large eggs - 1 cup milk (dairy or plant-based) - 1 cup all-purpose flour (or whole wheat) - 1 cup shredded cheese (cheddar or feta) - 1/2 teaspoon baking powder - 1/2 teaspoon salt - 1/4 teaspoon black pepper - 1/2 teaspoon garlic powder - 1/4 cup green onions, finely chopped - 1/4 cup bell pepper, finely diced (any color) - Olive oil for greasing muffin tin You can swap out some ingredients for variety. Here are my favorites: - Instead of all-purpose flour, try almond flour for a nutty taste. - Use turkey bacon or cooked sausage for added protein. - If you want a dairy-free option, use nutritional yeast instead of cheese. - For extra greens, add chopped spinach or kale. - You can replace green onions with chives for a milder flavor. These muffins are not just tasty; they are also good for you. Here are some details: - Each muffin has about 120 calories. - They provide a good source of protein from eggs and cheese. - Zucchini adds fiber and vitamins A and C. - These muffins are low in carbs if you choose whole wheat flour. - They make a great snack or meal option for all ages. For the full recipe, check out the detailed instructions and tips! 1. Preheat your oven to 375°F (190°C). Grease a muffin tin with olive oil or use muffin liners. 2. In a large bowl, whisk together four large eggs and one cup of milk. Mix until they are well blended. 3. Grate two medium zucchinis and add them to the egg mixture. If needed, use a sieve to drain excess liquid. This step keeps your muffins from being soggy. 4. Add one cup of all-purpose flour, half a teaspoon of baking powder, and half a teaspoon of salt. Also, include a quarter teaspoon of black pepper and half a teaspoon of garlic powder. Stir gently until just mixed. Don’t overmix; the batter should be a bit lumpy. 5. Fold in one cup of shredded cheese, a quarter cup of chopped green onions, and a quarter cup of diced bell pepper. Mix until everything is evenly distributed. 6. Use a spoon to fill each muffin cup about three-quarters full with the batter. 7. Place the muffin tin in the preheated oven. Bake for 20 to 25 minutes. You want them golden brown on top. 8. About halfway through baking, check on them. This way, you can ensure they rise evenly. 9. To check if the muffins are done, insert a toothpick into the center. If it comes out clean, they are ready. If not, give them a few more minutes. 10. Once baked, let the muffins cool for a few minutes in the tin. Then, transfer them to a wire rack to cool completely. For the full recipe and further details, check the [Full Recipe]. Enjoy these tasty muffins as a snack or a side! To get the best texture in your zucchini quiche muffins, use fresh zucchinis. Grate them finely, and squeeze out any extra water. This keeps the muffins from being soggy. Mix the batter gently. A few lumps are okay; overmixing can make them tough. Use a blend of cheese for more flavor. Cheddar and feta work great together. Store any leftovers in an airtight container. They stay fresh in the fridge for up to three days. For longer storage, freeze them. Place muffins in a freezer bag, and they will last up to three months. Thaw in the fridge overnight before enjoying again. Serve these muffins warm or at room temperature. They pair well with a fresh salad or soup. Top with herbs like parsley for a burst of flavor. You can also sprinkle extra cheese on top before serving. For a fun twist, serve with a dollop of sour cream or yogurt. Enjoy them as a snack, breakfast, or side dish! For the full recipe, check out the detailed instructions above. {{image_2}} You can easily make these muffins vegetarian. Just skip the cheese, or use a plant-based one. Add more veggies like spinach, mushrooms, or kale for a tasty twist. You can even mix in some sun-dried tomatoes for extra color and flavor. This way, you keep the muffins light and fresh! To make these muffins gluten-free, swap the all-purpose flour for a gluten-free blend. Many blends work well in baking. Just make sure to check the labels to avoid any hidden gluten. You can also use almond flour or oat flour for a nutty taste. Both will give you a nice texture. Herbs and spices can make these muffins pop. Try adding thyme, rosemary, or dill for a fragrant touch. You can also mix in a pinch of chili flakes if you like heat. Another idea is to add a sprinkle of smoked paprika for a unique flavor. Don't be afraid to get creative! To keep your zucchini quiche muffins fresh, place them in an airtight container. This helps to keep moisture out. You can store them at room temperature for up to two days. If you want them to last longer, consider the fridge. In the fridge, they can stay fresh for up to a week. Freezing is a great option if you want to save muffins for later. To freeze, first let them cool completely. Then, wrap each muffin tightly in plastic wrap. After that, place them in a freezer bag. Label the bag with the date. You can freeze them for up to three months. When you’re ready to eat, just take out what you need. Reheating zucchini quiche muffins is easy. For the best results, use an oven. Preheat your oven to 350°F (175°C). Place the muffins on a baking sheet. Heat them for about 10-15 minutes. You can also use a microwave. Just heat them for 20-30 seconds. This warms them but may not keep them crisp. Enjoy your muffins warm! For the full recipe, check out the earlier section. Yes, you can use other vegetables! Carrots, spinach, or mushrooms work well. Just remember to chop them small. If you want a burst of flavor, add some sun-dried tomatoes. The key is to keep the total vegetable amount similar to the zucchini. This keeps the muffins tasty and moist. Feel free to mix and match according to what you have at home. It makes cooking fun and creative! Zucchini quiche muffins last about four days in the fridge. To store them, place them in an airtight container. This keeps them fresh and tasty. If you notice any change in smell or texture, it’s best to toss them. You can enjoy them cold or warm them up in the microwave. They make a quick snack or breakfast option! Absolutely! Mini zucchini quiche muffins are a great idea. Use a mini muffin tin instead of a regular one. Just reduce the baking time to about 12-15 minutes. Keep an eye on them, as they cook faster. These bite-sized treats are perfect for parties or snacks. Plus, they are easy to grab and eat on the go. Try making them for your next gathering! For the full recipe, check out the complete instructions above. In this post, we covered how to make delicious zucchini quiche muffins. We explored key ingredients and their substitutions. I shared easy preparation steps and baking tips to ensure perfect results. You learned how to store and reheat your muffins and enjoyed ideas for tasty variations. Embrace these tips to make your own muffin masterpiece. Enjoy experimenting and savor every bite!](https://dailydishlab.com/wp-content/uploads/2025/06/fed823f9-c559-4a2e-ba47-9f1169717efa-768x768.webp)