Skip to content
About
Contact
Cookie Policy
Copyright Policy
Disclaimer
Search
Home
Dinner
Appetizer
Desserts
Drinks
About
Contact
Privacy Policy
Toggle Menu
Home
/
Desserts
- Page 19
Desserts
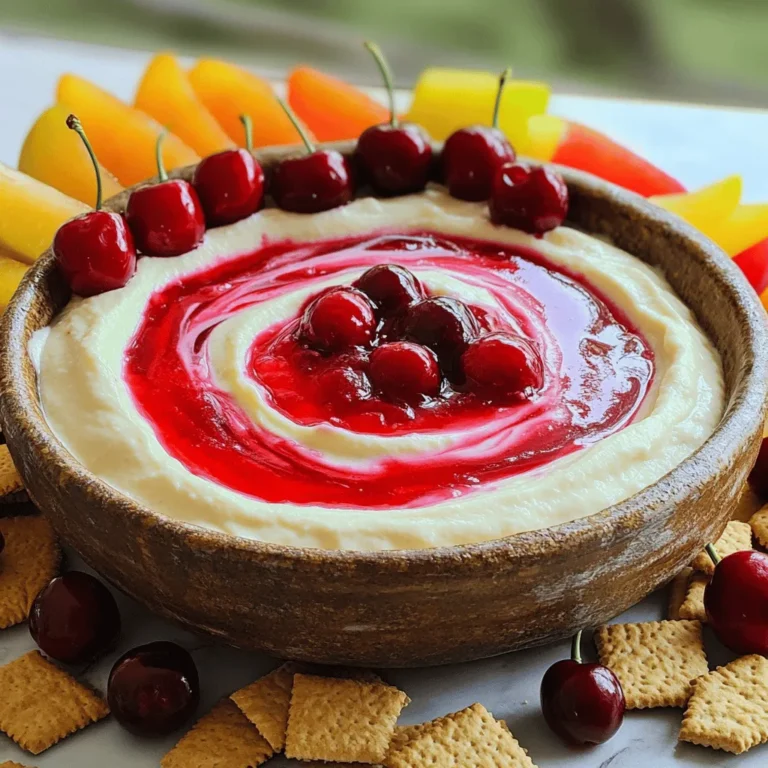
Cherry Cheesecake Dip Irresistible Party Pleaser
Cinnamon Sugar Donut Muffins Simple and Delicious Treat
Chewy Oatmeal Raisin Cookies Simple and Tasty Recipe
Cinnamon Swirl Pumpkin Pancakes Rich and Flavorful Treat
Chocolate Covered Strawberry Bark Easy and Delicious Treat
Chocolate Covered Strawberry Pops Tasty Delight Recipe
Mango Coconut Chia Pudding Refreshing and Simple Recipe
Peanut Butter Protein Balls Simple and Nutritious Snack
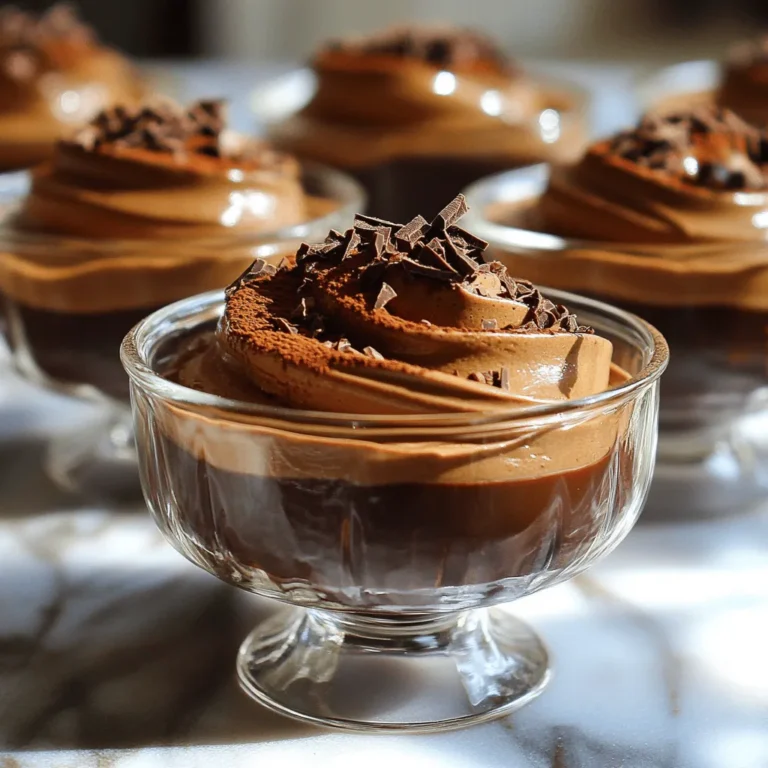
Chocolate Espresso Mousse Indulgent and Simple Recipe
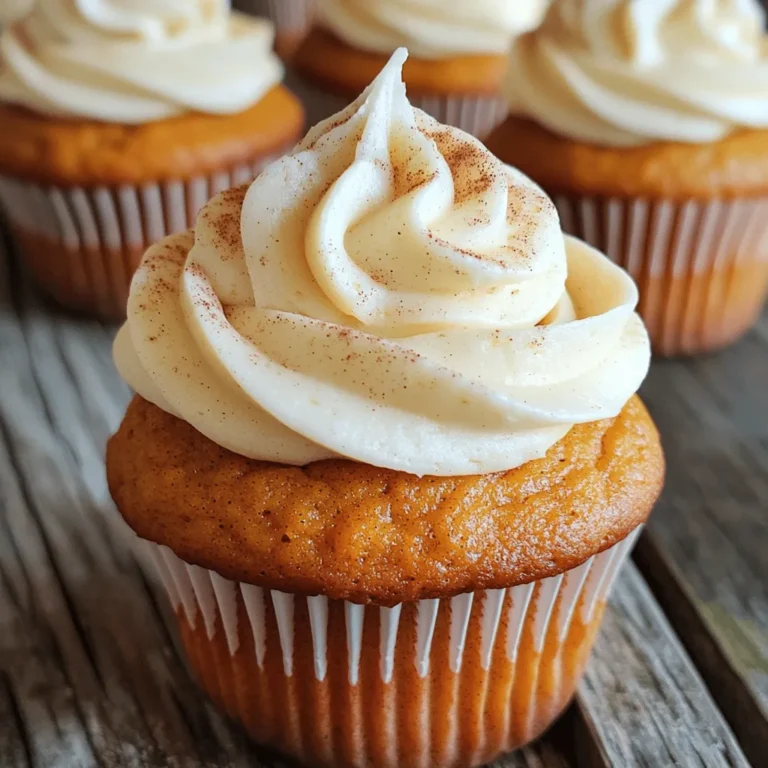
Pumpkin Spice Latte Cupcakes Delightful Autumn Treat
Page navigation
Previous Page
Previous
1
…
17
18
19
20
21
…
40
Next Page
Next
Home
Dinner
Appetizer
Desserts
Drinks
About
Contact
Privacy Policy
Toggle Menu Close
Search for:
Search


![To make chewy oatmeal raisin cookies, you need key ingredients. Here is what you should have: - 1 cup all-purpose flour - 1 teaspoon baking soda - 1 teaspoon cinnamon - 1/2 teaspoon salt - 1/2 cup unsalted butter, softened - 3/4 cup brown sugar, packed - 1/4 cup granulated sugar - 1 large egg - 1 teaspoon vanilla extract - 1 1/2 cups old-fashioned oats - 1 cup raisins These ingredients work together to create that soft and chewy texture. The oats give the cookies a hearty feel, while the raisins add natural sweetness. You can make your cookies even better with some optional add-ins. Here are a few ideas: - 1/2 cup chopped walnuts - 1/2 cup chocolate chips - 1/2 cup shredded coconut Feel free to mix and match these extras. Each add-in brings its own tasty twist. The walnuts add crunch, while chocolate chips can make them extra special. Choosing the right ingredients matters a lot. Here are some tips: - Butter: Use unsalted butter for better control over saltiness. - Oats: Choose old-fashioned oats for the best texture. - Raisins: Look for fresh, plump raisins; they should not be dry or hard. Fresh ingredients lead to better cookies. Always check expiration dates. For the full recipe, see the recipe section above. To start, gather all your ingredients. You will need flour, baking soda, cinnamon, salt, butter, brown sugar, granulated sugar, an egg, vanilla, oats, raisins, and optional walnuts. 1. Preheat your oven to 350°F (175°C). Line a baking sheet with parchment paper. 2. In a medium bowl, whisk the flour, baking soda, cinnamon, and salt. Set this aside. 3. In a large bowl, cream together the softened butter, brown sugar, and granulated sugar. Mix until it’s light and fluffy. 4. Beat in the egg and vanilla extract until everything is well combined. 5. Gradually mix the dry ingredients into the wet mixture. Stir until just combined. 6. Lastly, fold in the oats, raisins, and walnuts (if you’re using them). Now it’s time to bake! 1. Use a spoon to drop rounded tablespoons of dough onto your prepared baking sheet. Leave about 2 inches between each mound. 2. Bake in your preheated oven for 10-12 minutes. Look for golden edges, but keep the centers soft. Once baked, let the cookies cool. 1. Allow them to sit on the baking sheet for 5 minutes. This helps them set. 2. Carefully transfer the cookies to a wire rack to cool completely. 3. If you want to store them, keep them in an airtight container. They stay fresh for several days. For the full recipe, visit the recipe section above. Enjoy your chewy oatmeal raisin cookies! To get that perfect chewy texture in your cookies, use old-fashioned oats. They soak up moisture well, keeping your cookies soft. Also, do not overmix the dough. Just mix until the dry ingredients blend in. This keeps your cookies tender. Lastly, take them out of the oven while they still look a bit soft. They will firm up as they cool. One common mistake is using quick-cooking oats instead of old-fashioned oats. Quick oats can make your cookies dry. Another mistake is baking them too long. Watch the edges; they should be golden, but the center must stay soft. Lastly, make sure your butter is softened, not melted. Melted butter can change your cookie’s texture. For a lovely presentation, place the cookies on a nice platter. Dust them lightly with powdered sugar for a sweet touch. You can also serve them with a bowl of fresh fruit. Adding a side of flaxseeds or sunflower seeds gives a nice crunch. These ideas make your cookies not just tasty but also pretty! For the full recipe, check back to ensure you have all the steps. {{image_2}} You can make your cookies healthier. Use whole wheat flour instead of all-purpose flour. This adds fiber and nutrients. You can also swap in coconut oil for butter. This change gives a nice flavor and is a great fat source. For sweetness, try using honey or maple syrup instead of sugar. This can cut down on refined sugars and add a unique taste. Get creative with flavors! Add dark chocolate chips for a richer taste. You can also mix in dried cranberries or apricots for a fruity twist. Try spices like nutmeg or ginger to add warmth. Even a splash of orange juice can brighten the cookies. These fun changes keep the recipe exciting and fresh! If you need gluten-free cookies, use almond flour or a gluten-free flour blend. Make sure your oats are labeled gluten-free. For vegan cookies, skip the egg and use flaxseed meal. Mix one tablespoon of flaxseed with three tablespoons of water and let it sit for a few minutes. This makes a great egg substitute. These options let everyone enjoy chewy oatmeal raisin cookies! For the full recipe, check out the details above. To keep your chewy oatmeal raisin cookies fresh, store them in an airtight container. You can place a piece of bread in the container to help keep them soft. The bread will absorb extra moisture, ensuring your cookies remain chewy. You can freeze the cookies if you want to save some for later. First, let the cookies cool completely. Then, place them in a single layer on a baking sheet. Freeze them for about an hour. Once they are firm, transfer them to a freezer bag or container. This way, you can enjoy them anytime! Stored cookies stay fresh for about one week at room temperature. In the freezer, they can last up to three months. When you are ready to eat frozen cookies, let them thaw at room temperature for a few minutes. For a warm treat, heat them in the oven for a few minutes. Don’t forget to check the [Full Recipe] for more tips! Your oatmeal raisin cookies may not be chewy for a few reasons. First, check your oven temperature. If it is too hot, the cookies may bake too fast and dry out. Second, over-mixing the dough can lead to tough cookies. Mix only until the ingredients combine. Lastly, using too much flour can also make them dry. Always measure flour correctly. Yes, you can substitute some ingredients in the recipe. If you do not have brown sugar, use white sugar instead. This will change the flavor a bit, but the cookies will still be good. For a dairy-free option, use coconut oil or a dairy-free butter. You can also swap raisins for chocolate chips or nuts if you like. To find the best chewy oatmeal raisin cookies, check local bakeries or farmers' markets. Many bakeries make fresh cookies daily. You can also look at online stores that specialize in baked goods. They often ship cookies right to your door. If you want to try some now, check out the Full Recipe for a simple and tasty way to make them at home! To make chewy oatmeal raisin cookies, use key ingredients like oats and raisins. Remember to mix in optional flavors for a fun twist. Follow the step-by-step guide to prepare, bake, and store your cookies. For perfect texture, avoid common baking mistakes. Explore creative variations like gluten-free or vegan recipes. Proper storage extends their lifespan. With these tips, you’ll bake delicious cookies every time. Enjoy the baking process and share with others to spread the joy!](https://dailydishlab.com/wp-content/uploads/2025/07/06db6db4-aa4f-466c-8591-6bfd0fae1d2e-768x768.webp)
![To make these delicious pancakes, gather the following ingredients: - 1 cup all-purpose flour - 1 tablespoon baking powder - 1 teaspoon ground cinnamon - 1/2 teaspoon ground nutmeg - 1/4 teaspoon salt - 1 cup pumpkin puree (canned or fresh) - 1 cup milk (or non-dairy alternative) - 1 large egg - 2 tablespoons brown sugar - 1 teaspoon vanilla extract - 2 tablespoons melted butter (or coconut oil) - For the cinnamon swirl: - 2 tablespoons brown sugar - 1 teaspoon ground cinnamon - 1 tablespoon melted butter You can swap some ingredients for different options. Here are a few ideas: - For all-purpose flour, try whole wheat flour for a heartier pancake. - If you want a dairy-free option, use almond milk or oat milk instead of regular milk. - Replace the large egg with a flax egg (1 tablespoon ground flaxseed mixed with 2.5 tablespoons water). - Coconut oil can replace butter for a dairy-free pancake. Using fresh pumpkin can give your pancakes a vibrant taste. Fresh pumpkin has a rich texture and a sweet flavor. However, canned pumpkin works well too. It is convenient and saves time. Canned pumpkin is often cooked and pureed, making it ready to use. Both options can provide the delicious taste you want. So, choose based on your time and preference. To make Cinnamon Swirl Pumpkin Pancakes, start by gathering your ingredients. In a large bowl, whisk together the flour, baking powder, ground cinnamon, nutmeg, and salt. This helps the dry ingredients mix well. In another bowl, blend the pumpkin puree, milk, egg, brown sugar, vanilla extract, and melted butter until smooth. Pour this mixture into the dry ingredients and stir gently. Remember, a few lumps are okay; overmixing can make pancakes tough. Next, prepare the cinnamon swirl. In a small bowl, mix brown sugar, ground cinnamon, and melted butter until it forms a paste. Preheat your skillet over medium heat. Lightly grease it with cooking spray or butter. For each pancake, pour about 1/4 cup of batter onto the skillet. Use the back of a spoon to create a swirl with the cinnamon mix on top of the batter. Cook the pancakes until bubbles form on the surface, about 2-3 minutes. Then, carefully flip them and cook for another 1-2 minutes until golden brown. Repeat this process until you finish all the batter and swirl. These steps will give you fluffy and flavorful pancakes. To achieve the right pancake texture, keep these tips in mind: - Use fresh ingredients. Fresh baking powder gives better rise. - Avoid overmixing the batter. This keeps pancakes light and fluffy. - Let the batter rest for a few minutes. This helps the gluten relax. - Adjust your heat. If pancakes brown too quickly, reduce the heat. These small adjustments can make a big difference in your pancake outcome. The cinnamon swirl is what makes these pancakes special. Here’s how to incorporate it perfectly: - When you pour the batter, do it in a circular motion. This helps the swirl blend nicely. - Use a spoon to create a gentle spiral. Don’t press too hard; you want a light touch. - If you have leftover swirl, drizzle it on top when serving. This will enhance the flavor and visual appeal of your pancakes. If you want more tips or the full recipe, check out the details I provided earlier. Enjoy your cooking! To make your pancakes fluffy, use a light hand when mixing. Overmixing can lead to tough pancakes. Mix until just combined, leaving some lumps in the batter. Also, let the batter rest for a few minutes before cooking. This helps the baking powder to activate and creates a lighter texture. Use a non-stick skillet or griddle for even cooking, and keep the heat at medium. This way, you avoid burning the outside while the inside remains raw. If you want thicker pancakes, add a bit more flour. For thinner pancakes, add a little milk. You can also change the spices to match your taste. Love nutmeg? Add a bit more! Prefer a sweeter pancake? Increase the brown sugar slightly. Always taste your batter before cooking to get it just right. You can even mix in chocolate chips or nuts for extra flavor. Serve your pancakes warm with maple syrup or honey. A dollop of whipped cream adds a nice touch, too. For a fun twist, sprinkle some chopped pecans or walnuts on top. You can also add a sprinkle of cinnamon for added warmth. If you want to make it a full breakfast, serve alongside crispy bacon or fresh fruit. These pancakes also pair well with a cup of hot coffee or chai tea. For the full recipe, check out the complete instructions above. {{image_2}} You can make these pancakes gluten-free. Swap the all-purpose flour for a gluten-free blend. Look for one that works well in baking. You can also use almond flour or oat flour. Just keep in mind that the texture may change slightly. Adding a little xanthan gum helps to bind the batter. This keeps your pancakes light and fluffy. To make this recipe vegan, use a non-dairy milk like almond or oat milk. Replace the egg with a flax egg. Just mix one tablespoon of ground flaxseed with three tablespoons of water. Let it sit for five minutes to thicken. You can also use vegan butter or coconut oil in place of regular butter. These swaps keep the pancakes rich and tasty without any dairy or eggs. Spice it up! You can add different flavors to your pancakes. Try adding a dash of ginger or allspice for a warm kick. Chopped nuts, like walnuts or pecans, add a nice crunch. You can also fold in chocolate chips for a sweet treat. For a fruity twist, add blueberries or cranberries. Each variation gives a new taste to your pancakes. These ideas let you customize your breakfast to fit your mood. For the full recipe, check out the *Full Recipe* section. After you enjoy your cinnamon swirl pumpkin pancakes, store leftovers properly. Let the pancakes cool to room temperature. Then, stack them with parchment paper in between each. This helps prevent them from sticking. Place the stack in an airtight container or wrap them tightly in plastic wrap. Keep them in the fridge for up to three days. If you want to save pancakes for later, freezing is a great option. Place cooled pancakes in a single layer on a baking sheet. Freeze them for about an hour. Once frozen, transfer them to a freezer-safe bag. This prevents them from sticking together. They can last up to two months in the freezer. To reheat, you can use a microwave or a toaster oven. For the microwave, heat them for about 30 seconds. Check if they are warm enough. For the toaster oven, set it to a low temperature and heat until warmed through. Pancakes in the fridge should be eaten within three days. If they start to smell sour or look dry, it’s time to toss them. Frozen pancakes can last up to two months. Be sure to check for freezer burn or ice crystals before eating. If they seem off, it’s best to err on the side of caution. Enjoy your delicious cinnamon swirl pumpkin pancakes at their best! For the full recipe, check out the [Full Recipe]. Yes, you can make the batter ahead of time. Mix your dry and wet ingredients separately, then store them in the fridge. Just remember to combine them when you're ready to cook. This makes your mornings easier and faster! You can use several alternatives to milk. Almond milk, soy milk, or oat milk work well. If you want a creamier taste, try coconut milk. Each option adds a unique flavor to your pancakes. Look for bubbles on the surface of the pancakes. When bubbles form, it’s time to flip them. Cook until they turn golden brown on both sides. A good pancake should feel firm but springy to the touch. Enjoy your cooking! For the full recipe, check out the details above. In this blog post, we explored how to make delicious cinnamon swirl pumpkin pancakes. We covered the essential ingredients and suggested alternatives, like fresh versus canned pumpkin. You learned step-by-step instructions for perfect pancakes and tips for cooking and serving. We also shared variations, including gluten-free and vegan options. Finally, we went over storage tips to keep leftovers fresh. Enjoy making these pancakes! They’re easy, tasty, and perfect for any meal.](https://dailydishlab.com/wp-content/uploads/2025/07/40c25aa9-222c-4f53-9c69-0bb881f505c1-768x768.webp)
![- 2 cups dark chocolate chips - 1 cup white chocolate chips - 1 cup freeze-dried strawberries The main stars of this treat are dark and white chocolate chips. They blend well for a great taste. The freeze-dried strawberries add a fruity crunch and bright color. This combo makes each bite a delight. - 1/2 cup crushed walnuts - Sea salt for sprinkling You can add crushed walnuts for extra texture and flavor. A light sprinkle of sea salt gives a nice contrast to the sweet chocolate. Both are not must-haves but can enhance your bark. - Microwave-safe bowls - Baking sheet - Parchment paper You need a few tools to make this bark. Microwave-safe bowls help melt the chocolate easily. A baking sheet holds the bark while it sets, and parchment paper ensures it comes off cleanly. These simple items make your cooking process smooth. - Line with parchment paper - Ensure even coverage First, take a baking sheet and line it with parchment paper. This step is key. It helps the bark lift off easily once it's set. Make sure the paper covers the whole sheet. No gaps! - Microwave method for efficiency - Importance of stirring Next, grab a microwave-safe bowl. Add the dark chocolate chips into this bowl. Microwave the chocolate in 30-second bursts. After each burst, take it out and stir. Keep going until it's smooth and melted. Stirring helps avoid burning the chocolate. - Pouring dark chocolate onto baking sheet - Melting and drizzling white chocolate Now, pour the melted dark chocolate onto your lined baking sheet. Use a spatula to spread it into an even layer. This makes for a nice base. Then, take another microwave-safe bowl for the white chocolate chips. Melt them using the same 30-second method. Once melted, drizzle the white chocolate over the dark layer. Use a toothpick to swirl them together. This creates a pretty marbled look. Finally, sprinkle the freeze-dried strawberries and crushed walnuts over the top. Press them down gently so they stick. A light sprinkle of sea salt adds a great flavor contrast. Now, place the baking sheet in the fridge for about 30 minutes. When the chocolate hardens, remove it and break it into pieces. Enjoy your treat! For more details, check the [Full Recipe]. To make great chocolate bark, the type of chocolate matters. Use high-quality chocolate chips for the best taste. They melt smoothly and stay creamy. For perfect melting, heat chocolate in 30-second bursts. Stir well after each interval. This keeps the chocolate from burning. To create a fun marbled effect, drizzle the white chocolate over the dark chocolate. Use a toothpick or skewer to swirl them together. Be gentle to keep the design nice. If you want to get fancy, try using a fork or a spatula. Both work well for swirling. Evenly spread freeze-dried strawberries and walnuts over the chocolate. This helps to get a nice mix in every bite. After spreading, press down lightly on the toppings. This ensures they stick well to the chocolate. The more they stick, the better the bark will hold together. For more detailed steps, see the Full Recipe. {{image_2}} You can switch up the chocolate for your bark. If you prefer sweeter flavors, try milk chocolate instead of dark. Milk chocolate gives a creamy taste. White chocolate is another fun choice. It adds a nice contrast to the fruity flavors. You can also use flavored chocolate. Think about adding mint chocolate or orange chocolate for a twist. Toppings can change the game for your bark. Nuts like almonds or pecans add a nice crunch. You can also crush up candies for fun colors and flavors. Dried fruits like apricots or cranberries work well, too. For added freshness, use fresh fruits. Sliced bananas or raspberries can brighten up your bark. Just remember to use fresh fruit right before serving. Make your chocolate bark special for holidays or events. For Valentine's Day, use heart-shaped sprinkles. For Halloween, add orange and black candies. You can think outside the box with flavor combos. Try pairing dark chocolate with spicy chili flakes for a kick. Or use coconut and lime for a tropical feel. The options are endless! For the complete recipe, check out the [Full Recipe]. To keep your chocolate covered strawberry bark fresh, use an airtight container. This will stop air from getting in. It will keep the bark from drying out and losing its taste. I like using a glass or plastic container with a tight lid. You can also wrap the bark in plastic wrap before placing it in the container. This adds extra protection. Homemade chocolate bark can last about two weeks when stored correctly. If you notice any white spots or a dull look, it’s time to toss it. These signs mean the chocolate has gone bad. Always check for any off smells too. If it smells strange, don’t eat it. You can freeze chocolate bark if you want to keep it longer. First, break the bark into pieces. Then, place the pieces on a baking sheet lined with parchment paper. This stops them from sticking together. Freeze the pieces for about two hours. After that, move them to a freezer-safe bag. When you want to eat it, let it sit at room temperature for a bit. You can also microwave it for a few seconds to warm it up. Enjoy your treat! Yes, you can use chocolate bars. Just chop them into small pieces. This helps them melt evenly. Place the chopped chocolate in a microwave-safe bowl. Heat in 30-second bursts, stirring each time. Keep an eye on it to prevent burning. Once melted, you can spread it like you do with chips. Absolutely! You can use vegan chocolate. Look for dark chocolate that has no milk. Many brands make dairy-free chocolate chips. You can also try using cacao butter for a creamy texture. Add in your favorite toppings, like nuts or coconut, to keep it fun and tasty. Check for a firm texture. The chocolate should feel hard when you touch it. You can also look for a shiny surface. If it looks dull, it may need more time. Place it in the fridge for about 30 minutes. Once it's set, you can break it into pieces. Enjoy! This blog post guides you on making delicious chocolate bark. We covered key ingredients like dark and white chocolate, freeze-dried strawberries, and optional toppings. I shared easy instructions, tips for the best texture, and fun variations to try. Remember to store your bark properly for freshness. You can even freeze it! Enjoy your chocolate bark adventures. Try different flavors and have fun with the process. Your treats will impress everyone!](https://dailydishlab.com/wp-content/uploads/2025/07/181e2d08-5e1f-4f0a-bad9-4208d5aed422-768x768.webp)
![- Fresh strawberries - Semi-sweet chocolate chips - Coconut oil for smooth melting - Crushed nuts (almonds or hazelnuts) - Colorful sprinkles - Lollipop sticks - Microwave-safe bowl - Parchment paper To make delicious chocolate-covered strawberry pops, you need a few key items. Start with fresh strawberries. Choose ripe, firm ones for the best taste. Next, grab semi-sweet chocolate chips. They melt well and add a rich flavor. Also, use coconut oil. This helps the chocolate melt smoothly and stick to the strawberries. You can add fun toppings to make your pops even better. Try crushed nuts, like almonds or hazelnuts, for a crunchy bite. Colorful sprinkles also add a nice touch. They make the pops look festive and fun. For the tools, have lollipop sticks ready. They help you hold the strawberries while dipping. Use a microwave-safe bowl for melting the chocolate. Finally, get parchment paper. It keeps your pops from sticking as they cool. With these ingredients and tools, you're all set to create a tasty delight. For the full recipe, check the details above. First, wash the strawberries gently. Make sure they are dry. Any water will stop the chocolate from sticking. You can use a paper towel to help. Next, take the lollipop sticks. Push one stick into the stem end of each strawberry. Aim to push it about halfway in. This gives you a nice handle for dipping. Now, let’s melt the chocolate. In a microwave-safe bowl, mix the chocolate chips with coconut oil. The coconut oil helps the chocolate melt smoothly. Microwave this mix in 30-second bursts. Stir after each burst until it is fully melted. Be careful not to overheat it, or the chocolate can burn. Hold the strawberry by the stick. Dip it into the melted chocolate. Make sure to cover it fully. Let any extra chocolate drip off. After dipping, it’s time to add toppings. While the chocolate is still wet, sprinkle on crushed nuts or colorful sprinkles. This helps them stick well. Finally, place the dipped strawberries upright in a container or on parchment paper. Let them sit until the chocolate hardens. This usually takes about 15-20 minutes at room temperature. If you’re in a hurry, the fridge works too; just chill them for 10 minutes. To get a smooth coat on your pops, always add coconut oil. Coconut oil helps the chocolate melt evenly. This helps create a shiny finish that looks great. If you don't have coconut oil, you can use vegetable oil. Just keep in mind that it may not shine as much. When you melt the chocolate, do it slowly. Use short bursts in the microwave. Stir well after each burst to keep the texture just right. Making your chocolate-covered strawberry pops look fun is easy. Use colorful lollipop holders to make them pop at parties. Consider sticking them in a piece of foam or a pretty container. You can also arrange them in a fun shape, like a heart. Another idea is to drizzle white chocolate on top for a more stylish look. These small touches make your dessert stand out. Watch out for moisture! If your strawberries are wet, the chocolate will not stick. Always dry them well before dipping. Another mistake is overheating the chocolate. If it gets too hot, it can clump. This ruins the smooth finish you want. Always use a low heat and stir often to prevent this. {{image_2}} You can switch up the chocolate for your pops. Dark chocolate gives a rich taste. Milk chocolate is sweet and creamy. White chocolate adds a fun twist with its sweet flavor. You can also add flavor. Try a drop of peppermint extract for a cool touch. Vanilla extract brings a warm, sweet note to the mix. Get creative with toppings! Coconut flakes add a tropical flair. Mini chocolate chips bring extra sweetness and crunch. You can also use crushed nuts for a nutty bite. Rainbow sprinkles make the pops fun and colorful. Just make sure to add them right after dipping the strawberry. Make your pops party-ready! For holidays, decorate with colors that match the theme. Use red and green for Christmas or pastel colors for Easter. You can even customize them for birthdays. Just add sprinkles or edible glitter to match the party theme. These small touches make your pops stand out! For the complete recipe, check out the [Full Recipe]. Store chocolate-covered strawberry pops in a cool, dry place. The ideal temperature is between 60°F and 70°F. Keep them away from direct sunlight. This helps keep the chocolate smooth and shiny. To stack the pops, use a container with dividers. Place parchment paper between layers. This prevents them from sticking to each other. If you don't have dividers, lay them flat on a tray lined with parchment paper. For the best taste, eat the pops within two days. After that, the strawberries may lose their freshness. You can freeze chocolate-covered strawberry pops. Wrap them well in plastic wrap, then place them in a freezer bag. They can last up to a month in the freezer. To enjoy, thaw them in the fridge. Avoid thawing at room temperature. This keeps the chocolate from getting too soft. If you have leftover chocolate, pour it into molds. You can make chocolate bites or bars. This is a fun way to enjoy extra chocolate. For leftover strawberries, try making a smoothie. Blend them with yogurt or milk. You can also slice them for topping on pancakes or oatmeal. This way, nothing goes to waste, and you enjoy more treats. You can use frozen strawberries, but they change the texture. They may become mushy when thawed. This can affect how well the chocolate sticks to them. Fresh strawberries hold up better, ensuring a firm bite. If you choose frozen, let them thaw completely and dry them well before dipping. To make the chocolate smoother, you can add coconut oil during melting. This helps create a nice, glossy finish. Melt the chocolate in short bursts in the microwave, stirring well in between. Avoid overheating, as this can make the chocolate clumpy. Stirring helps keep the heat even, giving you a smooth result. Yes, there are vegan options! You can use dairy-free chocolate chips for a vegan treat. Look for brands that use plant-based ingredients. For toppings, consider nuts, seeds, or dairy-free sprinkles. This way, you can enjoy chocolate-covered strawberry pops while sticking to a vegan diet. We explored how to create delicious chocolate-covered strawberry pops, from essential ingredients to creative variations. Remember, fresh strawberries, coconut oil, and careful melting are key. Avoid common mistakes like moisture and overheating for the best results. With these tips, you can impress at any event. Enjoy experimenting with toppings and flavors, and get creative in your presentations. These treats are not just tasty; they can also be fun to make and share. Happy dipping!](https://dailydishlab.com/wp-content/uploads/2025/07/28782691-e2ef-4ba1-b328-d9019563a0b5-768x768.webp)
![- 1 cup coconut milk - 1/2 cup chia seeds - 1 ripe mango, diced - 2 tablespoons maple syrup or honey (adjust to taste) - 1 teaspoon vanilla extract - Pinch of salt - Toasted coconut flakes for garnish (optional) - Fresh mint leaves for garnish (optional) Coconut milk offers healthy fats that boost energy. It also helps with digestion. Chia seeds are full of fiber, which aids in digestion and keeps you full longer. Mango is rich in vitamins A and C, which support your immune system and skin. Maple syrup or honey adds natural sweetness and contains antioxidants. Vanilla extract gives flavor and may help reduce stress. Salt enhances taste and can help balance fluids in your body. Toasted coconut flakes add crunch and fiber, while mint adds freshness and aids digestion. If you don't have coconut milk, use almond or oat milk for a different taste. For chia seeds, you can use ground flaxseeds, but the texture will change. Any ripe fruit can replace mango, like bananas or berries, for varied flavors. Maple syrup can be swapped with agave syrup or stevia for a lower-calorie option. If you want a sugar-free choice, skip the sweetener and let the fruit shine. You can use vanilla bean paste instead of extract for a richer flavor. This recipe for Mango Coconut Chia Pudding is simple and packed with flavor. To make Mango Coconut Chia Pudding, start with the coconut milk. In a mixing bowl, combine: - 1 cup coconut milk - 2 tablespoons maple syrup or honey - 1 teaspoon vanilla extract - A pinch of salt Whisk these ingredients until they blend well. Next, add the chia seeds. Gradually whisk in: - 1/2 cup chia seeds This step is key. Make sure the seeds spread evenly in the liquid. Cover the bowl, or move the mix to a container with a lid. Place it in the fridge for at least 4 hours. For best results, leave it overnight. This waiting time lets the chia seeds absorb the coconut milk. After chilling, check the pudding. Stir it well to break up clumps. Now it’s ready for serving! To get the right texture, use fresh chia seeds. Old seeds may not thicken well. If your pudding is too thick, add a bit more coconut milk. For a creamier texture, use full-fat coconut milk. Remember to stir well after chilling. This helps avoid clumps and ensures smoothness. For a beautiful presentation, layer the pudding in clear glasses. Start with a layer of chia pudding, then add: - Diced mango Repeat the layers until the glass is full. Finish with a sprinkle of toasted coconut flakes and fresh mint leaves. This adds color and flavor. Serve it cold for a refreshing treat. For the full recipe, check below! You can make this pudding your own. Here are my favorite tips: - Add spices: A sprinkle of cinnamon or nutmeg can bring warmth. - Mix fruits: Try adding berries or pineapple for a tropical twist. - Change sweeteners: Use agave nectar or stevia instead of maple syrup. - Include nuts: Chopped almonds or walnuts add crunch and nutrition. Watch out for these common errors to get the best pudding: - Not whisking well: Make sure to mix the chia seeds fully into the liquid. - Skipping the chill time: Let the pudding sit for at least four hours. - Using too much liquid: Stick to the recipe for the right balance. - Not stirring before serving: A quick stir helps mix any settled chia seeds. You can boost both flavor and texture with some easy tricks: - Layer with fruit: Diced mango between layers adds freshness and color. - Garnish well: Use toasted coconut and mint leaves for a beautiful finish. - Serve chilled: This pudding tastes best when cold and creamy. - Experiment with toppings: Yogurt, granola, or seeds can add fun textures. For the full recipe, check out the detailed instructions above! {{image_2}} You can change the mango in this pudding for other fruits. Pineapple, kiwi, or passion fruit work great. Each fruit adds its own flavor and texture. You might want to mix in diced fruit before chilling the pudding. This way, each spoonful has a burst of tropical taste. You can also top the pudding with extra fruit for a colorful look. Coconut milk is a star in this recipe. If you want to try something different, use almond or oat milk. Both options are dairy-free and still creamy. Just keep in mind that each milk will change the flavor a bit. If you want a thicker base, add more chia seeds. This will help you achieve that creamy texture you love. Maple syrup or honey gives sweetness to the pudding. If you want a sugar-free option, try stevia or agave syrup. Both are great for adding sweetness without calories. You can also use ripe bananas for natural sweetness. Just mash them well and mix them into the base. This adds a new flavor while keeping the pudding healthy. For the full recipe, you can check the earlier section. Enjoy these fun variations! To keep your mango coconut chia pudding fresh, store it in airtight containers. This helps prevent any unwanted odors or flavors from seeping in. Make sure to place the pudding in the fridge right after it cools. You can also layer it in small jars for easy serving later. Mango coconut chia pudding lasts about 5 days in the fridge. If you want to keep it longer, you can freeze it. Pour the pudding into ice cube trays for easy portions. Just remember to thaw it in the fridge before serving. Do not refreeze after thawing. If your pudding thickens too much in the fridge, simply add a splash of coconut milk. Stir well to achieve your desired consistency. You can also mix in fresh mango pieces for a flavor boost. Enjoy it cold or let it sit at room temperature for a few minutes before digging in. Chia pudding is a simple dish made from chia seeds and liquid. When you mix chia seeds with coconut milk, they absorb the liquid. This makes a thick, creamy texture. To make it, whisk coconut milk, maple syrup, vanilla, and salt. Then, stir in chia seeds. Cover and chill for at least four hours. This lets the seeds swell and form a pudding. Yes, you can use different types of milk. Almond, soy, or oat milk work well. Each type adds its own flavor. Coconut milk gives a rich, tropical taste. Try what you like best to find your favorite! Mango coconut chia pudding lasts about four to five days in the fridge. Store it in an airtight container to keep it fresh. If you notice any changes in smell or texture, it is best to throw it away. Yes, chia pudding is very healthy. Chia seeds are high in fiber and protein. They also contain omega-3 fatty acids. Coconut milk provides good fats and vitamins. This dish is great for breakfast or a snack. To make chia pudding without sugar, skip the sweeteners. Use ripe mango for natural sweetness. You can also add spices like cinnamon or nutmeg for flavor. This makes the pudding tasty without added sugar. Here’s how to make it: - 1 cup coconut milk - 1/2 cup chia seeds - 1 ripe mango, diced - 2 tablespoons maple syrup or honey (adjust to taste) - 1 teaspoon vanilla extract - Pinch of salt - Toasted coconut flakes for garnish (optional) - Fresh mint leaves for garnish (optional) Follow the [Full Recipe] for step-by-step details on how to prepare this delicious treat! Mango coconut chia pudding is simple and fun to make. We explored key ingredients, their health perks, and ways to swap them out. I provided clear steps to prepare the dish and serve it just right. We looked at tips to enhance flavors and avoid common mistakes. You can try tropical fruit variations and find dairy-free options too. Proper storage ensures your pudding stays fresh and tasty. With these insights, you can create a delicious treat that fits your tastes and lifestyle. Enjoy your chia pudding adventure!](https://dailydishlab.com/wp-content/uploads/2025/07/e4ad1822-a4f3-41e3-be5e-fabc0a8bd60a-768x768.webp)