Skip to content
About
Contact
Cookie Policy
Copyright Policy
Disclaimer
Search
Home
Dinner
Appetizer
Desserts
Drinks
About
Contact
Privacy Policy
Toggle Menu
Home
/
Desserts
- Page 20
Desserts
Chocolate Swirl Banana Ice Cream Delightful and Simple
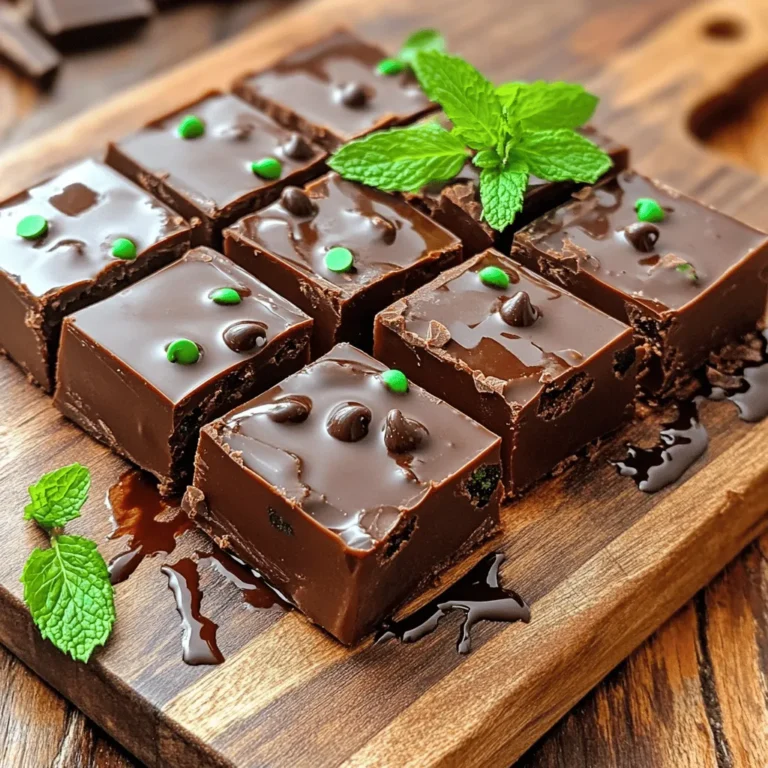
Mint Chocolate Chip Fudge Irresistible Dessert Treat
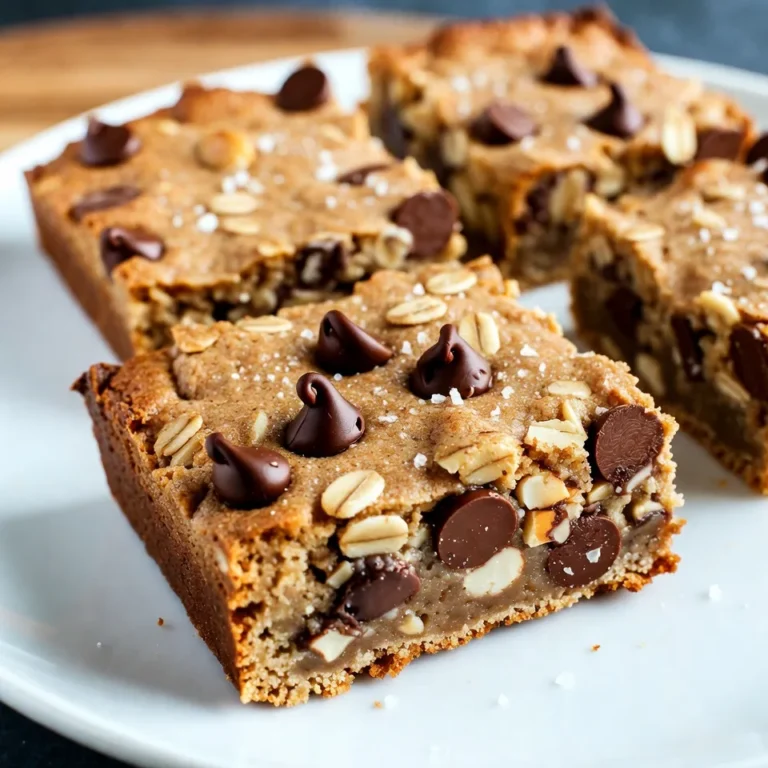
Chocolate Chip Oatmeal Cookie Bars Simple Delight
Lemon Blueberry Ricotta Pancakes Fresh and Fluffy Treat
Mango Coconut Overnight Oats Tasty and Healthy Meal
Chocolate Hazelnut French Toast Delightful Breakfast Dish
Blueberry Cheesecake Overnight Oats Simple Delight
Chocolate Hazelnut Mug Cake Quick and Easy Recipe
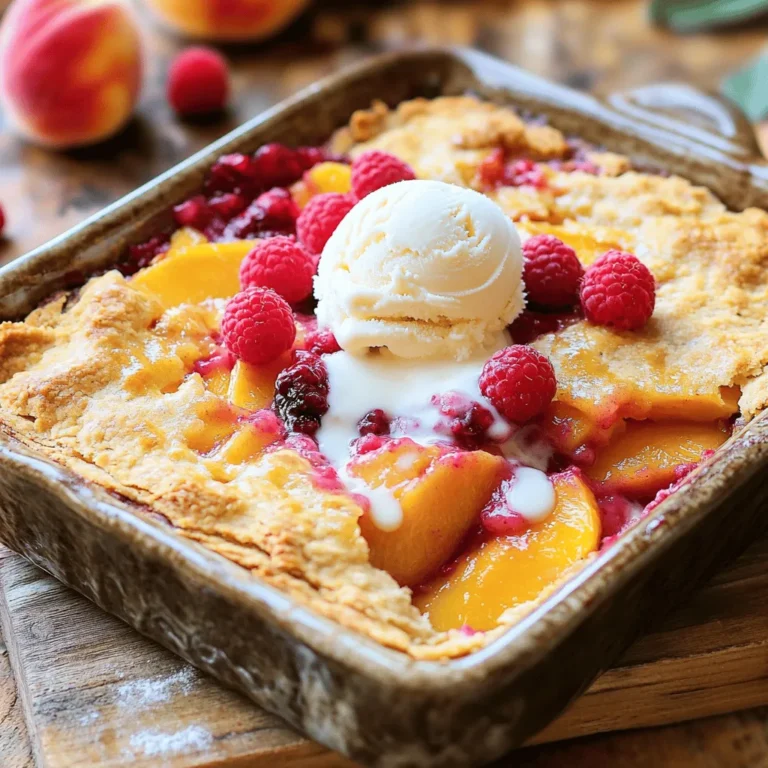
Peach Raspberry Cobbler Simple and Delicious Recipe
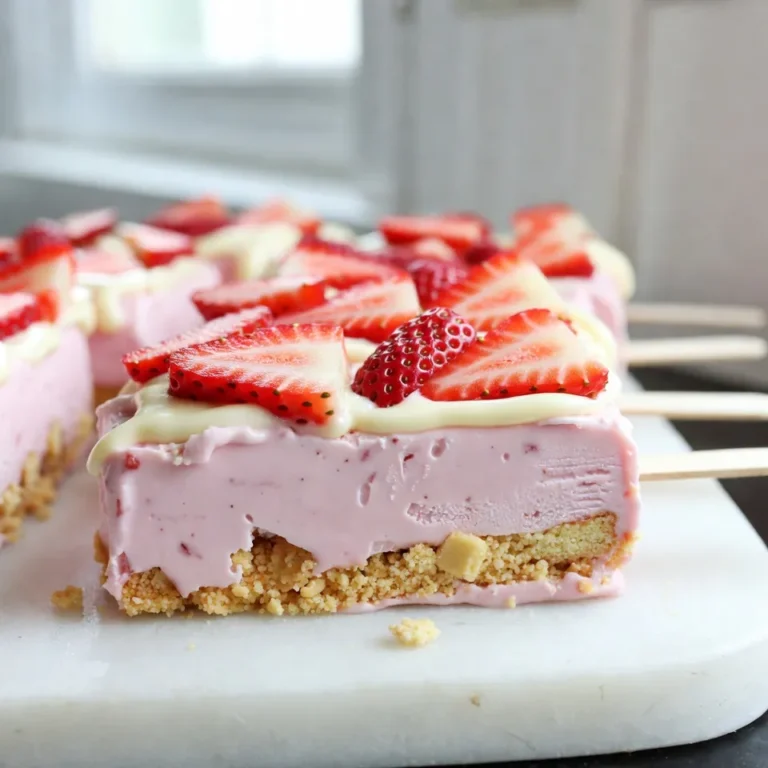
Strawberry Shortcake Ice Cream Bars Fresh and Tasty Treat
Page navigation
Previous Page
Previous
1
…
18
19
20
21
22
…
40
Next Page
Next
Home
Dinner
Appetizer
Desserts
Drinks
About
Contact
Privacy Policy
Toggle Menu Close
Search for:
Search

![To make Chocolate Swirl Banana Ice Cream, you will need: - 4 ripe bananas, sliced and frozen - 1 cup coconut milk (or any milk of choice) - 2 tablespoons maple syrup (adjust for sweetness) - 1 teaspoon vanilla extract - 1/4 cup cacao powder (or unsweetened cocoa powder) - A pinch of sea salt These ingredients come together to create a creamy and rich treat. The ripe bananas give sweetness, while the cacao powder adds that lovely chocolate flavor. If you have dietary needs, there are easy swaps. For dairy-free options, use almond milk or oat milk instead of coconut milk. You can replace maple syrup with agave syrup or honey for sweetness. Those who avoid sugar may use a sugar substitute like stevia. For the cacao powder, you can use carob powder for a different taste. This ice cream is not only tasty but also has some health benefits. Each serving contains: - Calories: Around 150 - Protein: 2g - Carbohydrates: 30g - Sugar: 12g (natural sugars from bananas) - Fat: 4g This treat is a great way to enjoy dessert while getting some nutrients from the bananas. It’s a fun way to cool down and feel good about what you eat. For the complete recipe, check out the [Full Recipe]. Start by gathering all your ingredients. You will need: - 4 ripe bananas, sliced and frozen - 1 cup coconut milk (or any milk of choice) - 2 tablespoons maple syrup (adjust for sweetness) - 1 teaspoon vanilla extract - 1/4 cup cacao powder (or unsweetened cocoa powder) - A pinch of sea salt Make sure your bananas are ripe. This will make your ice cream sweet and tasty. Slice the bananas and freeze them for a few hours. Now, let's blend! Take the frozen bananas and put them in a blender. Add the coconut milk, maple syrup, vanilla extract, and sea salt. Blend until everything is smooth and creamy. You may need to stop and scrape down the sides of the blender. This helps everything mix well. Once you see a creamy texture, transfer the banana mix to a big bowl. In a different bowl, mix the cacao powder with a splash of coconut milk. Stir until you make a smooth chocolate sauce. If it is too thick, add a little more milk until it is pourable. Now, drizzle the chocolate sauce over the banana mix in the large bowl. Use a spatula to gently swirl the chocolate into the banana mixture. Create those pretty marbled patterns! Once you finish swirling, transfer the mix into an airtight container. Smooth the top with your spatula and cover it tightly. Freeze it for 2-4 hours until it is firm enough to scoop. For the best experience, let the ice cream sit out for about 5 minutes before serving. This makes it easier to scoop. Enjoy the delightful taste of your homemade Chocolate Swirl Banana Ice Cream! Check out the Full Recipe for more details. To get the right texture, freeze your bananas well. I slice them and freeze them overnight. This gives a creamy base. When blending, add coconut milk slowly. Start with a little, then add more if needed. Blend until smooth, but don’t overdo it. If it's too soft, freeze it longer. You can easily boost the flavor of your ice cream. Try adding a pinch of cinnamon. It adds warmth and depth. You can also swap maple syrup for honey or agave. Each sweetener gives a unique taste. For a nutty twist, mix in some almond extract. This brings a fun twist to the classic flavor. Serve your ice cream in chilled bowls. This keeps it cold longer. Scoop it out after letting it sit for five minutes. This makes scooping easier. Top with fresh banana slices and a drizzle of chocolate sauce. For extra crunch, sprinkle cacao nibs on top. This adds texture and looks pretty too. For the full recipe, check the main article. {{image_2}} If you want a dairy-free treat, use coconut milk. It adds creaminess and a light flavor. You can also try almond milk or oat milk. Both work well in this recipe. Just make sure to pick a milk that you enjoy. You can make your ice cream even better with mix-ins. Try adding chopped nuts or shredded coconut. Chocolate chips are also a fun choice. For toppings, fresh fruit, crushed cookies, or granola add texture and flavor. Drizzle extra chocolate sauce on top for a sweet touch. Feel free to get creative with flavors. Add peanut butter for a rich taste. You might also try adding berries like strawberries or raspberries for a fruity twist. A pinch of cinnamon gives a warm note. Each of these options makes your chocolate swirl banana ice cream unique! Remember, you can find the full recipe above. Enjoy making your ice cream! To keep your chocolate swirl banana ice cream fresh, you need to store it right. Here are some tips to help you. First, always let your ice cream cool to room temperature. This helps to avoid ice crystals. After mixing, transfer it to a container. Make sure it’s airtight. This keeps the air out and prevents freezer burn. If you want to enjoy it later, freeze it for up to a month. Use a sturdy container for your ice cream. Glass and plastic containers work well. Make sure the lid fits tightly. This keeps the ice cream safe from other smells in the freezer. If you want to scoop easily, choose a shallow container. It makes it simple to reach every part of the ice cream. Chocolate swirl banana ice cream stays fresh for about two weeks. After that, it can lose flavor and texture. It’s best to eat it within this time frame for the best taste. If it sits too long, it might become icy. Now, you can enjoy your delightful chocolate swirl banana ice cream, knowing how to store it right! For the full recipe, check out the earlier section. To make chocolate swirl banana ice cream, start by blending frozen bananas, coconut milk, maple syrup, vanilla extract, and sea salt. Blend until smooth. Next, mix cacao powder with some coconut milk to create a chocolate sauce. After blending, transfer the banana mix to a bowl. Drizzle the chocolate sauce over it and gently swirl it in. Finally, put the mixture in an airtight container and freeze it for 2-4 hours. For the full recipe, check out the details above. Yes, you can use any milk you like. Almond milk, soy milk, or oat milk work well too. Each type will give a slightly different taste and texture. Choose the milk that fits your diet or taste. Store homemade ice cream in an airtight container. This keeps it fresh and prevents ice crystals. Make sure to smooth the top before sealing to avoid air pockets. It stays fresh in the freezer for about 1-2 weeks. This blog post covered how to make chocolate swirl banana ice cream. We talked about the right ingredients, step-by-step instructions, and helpful tips. You learned how to customize the recipe with different flavors and toppings. I shared storage advice to keep your ice cream fresh. Now you can enjoy a tasty treat that fits your diet. Get ready to impress your friends and family with your new skills!](https://dailydishlab.com/wp-content/uploads/2025/07/482899ed-90ac-4dc0-8cba-52d6130bf4d8-768x768.webp)
![- 1 cup rolled oats - 1 cup almond milk (or your preferred milk) - 1/2 cup plain Greek yogurt - 1/4 cup cream cheese, softened - 2 tablespoons maple syrup (or honey) - 1 teaspoon vanilla extract - 1/2 cup fresh blueberries - 1 tablespoon chia seeds (optional) - 1/4 teaspoon ground cinnamon - Fresh blueberries and graham cracker crumbs for topping - If you want dairy-free options, swap cream cheese and Greek yogurt for coconut yogurt. Almond milk works well, but you can also use oat or soy milk. - For gluten-free oats, use certified gluten-free rolled oats. They are easy to find in most stores. - If you prefer a different sweetener, try agave syrup or coconut sugar instead of maple syrup or honey. When I create this dish, I aim for the best taste and texture. These ingredients blend well, giving you that cheesecake flavor you crave. The oats soak up the almond milk and yogurt, creating a creamy base. The blueberries add a burst of natural sweetness and freshness. Plus, the graham cracker crumbs on top provide a nice crunch. You can find the full recipe here, which shows you how to mix everything perfectly. 1. In a medium bowl, combine the rolled oats, almond milk, Greek yogurt, and cream cheese. 2. Whisk these ingredients together until they form a creamy mixture. 3. Next, stir in the maple syrup, vanilla extract, chia seeds, and ground cinnamon. 4. Mix until all the flavors blend smoothly. 5. Now, gently fold in the fresh blueberries. 6. Be careful not to crush the blueberries while mixing. 1. Divide the mixture evenly into two mason jars or airtight containers. 2. Close the jars with their lids tightly. 3. Place the jars in the fridge overnight. 4. This helps the oats soak up the flavors and get soft. 1. When it's time to serve, remove the jars from the fridge. 2. Give each jar a good stir to mix everything up again. 3. For a cheesecake effect, top your oats with more fresh blueberries. 4. Sprinkle graham cracker crumbs on top to finish it off. For the full recipe, you can refer to the recipe section above. To get the best texture, use rolled oats. They soak up the liquid without getting mushy. You want your oats creamy but still holding their shape. Avoid quick oats; they can turn your dish into a mushy mess. For a thicker texture, add a bit more oats or reduce the milk slightly. Spices can take your oats to the next level. A pinch of nutmeg or a dash of vanilla can make a big difference. You can also add fresh lemon zest for a bright flavor. Don't forget about crunch! Toss in some chopped nuts or seeds. They add a nice texture and extra nutrition. Making a larger batch saves time. Double or triple the recipe and store in jars. This way, you can grab a jar for breakfast all week. These oats keep well in the fridge for up to five days. Use airtight containers to keep them fresh. Enjoy a quick and easy meal every morning! For the full recipe, check the earlier section. {{image_2}} You can swap blueberries for other fruits. Strawberries, raspberries, or blackberries work great, too. Each fruit brings its own sweet flavor. You can also use seasonal fruits. In summer, try peaches or cherries. In fall, apple slices or pumpkin puree can add a fun twist. Want to make your oats even better? You can add protein powders or nut butters. These add a great taste and extra protein. Almond butter or peanut butter mix well. Seeds like chia or flax can add crunch and fiber. They also help keep you full longer. Feeling fancy? You can create fun dessert flavors. Try adding cocoa powder for chocolate oats. You can also use caramel syrup for a sweet treat. Using flavored yogurt can make it even tastier. Vanilla or strawberry yogurt adds a nice twist. You can explore so many flavors with just a few tweaks! Check the [Full Recipe] for all the details you need. To keep your blueberry cheesecake overnight oats fresh, use glass jars or airtight containers. These options seal well and prevent odors from mixing in the fridge. Make sure to store them in the refrigerator. This keeps the oats cool and safe to eat. For the best taste and texture, eat your oats within three days. After this, the oats may lose their creamy texture. Signs of spoilage include a sour smell, watery separation, or mold. If you see any of these, throw them away. Yes, you can freeze overnight oats! This is great for meal prep. Just make sure to use freezer-safe containers. When you’re ready to eat, transfer the oats to the fridge to thaw overnight. Avoid heating them directly from the freezer. This can change the texture and flavor. Blueberry Cheesecake Overnight Oats stay fresh for about 3 to 5 days in the fridge. Store them in airtight containers. This keeps them moist and tasty. If you notice any strange smell or mold, it's best to toss them out. Yes, you can use frozen blueberries. However, they may change the texture a bit. Frozen berries can make the oats a little mushy. If you want to keep the fresh taste, add frozen blueberries just before serving. Almond milk is my go-to for these oats. It adds a nice flavor without extra calories. You can also use oat milk, soy milk, or regular cow's milk. Choose what you like best. Each type gives a different taste and creaminess. To make this recipe vegan, swap Greek yogurt for coconut yogurt. Use vegan cream cheese instead of regular cream cheese. For sweeteners, choose maple syrup or agave nectar. These simple swaps keep it dairy-free and delicious. Yes, you can meal prep these oats for the week. Just make sure to portion them in jars. They keep well in the fridge. This is a great way to have a quick and healthy breakfast ready. Just grab a jar each morning! For the full recipe, check out the provided link. This article covered how to make Blueberry Cheesecake Overnight Oats. We went over key ingredients, easy steps, and various storage tips. You learned how to customize your oats and enjoy delicious flavors. Whether you need a quick breakfast or snack, these oats fit the bill. Enjoy the creamy texture and fresh taste. Give this recipe a try and discover your favorite mix!](https://dailydishlab.com/wp-content/uploads/2025/07/6a6a2d5b-d90b-4d1a-93b4-34eef24f4ecd-768x768.webp)