Skip to content
About
Contact
Cookie Policy
Copyright Policy
Disclaimer
Search
Home
Dinner
Appetizer
Desserts
Drinks
About
Contact
Privacy Policy
Toggle Menu
Home
/
Desserts
- Page 21
Desserts
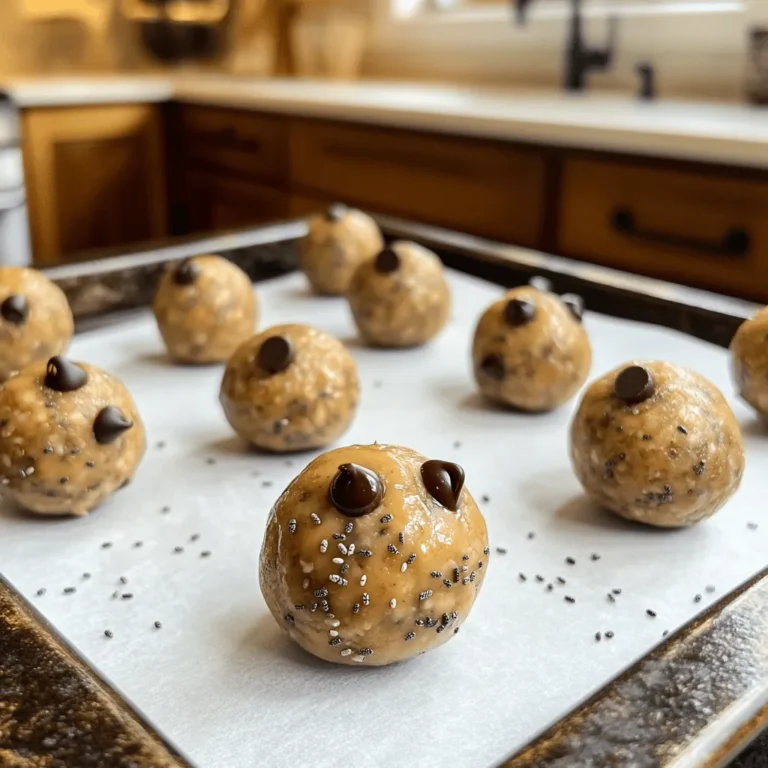
Peanut Butter Chocolate Chip Energy Balls Quick Treat
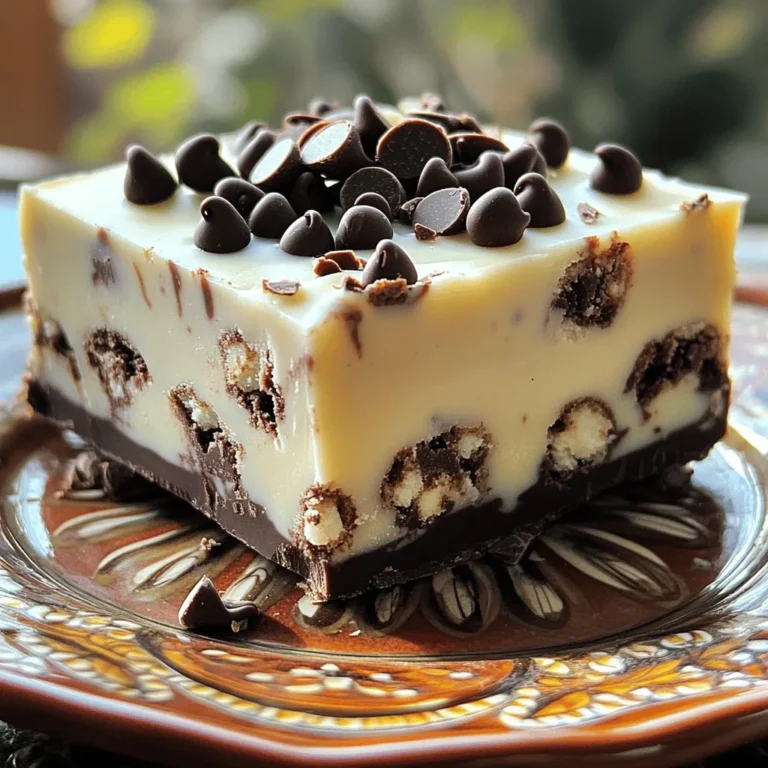
Cookies and Cream Fudge Simple and Delicious Treat
Mint Chocolate Chip Cheesecake Rich and Creamy Delight
Caramel Pecan Turtle Brownies Divine Chocolate Treat
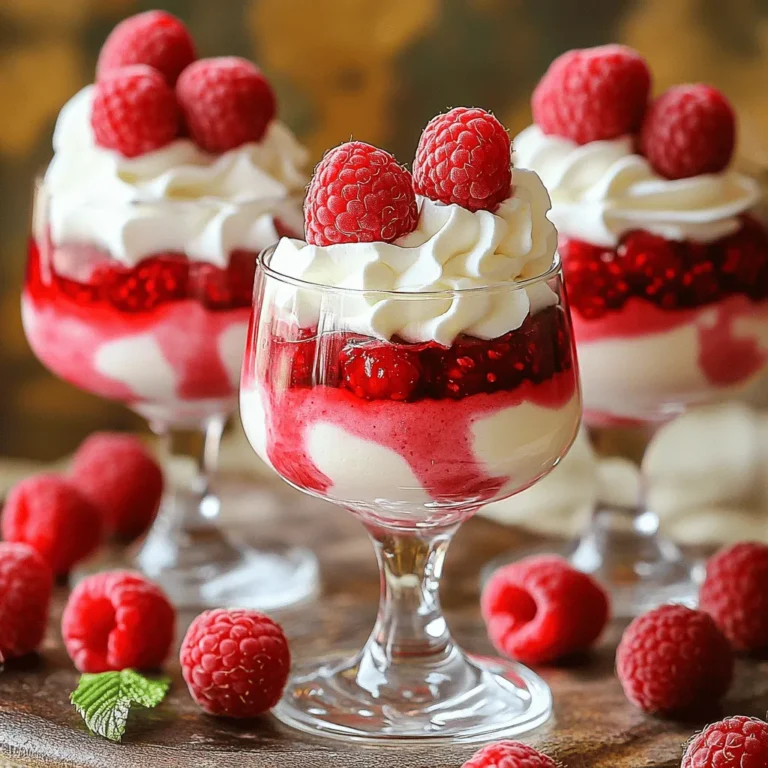
Raspberry Cheesecake Mousse Creamy Dessert Delight
Strawberry Shortcake Trifle Delightful Summer Treat
Lemon Blueberry Pound Cake Irresistible Dessert Recipe
Mocha Oreo Icebox Cake Tempting No-Bake Delight
Funfetti Cake Batter Dip Tasty and Easy Recipe
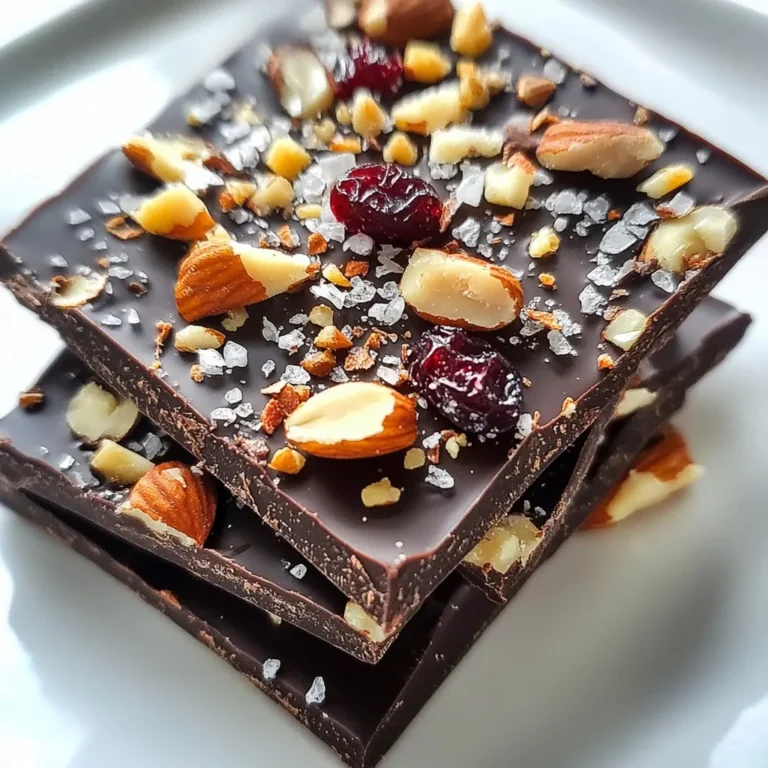
Dark Chocolate Sea Salt Bark Simple and Delicious Treat
Page navigation
Previous Page
Previous
1
…
19
20
21
22
23
…
40
Next Page
Next
Home
Dinner
Appetizer
Desserts
Drinks
About
Contact
Privacy Policy
Toggle Menu Close
Search for:
Search

![To make a tasty Mint Chocolate Chip Cheesecake, you need these main items: - 16 oz cream cheese, softened - 1 cup granulated sugar - 2 large eggs - 1 teaspoon peppermint extract These ingredients create a rich and creamy filling. The cream cheese gives the cheesecake its smooth texture. Sugar adds sweetness, while eggs help it set. Peppermint extract brings that fresh mint taste. The crust is simple and delicious. For it, gather: - 1 ½ cups chocolate sandwich cookie crumbs - ½ cup unsalted butter, melted Combining these makes a crunchy base. The chocolate crumbs add flavor, and the melted butter helps bind them together. You can add a few fun touches if you want: - Green food coloring (optional, for a minty hue) - Whipped cream (for topping) The green food coloring makes your cheesecake look extra festive. Whipped cream adds a nice finish on top, making it even more appealing. You can use the full recipe to guide you in making this delightful dessert. Start by preheating your oven to 325°F (160°C). In a medium bowl, combine 1 ½ cups of chocolate sandwich cookie crumbs with ½ cup of melted unsalted butter. Mix until the crumbs are coated well. Press this mixture evenly into the bottom of a 9-inch springform pan. Bake the crust for 10 minutes. Once done, take it out and let it cool. In a large mixing bowl, beat 16 ounces of softened cream cheese with a hand mixer until smooth. Gradually add 1 cup of granulated sugar, mixing until combined. Next, add 1 teaspoon of vanilla extract and 1 teaspoon of peppermint extract. If you want a fun minty color, add a few drops of green food coloring. Mix for another minute. Now, add 2 large eggs one at a time. Mix just until combined after each egg. Be careful not to overmix. Then, add 1 cup of sour cream and mix until smooth. Gently fold in 1 cup of mini chocolate chips. Pour the cheesecake mixture over the cool crust. Smooth the top with a spatula. Bake it in your preheated oven for 45-50 minutes. Look for the edges to be set, while the center has a slight jiggle. After baking, turn off the oven and crack the door. Let the cheesecake cool gradually for about an hour. Once it cools, cover it with plastic wrap. Refrigerate for at least 4 hours, or overnight for the best flavor and texture. Before serving, top with whipped cream and sprinkle more mini chocolate chips on top. Enjoy your Mint Chocolate Chip Cheesecake! For the complete recipe, check out the [Full Recipe]. To get a smooth texture, start with room temperature ingredients. Cold cream cheese can clump up. Mix the cream cheese slowly. Avoid overmixing. If you mix too fast, air bubbles can form. Those bubbles can crack your cheesecake. When baking, look for a slight jiggle in the center. This means it's not overcooked. Use an oven thermometer to check the heat. Ovens can be off by a few degrees. If you bake at the wrong temp, your cheesecake may not set right. Serve your cheesecake with a swirl of whipped cream. Sprinkle extra mini chocolate chips on top. This makes your cake look fancy and delicious. You can also add fresh mint leaves for a pop of color. Enjoy every creamy bite! For the full recipe, revisit the ingredients and instructions above. {{image_2}} You can make your mint chocolate chip cheesecake even better by adding extra flavors. A drop of vanilla or almond extract can change the taste. Vanilla adds warmth and depth, while almond gives a nice nutty touch. Use about half a teaspoon to start. Taste as you go to find your perfect mix. If you want a different crust, try using graham cracker crumbs instead of chocolate cookies. This gives a nice contrast to the minty filling. For gluten-free options, use gluten-free cookie crumbs. Just make sure the crumbs are finely crushed, so they hold together well. You can even use nuts for a crunchy and fun twist. Serving your cheesecake can be as fun as making it! Instead of cutting it into slices, try serving it in individual cups. This makes for a cute and easy dessert for parties. You can also use decorative plates. Add a sprig of mint or a drizzle of chocolate sauce on top for a fancy touch. These small details can impress your guests and make your dessert stand out. For the full recipe, check the link above. To keep your Mint Chocolate Chip Cheesecake fresh, cover it tightly. Use plastic wrap or foil. This keeps moisture in and prevents odors from other foods. Store it in the fridge for up to five days. The cheesecake tastes best after it chills overnight. This time lets the flavors blend well. You can freeze slices of cheesecake for later. Wrap each slice in plastic wrap. Then, place the wrapped slices in a freezer bag. Press out as much air as you can. This helps avoid freezer burn. To enjoy, thaw the slices in the fridge overnight. This keeps the texture smooth and creamy. In the fridge, your cheesecake lasts about five days. In the freezer, it can last up to three months. After this time, the taste and texture may change. Enjoy your Mint Chocolate Chip Cheesecake while it’s fresh for the best flavor. Making Mint Chocolate Chip Cheesecake takes about 5 hours in total. This includes: - Prep time: 30 minutes to gather and mix ingredients. - Bake time: 45-50 minutes in the oven. - Cooling time: 1 hour in the oven after baking. - Chilling time: At least 4 hours in the fridge for the best flavor. This breakdown helps you plan your day for this creamy delight. Yes, you can make this cheesecake in advance! In fact, it tastes better after chilling overnight. Here are some benefits of making it ahead: - Flavor develops: Chilling allows the mint and chocolate flavors to blend. - Convenience: You can serve it fresh without last-minute stress. - Storage: Wrap it well in plastic wrap to keep it fresh in the fridge. You can make this cheesecake up to 2 days ahead of when you plan to serve it. If you need a cream cheese substitute, you have options! Here are some alternatives: - Greek yogurt: Use plain Greek yogurt for a tangy flavor and creamy texture. - Ricotta cheese: This gives a lighter texture but still creamy. - Tofu: Silken tofu can work for a dairy-free option. Blend until smooth. Each option changes the taste a bit, but they all work in this recipe. This blog post covered how to make a delicious Mint Chocolate Chip Cheesecake. We explored the ingredients needed, including cream cheese and chocolate cookies. You learned the step-by-step method, from prepping the crust to baking and cooling. We shared tips for a smooth texture and perfect bake. Consider trying different flavors or crusts for variety. Lastly, we discussed how to store your cheesecake for freshness. Enjoy your homemade treat, and impress friends with your baking skills!](https://dailydishlab.com/wp-content/uploads/2025/07/65fe9dc3-6e9f-4190-956f-c2db90901af1-768x768.webp)
![To make these brownies, you need specific ingredients. Here’s what you’ll gather: - 1 cup unsalted butter (2 sticks) - 2 cups granulated sugar - 4 large eggs - 1 teaspoon vanilla extract - 1 cup all-purpose flour - 1 cup unsweetened cocoa powder - 1/2 teaspoon salt - 1 cup chopped pecans - 1 cup caramel sauce (store-bought or homemade) - 1/2 cup chocolate chips (semi-sweet or dark) - 1/4 teaspoon sea salt (for topping) Each ingredient plays a key role in creating the rich, fudgy texture and flavor you will love. While the essential ingredients are perfect, you can add more for extra flavor. Consider these options: - A dash of espresso powder can deepen the chocolate taste. - A splash of bourbon or rum brings warmth and complexity. - Use dark chocolate chips for a richer finish. - Add sea salt flakes on top for a contrast in taste. These optional ingredients can take your brownies to the next level. To make the process smooth, you'll need some tools. Here’s what I recommend: - A medium saucepan for melting butter. - A mixing bowl for combining wet ingredients. - A separate bowl for dry ingredients. - A whisk for mixing eggs and vanilla. - A spatula to fold in the nuts and chips. - A 9x13 inch baking pan lined with parchment paper. These tools help you create the perfect caramel pecan turtle brownies. For the full recipe, you can check the complete steps and tips. Enjoy your baking! To create your brownie batter, start with the basics. First, preheat your oven to 350°F (175°C). Next, grease a 9x13 inch baking pan and line the bottom with parchment paper. This step helps with easy removal later. In a medium saucepan, melt 1 cup of unsalted butter over low heat. Once it melts, add 2 cups of granulated sugar and stir until mixed well. Remove the saucepan from heat and let it cool for a few minutes. This cooling step is important to avoid cooking the eggs. Now, whisk in 4 large eggs, one at a time. Add 1 teaspoon of vanilla extract and mix until smooth. In another bowl, sift together 1 cup of all-purpose flour, 1 cup of unsweetened cocoa powder, and 1/2 teaspoon of salt. Gradually add the dry mix to the wet mix. Stir gently until just combined. Overmixing can lead to tough brownies. Fold in 1 cup of chopped pecans and 1/2 cup of chocolate chips, saving a few pecans for the topping. Now it’s time to layer your brownies. Pour half of the brownie batter into the prepared pan and spread it evenly. Drizzle half of the caramel sauce over this layer. Then spoon the rest of the batter on top and spread it gently. Drizzle the remaining caramel sauce over this layer. Sprinkle the reserved pecans on top and add a pinch of sea salt to enhance the flavor. Bake in your preheated oven for 30 to 35 minutes. To check for doneness, insert a toothpick in the center. It should come out with a few moist crumbs, not wet batter. After baking, remove the pan from the oven. Let the brownies cool in the pan for at least 30 minutes. Use the parchment paper to lift them out. Slice them into squares for serving. For a special touch, serve the brownies warm. Drizzle with extra caramel sauce and sprinkle with sea salt. This adds a lovely finishing touch that enhances the flavor. Enjoy your delicious creation! For the complete recipe, check out the [Full Recipe]. One big mistake is overmixing the batter. When you mix too much, it makes brownies tough. Mix until just combined for a softer bite. Another common error is not measuring ingredients well. Use dry measuring cups for flour and cocoa powder. Level the tops with a knife for accuracy. For that perfect chewy texture, use melted butter. This gives your brownies a rich flavor. Don't forget to let the batter rest for a few minutes before baking. It helps the ingredients meld together. Also, bake just until a toothpick shows a few moist crumbs. Too long makes them dry. Serve brownies warm to enjoy their gooey center. Drizzle extra caramel sauce on top for added sweetness. A sprinkle of sea salt can enhance the flavors. Pair with a scoop of vanilla ice cream for a delightful treat. Enjoy your Caramel Pecan Turtle Brownies with friends and family for a memorable dessert. Check out the Full Recipe for more tips! {{image_2}} If you want to change the taste, try other nuts. Almonds, walnuts, or hazelnuts can work well. Each nut gives a unique flavor. Almonds add a sweet crunch. Walnuts bring a rich, earthy taste. Hazelnuts give a hint of chocolate flavor. Just chop them as you would with pecans and mix them in. You can even toast the nuts lightly for extra flavor! Making your own caramel sauce is easy and fun. You need just sugar, butter, and cream. Start by melting sugar in a pan. Watch it closely so it doesn’t burn. Once it melts and turns golden, add butter and let it melt. Then, pour in heavy cream slowly and stir. Let it cool before using it in your brownies. This sauce adds a fresh taste that store-bought cannot match. Want to make these brownies gluten-free? Use gluten-free all-purpose flour instead of regular flour. Check that your caramel sauce is also gluten-free. Many brands are safe, but always read the label. This way, you can enjoy rich, gooey brownies without worry. The taste remains just as delightful, and your friends will never know the difference! Don't forget to check out the Full Recipe for all the details on making these sweet treats! To keep your caramel pecan turtle brownies fresh, store them in an airtight container. Place parchment paper between layers to avoid sticking. They can last up to a week at room temperature. For longer storage, put them in the fridge. This helps maintain their chewy texture and flavor. Freezing brownies is a great way to save some for later. First, allow them to cool completely. Then, cut them into squares. Wrap each piece tightly in plastic wrap. Put them in a freezer-safe bag or container. They can stay frozen for up to three months. When you’re ready to enjoy, just thaw them in the fridge overnight. To enjoy your brownies warm, reheat them in the microwave. Use a low power setting to avoid drying them out. Heat for about 10-15 seconds. You can also warm them in the oven. Set the oven to 350°F (175°C) and place the brownies in for about 5-10 minutes. This brings back that fresh-baked taste. For extra delight, drizzle some caramel sauce on top before serving. Turtle brownies get their name from the classic turtle candy. This candy has caramel, pecans, and chocolate. In our brownies, I mix these same flavors. The caramel adds sweetness, the pecans give a nice crunch, and the chocolate ties it all together. When you bite into these brownies, you taste the rich chocolate and gooey caramel. It's like a treat you can hold in your hand! Yes, you can. If you want to skip the eggs, you can use a few substitutes. Applesauce is a great choice. Use 1/4 cup of unsweetened applesauce for each egg. You can also use a flaxseed meal. Mix one tablespoon of flaxseed meal with three tablespoons of water. Let it sit for a few minutes until it gets thick. Both options work well and keep the brownies moist. These brownies stay fresh for about four to five days when stored properly. Keep them in an airtight container at room temperature. If you want them to last longer, you can freeze them. Just wrap them well in plastic wrap and place them in a freezer bag. They can last up to three months in the freezer. When you're ready to enjoy, just thaw them at room temperature or warm them in the microwave for a few seconds. Remember, for the full recipe, check our earlier section! In this post, we explored how to make delicious caramel pecan turtle brownies. We discussed essential and optional ingredients, the tools you need, and easy step-by-step instructions. I also shared useful tips to avoid common mistakes and achieve the perfect texture. Plus, we looked at variations, storage info, and common questions. Enjoying these brownies can be a fun baking adventure. I hope you try these tips and enjoy every bite!](https://dailydishlab.com/wp-content/uploads/2025/07/cd6252c4-9eb9-4ecc-b5d9-7ffc816e6e24-768x768.webp)
![- 2 cups fresh strawberries - 1/4 cup granulated sugar - 1 teaspoon vanilla extract - 2 cups whipped cream - 1 pound pound cake - 1 cup vanilla pudding - Mint leaves for garnish Fresh strawberries are the star of this dish. Choose ripe, sweet ones for the best flavor. The sugar helps draw out their juices, creating a tasty syrup. Vanilla extract adds depth to the whipped cream and pudding, enhancing the overall taste. I like to use a pound cake for its light, soft texture. You can buy it or make it from scratch. Vanilla pudding adds creaminess and richness to the layers. Finally, mint leaves add a pop of color and a refreshing touch on top. - Flavor variations for whipped cream - Additional fruits to mix in - Alternative cake options You can personalize your trifle with various options. For whipped cream, try adding lemon zest or almond extract for a new twist. Mix in more fruits like blueberries or raspberries for added flavor and color. If you want to change the cake, you could use angel food cake or sponge cake. Both options keep the dessert light and airy. Feel free to play with flavors and textures to make your own unique trifle. For the full recipe, check the earlier section. First, toss 2 cups of sliced strawberries with 1/4 cup of granulated sugar. This simple step helps bring out their sweet flavor. Let them sit for about 15 minutes. This process is called macerating. As the strawberries sit, they release their juices. These juices will add moisture and sweetness to your trifle. Grab your trifle dish or a large glass bowl. Start by layering the ingredients. Place cubes of pound cake at the bottom. Next, drizzle some of the strawberry juice over the cake. This makes the cake soft and tasty. Now, spread a layer of vanilla pudding over the soaked cake. Add the macerated strawberries on top. Make sure to distribute them evenly. Spoon a layer of whipped cream over the strawberries. Smooth it out gently. Repeat these layers until your dish is full. Finish with one last layer of whipped cream. To make your trifle look pretty, garnish the top. Place a few whole strawberries and some fresh mint leaves on the whipped cream. This adds a pop of color. Chill your trifle in the fridge for at least 1 hour. This helps the flavors blend together. For a fun twist, serve it in individual glass cups. It makes for a charming presentation. Enjoy your Strawberry Shortcake Trifle Delightful Summer Treat! For a stunning trifle, focus on layering. Start with a layer of pound cake cubes. Soak them with the juice from the strawberries. This adds flavor and keeps the cake moist. Next, pour a layer of vanilla pudding. It should be smooth but not too runny. If your pudding is too thick, add a splash of milk. This will help it spread easily. After pudding, add the strawberries. Place them evenly for a nice look. Finally, top with whipped cream. A gentle swirl makes it pretty. Repeat these steps until you fill your dish. End with whipped cream on top for a lovely finish. You can save time by using store-bought items. Grab pre-made vanilla pudding and whipped cream. This cuts down on prep time. You can also use ready-made pound cake. Just cube it, and you are set. If you're in a rush, layer ingredients in jars. This is fast and fun for serving. You can make individual servings quickly. Plus, it looks great at parties! Even with shortcuts, your trifle will taste amazing. You can still enjoy the full flavors of the Strawberry Shortcake Trifle with these easy steps. For the full recipe, check out the details above. {{image_2}} You can switch up the classic Strawberry Shortcake Trifle in fun ways. One tasty option is the Chocolate Strawberry Shortcake Trifle. Use chocolate cake instead of pound cake. Layer it with strawberries and chocolate pudding. Top it all with whipped cream. This twist adds rich flavors and a fun look. Another great choice is a lemon-infused variation. Substitute lemon pudding for vanilla pudding. You can also add lemon zest to the whipped cream. This will give the trifle a bright, zesty taste. It complements the strawberries nicely. You’ll have a refreshing treat perfect for hot days. If you need gluten-free options, use gluten-free cake. You can find mixes in stores or make your own. Just make sure the other ingredients are also gluten-free. This way, everyone can enjoy this dessert. For vegan adaptations, swap the whipped cream with a plant-based version. Use coconut cream or almond whipped cream. Replace the pudding with a vegan version too. You can make it with silken tofu and a bit of sweetener. These changes keep the trifle tasty while meeting dietary needs. For the full recipe, click here: [Full Recipe]. To store leftovers, cover the trifle with plastic wrap. Make sure it fits tightly to keep air out. You can also use a lid if your dish has one. This keeps the trifle fresh and tasty. The shelf life of the trifle is about 2-3 days in the fridge. After that, the layers may start to blend together. The strawberries can lose their texture, too. Always check for freshness before you dig in. If you want to refresh the trifle before serving, here are some tips. First, scoop out the top layer and set it aside. This lets you see if the layers need some help. Add fresh whipped cream to the top for a light touch. You can also add more sliced strawberries to make it look pretty. If the cake is too soft, consider adding a new layer of pound cake. This can help restore some of the texture and taste. Enjoy your delightful summer treat! Can I use frozen strawberries? Yes, you can use frozen strawberries. Thaw them first and drain any extra juice. This way, they still add great flavor to your trifle. How do I make it ahead of time? You can make your trifle a day before you serve it. Just layer everything and cover it well. Chill it in the fridge overnight. This helps the flavors mix nicely. What can I substitute for pound cake? If you don’t have pound cake, you can use angel food cake or sponge cake. Both options keep the trifle light and fluffy. You can also use cookies for a fun twist. For the full recipe, check the earlier section. Enjoy your delicious strawberry shortcake trifle! In this post, we covered how to make a delicious strawberry shortcake trifle. I shared the key ingredients, like fresh strawberries, whipped cream, and pound cake. You learned step-by-step instructions for preparation, assembly, and presentation. Tips helped you perfect your trifle and save time. Remember to explore flavor variations and dietary options. The trifle is easy to store and refresh, ensuring you enjoy every bite. Now, it's time to create your own tasty masterpiece!](https://dailydishlab.com/wp-content/uploads/2025/07/b9031d10-5e28-4fea-a2af-b8fc9fc435a5-768x768.webp)
![- 1 ½ cups all-purpose flour - 1 teaspoon baking powder - ½ teaspoon baking soda - ½ teaspoon salt - 1 cup unsalted butter, softened - 1 cup granulated sugar - 3 large eggs - 1 tablespoon lemon zest - 2 tablespoons lemon juice - 1 teaspoon vanilla extract - 1 cup fresh blueberries - Optional: 1 cup powdered sugar for glaze - Optional: 2 tablespoons lemon juice for glaze To create a Lemon Blueberry Pound Cake, you need some simple ingredients. The base combines flour, sugar, and butter for a rich texture. The eggs add moisture and help the cake rise. Lemon zest and juice give the cake its bright, fresh flavor. Fresh blueberries burst in your mouth with every bite. If you want to add a glaze, powdered sugar and more lemon juice make it shine. This cake is not just tasty; it looks great too! You can serve it on a nice plate with berries on top. - Calories per serving: Approximately 300 - Key nutrients: - Carbs: 40g - Fats: 15g - Proteins: 3g Knowing the nutritional facts helps you enjoy this treat wisely. Each slice has about 300 calories. It has a good mix of carbs for energy, some fats for flavor, and a bit of protein. This cake can fit well into a balanced diet. For the full recipe, check the [Full Recipe]. - Preheating the oven: Start by preheating your oven to 350°F (175°C). This helps the cake bake evenly. - Greasing the loaf pan: Next, grease and flour a 9x5-inch loaf pan. This step keeps the cake from sticking to the pan. - Creaming butter and sugar: In a large bowl, beat 1 cup of softened unsalted butter with 1 cup of granulated sugar. Use an electric mixer on medium speed for about 3-4 minutes. The mix should look light and fluffy. - Adding eggs and flavorings: Add 3 large eggs one at a time, mixing well after each. Then, stir in 1 tablespoon of lemon zest, 2 tablespoons of lemon juice, and 1 teaspoon of vanilla extract until combined. - Incorporating dry ingredients: In a separate bowl, whisk together 1 ½ cups of all-purpose flour, 1 teaspoon of baking powder, ½ teaspoon of baking soda, and ½ teaspoon of salt. Gradually add this mix to the wet ingredients. Mix until just combined to keep your cake light. - Folding in blueberries: Carefully fold in 1 cup of fresh blueberries with a rubber spatula. Make sure to spread them evenly throughout the batter. - Baking time and test for doneness: Pour the batter into your prepared loaf pan. Bake for 55-65 minutes. You will know it’s done when a toothpick inserted in the center comes out clean. For detailed instructions, check out the Full Recipe. - How to avoid overmixing: When you mix the batter, do it gently. After you add the dry ingredients, mix just until you see no more flour. Overmixing can make the cake tough. It’s okay if there are a few small lumps. - Ensuring even baking: Make sure your oven is at the right temperature. An oven thermometer can help with this. Place the cake in the center of the oven. This spot helps it bake evenly. Rotate the pan halfway through baking to avoid any hot spots. - Presentation ideas: The key to a great presentation is color. Serve the cake on a bright platter. Add fresh blueberries and mint leaves on top for a pop of color. You can also dust it with powdered sugar for a sweet touch. - Pairing with beverages: This lemon blueberry pound cake pairs well with tea or lemonade. The tartness of the lemon and sweetness of the blueberries complement these drinks perfectly. You can also serve it with a scoop of vanilla ice cream for an extra treat. - Dense cake: If your cake turns out dense, check your measurements. Too much butter or flour can cause this. Also, make sure you cream the butter and sugar well. This step adds air to the batter. - Sunken centers: A sunken center can happen if the oven is too hot. It can also happen if the batter is too heavy. To fix this, avoid adding too many blueberries. They make the batter heavy. Make sure to bake the cake long enough until a toothpick comes out clean. {{image_2}} You can make this lemon blueberry pound cake even more fun by adding other fruits. Raspberries and strawberries work great. They add a nice tartness that pairs well with lemon. You can also try different citrus zest. Lime or orange zest gives a fresh twist to the cake. Each fruit brings its own charm and flavor. If you need gluten-free options, use a 1-to-1 gluten-free flour blend. This swap will keep the cake tender and moist. For egg substitutions, consider using applesauce or flaxseed meal. One egg can be replaced with ¼ cup of applesauce or 1 tablespoon of flaxseed mixed with 2.5 tablespoons of water. These options work well in keeping the cake light and delicious. If you want to make mini loaves or muffins, adjust your baking time. Mini loaves take about 30-40 minutes, while muffins bake for 18-20 minutes. Check for doneness by inserting a toothpick in the center. This will help you get perfect little treats for any occasion. Enjoy the fun of sharing in smaller portions! You can store your lemon blueberry pound cake in two ways: at room temperature or in the fridge. If you keep it at room temperature, wrap it in plastic wrap. This keeps it moist and fresh. Make sure to place it in a cool, dry spot. Storing it this way works well for up to three days. If you want it to last longer, put it in the fridge. This will help it stay fresh for about a week. Just remember, cold air can dry out the cake. So, be sure to wrap it well. Freezing slices is a great option if you want to save some cake for later. First, let the cake cool completely. Then cut it into slices. Wrap each slice tightly in plastic wrap. After that, place the wrapped slices in a freezer bag. This way, they won’t stick together. You can freeze them for up to three months. When you want a slice, take it out and let it thaw. Simply leave it on the counter for a few hours or overnight in the fridge. Your lemon blueberry pound cake stays fresh for a while. If stored properly, it can last up to a week in the fridge. At room temperature, it stays good for about three days. Look for signs of spoilage. If the cake looks dry or has a strange smell, it’s best to throw it out. Also, any mold is a clear sign it’s time to say goodbye. Enjoy every bite while it’s fresh! To keep your pound cake moist, you can follow these tips: - Use fresh ingredients. - Measure flour correctly. Too much can dry the cake. - Avoid overbaking. Keep a close eye on baking time. - Wrap the cake in plastic wrap when cool. This helps lock in moisture. Yes, you can use frozen blueberries. They work well in this recipe. However, frozen blueberries may change the cake's texture. They can make the batter a little wetter. You might see some color bleed, turning the batter slightly blue. This won't affect the taste, and the cake will still be delicious! To check if your cake is done, insert a toothpick into the center. If it comes out clean or with just a few crumbs, the cake is ready. If it has wet batter on it, bake for a few more minutes. Be careful not to overbake, as this can dry out the cake. Yes, you can make this pound cake ahead of time. Bake it a day or two before serving. Just wrap it well to keep it fresh. You can serve it at room temperature. If you want, you can even freeze it for later. Just make sure to thaw it overnight in the fridge. Making a lemon glaze is simple. Here’s how: - Mix 1 cup of powdered sugar with 2 tablespoons of lemon juice. - Stir until smooth. - Drizzle it over the cooled pound cake for a sweet and tangy finish. This glaze adds a lovely shine and extra flavor. You now know how to make a delicious lemon blueberry pound cake. We covered key ingredients, step-by-step instructions, and helpful tips. Remember to avoid overmixing and adjust baking times for mini loaves. Consider flavor variations and storage advice for the best results. With these simple steps, you can bake an amazing treat that everyone will love. Enjoy the baking process and share your creation with others!](https://dailydishlab.com/wp-content/uploads/2025/07/b06ae976-d76d-41cd-a559-ecf5622799d5-768x768.webp)
![- 2 cups heavy whipping cream - 1 cup powdered sugar - 1 teaspoon vanilla extract - 1 cup strong brewed coffee, cooled - 1 tablespoon cocoa powder - 1 package (14.3 oz) Oreo cookies - 1/2 cup crushed espresso beans (optional, for garnish) - Shaved chocolate or chocolate curls (for garnish) Choosing the right coffee Select a coffee you enjoy drinking. A bold, rich coffee enhances the flavor of the cake. I recommend a dark roast for a deep, satisfying taste. Alternative sweeteners or creams You can use coconut cream or almond milk for a lighter version. If you want less sugar, consider using honey or maple syrup. Adjust the amount based on your taste. Substitutions for Oreo cookies If you can’t find Oreos, use chocolate wafer cookies. They provide a similar texture and flavor. You can also try gluten-free cookies if needed. For the full recipe, see the details above. First, gather your ingredients. You will need heavy cream, powdered sugar, and Oreo cookies. Brew strong coffee and let it cool. These steps set the stage for a great icebox cake. The chilling time is key. It helps the flavors blend and firm up the cake. I recommend letting it chill for at least four hours. Overnight is even better! Now, let’s layer the cake. Start by dipping each Oreo in the coffee mixture. Don’t soak them too long. You want them soft but not soggy. Place a layer of dipped Oreos in your baking dish. Next, spread a layer of whipped cream over the cookies. Make sure to smooth it out evenly. Repeat this process. Alternate between Oreos and whipped cream until you finish with cream on top. Once you complete layering, it’s time for the final touches. I love to sprinkle crushed espresso beans and chocolate curls on top for a fancy look. For serving, slice the cake into squares. Chilled plates add a nice touch. You can also add a dollop of whipped cream on the side. A sprinkle of cocoa powder gives an extra flair. Enjoy your Mocha Oreo Icebox Cake! For the full recipe, check out the details above. - Over-whipping cream: When you whip the cream, stop as soon as stiff peaks form. Over-whipping can turn your cream into butter. - Dipping Oreos too long: Dip each Oreo quickly. If you soak them too long, they will fall apart and get mushy. - How long to chill: Chill the cake for at least four hours. Overnight is best for rich flavors. - Timing for flavor melding: Allow the cake to sit in the fridge. This helps the coffee and cream flavors blend perfectly. - Best mixing tools: Use an electric mixer to whip the cream. It makes the process quick and easy. - Recommended baking dish: A 9x13 inch baking dish works great. It holds all the layers and fits in most fridges. For a detailed look at the ingredients and steps, check out the Full Recipe. {{image_2}} You can change the coffee type to fit your taste. Try espresso for a strong kick. Or, use flavored coffee like hazelnut or vanilla to add a unique twist. You can also mix in spices like cinnamon or a splash of coffee liqueur for more depth. Adding flavors to whipped cream can enhance the cake even more. Mix in a touch of almond extract or a bit of melted chocolate. You could also fold in some cocoa powder for a richer taste. Each flavor adds its own charm to this treat. For a gluten-free version, swap out regular Oreos for gluten-free cookies. Many brands offer delicious options that taste just as good. You can also use gluten-free chocolate wafers as an alternative. If you want a lower-calorie cake, use reduced-fat cream or a sugar substitute. Greek yogurt can also replace some of the cream for a lighter feel. Adjust the sweetness to your liking while keeping the taste intact. You can make holiday-themed twists by adding peppermint extract in December. Top the cake with crushed candy canes for a festive look. In the summer, use fresh fruits like strawberries or raspberries. Layer them between the Oreos for a bright, fruity taste. Each season brings a new chance to play with flavors. For the [Full Recipe], check out the detailed instructions and ingredients. To keep your Mocha Oreo Icebox Cake fresh, cover it tightly. Use plastic wrap or aluminum foil. This prevents air from getting in and keeps the flavors intact. I recommend a glass or plastic container with a lid. This way, it stays safe and tastes great. Yes, you can freeze the cake! This is a great option if you want to save some for later. Wrap the cake tightly in plastic wrap and then in foil. This helps prevent freezer burn. To defrost, move the cake to the fridge. Let it sit overnight. This keeps it moist and tasty. Your icebox cake will last about 3 to 5 days in the fridge. Look for signs of spoilage, like off smells or mold. If the cake looks dry or the cookies are too soft, it’s time to toss it. Enjoy your delicious treat while it’s fresh! For the [Full Recipe](#), check back to make this amazing dessert! An icebox cake is a no-bake dessert that layers cookies and whipped cream. It is simple to make and perfect for warm days. The history of icebox cakes dates back to the 1920s. People used iceboxes to chill desserts before modern fridges were common. This cake allows flavors to meld as it chills, creating a rich taste. Yes, you can use other cookies! Try chocolate chip cookies for a twist. Graham crackers also work well and give a nice crunch. Vanilla wafers add a sweet touch too. Feel free to experiment with different flavors and textures to find your favorite. You will know the cake is ready when the whipped cream is set and holds its shape. It should feel firm to the touch. After chilling for at least four hours, the cookies will soften, but they should not fall apart. The layers should look smooth and cohesive. Absolutely! This cake is perfect for making in advance. You can prepare it a day before you plan to serve. Just cover it well with plastic wrap before chilling. This way, the flavors deepen and the cake tastes even better. In this blog post, we explored the key ingredients for a delicious icebox cake. We covered tips on choosing the right coffee and alternatives for Oreos. You learned step-by-step instructions for preparation, layering, and adding final touches. We also shared common mistakes and timing for best results. Now, with these details in mind, you can create your own perfect icebox cake. Don't be afraid to experiment with flavors and variations. Enjoy the process and delight in sharing your creation!](https://dailydishlab.com/wp-content/uploads/2025/07/0dda9964-7972-494e-946c-2eb6009d36dd-768x768.webp)