Skip to content
About
Contact
Cookie Policy
Copyright Policy
Disclaimer
Search
Home
Dinner
Appetizer
Desserts
Drinks
About
Contact
Privacy Policy
Toggle Menu
Home
/
Desserts
- Page 26
Desserts
Peach Mango Overnight Oats Tasty Breakfast Delight
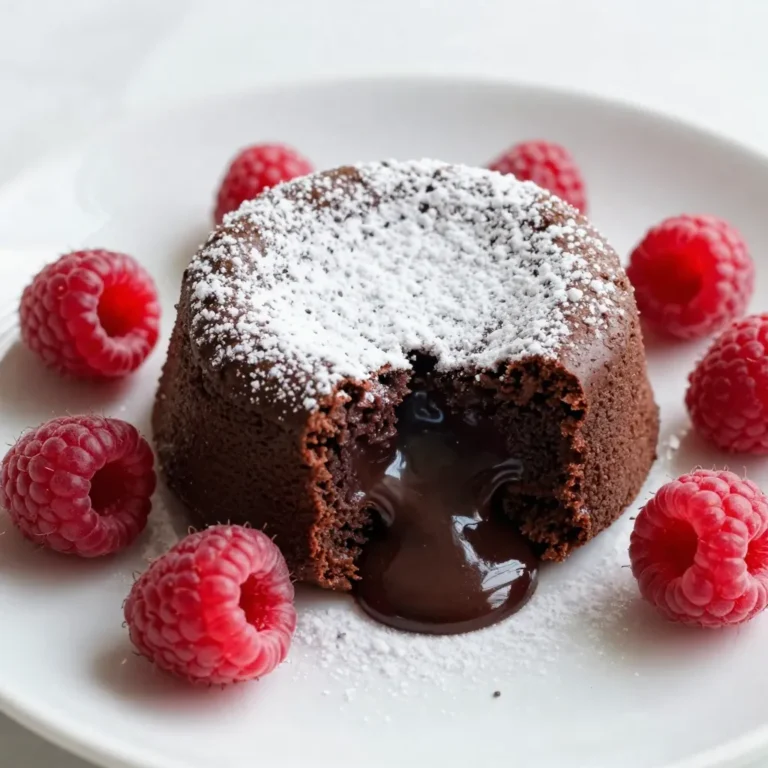
Chocolate Raspberry Lava Cakes Rich and Decadent Treat
No-Bake Chocolate Oat Bars Easy and Nutritious Treat
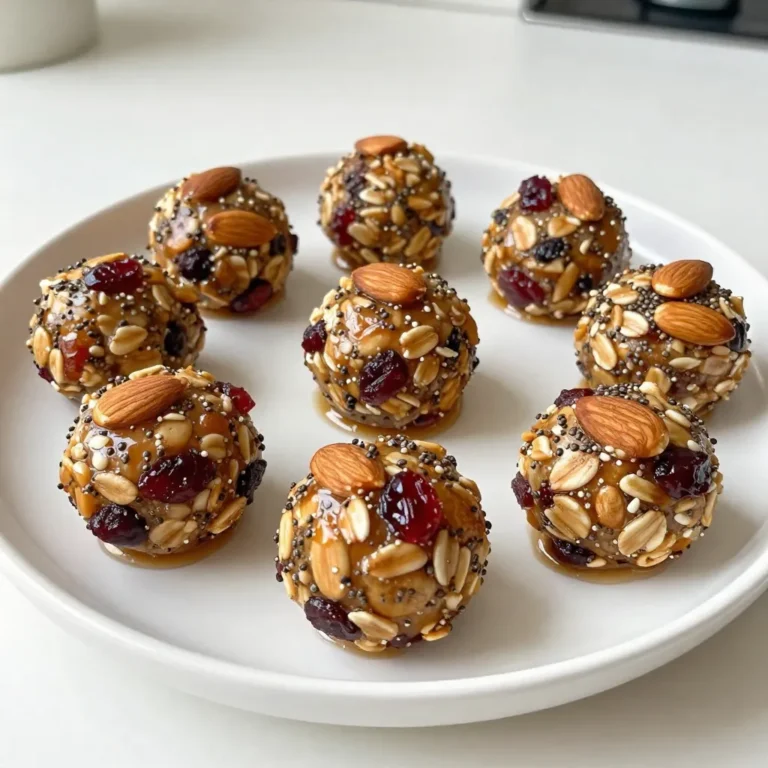
Almond Cranberry Energy Bites Healthy Snack Recipe
Caramel Apple Crisp Bars Irresistible Delight to Bake
Healthy Pumpkin Oat Muffins Simple and Tasty Treat
Chocolate Chip Energy Bites Easy and Tasty Snack
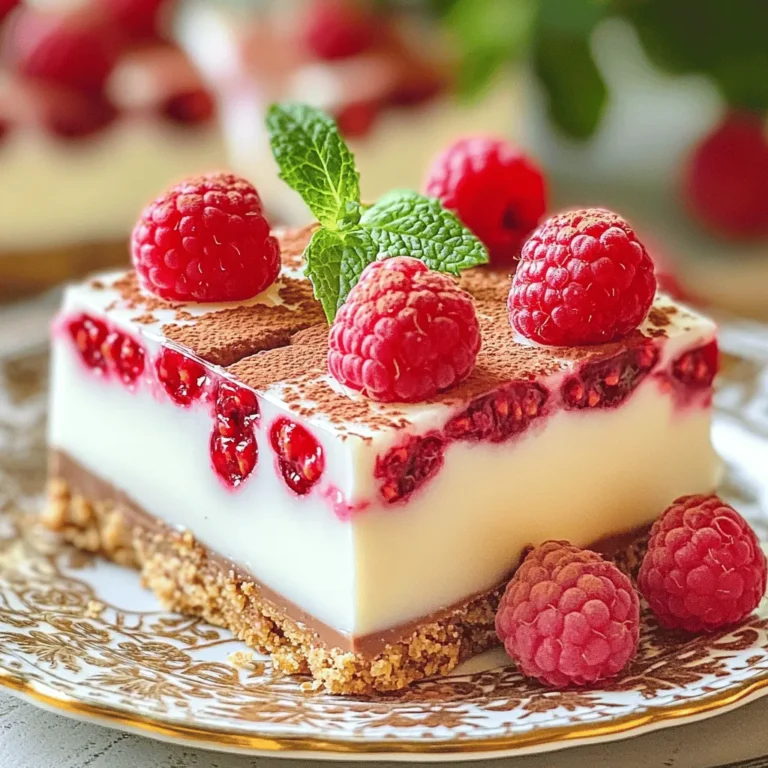
No-Bake White Chocolate Raspberry Bars Delight
No-Bake Funfetti Cake Batter Bars Easy and Delicious
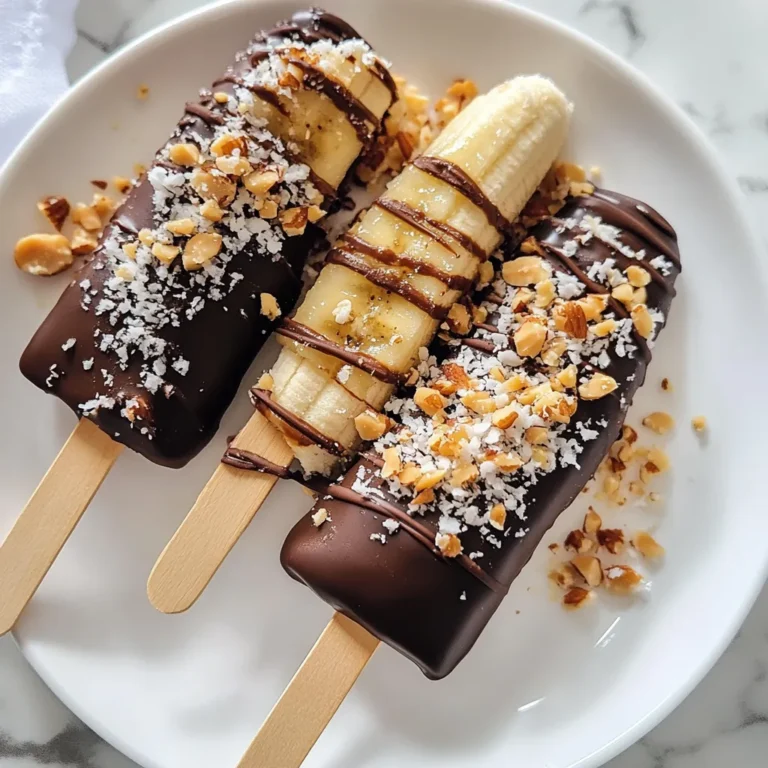
Chocolate Covered Banana Pops Delightful Frozen Treat
Page navigation
Previous Page
Previous
1
…
24
25
26
27
28
…
40
Next Page
Next
Home
Dinner
Appetizer
Desserts
Drinks
About
Contact
Privacy Policy
Toggle Menu Close
Search for:
Search

. Now that you have all your ingredients ready, you can start making this delightful breakfast! To start, you need to combine the rolled oats and milk in a mixing bowl. I like using almond milk for a nice flavor, but any milk works well. Then, add chia seeds, honey or maple syrup, vanilla extract, and cinnamon. Stir everything together until it's mixed well. Next, gently fold in the diced peach and mango. This adds a sweet, fruity touch to your oats. After mixing, divide the oat mixture into two airtight jars. Make sure to seal them tightly. Place the jars in the refrigerator. Let them chill overnight. This allows the oats to soak up the liquid and soften perfectly. When you’re ready to dig in, stir the oats well. This mixes all the flavors again. You can top your oats with extra diced peach and mango if you like. A sprinkle of fresh mint leaves adds a lovely touch. Enjoy this tasty breakfast delight! For more details, check the Full Recipe. For Peach Mango Overnight Oats, I recommend using rolled oats. Rolled oats are thick and chewy, making them perfect for soaking. Quick oats cook faster but can turn mushy. Instant oats lack texture and flavor. Rolled oats soak well overnight and stay firm. They absorb the milk and flavors, giving you a tasty dish in the morning. You can make your oats even more fun! Try adding nuts or seeds for a crunch. Almonds, walnuts, or sunflower seeds work great. You can also mix in different fruits. Berries, bananas, or even pineapple can add a twist. Get creative! Each new fruit brings a different taste and texture. Taste your oats before serving. You can adjust the sweetness easily. If you like it sweeter, add more honey or maple syrup. If you want a healthy option, try mashed banana or apple sauce. These natural sweeteners add flavor without refined sugar. Enjoy finding the right balance for your taste! {{image_2}} You can add a fun twist to your Peach Mango Overnight Oats. Try using coconut milk instead of almond milk. This change adds a creamy texture and tropical flavor. You might also sprinkle in some shredded coconut. This gives a nice crunch and enhances the coconut taste. Together, these ingredients create a refreshing and vibrant breakfast. Want to start your day with more protein? You can easily boost the protein in your overnight oats. Just mix in some Greek yogurt. It makes the oats creamy while adding extra protein. If you want, you can also stir in protein powder. This way, you’ll have a filling meal that keeps you energized all morning. You can switch up the fruits based on what’s in season. If peaches and mangoes aren’t available, use strawberries or blueberries. You can even mix in apples or bananas. Each fruit brings its own flavor and texture. This keeps your overnight oats fresh and exciting all year round. For the full recipe, check out the Peach Mango Paradise Overnight Oats. You can store the peach mango overnight oats in the fridge for up to five days. If the oats change color or smell sour, it’s time to toss them. Keep an eye on any liquid separation; this is normal but may signal it's nearing spoilage. Yes, you can freeze overnight oats! Use freezer-safe containers to avoid freezer burn. When ready to eat, thaw them overnight in the fridge or use the microwave. Remember, the texture may change slightly after freezing. To prep for the week, make several jars at once. Use small, airtight containers for easy storage. Aim for one jar per serving to keep portion sizes just right. This can save you time on busy mornings and keep breakfast exciting! You can use instant oats, but I prefer rolled oats. Rolled oats absorb liquid well and maintain a nice texture. Instant oats get mushy too quickly. If you choose instant oats, reduce the soaking time. They can still work, but the result may differ. You can store overnight oats for up to five days. Keep them in an airtight container in the fridge. I recommend eating them within three days for the best taste and texture. Always check for any signs of spoilage before enjoying. Yes, you can easily make this recipe vegan. Use plant-based milk like almond, soy, or oat milk. For sweeteners, maple syrup works great. Coconut sugar can also be a nice choice. Just pick what suits your taste best. Peach Mango Overnight Oats are simple and delicious. We covered how to prepare them using oats, almond milk, and fresh fruit. Remember to customize the flavors and adjust the sweetness to suit your taste. Store your oats properly for the best results, whether in the fridge or freezer. Try different fruits for seasonal variations. Enjoy a tasty and healthy breakfast packed with nutrients!](https://dailydishlab.com/wp-content/uploads/2025/07/bb11ae3b-fe9c-419d-8178-32614d376d1b-768x768.webp)
![To make no-bake chocolate oat bars, you need simple and wholesome ingredients. Here’s what you will need: - 2 cups rolled oats - 1 cup natural peanut butter (or almond butter) - 1/2 cup honey or maple syrup - 1/2 cup unsweetened cocoa powder - 1/4 teaspoon salt - 1 teaspoon vanilla extract - 1/2 cup mini chocolate chips (plus more for topping) - Optional: 1/4 cup chopped nuts (e.g., walnuts or almonds) These ingredients create a rich and tasty treat. The oats provide fiber and good nutrients. Peanut butter adds protein and healthy fats. Honey or maple syrup gives sweetness, while cocoa powder delivers that chocolate flavor we all love. Salt enhances the taste, making it all balanced. I love how easy it is to mix these ingredients together. You can customize it, too! Add nuts for crunch or swap the nut butter based on your taste. This recipe is perfect for snacks or dessert. You can find the full recipe with instructions to create these bars. Making no-bake chocolate oat bars is simple and fun. You only need a few basic steps. First, gather your ingredients. This recipe makes 16 bars, perfect for snacks or dessert. Start with a large bowl. Add 2 cups of rolled oats, 1/2 cup of cocoa powder, and 1/4 teaspoon of salt. Mix these dry ingredients well. This mixture gives the bars structure and rich flavor. In a small saucepan, add 1 cup of peanut butter and 1/2 cup of honey. Heat over low heat. Stir until smooth. This step helps the two ingredients blend nicely. Once mixed, take the pan off the heat and add 1 teaspoon of vanilla extract. Stir well to combine. Pour the warm peanut butter mix over your oat mixture. Stir until all the oats get coated. Fold in 1/2 cup of mini chocolate chips and optional chopped nuts if you like. Next, line an 8-inch square baking dish with parchment paper. Leave some paper hanging over the edges. This makes it easy to lift out the bars later. Transfer the oat mixture into the dish. Press it down firmly with a spatula or your hands. Sprinkle more mini chocolate chips on top and press them lightly into the mixture. Now, place the dish in the fridge for at least 2 hours. This will help the bars set. When ready, lift them out using the parchment paper. Cut into squares or rectangles. Enjoy your no-bake chocolate oat bars! For the full recipe, check out the complete list of steps above. To get the right texture for your no-bake chocolate oat bars, focus on the oats. Use rolled oats, not instant oats. Rolled oats give you that chewy bite. Make sure to mix the wet ingredients well. A smooth peanut butter blend helps to bind everything. Press the mixture firmly into your dish. This will help the bars set better. You can make these bars your own with toppings. Add different nuts for crunch, like walnuts or almonds. You can also sprinkle coconut flakes for a tropical twist. If you love chocolate, add more mini chocolate chips on top. Feel free to get creative! Use dried fruit or seeds for added flavor and nutrients. Avoid using too much liquid. This can make your bars too soft. If they don't hold together, they won't slice well. Also, don't skip chilling them long enough. They need at least two hours in the fridge. This helps them set properly. Lastly, always line your baking dish with parchment paper. This makes removing the bars easy and mess-free. For the full recipe, check out the [Full Recipe]. {{image_2}} You can make this treat even healthier. Try using whole grain oats instead of rolled oats. They add more fiber and nutrients. You can swap honey for agave syrup or use mashed bananas for sweetness. Both options lower the glycemic index. If you want a lower-fat option, use a nut butter with less oil. This keeps the flavor while cutting some calories. Let your taste buds explore! You can add spices like cinnamon or nutmeg to the oat mixture. This gives the bars a warm, cozy flavor. Try mixing in dried fruits like raisins or cranberries for a chewy texture. You can also switch up the chocolate chips. Use white chocolate or butterscotch chips for a fun twist. Each change makes the bars unique! Making these bars vegan or nut-free is easy. To go vegan, use maple syrup instead of honey. Replace peanut butter with sunflower seed butter. This keeps the bars nut-free and still delicious. You can also use pumpkin seed butter for a different flavor. Both options are rich in protein and healthy fats. Enjoy your tasty treat without worry! Check out the Full Recipe to see how easy these variations are to make. To keep your no-bake chocolate oat bars fresh, store them in an airtight container. Use parchment paper between layers to prevent sticking. This way, they stay nice and tasty for longer. If you have a big batch, you can also wrap them individually in plastic wrap. This makes it easy to grab one on the go. When stored properly, these bars last about one week at room temperature. You can keep them in the fridge for up to two weeks. The cool air helps keep them firm and tasty. Just make sure they stay in a sealed container to avoid moisture. You can freeze these bars for even longer storage. They freeze well for up to three months. To do this, wrap each bar in plastic wrap. Then, place them in a freezer-safe bag. When you want one, take it out and let it thaw in the fridge. This way, you’ll always have a treat ready to enjoy! For the full recipe, check out the detailed steps above. Yes, you can use other nut butters. Almond butter works well and has a nice flavor. Cashew butter is another tasty choice. Just make sure it is natural and creamy. Each nut butter may change the taste a little. Feel free to experiment with your favorite! To make this recipe gluten-free, choose certified gluten-free oats. Most rolled oats contain gluten. So, look for oats labeled as gluten-free. This small step ensures your tasty bars are safe for gluten-free diets. You can enjoy these bars without worry! If you want to substitute honey or maple syrup, try agave syrup or brown rice syrup. Both options add sweetness and keep the bars moist. You can also use date syrup for a fruity flavor. Just remember, these swaps may slightly change the taste. In this blog post, we covered a delicious recipe for oat bars. You learned about key ingredients like oats, nut butter, and cocoa powder. I shared step-by-step instructions to guide your cooking process. Tips for perfect texture and common mistakes were also discussed. Variations let you customize flavors and ensure everyone can enjoy these bars. Remember to follow storage tips for freshness. Baking these oat bars is fun and rewarding. They make a great snack for everyone. Enjoy your tasty creation!](https://dailydishlab.com/wp-content/uploads/2025/07/967f7db3-ab0b-4ab4-b9dd-ccfa3a2c04e2-768x768.webp)
![To create these tasty caramel apple crisp bars, you need a few key ingredients. Here’s what you’ll need: - 2 cups rolled oats - 1 cup all-purpose flour - 1/2 cup brown sugar, packed - 1/2 cup unsalted butter, melted - 1 teaspoon baking soda - 1/2 teaspoon cinnamon - 1/4 teaspoon salt - 3 cups diced apples (about 3 medium apples, peeled and cored) - 1/2 cup granulated sugar - 1 tablespoon lemon juice - 1/2 cup caramel sauce (store-bought or homemade) These ingredients blend together to make a deliciously sweet and crunchy treat. If you need to convert measurements, here are some handy tips: - 1 cup equals 8 ounces. - 1/2 cup equals 4 ounces. - 1 tablespoon equals 15 milliliters. - 1 teaspoon equals 5 milliliters. These conversions help you scale the recipe if needed. You can get creative with your bars! Here are a few optional ingredients: - 1/4 cup chopped nuts, like pecans or walnuts - 1/2 teaspoon vanilla extract - A pinch of nutmeg for warmth - A sprinkle of sea salt on top for contrast Adding these flavors can really elevate your caramel apple crisp bars. If you want, you can mix and match! For the full recipe and instructions, check out the [Full Recipe]. Start by preheating your oven to 350°F (175°C). This step is key for even baking. Next, take a 9x9-inch baking dish and line it with parchment paper. Leave some paper hanging over the edges. This helps when you remove the bars later. In a mixing bowl, combine these ingredients: - 2 cups rolled oats - 1 cup all-purpose flour - 1/2 cup brown sugar, packed - 1/2 cup unsalted butter, melted - 1 teaspoon baking soda - 1/2 teaspoon cinnamon - 1/4 teaspoon salt Stir until the mix looks crumbly. Now, take about two-thirds of this mixture and press it into the bottom of your lined dish. This forms the crust layer. Make sure it is even and compact. Next, grab another bowl and toss together: - 3 cups diced apples (about 3 medium apples, peeled and cored) - 1/2 cup granulated sugar - 1 tablespoon lemon juice Toss until the apples are well coated. Spread this apple mixture evenly over your crust. Drizzle half of the caramel sauce over the apples. This adds a sweet touch. Now, take the remaining oat mixture and crumble it over the apples and caramel. This topping will create a lovely crisp. Once you have done this, you are ready to bake! Follow the [Full Recipe] for the baking time and enjoy the delicious smell that fills your kitchen! Choosing the right apples is key. I recommend using tart apples like Granny Smith. They balance the sweet caramel well. You can also mix sweet apples, like Fuji or Honeycrisp, for extra flavor. Look for firm apples without bruises. They should feel heavy for their size. Fresh apples give a great texture in your bars. For a smooth caramel, heat it gently. If you use store-bought, warm it in a microwave. Stir it every 20 seconds until it’s easy to drizzle. If you make it at home, keep stirring to avoid burning. Let it cool slightly before drizzling. This helps it stick better to the apples and crust. You want that perfect, gooey layer. To keep your bars fresh, store them in an airtight container. This keeps them moist and tasty. You can place parchment paper between layers to avoid sticking. If you have a lot left, freeze them. Just wrap individual bars in plastic wrap, then place them in a freezer bag. They stay good for up to three months. Enjoy your delicious caramel apple crisp bars whenever you want! {{image_2}} You can try different toppings for your caramel apple crisp bars. Add chopped nuts like walnuts or pecans for crunch. You can also sprinkle some shredded coconut for a tropical twist. If you love chocolate, drizzle some melted chocolate on top. These toppings make the dessert even more fun and tasty. If you want a gluten-free crust, swap all-purpose flour with gluten-free flour. Make sure it’s a blend that works well in baking. You can also use almond flour or oat flour for a nutty taste. This way, everyone can enjoy these bars without worry. As the seasons change, so can your bars. In fall, add pumpkin spice to the apple filling. Mix cinnamon, nutmeg, and clove for a warm flavor. For summer, use peaches or berries instead of apples. Each season brings new fun to this recipe. Enjoy the Full Recipe for more ideas! Storing caramel apple crisp bars is simple. Once they cool, place them in an airtight container. You can keep them at room temperature for up to three days. If you want them to last longer, store them in the fridge. This keeps them fresh and tasty. Just make sure they are sealed well to avoid drying out. If you want to save some bars for later, freezing is a great option. First, wrap each bar in plastic wrap. Then, place them in a freezer-safe bag or container. They can stay in the freezer for up to three months. To enjoy later, just thaw them in the fridge overnight. You can also let them sit at room temperature for an hour before eating. Reheating your caramel apple crisp bars can bring back their warm, gooey goodness. To do this, preheat your oven to 350°F (175°C). Place the bars on a baking sheet and cover them with foil. Heat for about 10-15 minutes. This method keeps the bars soft and the caramel melty. You can also use a microwave, but heat them in short bursts to avoid drying them out. Enjoy them warm for a delightful treat! Yes, you can! I love using Granny Smith apples for their tartness. They balance well with the sweet caramel. Honeycrisp apples add a nice crunch and sweetness. You can also mix different types for more flavor. Just make sure the apples are firm and fresh for the best results. To make these bars vegan, swap the unsalted butter for coconut oil or a vegan butter substitute. Use brown sugar, as it is usually vegan. You can also find vegan caramel sauce or make your own. This way, everyone can enjoy the deliciousness of caramel apple crisp bars! After the bars cool, use a sharp knife to cut them. I recommend lifting the whole batch out of the pan using the parchment paper. This makes it easy. For neat squares, wipe the knife clean after each cut. You’ll get perfect pieces to share with friends and family! For the full recipe, check out the details above. Caramel apple crisp bars are simple to make. We covered key ingredients and measurements. You learned how to prepare, create layers, and perfect the caramel drizzle. I shared tips on apple selection and storage. Variations let you explore new flavors, even gluten-free options. In the end, these bars are a fun treat. They work for any season and occasion. Try making them your own! Enjoy the sweet, warm taste today.](https://dailydishlab.com/wp-content/uploads/2025/07/dc1cd077-e04f-4984-9460-89b9559f5089-768x768.webp)
![For these muffins, you need simple, wholesome ingredients. Here’s what you will use: - 1 cup rolled oats - 1 cup canned pumpkin puree - 1/4 cup honey or maple syrup - 1/4 cup Greek yogurt - 2 large eggs - 1 teaspoon vanilla extract - 1 teaspoon baking powder - 1/2 teaspoon baking soda - 1 teaspoon ground cinnamon - 1/2 teaspoon ground nutmeg - 1/4 teaspoon salt These ingredients blend to create a moist and tasty treat. The oats add fiber, while pumpkin gives a rich flavor and nutrition. You can enhance your muffins with optional items. Try adding: - 1/2 cup chopped nuts (like walnuts or pecans) - 1/2 cup chocolate chips These extras add crunch and sweetness. You can mix and match based on your taste. If you need to swap ingredients, here are some ideas: - For honey or maple syrup, use agave syrup or coconut sugar. - Replace Greek yogurt with applesauce for a dairy-free option. - If you want a nut-free version, skip the nuts or use seeds instead. These swaps keep the muffins healthy while catering to your needs. You can find the full recipe above for step-by-step guidance. First, gather all your ingredients. You will need rolled oats, pumpkin puree, honey, Greek yogurt, eggs, and spices. Preheat your oven to 350°F (175°C). Line a muffin tin with paper liners or grease it lightly with oil. This step helps to prevent the muffins from sticking. In a large bowl, combine the rolled oats, baking powder, baking soda, salt, and spices. This includes ground cinnamon and nutmeg. Mix these ingredients well. An even mix ensures that each muffin gets the same flavor and rise. In a separate bowl, whisk together the pumpkin puree, honey or maple syrup, Greek yogurt, eggs, and vanilla. Make sure this mixture is smooth and creamy. Once combined, pour this wet mixture into the dry ingredients. Stir gently until just combined. If you want to add nuts or chocolate chips, fold them in now. Now you have a delicious batter ready for baking. Follow the [Full Recipe] to continue. Baking muffins can be fun and easy. To get the best results, start with fresh ingredients. Check the expiration dates on your baking powder and baking soda. Use room temperature eggs and yogurt for a better mix. Always preheat your oven. This helps muffins rise nicely. To get a soft, fluffy muffin, do not overmix your batter. Stir until the dry and wet ingredients just come together. Small lumps are okay! Overmixing makes muffins dense. Bake them until a toothpick comes out clean. This ensures they are cooked but not dry. You can boost flavor by adding spices like ginger or cloves. Try adding nuts or seeds for crunch and taste. For more nutrients, swap out some oats for ground flaxseed or chia seeds. This adds fiber and omega-3s. You can also use unsweetened applesauce instead of some sweetener for a healthier twist. For the complete recipe, check out the Full Recipe. {{image_2}} You can make these muffins gluten-free. Use gluten-free oats instead of regular rolled oats. Make sure to check the label to ensure they are certified gluten-free. For the flour, try almond flour or coconut flour. These flours add a nice texture and flavor. Adjust the amount of liquid in your recipe, as these flours absorb moisture differently. To make these muffins vegan, swap the eggs for flax eggs. Mix one tablespoon of ground flaxseed with three tablespoons of water for each egg. Let it sit for a few minutes until it thickens. Replace Greek yogurt with unsweetened applesauce or a dairy-free yogurt. Use maple syrup instead of honey for sweetness. This keeps the muffins moist while staying plant-based. Feel free to get creative with your muffins. Add-ins can change the flavor and texture. Some great options include: - 1/2 cup chopped nuts (walnuts or pecans) - 1/2 cup chocolate chips - 1/2 cup dried cranberries or raisins - 1/2 teaspoon of ginger or cloves for warmth - 1/4 cup of apple sauce for extra moisture For seasonal twists, try stirring in a bit of orange zest or a splash of maple extract. These small changes can elevate your muffins. You can also top them with pumpkin seeds or a sprinkle of cinnamon for extra flair. Enjoy experimenting with these variations from the Full Recipe! To keep your muffins fresh, store them in an airtight container. This helps avoid drying out. You can place a paper towel in the container. The towel absorbs excess moisture, keeping muffins soft. If you live in a humid area, store them in the fridge to prevent mold. You can freeze muffins for later use. First, let them cool completely. Wrap each muffin in plastic wrap. Then place them in a freezer-safe bag. This keeps them fresh for up to three months. When you're ready to eat, remove a muffin and thaw it overnight in the fridge. You can also warm it in the microwave for 15-20 seconds. Healthy Pumpkin Oat Muffins last for about five days at room temperature. If stored in the fridge, they can last up to a week. For the best taste, eat them within three days. You can find the full recipe above for detailed instructions. Enjoy these tasty treats while they are fresh! You can replace eggs with applesauce or mashed banana. Use 1/4 cup of either for each egg. This keeps the muffins moist and adds natural sweetness. You can also use flaxseed meal. Mix 1 tablespoon of flaxseed with 2.5 tablespoons of water. Let it sit for five minutes until it gels. Both options work well in this recipe. Rolled oats are best for these muffins. They give a nice texture and hold their shape. You can also use quick oats, but they will make the muffins softer. Avoid steel-cut oats, as they need more cooking time. Using rolled oats ensures a good balance of flavor and texture in every bite. Yes, you can use fresh pumpkin. Just cook it until soft, then blend until smooth. This adds a fresh flavor to your muffins. Make sure to measure the same amount as the canned pumpkin. Fresh pumpkin can be more watery, so drain any excess moisture if needed. Pumpkin is rich in vitamins A and C, which support your immune system. It also has fiber that helps digestion. Oats are a great source of whole grains. They lower cholesterol and keep you full longer. Together, they make a nutritious snack. Enjoy these muffins guilt-free! You can find the Full Recipe above for a tasty way to enjoy these benefits. Healthy pumpkin oat muffins are simple and tasty. We covered key ingredients and how to make them. You learned tips for perfect texture and added flavors. Variations cater to gluten-free and vegan diets. I also shared storage tips for freshness and longevity. In the end, these muffins offer a healthy option for any meal. Enjoy making them your own with different ingredients and flavors. Your baking journey can be both fun and healthy!](https://dailydishlab.com/wp-content/uploads/2025/07/c0729778-358d-4726-8681-cbd04cabebc9-768x768.webp)
![- 1 cup rolled oats - 1/2 cup almond butter (or any nut butter of choice) - 1/4 cup honey or maple syrup These key ingredients form the base of your energy bites. Rolled oats provide fiber and texture. Almond butter gives healthy fats and protein. Honey or maple syrup adds natural sweetness. - 1/4 cup mini chocolate chips - 1/4 cup ground flaxseed - 1/4 cup shredded coconut (unsweetened) Mini chocolate chips add a delightful burst of flavor. Ground flaxseed boosts nutrition with omega-3s. Shredded coconut gives a chewy texture and tropical taste. - 1 tsp vanilla extract - 1/2 tsp cinnamon - A pinch of salt Vanilla extract enhances the overall flavor. Cinnamon adds warmth and depth. A pinch of salt balances the sweetness and brings all the flavors together. For the complete guide on making these bites, check out the [Full Recipe]. To start, gather your ingredients. For the dry mix, you need rolled oats, ground flaxseed, shredded coconut, and cinnamon. In a medium bowl, combine these dry ingredients. Mix them well so they blend nicely. Next, let's make the wet mix. In a separate bowl, add almond butter, honey (or maple syrup), vanilla extract, and a pinch of salt. Stir until it becomes smooth and creamy. This step is key for a good flavor. Now, pour the wet mix into the dry mix. Stir until you combine everything. You want all the dry ingredients to be coated with the wet mix. Finally, gently fold in mini chocolate chips. This adds a sweet delight to every bite. Now it’s time to shape your energy bites. Take about one tablespoon of the mixture. Roll it between your hands to form a ball. Make sure they are about the same size for even bites. Repeat this process until you use all the mixture. Place each ball on a parchment-lined baking sheet. This helps them not stick and makes clean-up easy. Keep them spaced out a bit to avoid sticking together. After shaping, place the baking sheet in the fridge. Let the energy bites chill for at least 30 minutes. This helps them firm up and hold their shape. Once chilled, store the bites in an airtight container. Keep them in the fridge for up to one week. Enjoy these tasty snacks whenever you need a quick energy boost, and don’t forget to check out the Full Recipe for more details! To boost the flavor of your energy bites, add spices like nutmeg or ginger. They give a warm kick. You can also try different extracts, like almond or coconut, for a unique taste. If you like it sweeter, adjust the honey or maple syrup. Just add a little at a time to find your perfect sweetness. For a better texture, focus on the consistency of your mixture. If it's too dry, add a touch more nut butter or honey. For crunchier bites, mix in chopped nuts or seeds. If you prefer them chewier, reduce the baking time slightly. This makes them softer and more enjoyable. Use a medium bowl for mixing your ingredients. A spatula works well for combining everything. To store your energy bites, an airtight container is best. It keeps them fresh longer. You can also use parchment paper to prevent sticking when chilling them in the fridge. For the full recipe, check out the [Full Recipe]. {{image_2}} You can easily make these energy bites fit your diet. For gluten-free options, use certified gluten-free oats. This way, you avoid any gluten while still enjoying a tasty snack. If you want vegan alternatives, swap honey for maple syrup. Both options keep the bites sweet and delicious. You can add fun flavors to your energy bites. Try mixing in dried fruits like raisins or cranberries. These add chewiness and natural sweetness. Nuts such as almonds or walnuts also work well. They add crunch and healthy fats. You can also experiment with different types of chocolate. Use dark, milk, or even white chocolate chips. Each type brings its own unique taste. Get creative with nut butters! While almond butter is great, you can try peanut butter or cashew butter. Each brings a different flavor and texture. You can also incorporate protein powder for a boost. This makes the bites even more filling and nutritious. Adjust the wet ingredients slightly if you add protein powder to keep the right texture. Feel free to explore these variations. They can help you make the perfect chocolate chip energy bites just for you. Check out the Full Recipe for the basic mix, then let your imagination lead the way! To keep your chocolate chip energy bites fresh, store them in an airtight container. Glass or plastic containers work well. Place them in the fridge to maintain their texture and taste. They can last up to one week when stored properly. You can freeze energy bites for longer storage. To freeze, place them in a single layer on a baking sheet. Once frozen, transfer them to a freezer-safe bag. This method prevents them from sticking together. When you want to eat them, take out a few bites and let them thaw in the fridge. This process takes about an hour. In the fridge, these bites last about one week. After that, they may lose flavor and texture. Watch for signs of spoilage, like an off smell or changes in color. If you see or smell anything unusual, it's best to toss them. Enjoy your homemade snacks while they’re fresh! Chocolate chip energy bites can last up to one week in the fridge. Store them in an airtight container for the best freshness. If you freeze them, they can last for about three months. Just thaw them in the fridge when you're ready to enjoy. Yes, you can easily substitute ingredients in this recipe. If you don't like almond butter, feel free to use peanut butter or sunflower seed butter. You can swap honey for maple syrup if you prefer a vegan option. The mini chocolate chips can also be replaced with dried fruits or nuts. Absolutely! These energy bites are a great snack for kids. They are tasty, healthy, and easy to make. You can even involve your kids in the preparation. They will love rolling the bites into balls. Just ensure there are no allergies to the ingredients used. Yes, making these energy bites in advance is a smart idea. You can prepare a batch at the start of the week. This way, you have quick snacks ready for busy days. Just store them in the fridge or freeze some for later use. Chocolate chip energy bites offer many nutritional benefits. They contain rolled oats, which provide fiber for digestion. Almond butter adds healthy fats and protein. Flaxseed is rich in omega-3 fatty acids, promoting heart health. Plus, the little bit of chocolate makes them a treat! These chocolate chip energy bites are simple to make and full of good stuff. You can enjoy them as snacks or quick breakfast bites. Let’s dive into what makes these little treats so special. - Rolled oats: They give a hearty base and provide fiber. - Almond butter (or nut butter alternatives): This adds creaminess and healthy fats. - Honey or maple syrup: Sweeteners that bring flavor and stickiness. - Mini chocolate chips: They add sweetness and a fun texture. - Ground flaxseed: This boosts nutrition and adds omega-3s. - Unsweetened shredded coconut: It gives a nice chewiness. - Vanilla extract: This enhances the flavor and warms the bites. - Cinnamon: It adds spice and depth. - Salt: Just a pinch balances all the flavors. In this recipe, we blend all these ingredients to create something delicious. You can find the [Full Recipe] at the start of this article. It only takes about 10 minutes to mix, and then just chill for 30 minutes. You’ll have about 12 bites ready to enjoy! Feel free to switch it up with your favorite nut butter or add different mix-ins. The options are endless! These chocolate chip energy bites are simple to make and full of flavor. We covered key ingredients like oats and nut butter. I shared tips on making them crunchier or chewier, and variations for different diets. Remember to store them in an airtight container for the best taste. You can enjoy these bites anytime you need a quick snack. Making them yourself lets you control the ingredients and flavors. Healthy snacks can be easy and delicious, so try these energy bites today!](https://dailydishlab.com/wp-content/uploads/2025/07/ee6487bc-f560-4f96-a21c-d76d52703957-768x768.webp)
![- 1 cup all-purpose flour (heat-treated) - 1/4 cup granulated sugar - 1/4 cup brown sugar, packed - 1/2 cup unsalted butter, melted - 1/4 teaspoon salt - 1 teaspoon vanilla extract - 1/2 cup rainbow sprinkles - 1/2 cup mini chocolate chips (optional) - 1 cup vanilla frosting Heat-treating flour is key for safety. Raw flour can have germs. To heat-treat, spread the flour on a baking sheet. Bake it at 350°F (175°C) for five minutes. This step kills any harmful bacteria, making it safe to eat without baking. If you want a gluten-free option, you can use a gluten-free flour blend. Look for one that is designed for baking. This makes it easy for everyone to enjoy these tasty bars. Feel free to mix it up with different sprinkles. You can use chocolate sprinkles, or even themed sprinkles for events. For frosting, try chocolate or cream cheese frosting instead. Each will give a new twist to the bars. You can always experiment to find your favorite combination! 1. Mixing the dry ingredients Start with a large mixing bowl. Add 1 cup of heat-treated flour, 1/4 cup of granulated sugar, 1/4 cup of brown sugar, and 1/4 teaspoon of salt. Use a whisk to blend them well. This mix forms the base of your bars. 2. Combining wet ingredients Next, pour in 1/2 cup of melted unsalted butter and 1 teaspoon of vanilla extract. Stir until everything combines into a dough. This part brings the sweetness and rich flavor to the bars. 1. Pressing mixture into the pan Line an 8x8-inch square baking pan with parchment paper. Leave some paper hanging over the edges. This makes it easy to lift the bars later. Press the dough evenly into the pan. Use a spatula to smooth the top. 2. Spreading the frosting evenly Grab 1 cup of vanilla frosting. Spread it over the pressed mixture. Use your spatula to create a nice, even layer. For fun, sprinkle some extra rainbow sprinkles on top for color and crunch. 1. Refrigeration time and tips for proper setting Place the pan in the fridge for at least 30 minutes. This helps the bars firm up. If you want them extra solid, leave them in longer. Once set, lift the bars out using the parchment paper. Cut into squares and enjoy! For the complete recipe, check out the Full Recipe section. - Overmixing the batter: Mixing too much can make your bars dense. Just mix until combined. - Skipping refrigeration: If you don’t chill the bars, they will stay too soft. Chill for at least 30 minutes. - Reducing sugar for less sweetness: You can cut down the granulated sugar. This will make the bars less sweet without losing flavor. - Adding flavor extracts: Try different extracts like almond or coconut. Just a little can change the taste. - Best mixing bowls and tools: Use a large mixing bowl for easy stirring. A sturdy spatula helps combine the batter well. - Recommended baking pan types: A metal or glass 8x8-inch pan works best. Line it with parchment paper for easy removal. For the full recipe, check out the No-Bake Funfetti Cake Batter Bars. {{image_2}} You can change the flavor of your No-Bake Funfetti Cake Batter Bars easily. Try making chocolate cake batter bars by swapping in chocolate cake mix for the flour. Just mix it in as you would the flour. This gives a rich, chocolatey taste that many love. Another fun twist is using peanut butter. Replace the butter with creamy peanut butter. This adds a nutty flavor that pairs well with sprinkles. You can also mix in mini chocolate chips for extra indulgence. Make your bars pop with seasonal decorations. Use holiday-themed sprinkles for Christmas, Halloween, or birthdays. You can find sprinkles shaped like stars, hearts, or seasonal colors. This makes the bars festive and fun for any occasion. You can also change the color of your sprinkles based on the season. For spring, use pastel colors. For summer, bright colors shine. This small touch makes your bars look special and inviting. Want a vegan version? It’s easy! For dairy-free substitutions, use coconut oil in place of butter. It gives a nice flavor and texture. You can also use plant-based milk for the frosting. For frosting, try a vegan buttercream made with powdered sugar and plant-based butter. This way, you keep the creamy texture without using dairy. These options make your delicious bars suitable for everyone! For the full recipe, check out the [Full Recipe]. To keep your No-Bake Funfetti Cake Batter Bars fresh, store them in the refrigerator. Place the bars in an airtight container. This helps keep them moist and tasty. You can also cover them tightly with plastic wrap. If you want to save them for later, you can freeze them. Cut the bars into squares first. Wrap each piece in plastic wrap and then put them in a freezer bag. They will stay fresh this way! When stored correctly, these bars can last about a week in the fridge. If you freeze them, expect them to stay fresh for up to three months. Always check for any signs of spoilage before eating them. Look for changes in color or smell. You don’t need to reheat these bars, as they are best served cold. If you want a warm treat, you can microwave them for a few seconds. Just be careful not to overheat. A few seconds is all you need to enjoy a soft, tasty treat! No, you should not use regular flour. Raw flour can contain harmful bacteria. Heat-treated flour kills these germs and makes the flour safe for no-bake recipes. You can easily heat-treat flour at home by baking it on a baking sheet. Spread it out and bake at 350°F for about five minutes. Let it cool before using. These bars stay fresh for about five days at room temperature. To keep them longer, store them in the fridge. You know they are spoiled if they smell bad or look dry. Check for any mold as well. If you see any signs of spoilage, toss them out. Yes, you can make these bars ahead of time. They are great for parties and special events. Just prepare them a day or two before. Store them in the fridge until you are ready to serve. To save time, you can also press the mixture into the pan and chill it. Frost just before serving for the best taste. You can easily swap ingredients if needed. If you lack rainbow sprinkles, use chocolate or other types. For the frosting, any flavor works well. Don’t have mini chocolate chips? You can skip them or use nuts instead. Just be creative and adjust the recipe to fit what you have at home. For the full recipe, check the original instructions. This blog post covered the key ingredients, steps, and tips for making delicious dessert bars. We discussed crucial details like heat-treating flour and gluten-free options. I shared variations and ideas for seasonal fun, plus how to store and reheat leftovers. In summary, these bars are easy to make and fun to customize. With simple ingredients and clear steps, you're ready to bake. Enjoy creating your own tasty treats!](https://dailydishlab.com/wp-content/uploads/2025/07/c4f5a401-6c49-4de0-bdd4-db0dcac5f5d0-768x768.webp)