Skip to content
About
Contact
Cookie Policy
Copyright Policy
Disclaimer
Search
Home
Dinner
Appetizer
Desserts
Drinks
About
Contact
Privacy Policy
Toggle Menu
Home
/
Dinner
- Page 24
Dinner
Tasty Orange Glazed Chicken Quick and Easy Recipe
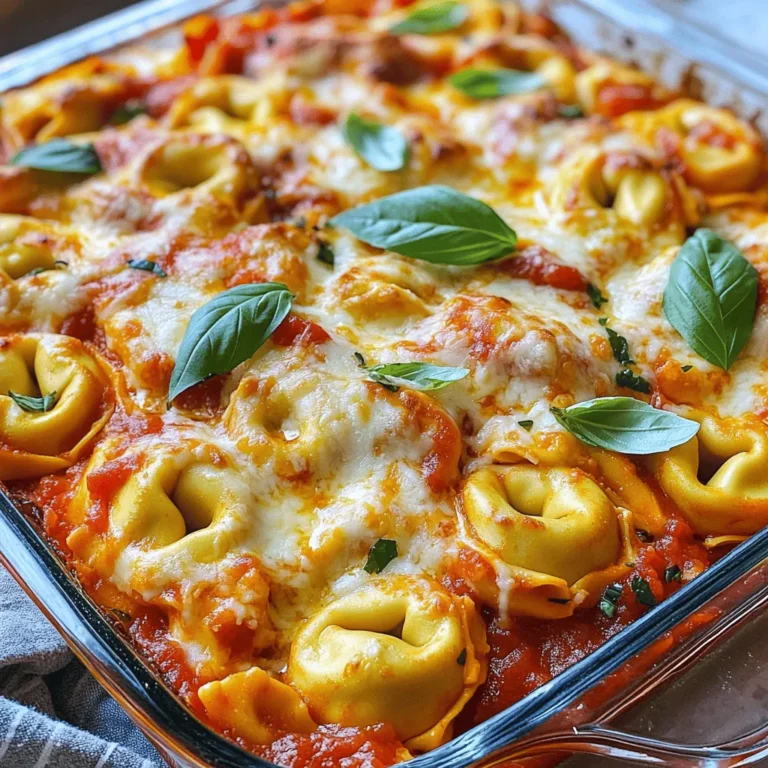
Cheesy Baked Tortellini Casserole Wholesome Comfort Dish
Sheet Pan Veggie Quesadillas Easy and Flavorful Meal
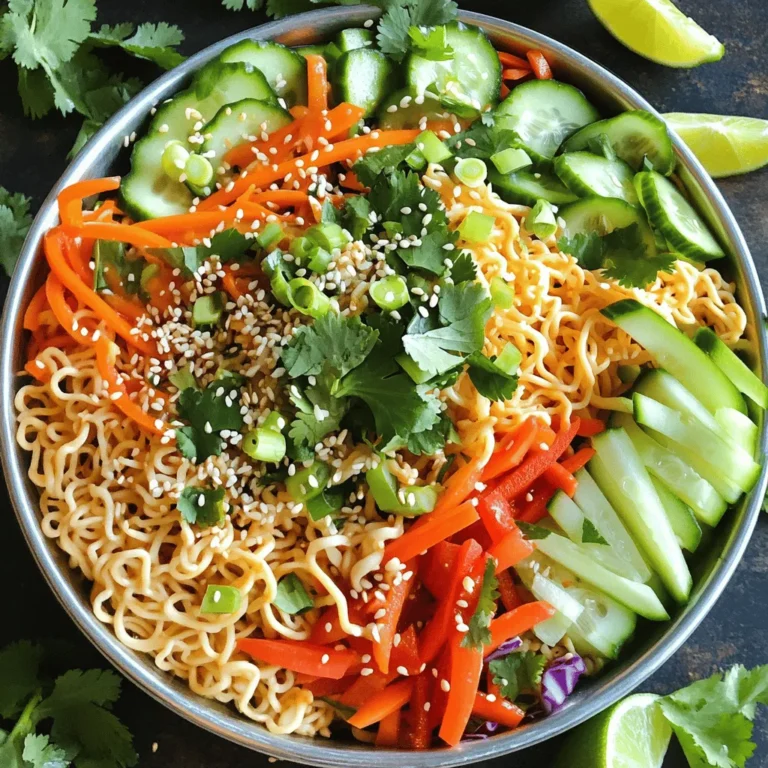
Sesame Garlic Ramen Salad Fresh and Flavorful Delight
BBQ Chicken Flatbread Pizza Tasty and Easy Recipe
Creamy Broccoli Cheddar Rice Simple and Tasty Dish
Lemon Garlic Salmon Orzo Delightful and Easy Recipe
Creamy Spinach Stuffed Salmon Flavorful and Rich Dish
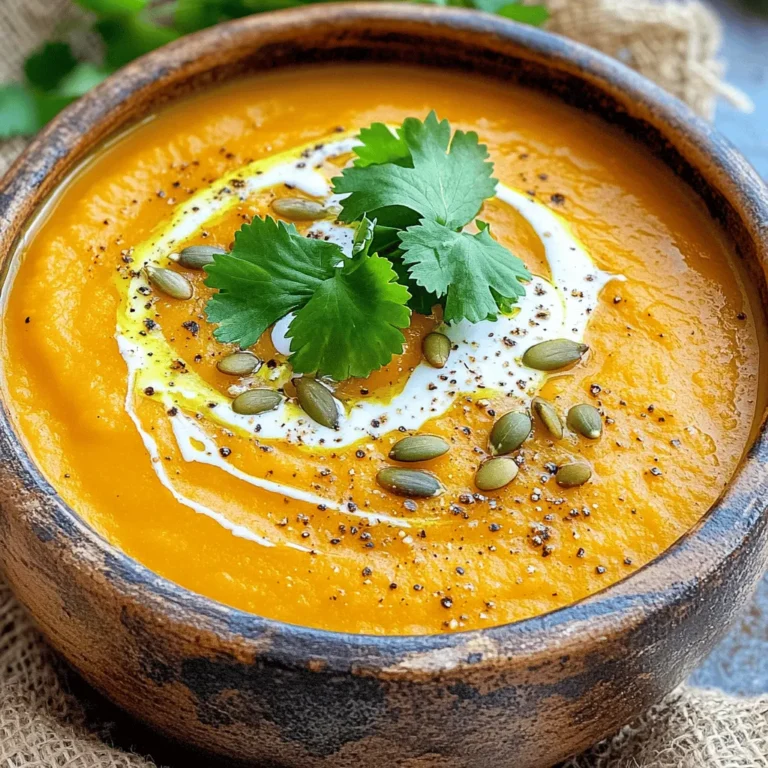
Roasted Pumpkin Soup Rich and Creamy Delight
Italian Wedding Soup Flavorful and Hearty Dish
Page navigation
Previous Page
Previous
1
…
22
23
24
25
26
…
64
Next Page
Next
Home
Dinner
Appetizer
Desserts
Drinks
About
Contact
Privacy Policy
Toggle Menu Close
Search for:
Search


![- 2 large flatbreads (store-bought or homemade) - 1 cup cooked chicken breast, shredded - 1/2 cup BBQ sauce (your favorite brand) - 1 cup shredded mozzarella cheese - 1/2 red onion, thinly sliced - 1/4 cup fresh cilantro, chopped - 1/4 cup sliced jalapeños (optional for heat) - 1 tablespoon olive oil - Salt and pepper to taste It’s fun to create BBQ Chicken Flatbread Pizza with these simple ingredients. You can use store-bought flatbreads or make your own. I often choose the store-bought ones for quick meals. Shredded chicken is key. You can use leftover rotisserie chicken or cook it fresh. The BBQ sauce brings a sweet and tangy flavor. I love using my favorite brand, but feel free to explore. Mozzarella cheese adds creaminess and helps everything stick together. Red onion gives a nice crunch and flavor. Cilantro adds freshness, while jalapeños can bring some heat. I like to keep them optional because not everyone enjoys spicy food. Olive oil makes the flatbreads crispy and golden. Finally, remember to season with salt and pepper to enhance the flavors. - Calories per serving: Approximately 300-350 - Macronutrients: - Protein: 25g - Carbohydrates: 30g - Fats: 12g This dish is not only tasty but also filling. Each serving gives you a good amount of protein. The carbs come mainly from the flatbreads. The fats are from the cheese and olive oil. Enjoy this delightful meal while knowing it's also packed with nutrients. For the complete cooking steps, check the Full Recipe. 1. Start by preheating your oven to 450°F (230°C). This high heat will help create a crispy pizza base. 2. In a mixing bowl, combine 1 cup of shredded chicken with 1/4 cup of your favorite BBQ sauce. Mix well until the chicken is fully coated. This adds flavor and keeps the chicken moist. 1. Place the flatbreads on a baking sheet lined with parchment paper. This prevents sticking and makes cleanup easy. 2. Brush each flatbread lightly with 1 tablespoon of olive oil. This helps achieve a nice, crispy texture. 3. Spread the remaining BBQ sauce (about 1/4 cup) evenly over the flatbreads. Leave a small border around the edges for a perfect crust. 4. Evenly distribute the BBQ chicken mixture on top of the sauce on each flatbread. Make sure to cover it well for great flavor. 5. Sprinkle 1 cup of shredded mozzarella cheese generously on top of the chicken. This will melt into a gooey layer as it bakes. 6. Add sliced red onions and jalapeños (if using) on top for added crunch and heat. 1. Bake in the preheated oven for about 12-15 minutes. Watch closely until the cheese is melted and bubbly, and the edges of the flatbreads turn golden brown. 2. Once baked, remove the flatbreads from the oven. Let them cool for a couple of minutes before slicing. 3. Before serving, garnish with 1/4 cup of fresh chopped cilantro. This adds a pop of color and fresh flavor. Now, you're ready to enjoy your BBQ Chicken Flatbread Pizza! For the complete recipe, check the [Full Recipe]. To get crispy flatbreads, brush them lightly with olive oil. This helps create a nice crunch. Bake them at a high temperature, around 450°F (230°C), for the best results. For BBQ sauce, I recommend brands like Sweet Baby Ray's or Stubbs. These sauces add great flavor and a touch of sweetness. You can also make your own sauce for a personal touch. One common mistake is overloading the flatbreads with toppings. Too many toppings can make the flatbread soggy. Stick to a few key ingredients for the best taste and texture. Another mistake is not preheating the oven. Always preheat to ensure even cooking. If the oven is not hot enough, the flatbread won’t bake well. To pair with BBQ Chicken Flatbread Pizza, consider serving a fresh salad. A crunchy coleslaw or a Caesar salad works well. You can also try fresh veggies and dip for a side. For drinks, iced tea or lemonade can be refreshing. If you want something stronger, pair it with a light beer. These drinks complement the flavors nicely. For more details, check out the Full Recipe to make this dish at home! {{image_2}} You can switch up your BBQ chicken flatbread pizza with fun toppings. For a vegan option, use shredded jackfruit instead of chicken. It mimics the texture well. For cheese, try vegan mozzarella or cashew cheese. Both melt nicely and add flavor. You can also play with sauces. Instead of BBQ, drizzle ranch dressing for a creamy touch. Hot sauce brings heat if you love spice. Both options can change the feel of your pizza. Making your own flatbread can be easy and fun. Mix flour, water, salt, and olive oil for a simple dough. Roll it out, then cook it on a skillet until golden. This gives you a fresh base. If you need gluten-free options, use almond flour or chickpea flour. You can also find gluten-free flatbreads at many stores. They work just as well for this recipe. Add a twist of flavor by including fruits. Pineapple adds sweetness and pairs well with BBQ. Apples can bring a crisp bite, too. Slice them thin and scatter them on top. For an international flair, think beyond the usual. Try adding some Indian spices for a curry twist. You can also use Mexican flavors like black beans and corn. Don't be afraid to get creative! These variations keep your BBQ chicken flatbread pizza fresh and exciting. For the complete recipe, check out the Full Recipe. To keep your BBQ chicken flatbread pizza fresh, use these simple tips: - Refrigeration: Place leftover pizza in an airtight container. You can also wrap it tightly in plastic wrap or aluminum foil. This helps keep the moisture in and the pizza fresh for up to three days. - Freezing: For longer storage, freeze the flatbread pizza. Wrap each piece in plastic wrap, then place it in a freezer bag. Squeeze out as much air as possible. It will stay good for up to three months. Reheating flatbread pizza can be tricky, but I have some great methods to keep it tasty: - Best Practices: Preheat your oven to 350°F (175°C). Place the pizza on a baking sheet. Heat for about 10-15 minutes. This warms it up and keeps the crust crisp. - Avoiding Sogginess: To avoid a soggy pizza, do not use the microwave. It makes the flatbread soft. If you must use a microwave, heat it for a very short time, about 20 seconds, just to warm it slightly. To make BBQ Chicken Flatbread Pizza, you start with the flatbread. You can buy flatbread or make it. If you choose to make it, mix flour, water, yeast, and salt. Knead it well and let it rise for about an hour. Once it rises, roll it out to your desired shape. Then, bake it for a few minutes before adding toppings. Yes! You can use rotisserie chicken, grilled chicken, or even leftover chicken. Just shred the chicken and mix it with your BBQ sauce. Each type of chicken adds a unique flavor to your flatbread pizza. Choose what you like best or what you have on hand. If you want to avoid cheese, try using dairy-free cheese options. Some good choices are cashew cheese or almond cheese. You can also use goat cheese or feta for a tangy taste. These options will change the flavor but can still be delicious. BBQ Chicken Flatbread Pizza can be healthy, depending on your choices. Use whole grain flatbreads for more fiber. Opt for low-sugar BBQ sauce to cut calories. Add more veggies like peppers or spinach for extra nutrients. You can make it fit your diet by swapping some ingredients. Making BBQ Chicken Flatbread Pizza is fun and easy. We covered the key ingredients, step-by-step instructions, tips, and possible variations. This dish offers great flavor and is perfect for sharing. Remember to avoid common mistakes, like overloading toppings, to ensure the best results. Enjoy experimenting with different ingredients to make it your own. Whether for lunch or a cozy dinner, this recipe will impress your friends and family. Get ready to dive into flavor and creativity with your next flatbread pizza!](https://dailydishlab.com/wp-content/uploads/2025/07/4b21d134-1098-456f-bde0-d7ec0e969aee-768x768.webp)


![To make this creamy spinach stuffed salmon, you need simple and fresh ingredients. Here’s what you will use: - 4 salmon fillets, skinless - 2 cups fresh spinach, chopped - 1 cup cream cheese, softened - 1/2 cup feta cheese, crumbled - 1/4 cup grated Parmesan cheese - 2 cloves garlic, minced - 1 tablespoon olive oil - 1 teaspoon lemon juice - Salt and pepper to taste These ingredients create a rich, flavorful filling that pairs perfectly with salmon. The cream cheese adds creaminess, while feta offers tang. Spinach gives a fresh taste. Adding garnishes makes the dish look great and taste even better. Here are some options: - Fresh dill or parsley - Lemon wedges These garnishes add color and freshness. They also enhance the flavor of your dish. Having the right tools helps make cooking easier. You will need: - A skillet - A mixing bowl - A baking dish - Toothpicks (if needed) - A knife These tools help you prepare and cook the salmon. They ensure everything goes smoothly. If you want to see the full recipe, check it out here: [Full Recipe]. To start, gather your ingredients. You need: - 4 salmon fillets, skinless - 2 cups fresh spinach, chopped - 1 cup cream cheese, softened - 1/2 cup feta cheese, crumbled - 1/4 cup grated Parmesan cheese - 2 cloves garlic, minced - 1 tablespoon olive oil - 1 teaspoon lemon juice - Salt and pepper to taste - Fresh dill or parsley, for garnish First, preheat your oven to 375°F (190°C). This step helps cook the salmon evenly. Next, heat a skillet over medium heat. Add the olive oil and sauté minced garlic for about 1 minute. You want it fragrant but not burnt. Then, add the chopped spinach to the skillet. Cook until it wilts, which takes about 2-3 minutes. Remove the skillet from heat and let the spinach cool a bit. In a bowl, mix the softened cream cheese, feta cheese, grated Parmesan, sautéed spinach, lemon juice, salt, and pepper. Stir until combined, creating a creamy filling. Now, take your salmon fillets and place them on a cutting board. Make a slit in the side of each fillet. This creates a pocket for your filling. Next, generously fill each pocket with the creamy mixture. If needed, use toothpicks to secure the openings. Place the stuffed salmon fillets in a lightly greased baking dish. Bake in the preheated oven for 20-25 minutes. The salmon should cook through and flake easily with a fork. This timing ensures a moist and flavorful dish. To ensure you cook the salmon just right, use a meat thermometer. The internal temperature should reach 145°F (63°C). This helps you avoid overcooking, which can make the fish dry. Let the salmon rest for a few minutes after baking. This allows the juices to redistribute. For a beautiful finish, garnish with fresh dill or parsley. Serve it on a bed of sautéed asparagus or a light salad for a colorful plate. Enjoy your creamy spinach stuffed salmon! If you want the full recipe, check out the [Full Recipe]. When picking salmon, freshness is key. Look for bright, shiny skin without any brown spots. The flesh should be firm and spring back when you press it. Wild-caught salmon often has a richer taste than farmed salmon. If you can, ask your fishmonger for the best catch of the day. You can prepare this dish ahead for a busy weeknight. Make the creamy spinach filling and stuff the salmon up to one day before cooking. Wrap the salmon tightly in plastic wrap and store it in the fridge. This way, the flavors meld nicely. Just bake it when you’re ready to eat! Avoid these pitfalls for the best results. First, do not overstuff the salmon. Too much filling can make it hard to cook evenly. Second, don’t skip the resting time after baking. Letting it rest helps the juices settle. Lastly, be careful not to overcook the salmon. It should flake easily but still be moist. Enjoy your delicious meal! {{image_2}} You can switch up the cheeses in this recipe. Cream cheese gives a rich taste. Feta adds a nice tang. You can try goat cheese for a creamy twist. Mozzarella works well for a mild flavor. Each cheese brings a unique taste to the dish. Want to make this dish lighter? Use low-fat cream cheese. You can also swap out feta for a lower-fat cheese. Instead of olive oil, try using a cooking spray. This will cut down on extra calories while keeping the flavors intact. Adding fresh herbs can boost the dish's taste. Try basil or thyme for a fresh kick. A sprinkle of red pepper flakes adds heat if you want spice. For a zesty touch, squeeze more lemon juice before serving. These simple changes bring new life to the salmon. For the full recipe, check the details above. To store leftovers of creamy spinach stuffed salmon, let it cool first. Place the salmon in an airtight container. Keep it in the fridge for up to three days. This helps maintain its flavor and texture. If you have extra stuffing, store it in a separate container. Reheat the salmon gently to avoid drying it out. Preheat your oven to 350°F (175°C). Place the salmon on a baking sheet. Cover it with foil to keep moisture in. Heat for about 10-15 minutes. You can also use a microwave. Heat it on low power in short intervals. Check to ensure it warms evenly. You can freeze creamy spinach stuffed salmon for longer storage. Wrap each piece tightly in plastic wrap. Then, place it in a freezer-safe bag. It can last for up to three months in the freezer. To thaw, move it to the fridge overnight before reheating. This keeps the salmon moist and tasty. For the best results, avoid refreezing after thawing. Yes, you can use frozen salmon. Just make sure to thaw it first. Place it in the fridge overnight or submerge it in cold water for faster thawing. Frozen salmon works well, but fresh salmon gives the best flavor and texture. You can pair this dish with many sides. Here are a few ideas: - Sautéed asparagus - Lemon rice - Garlic mashed potatoes - A light salad with vinaigrette - Steamed broccoli These sides will balance the rich flavors of the salmon. To check if salmon is cooked, look for a few signs: - The flesh should be opaque and flake easily with a fork. - The internal temperature should reach 145°F (63°C). - The color should change from bright pink to pale pink. These tips will help ensure your salmon is safe and tasty. For the full recipe, check the details above. In this article, we covered how to make creamy spinach stuffed salmon. We looked at key ingredients, preparation, and baking steps. I shared tips for choosing the best salmon, making ahead, and avoiding common mistakes. You also learned about tasty cheese swaps and ways to enhance flavor. Lastly, I explained how to store, reheat, and freeze leftovers. Enjoy this dish that combines ease and flavor. With practice, you’ll master it!](https://dailydishlab.com/wp-content/uploads/2025/07/597501d1-48c7-4a9b-bedb-1c262109b33c-768x768.webp)
![For a great Italian wedding soup, you need a few key items: - 1 cup acini di pepe pasta (or any small pasta) - 1 tablespoon olive oil - 1 medium onion, diced - 2 cloves garlic, minced - 2 medium carrots, diced - 2 celery stalks, diced - 6 cups chicken broth (low sodium) - 1 teaspoon dried oregano - 1 teaspoon dried thyme - Salt and pepper to taste - 1 cup fresh spinach or Swiss chard, chopped - ½ cup grated Parmesan cheese - 1 pound ground turkey (or chicken) - 1 teaspoon Italian seasoning - ¼ cup fresh parsley, chopped (for garnish) These ingredients work together to create a warm, comforting soup. The acini di pepe pasta adds a fun texture. The fresh veggies provide crunch and flavor. The meatballs bring hearty satisfaction. You can switch up some ingredients for your taste. Here are a few ideas: - Use spinach or Swiss chard for greens. Both add color and nutrients. - Add extra spices like red pepper flakes or fresh herbs to boost flavor. These optional ingredients let you personalize your soup. Don’t be afraid to experiment and make it your own. When it’s time to serve, pair your soup with some tasty options: - Serve with a slice of crusty bread for dipping. - A light salad on the side adds freshness to the meal. For garnishing, top your soup with fresh parsley and a sprinkle of Parmesan cheese. This makes the soup look extra special and inviting. For the complete cooking directions, check the Full Recipe. Enjoy crafting this delicious dish! To start, heat olive oil in a large pot over medium heat. Add the diced onion and sauté it until it turns soft and clear, about 3-4 minutes. Then, toss in the minced garlic, diced carrots, and celery. Cook these veggies for another 5 minutes. This step builds a great flavor base for the soup. Next, pour in 6 cups of chicken broth and bring it to a boil. The broth adds depth and richness to the soup. In a bowl, mix ground turkey with Italian seasoning, salt, and pepper. This simple mix creates tasty meatballs. Form the meat into small balls, about 1 inch wide. Once the broth is boiling, carefully add the meatballs. Reduce the heat to a gentle simmer. Let them cook for about 10 minutes. This allows the meatballs to cook fully while adding flavor to the broth. Next, stir in the acini di pepe pasta. Cook it according to the package instructions, usually about 7-9 minutes. The pasta adds heartiness to the soup. When the pasta is almost done, add chopped spinach or Swiss chard. Stir it in and let it wilt into the soup. This adds a fresh taste and bright color. Finally, mix in the grated Parmesan cheese. This adds creaminess and a savory finish. Taste and adjust salt and pepper if needed. Let the soup rest for a few minutes before serving. Enjoy this Italian wedding soup with a crusty bread slice for a complete meal. For the full recipe, check [Full Recipe]. Seasoning is key. I always add salt and pepper at each step. This builds deep flavor. Use homemade broth when you can. It gives a rich taste that store-bought broth lacks. If you use store-bought, choose low-sodium to control salt levels. Add herbs like oregano and thyme to boost the flavor. Fresh herbs work even better than dried. To save time, prep ingredients ahead. Chop veggies and form meatballs the night before. Store them in the fridge until you are ready. Cook pasta separately to keep it firm. This stops the pasta from becoming mushy in the soup. You can also cook it in a large pot of salted water while making the soup. For great meatballs, mix ground turkey with breadcrumbs and egg. This keeps them moist and tender. Aim for a consistency that holds shape but is not too dense. Choose acini di pepe pasta for the best texture. It adds a nice bite and fits perfectly in the soup. You can use small shells or ditalini if needed, but nothing beats the classic choice. {{image_2}} You can change the soup to fit your needs. If you have dietary restrictions, try these swaps: - Ground meat: Use ground beef or pork instead of turkey. - Pasta: If you don't have acini di pepe, use small shells or ditalini. - Broth: Use vegetable broth for a vegetarian version. - Greens: If you can't find spinach, try kale or arugula. These substitutions keep the soup tasty while meeting your needs. Italian wedding soup has many faces. Each region adds its own twist: - Southern Italy: You might find a spicier version with hot sausage. - Northern Italy: Some recipes use beef broth instead of chicken broth. - Local ingredients: Different herbs and vegetables may appear based on what's fresh. These regional touches highlight the rich culture behind this dish. Make the soup your own by adding fun ingredients: - Extra veggies: Try adding peas, green beans, or zucchini for more texture. - Legumes: Toss in some cannellini beans for added protein and fiber. - Spices: A dash of red pepper flakes or smoked paprika can change the flavor. These creative twists keep your Italian wedding soup exciting and flavorful. For the full recipe, check out Italian Love Soup . To store leftover Italian wedding soup, let it cool first. Pour it into an airtight container. This keeps the soup fresh and tasty. Store it in the fridge for up to three days. If you want to keep it longer, freezing is great too. Pour the soup into freezer-safe containers. Leave some space at the top for expansion. This helps prevent spills. To reheat the soup, you can use the stove or microwave. If using the stove, heat it over medium heat until it's hot. Stir it often to avoid sticking. For the microwave, place it in a microwave-safe bowl. Heat in one-minute intervals, stirring in between, until hot. In the fridge, this soup lasts about three days. After that, it may spoil. Signs of spoilage include an off smell or changes in color. If you see mold, throw it away. Always check your leftovers before eating. Making a large batch of Italian wedding soup is smart. You can enjoy it for several meals. Just double or triple the recipe. Store it in portions for easy meals later. On busy days, you can reheat the soup quickly. Use the microwave or stove as mentioned. This way, you have a warm meal ready in no time. With the soup on hand, you can enjoy a hearty dish without much fuss. For the full recipe, check out the Italian Love Soup. Italian wedding soup is a tasty dish from Italy. The name comes from "matrimonio," meaning marriage. It reflects the blend of flavors from meat and greens. This soup combines meatballs, small pasta, and fresh greens. It offers a hearty and warm meal, perfect for family gatherings. The dish showcases Italian cooking's charm, bringing people together at the table. Yes, you can make Italian wedding soup ahead of time. To do this, prepare the soup base without the pasta. Store it in an airtight container in the fridge for up to three days. When ready to serve, reheat the soup and add the pasta. This keeps the pasta from getting mushy. You can also freeze the soup base. Just remember to add the pasta when you reheat it. There are many fun ways to change up Italian wedding soup. You can swap out ground turkey for ground beef or pork. Try adding different greens, like kale or escarole, for variety. Using different types of pasta can also change the texture. For a unique twist, add beans for extra protein. Feel free to get creative and make it your own! To boost flavor, use fresh herbs like basil or dill. Adding a squeeze of lemon juice brightens the soup. You can also mix in red pepper flakes for a bit of heat. Consider using homemade broth for richer taste. Don't forget to taste and adjust salt and pepper. These simple tweaks can make your soup even more delicious. For the full recipe, please check the Italian Love Soup section. Italian Wedding Soup blends rich flavors with fresh ingredients. We covered key ingredients like pasta, meat, and vegetables. You learned how to make this dish step-by-step, from cooking the base to preparing meatballs. Tips and tricks help enhance flavors and save time. Variations allow for personal twists, accommodating dietary needs. Lastly, we discussed how to store your soup safely. With these insights, you can create a tasty and satisfying Italian Wedding Soup. Enjoy your cooking experience!](https://dailydishlab.com/wp-content/uploads/2025/07/6044dbfa-4b21-481c-9945-f2312ef87f99-768x768.webp)