Skip to content
About
Contact
Cookie Policy
Copyright Policy
Disclaimer
Search
Home
Dinner
Appetizer
Desserts
Drinks
About
Contact
Privacy Policy
Toggle Menu
Home
/
Dinner
- Page 25
Dinner
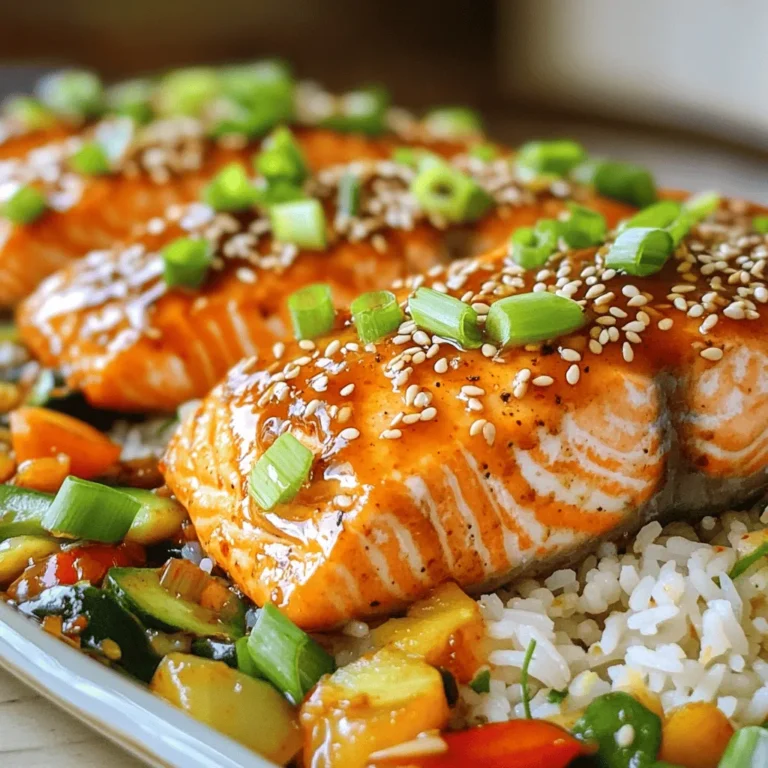
Sweet Chili Garlic Salmon Simple and Flavorful Dish
Veggie Loaded Breakfast Casserole Tasty and Hearty Dish
Lemon Herb Quinoa Salad Fresh and Nourishing Recipe
Creamy Lemon Garlic Chicken Smooth and Savory Recipe
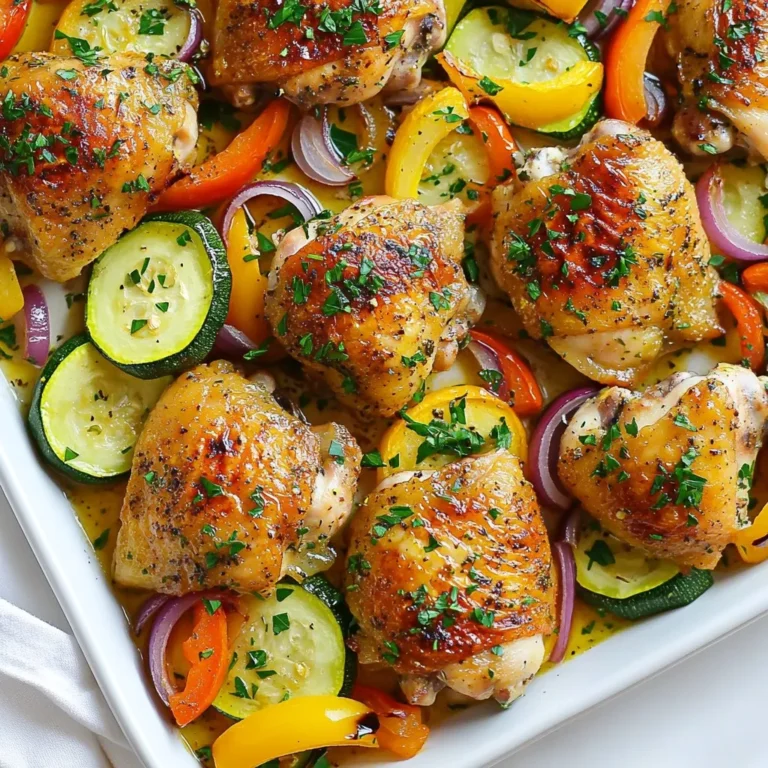
Lemon Herb Chicken Sheet Pan Simple and Flavorful Meal
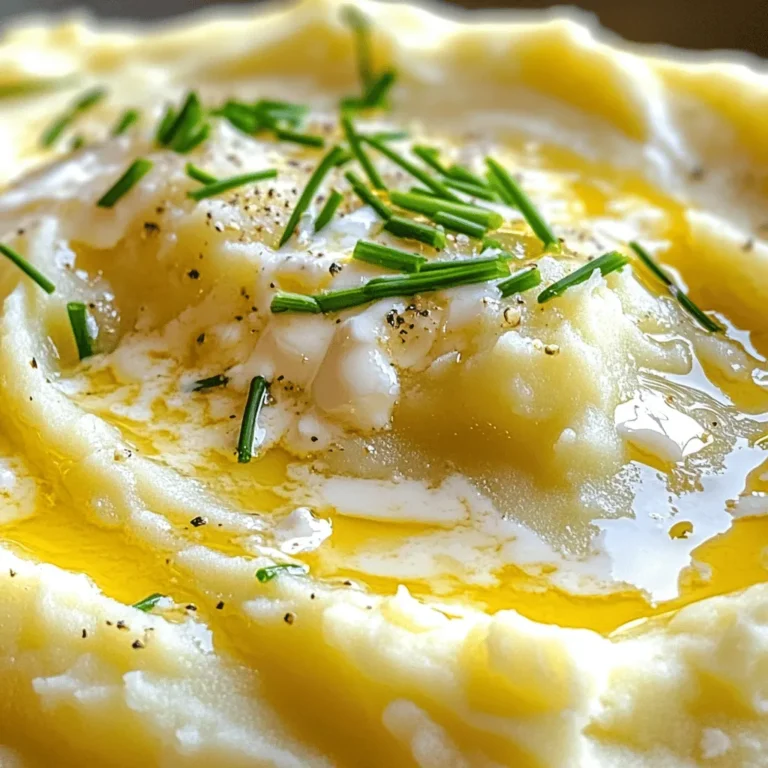
Garlic Parmesan Mashed Potatoes Creamy Comfort Dish
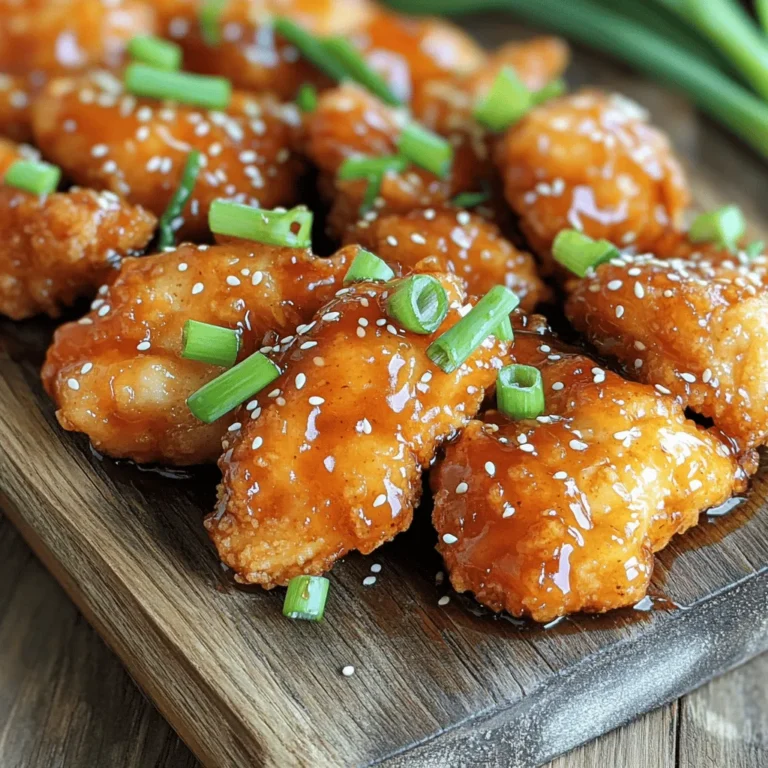
Crispy Honey Garlic Chicken Easy Recipe for Dinner
Teriyaki Tofu Buddha Bowl Flavorful and Healthy Meal
Creamy Tuscan Tortellini Soup Savory and Comforting Dish
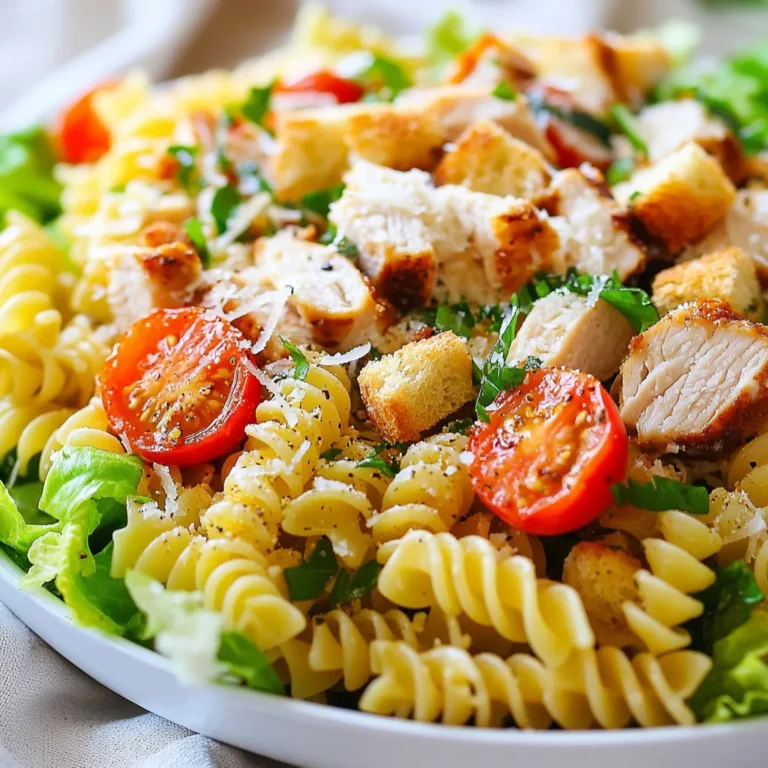
Chicken Caesar Pasta Salad Tasty and Simple Meal
Page navigation
Previous Page
Previous
1
…
23
24
25
26
27
…
64
Next Page
Next
Home
Dinner
Appetizer
Desserts
Drinks
About
Contact
Privacy Policy
Toggle Menu Close
Search for:
Search


. {{image_2}} To make your Lemon Herb Quinoa Salad more filling, add protein. Grilled chicken is a great choice. It adds a nice texture and taste. If you want a plant-based option, try chickpeas or tofu. Chickpeas provide fiber and protein. Tofu is versatile and absorbs flavors well. These options cater to different diets, making the salad more enjoyable for everyone. You can boost the flavor of your salad with herbs and spices. Try adding dill or basil for a fresh twist. A pinch of cumin can add warmth. For a crunchy texture, mix in nuts or seeds. Almonds or sunflower seeds work well. They add a delightful crunch to each bite. You can also experiment by adding feta cheese or olives for a salty kick. Switch up the ingredients based on the season. In summer, use fresh corn or bell peppers. These ingredients are sweet and juicy. In winter, try adding roasted butternut squash or brussels sprouts for warmth. You can also swap out herbs based on what's fresh. This keeps the salad exciting and full of flavor. Each season offers unique tastes to explore. For the full recipe, check out the details above. To keep your Lemon Herb Quinoa Salad fresh, cool it down first. Place the salad in a bowl and let it sit at room temperature. Once cool, transfer it to the fridge. Use airtight containers to keep it fresh. Glass containers work great because they don’t stain and seal well. Clear containers also let you see the colorful salad inside! Can quinoa salad be frozen? Yes, but it’s best to eat it fresh. Freezing can change the texture of the veggies. If you want to freeze it, pack it tightly in a container or freezer bag. When you’re ready to eat, thaw it in the fridge overnight. Once thawed, stir it up and add fresh herbs to revive the flavor. How long does it last in the fridge? Your salad will stay good for about 3 to 5 days if stored properly. Always check for signs that the salad has gone bad. Look for changes in color or a sour smell. If you see mold or the salad looks slimy, throw it away. Keeping an eye on it helps you enjoy the salad at its best! Quinoa is a small grain that packs a big punch. It is a complete protein, meaning it has all nine essential amino acids. This makes it great for vegans and vegetarians. Quinoa is also high in fiber, which helps with digestion. It contains vitamins and minerals like magnesium, iron, and B vitamins. Adding quinoa to salads is smart. It gives a nice texture and taste. Plus, it keeps you full longer. Quinoa is gluten-free, so many people can enjoy it. Its mild flavor lets it blend well with other ingredients, like in the Lemon Herb Quinoa Salad. Yes, you can make this salad ahead of time. It tastes even better after sitting for a bit. Just keep the dressing separate until you are ready to serve. This keeps everything fresh and crunchy. To prepare ahead, follow these tips: - Cook the quinoa and let it cool before mixing. - Dice the veggies and store them in airtight containers. - Combine all ingredients the night before, but wait on the avocado to avoid browning. This salad pairs well with many dishes. For a light meal, serve it with grilled chicken or fish. If you want a vegetarian option, try it with roasted chickpeas or tofu. You can also serve it with: - Hummus and pita bread for a Mediterranean vibe. - Fresh fruit or a light soup to balance the meal. - Add some crusty bread for a filling lunch or dinner. These pairings can help you create a balanced diet while enjoying the refreshing taste of Lemon Herb Quinoa Salad. For the full recipe, check out the details! This blog post outlined a tasty Lemon Herb Quinoa Salad. We covered the key ingredients, cooking steps, tips, and variations. Now, you can make this easy, healthy dish with fresh flavors. Remember to adjust ingredients based on seasons and preferences. Try adding protein for a nutritional boost. With proper storage, your salad will stay fresh longer. Enjoy experimenting with this recipe and make it your own. A delicious meal like this can fit any table and delight anyone.](https://dailydishlab.com/wp-content/uploads/2025/07/e1eac98a-3473-4b27-b7c4-16487baee0ea-768x768.webp)

![- 1 block (14 oz) firm tofu, drained and pressed - 1 cup cooked brown rice or quinoa - 1 cup broccoli florets - 1 cup shredded carrots - 1 bell pepper, sliced (any color) - 2 green onions, sliced - 1 tablespoon sesame oil - 1 tablespoon olive oil - 1/4 cup soy sauce (or tamari for gluten-free) - 2 tablespoons maple syrup - 1 tablespoon rice vinegar - 1 teaspoon minced garlic - 1 teaspoon grated ginger - 1 tablespoon sesame seeds for garnish Each serving of the Teriyaki Tofu Buddha Bowl is packed with nutrients. You get about 400 calories, 20 grams of protein, 50 grams of carbs, and 15 grams of fats. This bowl is a great balance of macronutrients. The ingredients offer many health benefits. Tofu serves as a fantastic source of plant protein. Brown rice or quinoa adds fiber and essential minerals. Broccoli is rich in vitamins C and K, while carrots provide beta-carotene. Bell peppers can boost your immune system as well. Green onions add flavor and nutrients without many calories. Eating this bowl can support a healthy diet and keep you energized. The blend of flavors and textures makes every bite enjoyable. It's not just a meal; it’s a feast for your body and spirit. For the full recipe, check the details above. First, press the tofu to remove excess water. Wrap it in a clean towel and place a heavy object on top for about 15 minutes. This helps the tofu absorb flavors better. After pressing, cut the tofu into small cubes. Next, make the teriyaki marinade. In a bowl, mix together: - 1/4 cup soy sauce (or tamari for gluten-free) - 2 tablespoons maple syrup - 1 tablespoon rice vinegar - 1 teaspoon minced garlic - 1 teaspoon grated ginger Gently add the tofu cubes to the marinade and stir to coat. Let the tofu soak in the flavors for at least 15 minutes. While the tofu marinates, cook your grains. You can use either brown rice or quinoa. Follow the package instructions for cooking. For perfect grains, use a 2:1 ratio of water to grains. Here’s a tip: After cooking, let the grains sit covered for 5 minutes. This helps them fluff up nicely. Heat a large skillet or wok over medium heat. Add 1 tablespoon of olive oil. Sauté the broccoli and bell pepper for about 4-5 minutes. You want them to be tender but still crisp. Then, add 1 cup of shredded carrots and cook for another 2 minutes. Remove the skillet from the heat and set the vegetables aside. In the same skillet, add 1 tablespoon of sesame oil and heat it over medium-high. Carefully place the marinated tofu cubes in the skillet. Cook for about 5-7 minutes. Turn the tofu occasionally until it is golden brown and slightly crispy. The right oil helps achieve that perfect texture. Now, it’s time to put everything together! Start with a base of cooked brown rice or quinoa in a deep bowl. Layer the sautéed vegetables on top of the grains. Finally, add the crispy teriyaki tofu. For a beautiful presentation, arrange the ingredients in sections. This adds color and makes the dish more appealing. You can also sprinkle some sliced green onions and sesame seeds on top for extra flavor and crunch. Enjoy your Teriyaki Tofu Buddha Bowl! For the complete recipe, check out [Full Recipe]. To make your Teriyaki Tofu Buddha Bowl burst with flavor, focus on your marinade. A great mix includes: - 1/4 cup soy sauce or tamari for gluten-free - 2 tablespoons maple syrup - 1 tablespoon rice vinegar - 1 teaspoon minced garlic - 1 teaspoon grated ginger Letting the tofu soak in this marinade for at least 15 minutes enhances the taste. You can even marinate it longer for a stronger flavor. When cooking, use medium-high heat to get a nice sear on your tofu. This step locks in the flavor and gives it a delightful crunch. Stir-fry the veggies quickly. This keeps them vibrant and crisp. A beautiful bowl is all about colors and textures. Here’s how to make it pop: - Start with a base of brown rice or quinoa. - Layer the sautéed veggies in sections. - Place the crispy tofu on top. - Add a sprinkle of green onions and sesame seeds for crunch. This layout not only looks good but also makes it easy to enjoy each bite. Drizzle a bit of extra teriyaki sauce over the top for shine and flavor. You can easily change this bowl to fit your taste. Here are some ideas: - Swap tofu for tempeh or chickpeas for added protein. - Try adding different vegetables like spinach, corn, or snap peas. - For a gluten-free option, use tamari instead of soy sauce. - For a low-carb version, consider cauliflower rice instead of grains. These simple swaps keep your meals fresh and exciting while catering to your dietary needs. For the full recipe, check out my detailed guide. {{image_2}} You can switch tofu for other proteins. Tempeh is a great choice. It has a nutty flavor and a firm texture. Chickpeas are another option; they add protein and fiber. For tempeh, cook it for about 7-10 minutes until golden. If using chickpeas, add them to the pan for just a few minutes to warm up. Don’t feel stuck with just brown rice. Quinoa is a fantastic alternative. It cooks quickly and is packed with protein. Farro adds a chewy texture and a nutty taste. If you want a low-carb option, try cauliflower rice. Each grain brings different health benefits. Quinoa is high in protein, while farro has fiber. The teriyaki sauce can be boosted with spices. Add a pinch of red pepper flakes for heat. You can also stir in some orange zest for a citrus kick. For toppings, consider avocado for creaminess or nuts for crunch. These little touches make your bowl unique and tasty. Explore various toppings to find your favorite mix. To keep your Teriyaki Tofu Buddha Bowl fresh, store it in airtight containers. Glass containers work best as they do not absorb odors. Make sure the bowl is cool before sealing it. This helps avoid moisture build-up, which can make the food soggy. Store any leftover rice or quinoa separately to keep them fluffy. Reheat your tofu and vegetables gently. The microwave is quick, but it can make the tofu soft. Instead, try using a skillet. Heat a little oil over medium heat, add the tofu and veggies, and stir until hot. This keeps the texture nice and tasty. You can also add a splash of water to create steam and warm everything evenly. If you want to freeze your Buddha bowl, separate the components first. Freeze the tofu and cooked grains in different bags. This way, they stay fresh longer. To thaw, place them in the fridge overnight. For reheating, use the skillet method to ensure everything is hot and tasty. You can even add some fresh veggies during reheating for added crunch. You can use tempeh, chickpeas, or seitan. Tempeh has a nutty taste. It cooks fast and adds protein. Chickpeas add a hearty texture. You can roast them for crunch. Seitan works well for a chewy bite. Cook it in the same way as tofu. Homemade teriyaki sauce lasts about a week in the fridge. Store it in a clean jar. Make sure to seal it tight. If you notice any odd smell, throw it away. You can freeze it for longer storage. Just thaw it when you need it. Yes, you can prep this bowl ahead of time. Cook grains and chop veggies in advance. Store them in airtight containers. The flavors will blend well if left overnight. Just add the tofu before serving. This keeps it crispy and fresh. Yes, you can easily make it gluten-free. Use tamari instead of soy sauce. Choose gluten-free grains like quinoa. All the veggies are naturally gluten-free too. This way, everyone can enjoy it without worry. You can add sriracha or chili flakes for heat. Mix it into the teriyaki sauce. For a different flavor, try fresh jalapeños. You can also serve with spicy sesame oil. Adjust the spice to your taste for a kick! This blog post detailed how to create a tasty Teriyaki Tofu Buddha Bowl. We covered ingredients, step-by-step cooking, and helpful tips for flavor and presentation. You learned about storage and variations for customization. Now, you can make this dish your own. Experiment with flavors, grains, and proteins. Enjoy the health benefits while satisfying your taste buds. This bowl is not just a meal; it's a canvas for your creativity. Happy cooking!](https://dailydishlab.com/wp-content/uploads/2025/07/885aa078-9488-4511-acaf-c3412a5f03ff-768x768.webp)