Skip to content
About
Contact
Cookie Policy
Copyright Policy
Disclaimer
Search
Home
Dinner
Appetizer
Desserts
Drinks
About
Contact
Privacy Policy
Toggle Menu
Home
/
Dinner
- Page 27
Dinner
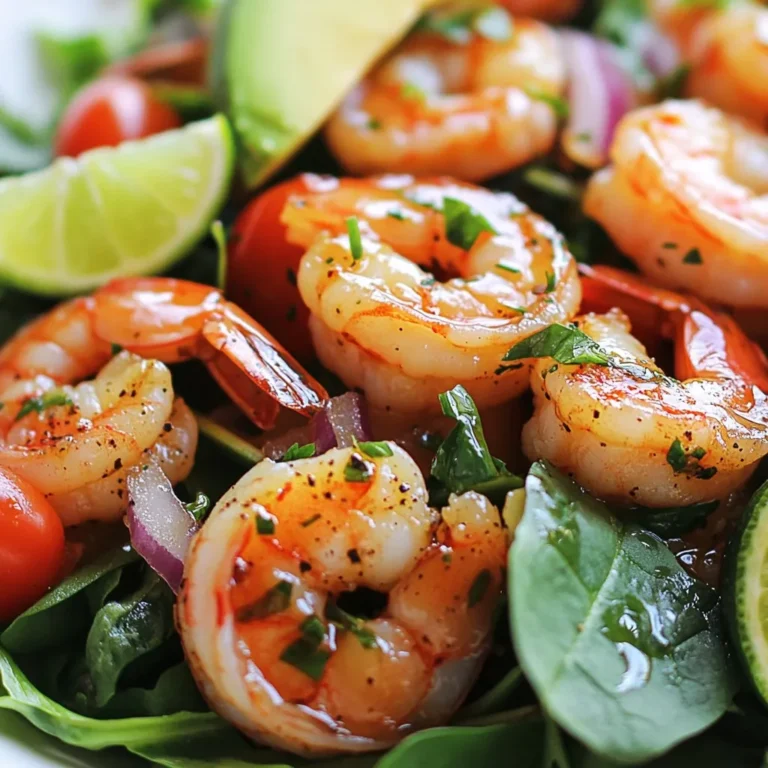
Honey Lime Shrimp Salad Fresh and Flavorful Delight
Caprese Chicken Meatballs Delicious and Easy Recipe
Greek Turkey Meatballs Tasty and Healthy Recipe
Honey Garlic Turkey Meatballs Flavorful and Easy Recipe
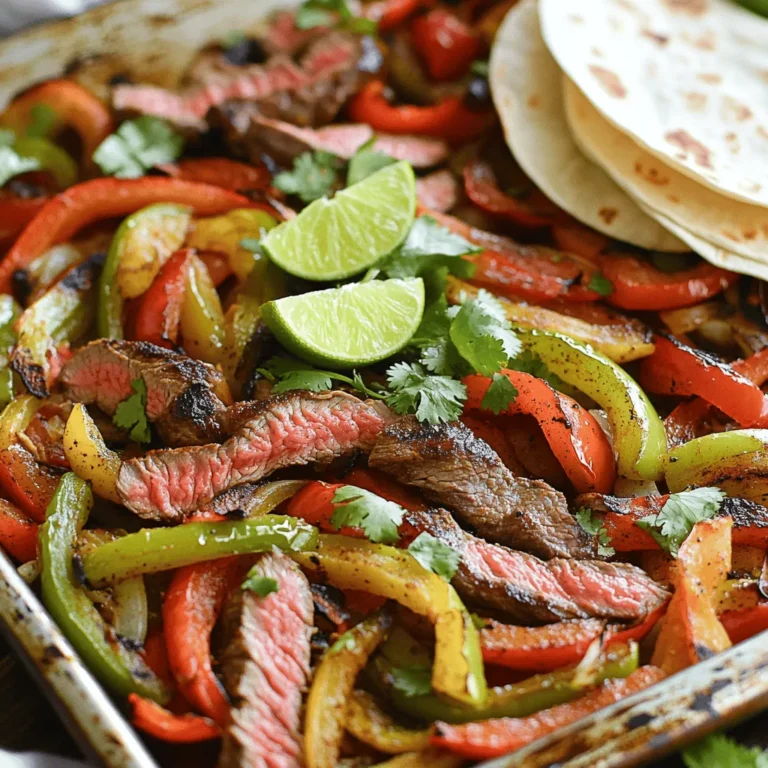
Sheet Pan Steak Fajitas Flavorful and Easy Meal
Cajun Butter Steak Flavorful and Juicy Dish
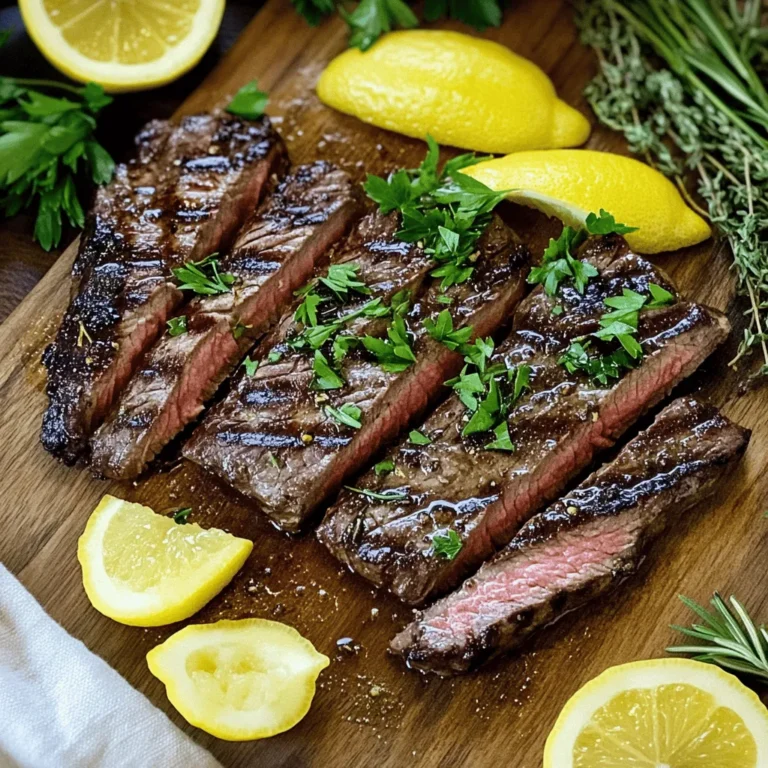
Lemon Herb Grilled Steak Flavorful and Simple Recipe
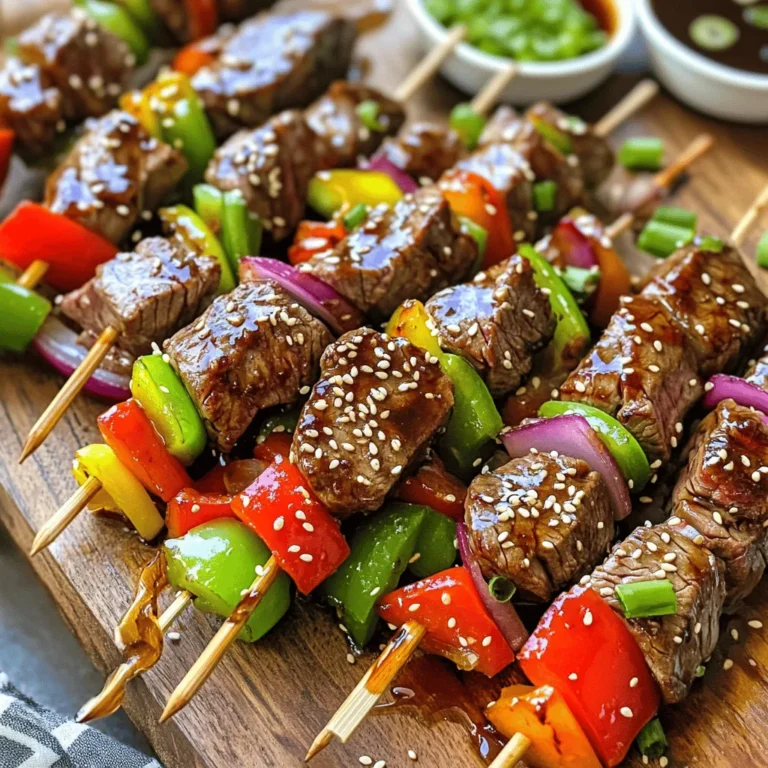
Teriyaki Steak Skewers Irresistible Grilled Delight
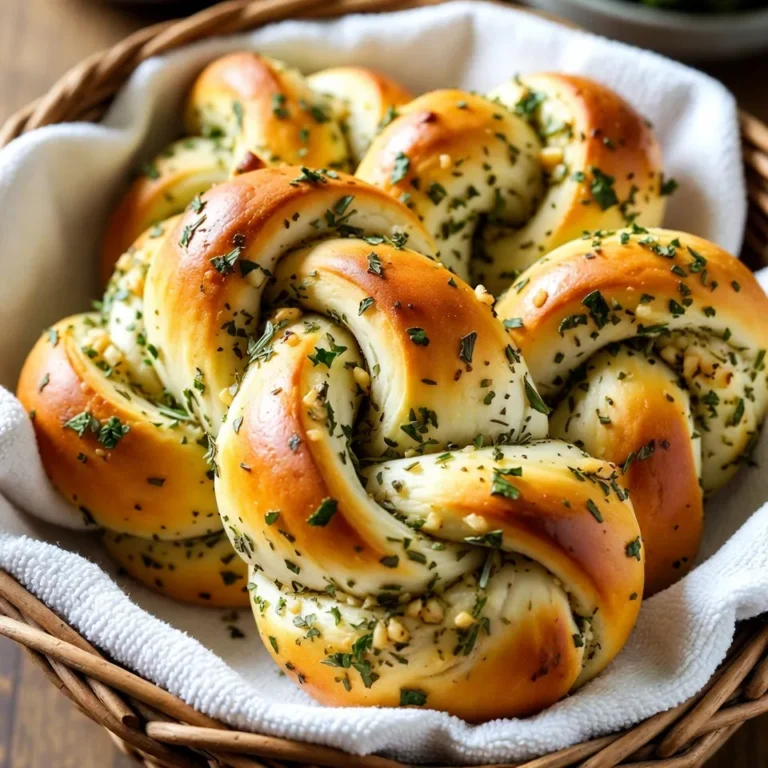
Garlic Herb Dinner Knots Tasty and Easy Recipe
Tuscan White Bean Soup Flavorful and Nourishing Dish
Page navigation
Previous Page
Previous
1
…
25
26
27
28
29
…
64
Next Page
Next
Home
Dinner
Appetizer
Desserts
Drinks
About
Contact
Privacy Policy
Toggle Menu Close
Search for:
Search


. 1. First, preheat your oven to 400°F (200°C). This helps the meatballs cook evenly. 2. Next, line a baking sheet with parchment paper. This makes for easy cleanup later. 3. In a large bowl, combine the ground turkey, breadcrumbs, grated Parmesan, minced garlic, grated ginger, egg, black pepper, and salt. Mix gently until everything is just combined. 4. Using your hands, form the mixture into meatballs. Aim for about 1 to 1.5 inches in diameter. Place them on the prepared baking sheet. 1. In a small bowl, whisk together the honey, soy sauce, and sesame oil. This will be your tasty honey garlic sauce. 2. Brush or drizzle half of the honey garlic sauce over the meatballs. Ensure each meatball gets a good coat. 1. Now, bake the meatballs in the oven for 15 minutes. This helps them cook through. 2. After 15 minutes, take the meatballs out. Drizzle the remaining honey garlic sauce over them. 3. Return the meatballs to the oven for another 10 minutes. They should be golden brown and fully cooked. 4. Once done, remove the meatballs from the oven. Let them rest for a few minutes. 5. Before serving, garnish with chopped cilantro and sprinkle sesame seeds on top for a nice touch. For the full experience of these flavors, check out the Full Recipe. Enjoy your cooking! Choosing the right ground turkey is key. Use lean ground turkey for juicy meatballs. Look for a blend that is 93% lean or higher. This gives a nice balance of flavor and moisture. Mixing techniques matter too. Use your hands, but don’t overmix. Overmixing can make the meatballs tough. Just mix until all the ingredients hold together. This keeps them light and tender. Ensure even cooking by placing meatballs apart on the baking sheet. This allows heat to flow around each one. You can also turn them halfway through baking for a nice brown color all over. Adjusting sweetness and saltiness can enhance your dish. If you like it sweeter, add more honey. For more salt, increase the soy sauce. Taste as you go to get it just right. Try alternative sauces for a twist. You can use teriyaki sauce for a richer taste. Or mix in some sriracha for a spicy kick. These changes can make the meatballs feel new and exciting. Using gluten-free substitutes is easy. Swap regular soy sauce with tamari. This keeps all the great flavor while making it gluten-free. Plus, you can use gluten-free breadcrumbs for the same tasty meatballs. For the full recipe, check the earlier section of this article. {{image_2}} You can easily swap turkey for other meats. Chicken and beef work well in this recipe. They both give great flavor. Just keep the cooking times in mind. If you want a vegetarian option, try plant-based meatballs. They are tasty and healthy. Use lentils or chickpeas as the base. You can also find many brands ready to cook. Experiment with herbs for different flavors. Add basil, parsley, or oregano to mix it up. Each herb brings a new taste to the dish. The air fryer is a quick way to cook these meatballs. Set it to 375°F (190°C). Cook for about 12 minutes, turning halfway. This gives them a nice crispy outside. You can also use a slow cooker. Place the meatballs in the cooker and pour the honey garlic sauce over them. Cook on low for 4 hours. The meatballs will be juicy and full of flavor. Grilling adds a smoky taste. Preheat your grill and cook for about 10 minutes. Turn them often to avoid burning. This method gives a nice char and enhances the flavor even more. For the full recipe, check out the complete guide above. Store your leftover honey garlic turkey meatballs in the fridge. Use an airtight container to keep them fresh. They can last for about 3 to 4 days in the refrigerator. When you want to eat them, simply reheat in the microwave or warm them on the stove. You can freeze these meatballs for later use. Let them cool completely after cooking. Place them in a single layer on a baking sheet. Freeze for about an hour until firm. Then, transfer the meatballs to a freezer-safe bag or container. Label the bag with the date. They should stay good for about 3 months. When you want to enjoy them, take out the meatballs and let them thaw in the fridge overnight. For reheating, you can bake them in the oven at 350°F (175°C) for about 15 minutes. This will help them stay juicy and flavorful. For more details and the full recipe, check out the entire guide! How do I know when turkey meatballs are cooked? Turkey meatballs are done when they reach an internal temperature of 165°F (74°C). Use a meat thermometer to check. The outside should also be golden brown for best taste. Can I make honey garlic turkey meatballs ahead of time? Yes, you can prepare the meatballs ahead of time. Shape them and store them in the fridge for up to 24 hours. This saves time on busy days. What can I serve with honey garlic turkey meatballs? These meatballs pair well with jasmine rice, steamed veggies, or a fresh salad. You can also serve them as appetizers with toothpicks. Is this recipe suitable for meal prep? Absolutely! The meatballs store well in airtight containers. They can last in the fridge for 3 to 4 days, making them perfect for meal prep. Can I substitute honey for another sweetener? Yes, you can use maple syrup or agave nectar. They will give a similar sweetness without the honey flavor. How can I make these meatballs spicier? Add red pepper flakes or sriracha to the meatball mix. You can also drizzle hot sauce over the meatballs before serving for an extra kick. In this post, I shared a simple recipe for honey garlic turkey meatballs. We covered the key ingredients, from ground turkey to delicious sauce options. You learned how to prepare, bake, and store your meatballs. With tips on perfecting texture and flavor, plus variations for all diets, you can make this dish your own. Enjoy making these meatballs and impress your family with your cooking skills!](https://dailydishlab.com/wp-content/uploads/2025/07/69b29533-6935-43ed-a652-e91bcda4bd1d-768x768.webp)
. Enjoy using these ingredients to create a flavorful and juicy dish! Start by taking the ribeye steaks out of the fridge. Let them sit at room temperature for about 30 minutes. This helps the meat cook evenly. While they rest, you should preheat your grill or a cast-iron skillet on medium-high heat. A hot cooking surface will give your steaks a nice crust. Now, pat the steaks dry with paper towels. This step is key for a good sear. Next, rub salt, pepper, and Cajun seasoning on both sides of the steaks. Make sure they are well-coated for the best flavor. Add 2 tablespoons of butter to your skillet or grill. Let it melt and get slightly browned for extra taste. Place the seasoned steaks on the hot surface. Cook them for about 4-5 minutes on one side. This will create a nice crust. Flip the steaks over and add the remaining 2 tablespoons of butter. Also, sprinkle the minced garlic and smoked paprika on top. Continue cooking for another 4-5 minutes. Spoon the melted garlic butter over the steaks often. Aim for a temperature of 130°F for medium-rare. Once the steaks are done, take them off the grill or skillet. Let them rest for about 5 minutes on a cutting board. This resting time helps keep the juices inside the meat. Slice the steaks against the grain. Drizzle the garlicky Cajun butter from the skillet over the slices. Finally, sprinkle chopped parsley on top for color and flavor. Serve with lemon wedges for a zesty kick. For the complete recipe, refer to the Full Recipe section. To check steak temperature, use a meat thermometer. Insert it into the thickest part of the steak. This gives the most accurate reading. Here are the recommended doneness levels: - Rare: 120°F - 125°F - Medium Rare: 130°F - 135°F - Medium: 140°F - 145°F - Medium Well: 150°F - 155°F - Well Done: 160°F and above Aim for medium-rare for the best flavor and juiciness. Cajun seasoning can vary. You can find blends with more heat or herbs. Feel free to mix your own. Add paprika, onion powder, or cayenne for extra kick. When browning the butter, heat it slowly. Watch for the golden color and a nutty aroma. This adds depth to your dish. For serving, place the steak on a warm plate. This keeps it hot longer. You can slice the steak for easier eating. Garnish with fresh parsley for a pop of color. Add lemon wedges on the side for a zesty touch. These simple moves make your meal look and taste gourmet. For the complete experience, check the Full Recipe. {{image_2}} You can use different cuts of meat for your Cajun butter steak. Ribeye is great, but you can try sirloin, filet mignon, or T-bone. Each cut has its unique taste and texture. - Sirloin: This cut is leaner but still juicy. Cook for 3-4 minutes per side. - Filet Mignon: Very tender, it cooks quickly. Aim for 2-3 minutes per side. - T-bone: A mix of tenderloin and strip steak. Cook for about 4-5 minutes per side. Cooking times vary based on thickness and how you like your steak. Always check the internal temperature to ensure it’s safe and delicious. You can adjust the spice level of your Cajun butter steak to fit your taste. If you want more heat, add extra Cajun seasoning. If you prefer less spice, cut back on it. You can also mix in other spices. Try adding: - Cayenne pepper for extra heat. - Paprika for a smoky flavor. - Thyme or oregano for herbal notes. Experiment with these spices to create a unique flavor profile. Adding vegetables can enhance your dish. Grilled vegetables like bell peppers, zucchini, or asparagus pair well with the steak. You can also add sauces and sides. Think about these options: - Creamy mashed potatoes for a comforting side. - Garlic bread for a crunchy texture. - A fresh salad to add a light touch. These additions make your meal more balanced and exciting. For the full recipe, check out the Cajun butter steak steps above. To store leftover Cajun Butter Steak, let it cool first. Then, place it in an airtight container. This helps keep the steak fresh for up to three days. If you want to enjoy its full flavor, reheat it gently. Use a skillet or the microwave on low power. If you want to freeze cooked steak, wrap each piece in plastic wrap. Then, put it in a freezer-safe bag. This way, it can last up to three months. When you're ready to eat, thaw the steak in the fridge overnight. For best texture and flavor, reheat it in a skillet. This keeps it juicy and tasty. Enjoy your Cajun Butter Steak anytime with these storage tips! To get a great sear, start with a hot grill or skillet. Here are some key tips: - Use a cast-iron skillet or a grill for best results. - Pat your steaks dry to remove moisture. - Season the steaks right before cooking. - Avoid overcrowding the pan or grill. - Cook without moving the steak for a few minutes. This helps form a nice crust. Flip the steak only once. You want to hear that sizzle! Yes, you can adapt the Cajun butter for chicken or seafood. - For chicken, use the same Cajun butter mix. Cook until the chicken reaches 165°F. - For seafood like shrimp or fish, reduce cooking time. Seafood cooks fast! Just remember to adjust the cooking time based on the protein you choose. Cajun Butter Steak goes well with many sides. Here are my favorites: - Garlic mashed potatoes - Grilled corn on the cob - Sautéed green beans - Coleslaw for a crunchy contrast - A fresh garden salad for balance These sides enhance the steak's bold flavors and make a complete meal. Cooking time for a ribeye varies by preference: - Rare: 3-4 minutes per side (120°F) - Medium-rare: 4-5 minutes per side (130°F) - Medium: 5-6 minutes per side (140°F) - Medium-well: 6-7 minutes per side (150°F) - Well-done: 8-9 minutes per side (160°F) Always let the steak rest after cooking. This keeps it juicy and flavorful. For the full recipe, check out the detailed cooking steps above. You now have a flavorful Cajun Butter Steak recipe. We explored key ingredients, cooking steps, and tips for perfect doneness. Remember to adjust the spice level to suit your taste. Try adding different cuts, vegetables, or sauces for variety. Proper storage keeps leftovers fresh for later. This dish is simple to prepare and sure to impress. Enjoy your cooking adventure with this tasty recipe!](https://dailydishlab.com/wp-content/uploads/2025/07/cefc687f-9021-4868-bb93-419ddf0ee92f-768x768.webp)