Skip to content
About
Contact
Cookie Policy
Copyright Policy
Disclaimer
Search
Home
Dinner
Appetizer
Desserts
Drinks
About
Contact
Privacy Policy
Toggle Menu
Home
/
Dinner
- Page 29
Dinner
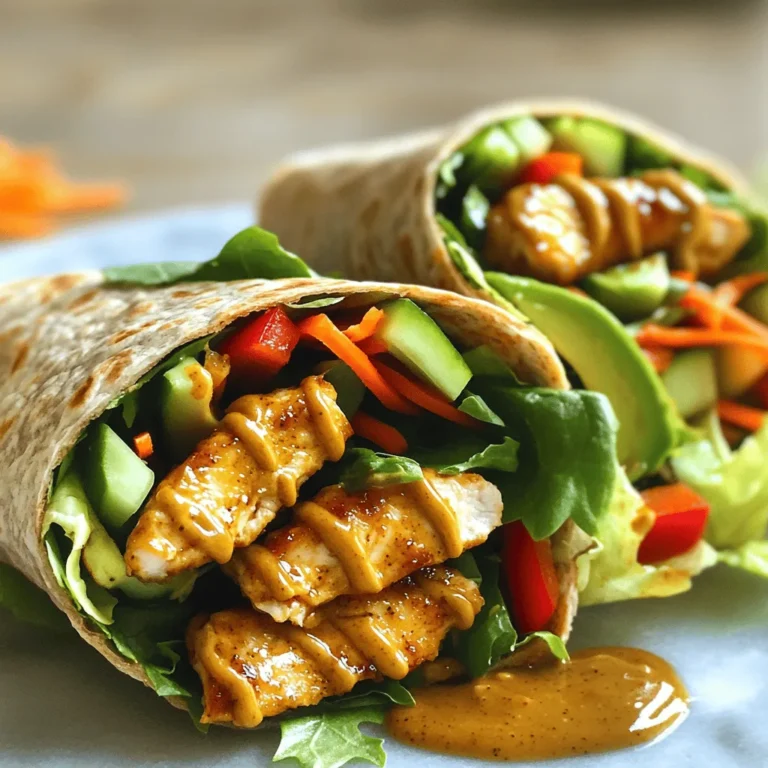
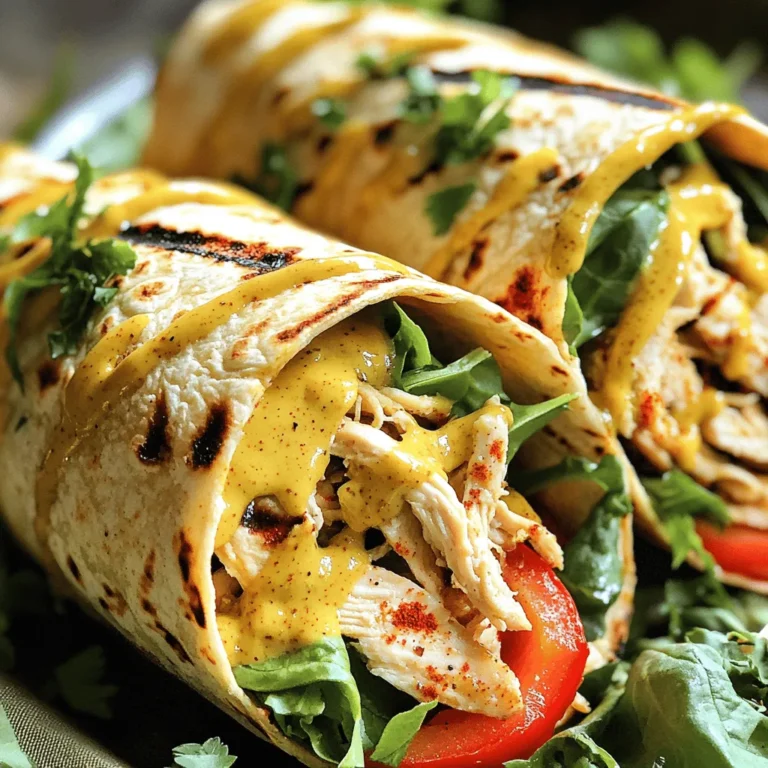
Spicy Honey Mustard Chicken Wraps Tasty and Easy Meal
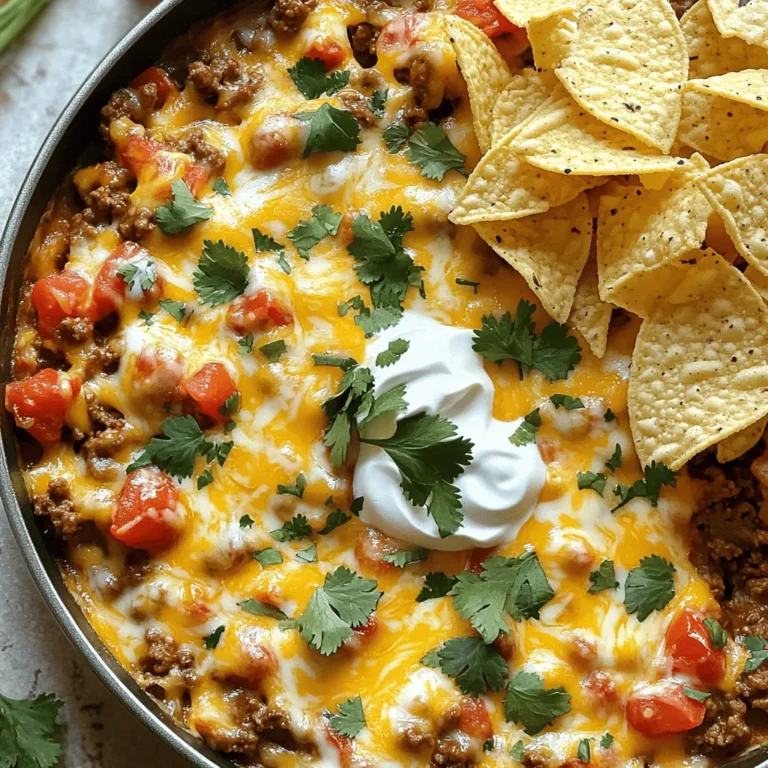
Loaded Cheesy Taco Skillet Flavorful Family Meal
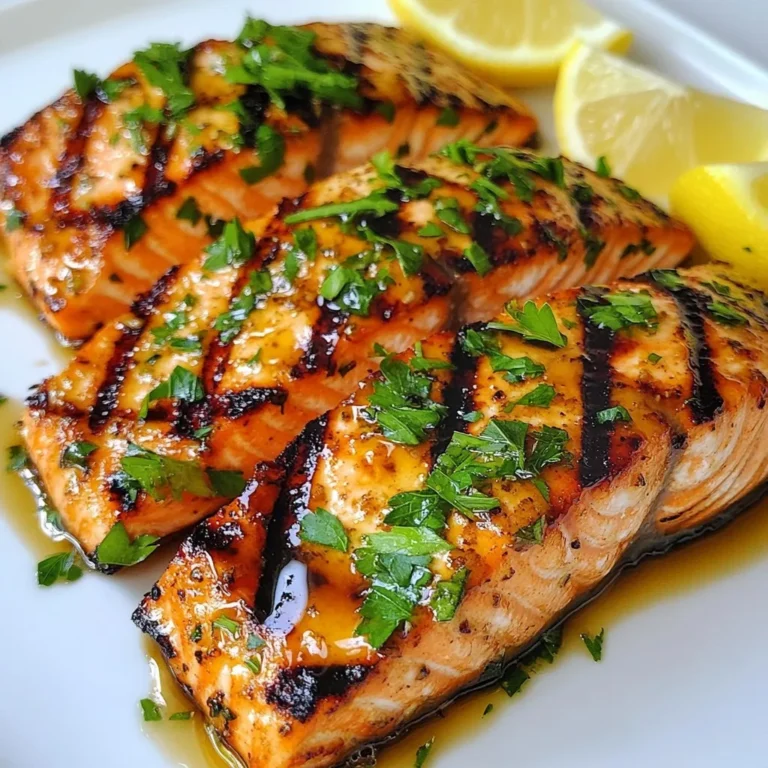
Honey Garlic Grilled Salmon Flavorful and Easy Recipe
Creamy Tuscan Gnocchi Rich and Flavorful Delight
Easy Sheet Pan Gnocchi Primavera Quick Dinner Recipe
Spicy Honey Mustard Chicken Wraps Tasty and Easy Meal
Loaded Cheesy Taco Skillet Flavorful and Easy Meal
Pickle Ranch Chicken and Quinoa Salad Delightful Meal
Pickle Ranch Chicken and Avocado Salad Delight
Pickle Ranch Chicken and Broccoli Casserole Delight
Page navigation
Previous Page
Previous
1
…
27
28
29
30
31
…
64
Next Page
Next
Home
Dinner
Appetizer
Desserts
Drinks
About
Contact
Privacy Policy
Toggle Menu Close
Search for:
Search

![- 1 lb ground beef or turkey - 1 small onion, diced - 2 cloves garlic, minced - 1 packet taco seasoning - 1 cup diced tomatoes (canned or fresh) The base of our Loaded Cheesy Taco Skillet starts with ground beef or turkey. You can choose either, but I prefer ground turkey for a lighter meal. Next, we add a small diced onion and two cloves of minced garlic. These add flavor and aroma to the dish. Taco seasoning gives a rich taste. Don't forget the diced tomatoes! They add moisture and freshness. - 1 cup black beans, drained and rinsed - 1 cup corn (canned or frozen) - 1 cup bell peppers, diced (mix of colors for vibrancy) - 1 ½ cups shredded cheddar cheese - 1 cup sour cream - 2 green onions, sliced (for garnish) - Fresh cilantro, chopped (for garnish) Now, let’s add some color and nutrition! Black beans and corn bring a nice texture. Bell peppers add crunch and sweetness. I love to use a mix of colors for a pop! We need a cheesy topping, so grab some shredded cheddar cheese. It melts beautifully. For serving, sour cream cools the dish, while green onions and fresh cilantro make it look pretty and bright. - Best types of tortilla chips - Ideal accompaniments or side dishes When serving, use sturdy tortilla chips. They hold up well for scooping. Pair this skillet meal with a fresh side salad or some guacamole for extra flavor. You can also add some salsa for a zesty kick. Enjoy this dish with family and friends, and don’t forget to share the Full Recipe! Start with a large skillet over medium heat. Add 1 pound of ground beef or turkey. Cook it until it turns brown, which takes about 5 to 7 minutes. Make sure to break it apart with a spatula as it cooks. This helps it cook evenly. Once the meat is browned, add 1 small diced onion and 2 minced garlic cloves. Sauté these for 3 to 4 minutes. You want the onion to become soft and translucent. This step adds a nice flavor base to your dish. Next, stir in a packet of taco seasoning. Mix in 1 cup of diced tomatoes, 1 cup of black beans (drained and rinsed), 1 cup of corn (canned or frozen), and 1 cup of diced bell peppers. Mix everything well, so the flavors blend. Allow this mixture to simmer for about 5 to 8 minutes. Simmering helps all the flavors meld together, making your dish even tastier. Now, preheat your oven to 350°F (175°C). After simmering, take the skillet off the heat. Sprinkle 1 ½ cups of shredded cheddar cheese evenly over the top. Place the skillet in the oven for about 10 minutes. You want the cheese to melt and become bubbly. Once it's done, let it cool slightly. Then, add dollops of 1 cup of sour cream on top. Finish with sliced green onions and chopped fresh cilantro. Serve with tortilla chips on the side for scooping. For the full recipe, click [Full Recipe]. To keep your meat juicy, don't cook it too long. Ground beef or turkey cooks fast. Stir it often to break it apart. This helps it cook evenly. Use taco seasoning to boost flavor. I love adding extra spices like cumin and paprika. These spices add depth and warmth. A pinch of chili powder can add a nice kick too. Layering is key for a great look. Start with the meat on the bottom. Then, add beans and corn evenly. Top it off with the cheese. When melted, it looks lovely! Colorful garnishes make a big impact. Use bright green cilantro and green onions. A dollop of white sour cream adds contrast. These colors catch the eye and make the dish pop. Tortilla chips are perfect for scooping. Choose sturdy chips to hold the weight. You can also serve some chips on the side for dipping. Portion sizes matter. Aim for ½ to ¾ cup per person. This way, everyone gets enough without waste. Adjust based on your family’s appetite! For the full recipe, check out the Loaded Cheesy Taco Skillet. {{image_2}} You can easily change the protein in this dish. Ground chicken or turkey work well. If you want a meat-free meal, try using black beans or pinto beans. Both options add great texture and flavor. You can also add extra veggies like zucchini or spinach. These swaps keep the meal fresh while still being hearty. For those who like it spicy, add sliced jalapeños or a splash of hot sauce. These ingredients give a nice kick. If you have kids or prefer milder flavors, skip the heat. Instead, you can use sweet bell peppers or a bit of mild salsa. This makes the dish family-friendly while still being tasty. Think about adding spices from other cuisines. You can mix in taco seasoning with chili powder or cumin for a deeper flavor. Want to try something different? Incorporate Italian herbs like oregano and basil. These spices create a fusion twist that surprises the taste buds. You can make it your own by mixing flavors from around the world. Explore the [Full Recipe] for more ideas and details! To store leftovers, let the Loaded Cheesy Taco Skillet cool first. Then, place it in an airtight container. This keeps it fresh for later meals. When reheating, use a microwave or stovetop. Heat it gently to avoid drying it out. You can freeze this dish for future meals. Let it cool completely, then transfer it to a freezer-safe container. Be sure to label it with the date. It will keep well for about three months. For best flavor, eat it within this time frame. In the fridge, your Loaded Cheesy Taco Skillet lasts about three to four days. Look for signs of spoilage, like a sour smell, mold, or change in color. If you see any of these signs, it’s best to toss it out. Enjoy your meal safely! You can serve many tasty sides with this dish. Here are some ideas: - Mexican rice: Fluffy and flavorful, it pairs well with the skillet. - Refried beans: Creamy and rich, they add a nice touch. - Guacamole: Fresh and creamy, it adds a cool contrast. - Simple salad: A mix of greens, tomatoes, and a light dressing works great. - Cornbread: Sweet and soft, it complements the savory flavors. Yes, you can prep Loaded Cheesy Taco Skillet in advance. Here’s how: - Cook the meat: Prepare the ground beef or turkey and let it cool. - Chop veggies: Dice onions, garlic, and peppers ahead of time. - Mix it up: Combine all the ingredients until you’re ready to bake. - Store in the fridge: Keep it in an airtight dish for up to two days. - Bake when ready: Just add cheese and bake before serving. Absolutely! You can make it vegetarian-friendly by swapping a few ingredients: - Use beans: Replace meat with black beans or pinto beans for protein. - Add more veggies: Try zucchini, mushrooms, or spinach for extra flavor. - Use a meat substitute: Choose plant-based ground meat for a similar texture. - Top with cheese: Use your favorite cheese or a plant-based option for a creamy layer. The Loaded Cheesy Taco Skillet is a fun and tasty dish. We explored key ingredients like ground beef, cheese, and fresh veggies, combining them for rich flavor. You can tweak this dish with different proteins and spice levels. Don’t forget tips on storage and serving suggestions for the best experience. Enjoy making this dish at home, impressing friends and family alike. With a few simple steps, you create a crowd-pleaser that’s easy and rewarding. Happy cooking!](https://dailydishlab.com/wp-content/uploads/2025/07/b0f98873-f356-44f9-8ffc-552e70b38ff9-768x768.webp)

![- 1 pound gnocchi (store-bought or homemade) - 1 cup cherry tomatoes, halved - 1 zucchini, sliced into half-moons - 1 bell pepper (red or yellow), chopped - 1 cup broccoli florets - 2 tablespoons olive oil - 2 cloves garlic, minced - 1 teaspoon Italian seasoning - Salt and pepper to taste - 1/4 cup grated Parmesan cheese (optional) - Fresh basil leaves for garnish To make Easy Sheet Pan Gnocchi Primavera, gather these simple ingredients. Start with gnocchi, which you can find at any store. The cherry tomatoes add sweetness. Zucchini and bell pepper give texture and color. Broccoli adds a crunch, balancing the dish. For seasoning, olive oil helps cook the veggies and gnocchi. Garlic brings a bold flavor. Italian seasoning adds a classic taste. Salt and pepper enhance all the flavors. Don’t forget the Parmesan cheese for creaminess! Fresh basil leaves make a lovely garnish. Once you have all your ingredients, you’re ready to create a delicious meal! For the complete recipe, check out the [Full Recipe]. - Step 1: Preheat your oven to 425°F (220°C). This helps cook the gnocchi right. - Step 2: Combine gnocchi, cherry tomatoes, zucchini, bell pepper, and broccoli on a baking sheet. Make sure they mix well for even cooking. - Step 3: Drizzle olive oil and add minced garlic, Italian seasoning, salt, and pepper. This adds great flavor to the dish. - Step 4: Toss and spread everything evenly on the baking sheet. This helps all the ingredients cook at the same time. - Step 5: Roast for 20-25 minutes, stirring halfway through. This step ensures a nice golden color. - Step 6: Sprinkle with Parmesan cheese and garnish with basil before serving. This makes your dish look and taste amazing. Follow these steps closely for a delicious Easy Sheet Pan Gnocchi Primavera. For the full recipe, check out the section above. - Cook gnocchi until golden brown and vegetables are tender. This adds great flavor. - Use parchment paper for easier cleanup. It saves time and keeps your pan clean. - Add red pepper flakes for heat. It gives a nice kick to the dish. - Try different herbs like thyme or rosemary for varied flavor. Fresh herbs can brighten your meal. - Serve directly from the sheet pan for a casual meal. This makes for easy serving and a fun vibe. - Pair with a side salad for a balanced dinner. A light salad complements the warm gnocchi well. For the complete details, check out the Full Recipe. {{image_2}} You can change up the veggies based on your taste. Try replacing the broccoli with asparagus or green beans. These veggies add crunch and flavor. For more greens, toss in baby spinach or kale. They cook down nicely and boost nutrition. Want more protein? You can add cooked chicken, shrimp, or tofu. These ingredients make the dish heartier. If you prefer a vegetarian option, mix in cannellini beans. They are creamy and fill you up. If you want a healthier twist, consider using cauliflower gnocchi. Whole wheat gnocchi is another great option. If gnocchi is not available, try other types of dumplings. They can add a fun new taste to your meal. For the full recipe, check out the Easy Sheet Pan Gnocchi Primavera. To store leftovers, place them in an airtight container. This keeps them fresh. You can keep them in the fridge for up to three days. If you want to save them longer, freeze portions. Use freezer-safe bags or containers. Label them with the date. They can last up to three months in the freezer. To reheat gnocchi, use the oven for best texture. Preheat the oven to 350°F (175°C). Place the gnocchi on a baking sheet. Heat for about 10-15 minutes. Stir halfway through to warm evenly. If you use a microwave, put the gnocchi in a bowl. Heat for 1-2 minutes, stirring once. Be careful not to overheat, as it can change the texture. For easy weeknight meals, prepare ingredients in advance. Chop vegetables and store them in the fridge. You can also cook the gnocchi ahead of time. Keep sauces and garnishes separate to keep them fresh. This way, you can mix and match ingredients as needed. Use these tips to enjoy quick meals all week. If you want to see the full recipe, check the link. Can I use frozen gnocchi for this recipe? Yes, you can use frozen gnocchi. Just toss them straight on the sheet pan. They will cook well and taste great. No need to thaw them first. How can I make this vegan-friendly? To make this dish vegan, skip the Parmesan cheese. You can use nutritional yeast for a cheesy flavor. Also, check that your gnocchi is egg-free. What’s the best way to tell when the vegetables are done? The best way is to check their color and texture. They should be bright and tender, but not mushy. You can poke them with a fork to test. Can I add more vegetables or change the quantities? Absolutely! Feel free to add more veggies like carrots or mushrooms. Just remember to keep the total amount similar so everything cooks evenly. What can I serve with Easy Sheet Pan Gnocchi Primavera? This dish goes well with a fresh salad. You can also serve garlic bread or a light soup. They add flavors and make the meal more filling. How do I store leftovers for the next day? To store leftovers, place them in an airtight container. Keep them in the fridge for up to three days. Reheat in the oven or microwave before serving. This recipe shows how to make a simple sheet pan gnocchi dish. We covered all the main ingredients, seasonings, and step-by-step cooking directions to ensure success. Remember to customize your meal with different veggies, proteins, or gnocchi types. After a quick roast, you can have a delicious dinner ready. Keep it fresh with storage tips for leftovers. Enjoy your cooking and make this dish your own. Each bite is packed with flavor and fun. Happy cooking!](https://dailydishlab.com/wp-content/uploads/2025/07/51139aef-520e-4271-91ea-5c6754dfc759-768x768.webp)
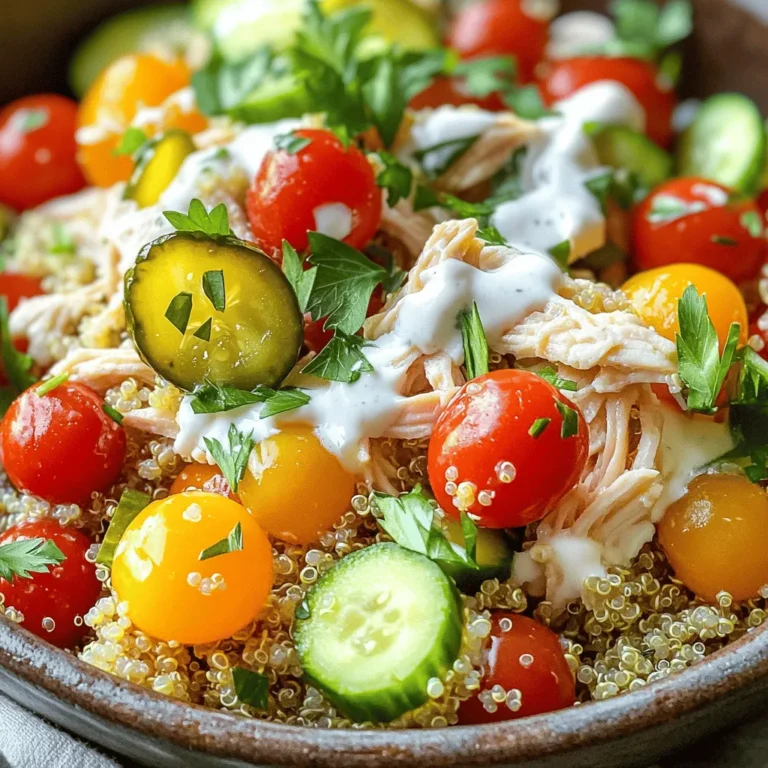
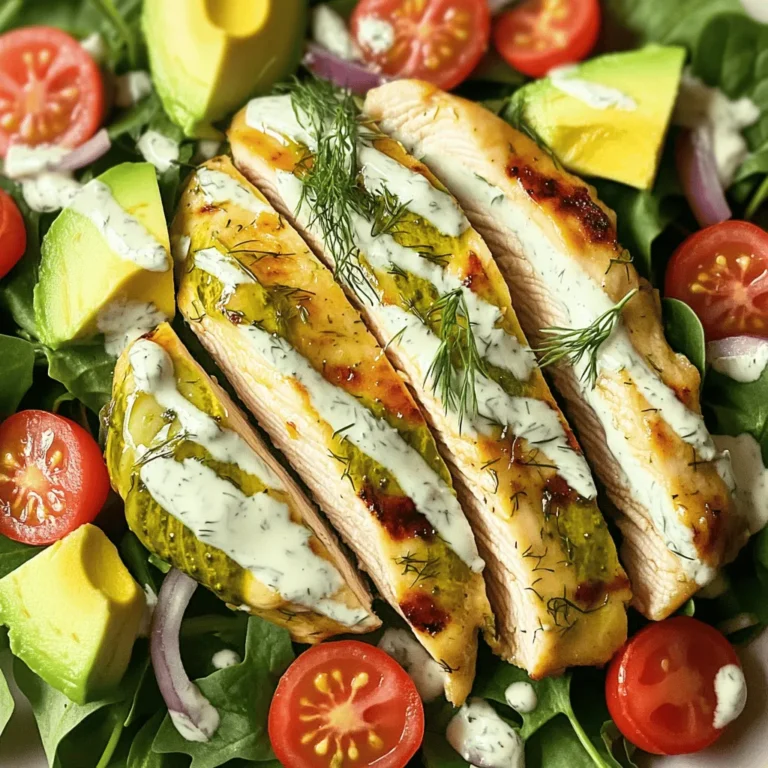
![When making Pickle Ranch Chicken and Broccoli Casserole, you need some key ingredients. Here’s what you will need: - 2 cups cooked chicken, shredded - 3 cups broccoli florets, steamed - 1 cup pickles, chopped (dill works best) - 1 cup ranch dressing - 1 cup shredded cheddar cheese - 1/2 cup cream cheese, softened - 1 teaspoon garlic powder - 1 teaspoon onion powder - 1/2 teaspoon salt - 1/4 teaspoon black pepper - 1/4 cup breadcrumbs (optional, for topping) These ingredients create a tasty and rich flavor. The pickles add a fun twist that makes this dish special. You can add your own flair to this casserole. Here are some ideas: - Use rotisserie chicken for quick prep. - Swap broccoli for green beans or spinach. - Try ranch dip instead of ranch dressing for a thicker mix. - Change the cheese! Use mozzarella or pepper jack for more kick. These optional ingredients can help you customize the dish to your taste. Understanding the nutrition in your meal is key. Here’s a simple breakdown per serving: - Calories: About 320 - Protein: 24g - Carbohydrates: 10g - Fat: 20g - Fiber: 2g This casserole is not just tasty, but it also gives you good protein and flavor. Enjoy the Full Recipe to see how simple it is to make this dish. To start, gather all your ingredients. You will need: - 2 cups cooked chicken, shredded - 3 cups broccoli florets, steamed - 1 cup pickles, chopped - 1 cup ranch dressing - 1 cup shredded cheddar cheese - 1/2 cup cream cheese, softened - 1 teaspoon garlic powder - 1 teaspoon onion powder - 1/2 teaspoon salt - 1/4 teaspoon black pepper - 1/4 cup breadcrumbs (optional) Make sure the chicken is cooked and shredded. Steam the broccoli until it is bright green and tender. Chop the pickles into small pieces. This blend of flavors is what makes this casserole special. Now, let's mix everything together. In a large bowl, combine the shredded chicken, steamed broccoli, and chopped pickles. In another bowl, mix the ranch dressing, softened cream cheese, garlic powder, onion powder, salt, and black pepper. Blend them well until smooth. Pour this creamy mixture over the chicken, broccoli, and pickles. Stir gently to coat all the pieces evenly. Next, transfer everything to a greased 9x13 inch baking dish. Top with shredded cheddar cheese for a cheesy finish. If you like a crunchy topping, sprinkle breadcrumbs over the cheese. Preheat your oven to 350°F (175°C) and bake the casserole for 25-30 minutes. It’s ready when the cheese is bubbly and golden brown. Let it cool for a few minutes before serving. For a creamy and rich texture, use softened cream cheese. This helps it blend smoothly with the ranch dressing. Make sure to steam the broccoli just right. Overcooking can make it mushy. If you want a crispy topping, bake the casserole without covering it. This allows the cheese to brown nicely. You can also add more cheese for an extra gooey texture. If you follow these tips, your Pickle Ranch Chicken and Broccoli Casserole will turn out delicious every time! For the full recipe, check out the [Full Recipe]. When making Pickle Ranch Chicken and Broccoli Casserole, avoid undercooking your broccoli. Cook it until it is tender but still bright green. If you skip this step, the broccoli may turn mushy in the oven. Another mistake is not mixing the ranch dressing well. Make sure the cream cheese blends completely for a smooth taste. Lastly, don’t use stale breadcrumbs if you decide to add a topping. Fresh breadcrumbs give a better crunch. You can easily change the flavor of your casserole. Want it spicy? Add some diced jalapeños or a dash of hot sauce. For a tangy twist, try using sweet pickles instead of dill. You can also swap ranch dressing for blue cheese or a yogurt-based dressing. If you love herbs, mix in fresh dill or parsley. Each twist adds a new element and keeps it exciting! Serve your casserole hot and bubbly right from the oven. Garnish with fresh parsley for a pop of color. You can also add extra pickle slices on top for a fun look and flavor. This dish pairs well with a fresh garden salad or crusty bread. For a complete meal, serve it with rice or quinoa on the side. For the full recipe, check out the details above! {{image_2}} You can switch chicken for other proteins. Try turkey or pork for a new taste. These meats blend well with the pickles and ranch dressing. If you want a lighter option, use shredded rotisserie chicken. It adds great flavor with less work. Each protein brings its own flavor twist to the dish. If you want a meat-free meal, go for a vegetarian version. Replace the chicken with chickpeas or white beans. They add protein and fiber. You can also use mushrooms for a savory bite. Make sure to keep the broccoli and pickles for that crunch and tang. This version tastes great and is filling. You can easily swap ingredients to fit your diet. If you're dairy-free, try plant-based cream cheese and cheese alternatives. For gluten-free options, use gluten-free breadcrumbs. You can also use Greek yogurt instead of ranch dressing for a healthier twist. These swaps keep the casserole tasty while meeting your needs. For the full recipe, check out the details above. Enjoy making it your own! After enjoying your casserole, let it cool first. Place any leftovers in an airtight container. Store it in the fridge. This dish stays fresh for up to three days. If you want to keep it longer, try freezing it. To reheat, take the casserole out of the fridge. Preheat your oven to 350°F (175°C). Cover the dish with aluminum foil. Heat for about 20-25 minutes. Check if it's hot all the way through before serving. You can also use a microwave for quicker reheating. Just heat one serving at a time. If you want to freeze the casserole, cool it completely first. Place it in a freezer-safe dish. Wrap it tightly with plastic wrap and foil. It can last for up to three months in the freezer. When ready to eat, let it thaw in the fridge overnight before reheating. This way, you still get that great taste from the Full Recipe. Yes, you can use frozen broccoli in this dish. Just thaw it first and drain any extra water. Frozen broccoli can save time and still taste great in the casserole. It adds a nice texture and flavor. If you don’t have ranch dressing, try using a mix of sour cream and herbs. You can also use yogurt mixed with garlic and dill. These options give a similar creamy texture and taste. You can even experiment with your favorite dressings. This casserole will last about three to four days in the fridge. Just cover it tightly with plastic wrap or foil. For the best taste, eat it within this time frame. Always check for any off smells or changes in texture before eating. Yes, you can prepare this casserole ahead of time. Just assemble it and cover it. You can store it in the fridge for up to a day before baking. This makes it easy for busy nights. Just pop it in the oven when you’re ready to eat. For the full recipe, check the details above. In this article, we explored the tasty Pickle Ranch Chicken and Broccoli Casserole. We covered key ingredients and shared optional swaps for your needs. You learned how to prepare and cook the dish for the best texture. I also shared tips to avoid common mistakes and ways to customize flavors. Finally, we discussed variations, storage tips, and answered common questions. This casserole offers great flavor and is easy to make. Enjoy crafting your perfect dish!](https://dailydishlab.com/wp-content/uploads/2025/07/cf154b41-3af7-41bb-b9a3-230edc58aa3b-768x768.webp)