Skip to content
About
Contact
Cookie Policy
Copyright Policy
Disclaimer
Search
Home
Dinner
Appetizer
Desserts
Drinks
About
Contact
Privacy Policy
Toggle Menu
Home
/
Dinner
- Page 42
Dinner
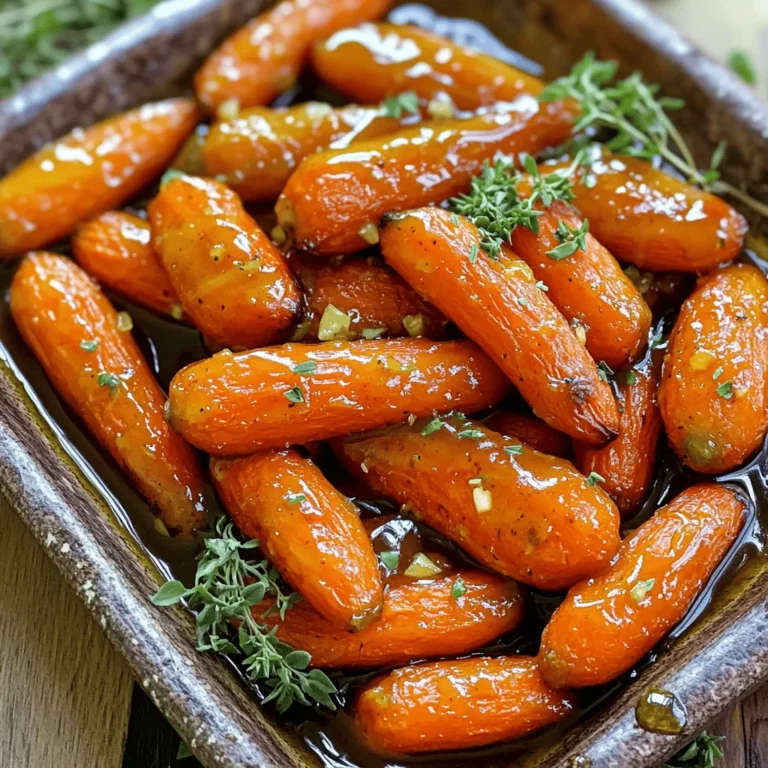
Honey Garlic Butter Roasted Carrots Flavor Boost Recipe
Cheesy Mexican Rice Skillet Simple and Flavorful Dish
Lemon Herb Roasted Chicken Simple and Flavorful Meal
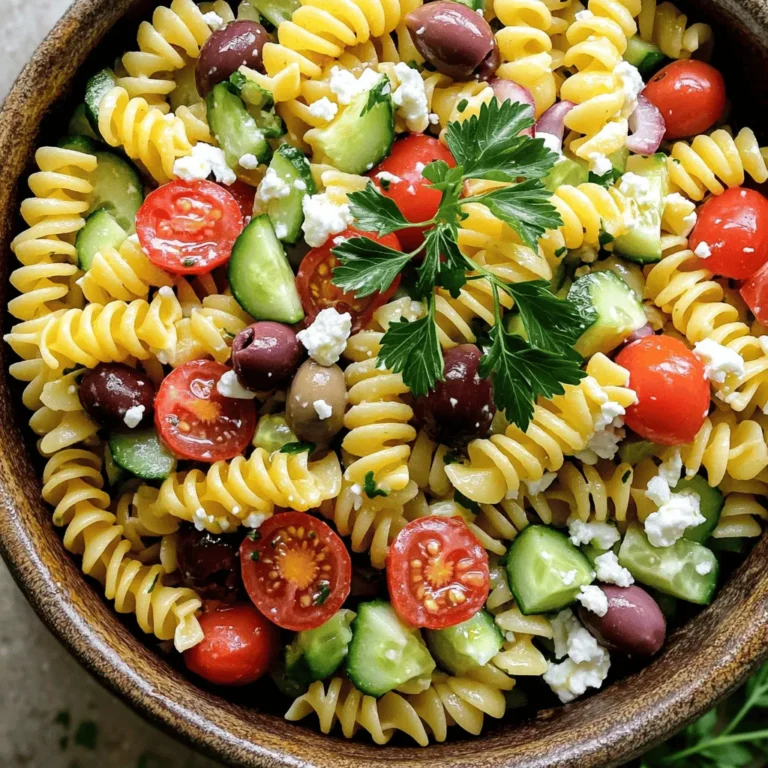
Easy Greek Pasta Salad Flavorful and Simple Dish
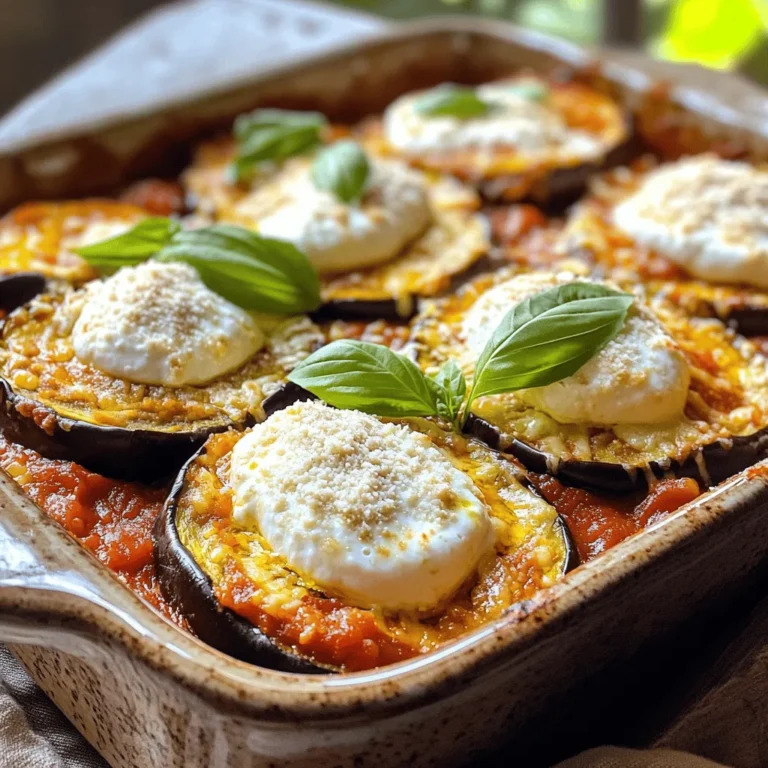
Classic Eggplant Parmesan Flavorful and Hearty Dish
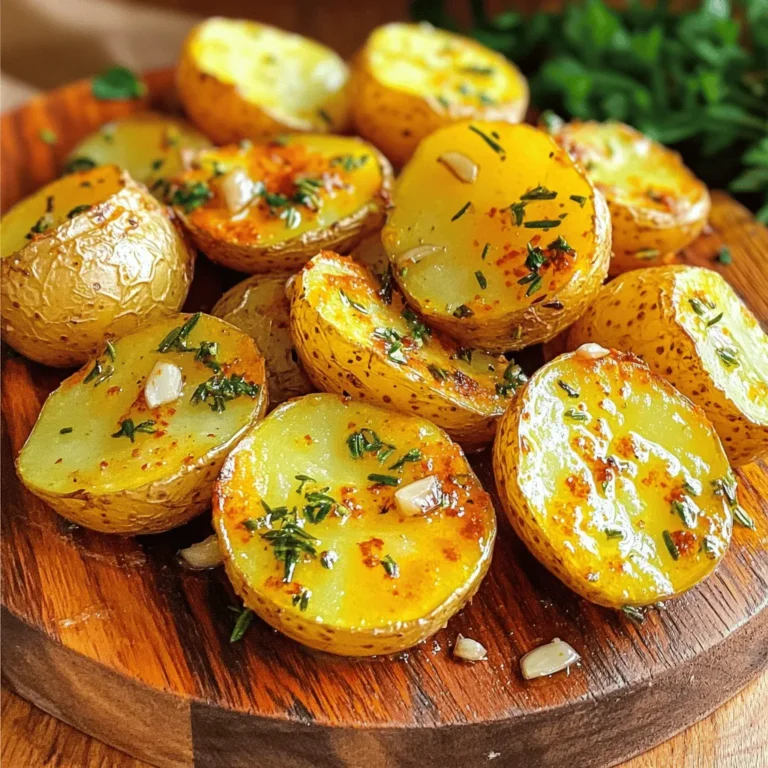
Garlic Herb Roasted Potatoes Simple and Flavorful Dish
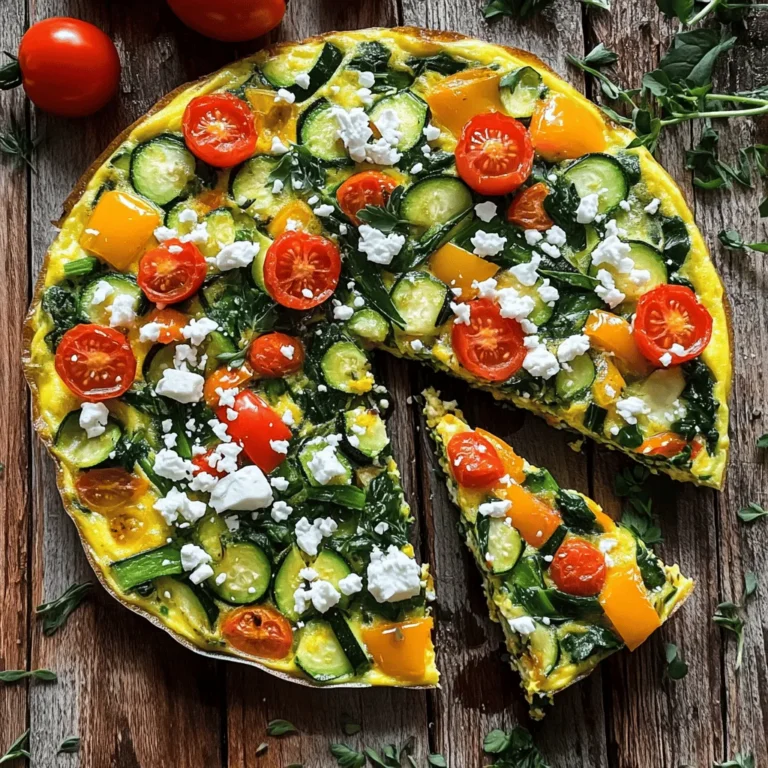
Quick and Easy Veggie Frittata Savory and Simple Dish
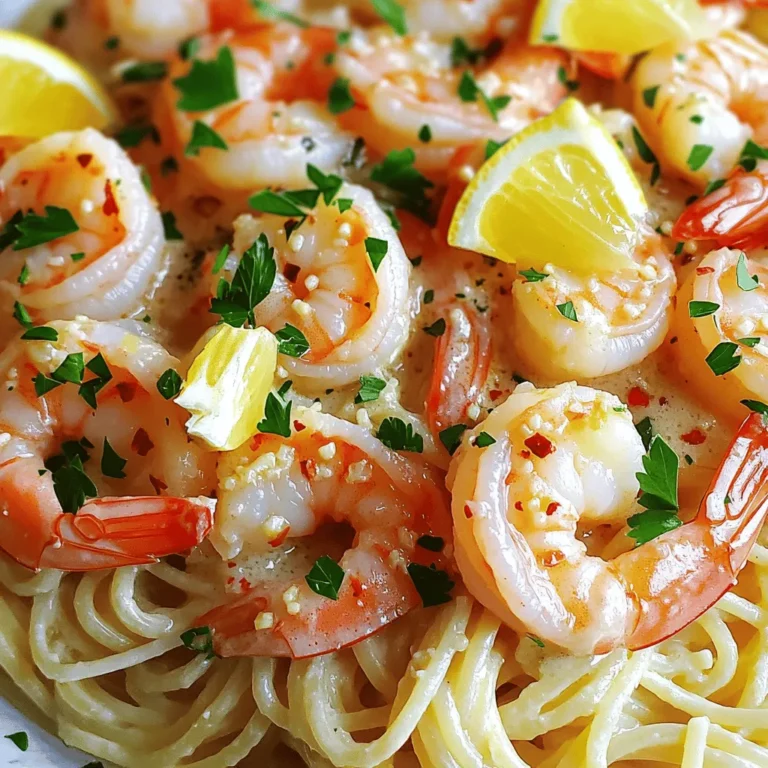
Classic Shrimp Scampi Tasty and Quick Dinner Recipe
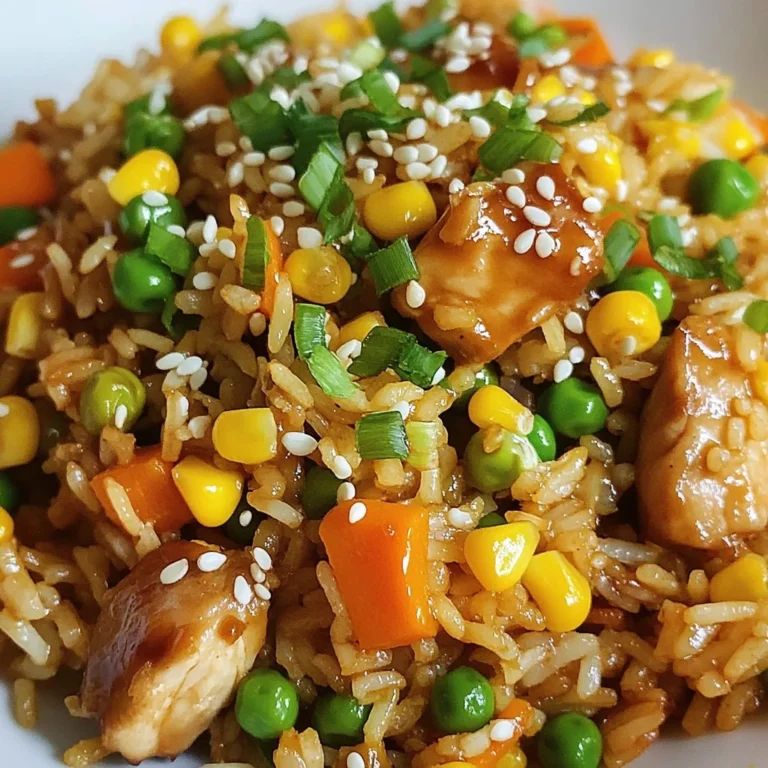
Teriyaki Chicken Fried Rice Tasty Meal Idea
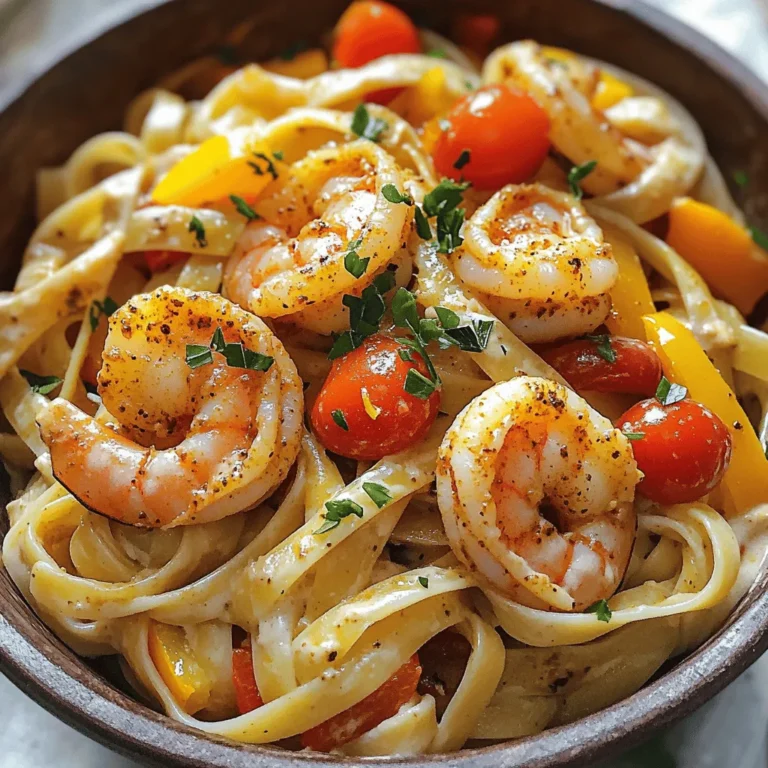
Spicy Cajun Shrimp Pasta Flavorful and Easy Recipe
Page navigation
Previous Page
Previous
1
…
40
41
42
43
44
…
64
Next Page
Next
Home
Dinner
Appetizer
Desserts
Drinks
About
Contact
Privacy Policy
Toggle Menu Close
Search for:
Search


![To make this dish, you need simple and fresh ingredients. Here’s what you'll need: - 1 whole chicken (about 4-5 lbs) - 2 lemons (one for juicing, one for slicing) - 4 tablespoons olive oil - 4 cloves garlic, minced - 1 tablespoon fresh rosemary, chopped - 1 tablespoon fresh thyme, chopped - 1 tablespoon fresh parsley, chopped - Salt and pepper, to taste - 1 large onion, quartered - 1 cup chicken broth This mix brings out bright flavors and makes the chicken delicious. The lemon juice adds zing, while the herbs give it depth. You can boost the taste with a few extra ingredients. Try adding: - 1 teaspoon paprika for a smoky touch - 1 tablespoon Dijon mustard for a hint of tang - A pinch of chili flakes for some heat These additions can personalize your dish and make it even more exciting. Pair your chicken with sides that complement its flavors. Here are some great options: - Roasted vegetables like carrots and potatoes - A green salad with a light vinaigrette - Garlic bread to soak up the tasty juices These sides create a balanced meal and make dinner feel special. For the full recipe, check out the details above. First, gather your ingredients. You need a whole chicken, lemons, olive oil, garlic, and herbs. I love using fresh rosemary, thyme, and parsley. These add great flavor. Start by preheating your oven to 425°F (220°C). Next, pat the chicken dry with paper towels. This helps the skin crisp up while roasting. Place the chicken in a roasting pan. In a bowl, mix olive oil, juice from one lemon, minced garlic, and the chopped herbs. Add salt and pepper to taste. This mix is packed with flavor! Now, rub this mixture all over the chicken. Make sure to get it under the skin. This step is key for juicy meat. Stuff the chicken's cavity with the quartered onion and sliced lemon. This adds moisture and aroma while cooking. Pour chicken broth into the roasting pan. This keeps the chicken moist. Next, tie the chicken legs together with kitchen twine. Tuck the wing tips under the bird. This helps the chicken cook evenly. Roast the chicken in your preheated oven. It should take about 1 hour and 15 minutes. Use a meat thermometer to check that it hits 165°F (74°C). Halfway through, baste the chicken with pan juices. This adds extra flavor and moisture. Once done, take the chicken out of the oven. Let it rest for 10-15 minutes before carving. This helps the juices settle. For carving, use a sharp knife. Start with the legs, then move to the breast. For a lovely presentation, place the carved chicken on a large platter. Add fresh lemon slices and sprinkle more herbs on top. Serve with sides like roasted vegetables or a green salad for a complete meal. For the full recipe, check the details above. To make your Lemon Herb Roasted Chicken burst with flavor, start with fresh herbs. Fresh rosemary, thyme, and parsley work best. They add a bright taste that dried herbs can’t match. Always rub the herb mix under the chicken skin. This step seals in the flavors. Squeeze the juice of one lemon over the chicken too. The lemon gives a nice tang and helps balance the richness of the meat. Juiciness is key to a great roasted chicken. First, make sure to pat the chicken dry. This helps the skin crisp up. Pour chicken broth into the pan before roasting. This broth creates steam, keeping the meat moist. Basting the chicken with its pan juices halfway through cooking adds flavor and moisture. Finally, let the chicken rest after roasting. This step helps the juices settle for a tender bite. One common mistake is not preheating the oven. Always preheat to 425°F (220°C) to ensure even cooking. Don’t skip the kitchen twine either. Tying the legs helps the chicken cook evenly. Avoid opening the oven too often, as this lets heat escape. Lastly, don’t rush the resting time after cooking. This time allows for a juicier chicken. For a complete guide, check out the Full Recipe. {{image_2}} You can mix up your herbs for new tastes. Instead of rosemary, try sage or dill. These herbs give a different feel to the chicken. You can also use dried herbs. They work well if you do not have fresh ones. Just use one-third of the amount. This change keeps the dish fresh and fun. You can roast this chicken in many ways. An air fryer cooks it quick and gives a nice crisp skin. Cook at 375°F for about 50 minutes. A slow cooker is another option. Cook on low for 6 to 8 hours. This method keeps the chicken super juicy and tender. Each method has its charm, making dinner easy and tasty. This lemon herb roasted chicken is already gluten-free. You can enjoy it safe without worry. For a keto diet, skip any starchy sides. Instead, serve it with a salad or steamed veggies. This keeps your meal low in carbs but high in flavor. You can enjoy a delicious meal that fits your needs! For the full recipe, check out [Full Recipe]. After enjoying your lemon herb roasted chicken, store the leftovers. Let the chicken cool first. Place it in an airtight container. Keep it in the fridge. Use the leftovers within three to four days. You can shred the meat for salads or sandwiches. This way, you avoid waste and enjoy tasty meals. If you want to save your chicken longer, freezing is a great option. Cut the chicken into portions. Wrap each piece tightly in plastic wrap. Then, place the wrapped chicken in a freezer bag. Remove as much air as possible. Label the bag with the date. When you're ready to eat, thaw it overnight in the fridge. Reheat the chicken in the oven at 350°F (175°C) until warm. This will keep it juicy and delicious. Lemon herb roasted chicken lasts in the fridge for three to four days. If frozen, it stays good for about four months. After that, the quality may drop. Always check for any off smells or changes in texture before eating. Keeping track of how long it’s been stored helps ensure your meals stay safe and tasty. You can tell when the chicken is done by checking its temperature. Use a meat thermometer to check the thickest part of the thigh. The safe internal temperature is 165°F (74°C). If the juices run clear, it is also a good sign. Always let the chicken rest after cooking. This allows the juices to spread and keeps the meat moist. Yes, you can use chicken parts. Thighs, breasts, or drumsticks work well. Just adjust the cooking time. Smaller pieces will cook faster, so keep an eye on them. They may take about 30 to 45 minutes to cook through. Ensure each piece reaches 165°F (74°C) for safety. If you don’t have fresh herbs, you can use dried ones. Use about one-third of the amount of dried herbs compared to fresh. For example, if the recipe calls for one tablespoon of fresh rosemary, use one teaspoon of dried rosemary. Dried herbs can still add great flavor. Experiment with different ones to find your favorite mix. For the complete cooking process, check out the Full Recipe. Lemon herb roasted chicken is a delightful dish you can easily make at home. We covered the key ingredients and how to prepare and roast your chicken for the best taste. I shared tips for keeping the chicken juicy and avoiding common mistakes. I also highlighted variations for unique flavors and dietary needs and provided storage information for leftovers. Remember, cooking is about enjoyment. Experiment and have fun with this recipe to make it your own. Enjoy your delicious meal!](https://dailydishlab.com/wp-content/uploads/2025/06/834e469e-ee3b-4758-a8f8-2aa538b40a90-768x768.webp)