Skip to content
About
Contact
Cookie Policy
Copyright Policy
Disclaimer
Search
Home
Dinner
Appetizer
Desserts
Drinks
About
Contact
Privacy Policy
Toggle Menu
Home
/
Dinner
- Page 49
Dinner
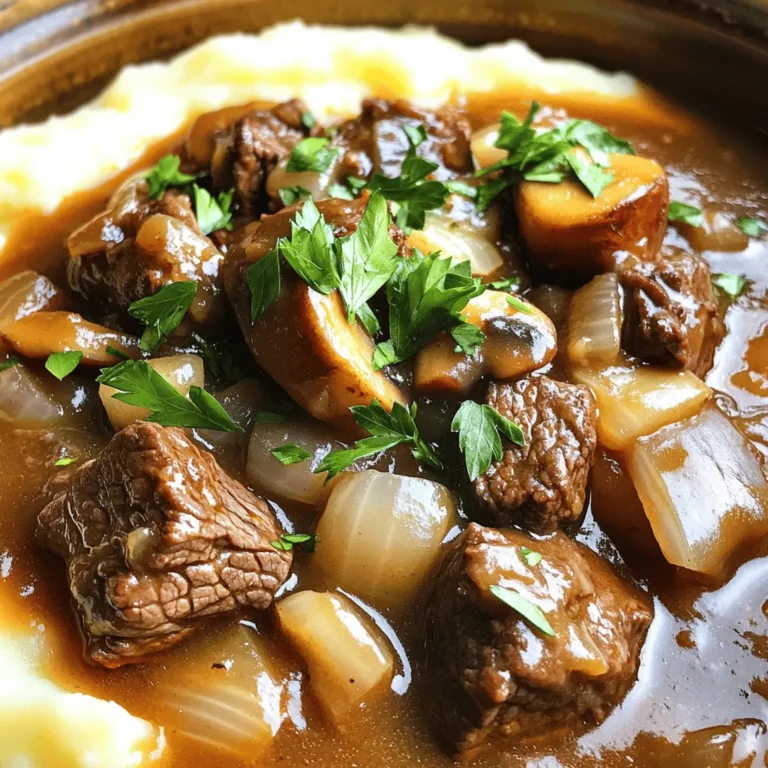
Crock Pot Beef Tips and Gravy Hearty Family Meal
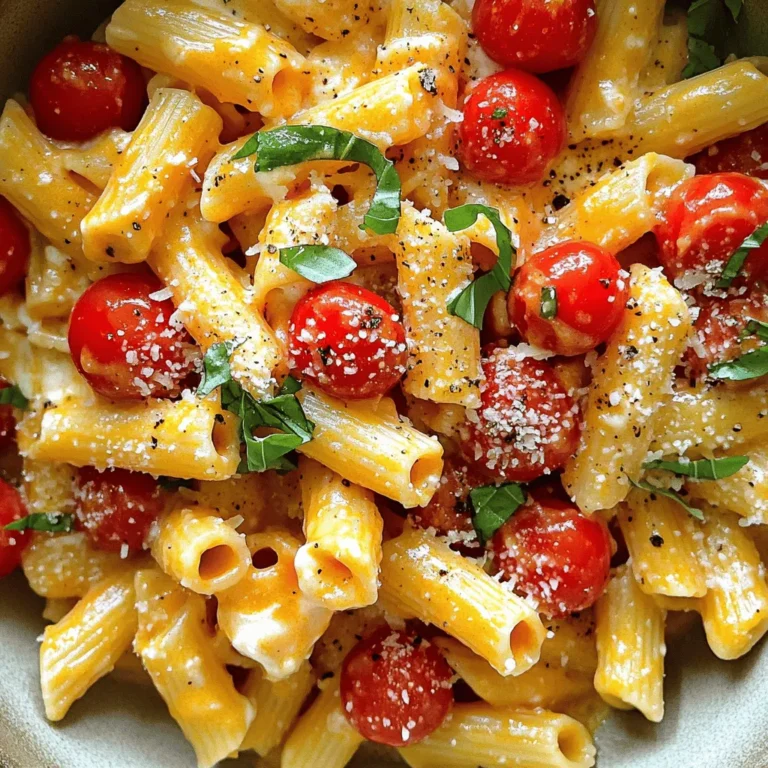
Creamy Ricotta and Tomato Pasta Delightful Meal
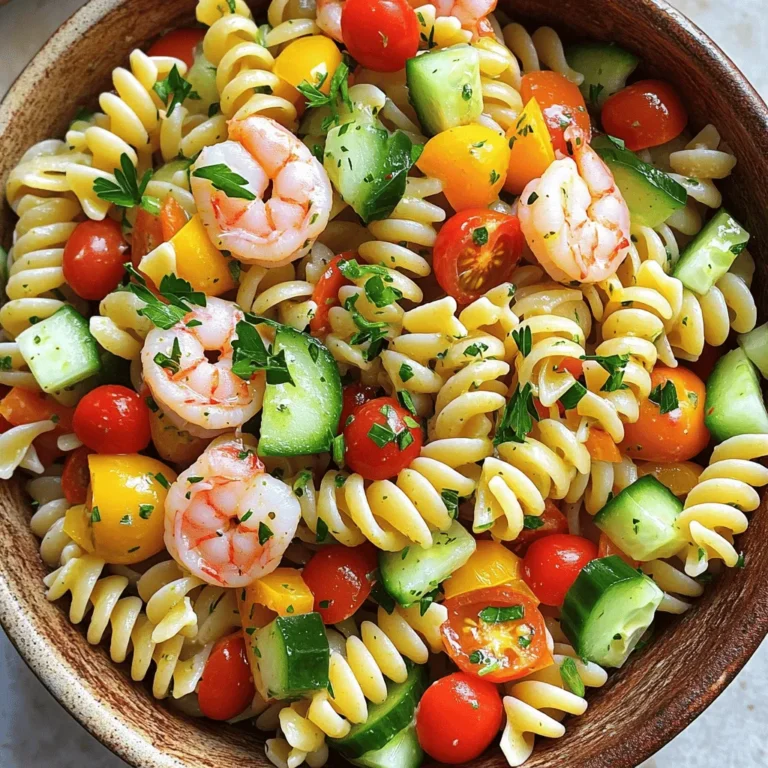
Savory Shrimp Pasta Salad with Italian Dressing
Ultimate Cheesesteak Sandwich Flavorful and Filling Recipe
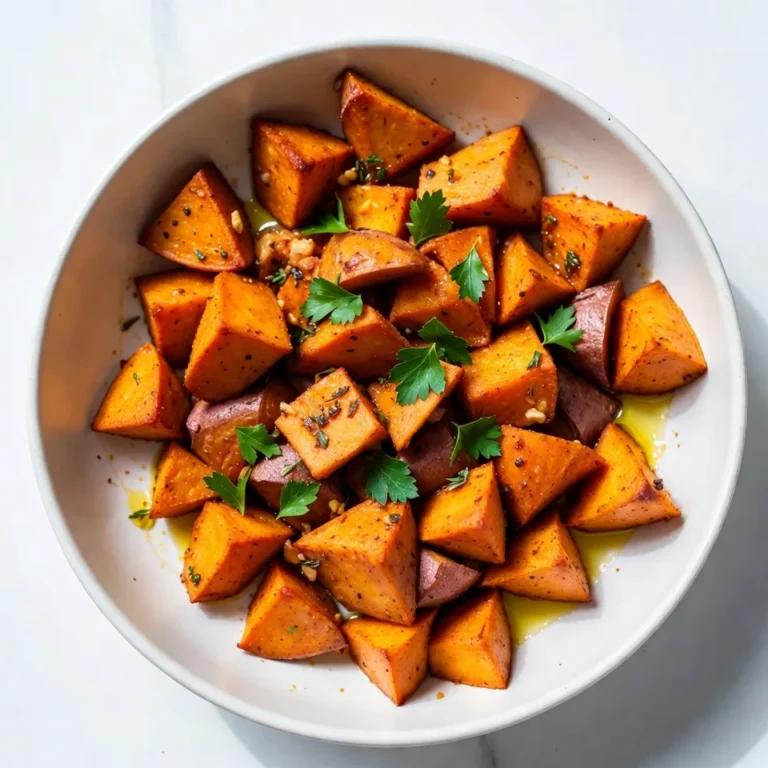
Garlic Herb Roasted Sweet Potatoes Flavorful Delight
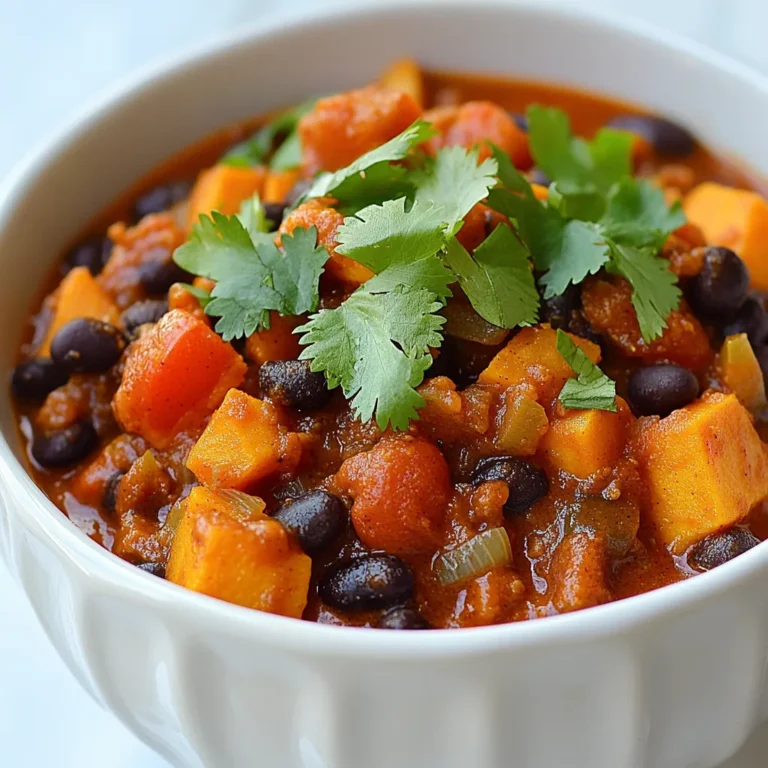
Spicy Chipotle Sweet Potato Chili Bold and Flavorful Dish
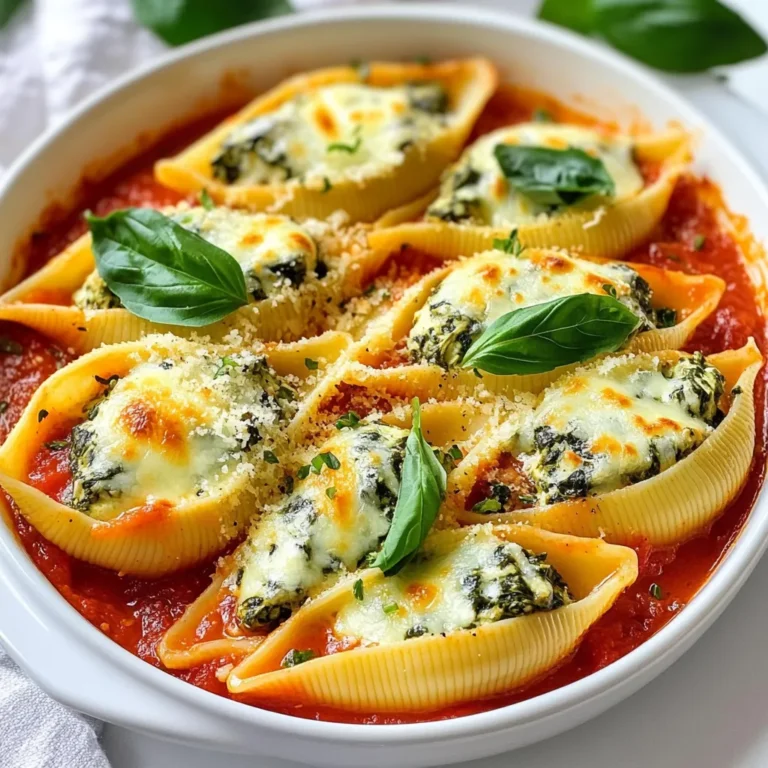
Creamy Spinach Stuffed Shells Delicious Dinner Delight
Creamy Avocado Pasta Flavorful and Quick Meal Guide
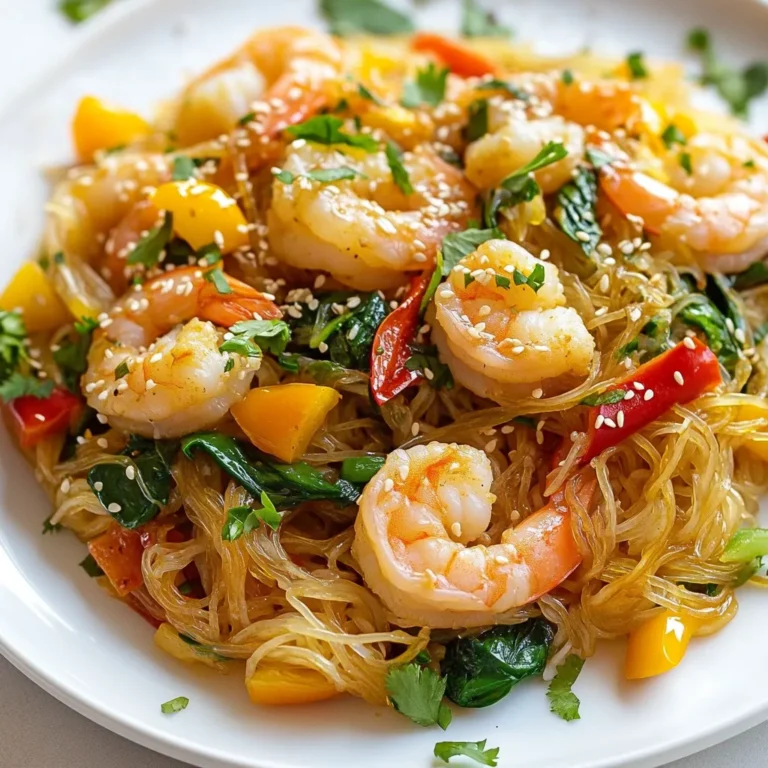
Spicy Garlic Shrimp Noodles Flavorful and Easy Recipe
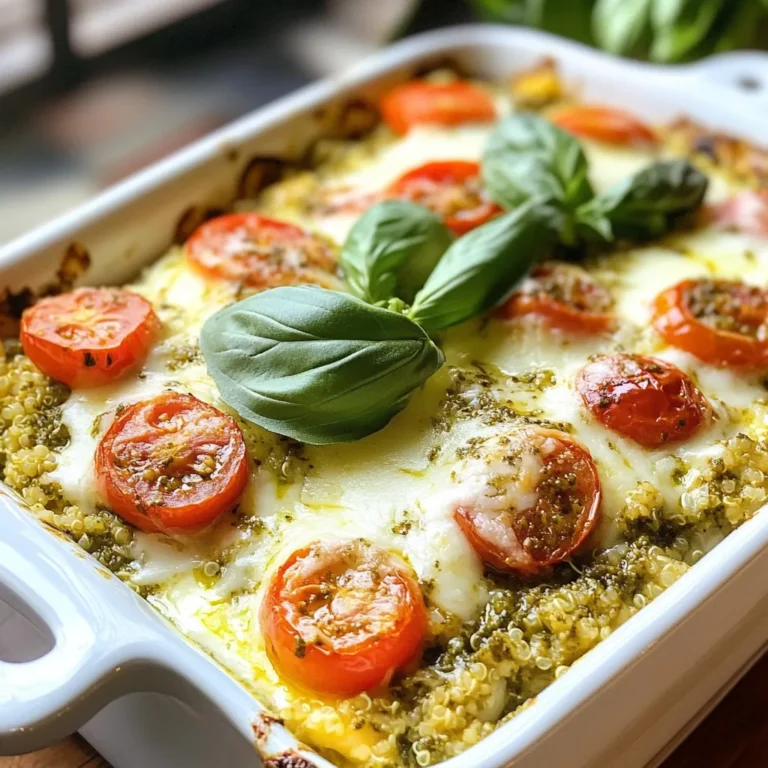
Pesto Chicken Quinoa Bake Flavorful and Easy Recipe
Page navigation
Previous Page
Previous
1
…
47
48
49
50
51
…
64
Next Page
Next
Home
Dinner
Appetizer
Desserts
Drinks
About
Contact
Privacy Policy
Toggle Menu Close
Search for:
Search

![To make the perfect cheesesteak, you need a few key ingredients: - 1 lb ribeye steak, thinly sliced against the grain - 4 slices provolone cheese or Cheez Whiz - 4 fresh hoagie rolls Ribeye steak is great because it has a lot of flavor. Thin slices help it cook fast. Provolone cheese adds a nice, creamy texture. Cheez Whiz gives a fun twist. The hoagie rolls hold all the goodness together. You can make your cheesesteak even better with some optional ingredients: - Bell peppers (red or green) - Sliced jalapeños - Seasonings and spices Bell peppers add sweetness and color. Sliced jalapeños bring heat and spice. You can also add spices like garlic powder and pepper for extra flavor. Feel free to mix and match these ingredients. This way, you can create a cheesesteak that fits your taste! For the full recipe, check out the Ultimate Cheesesteak Sandwich. - Preheat the skillet: Start by heating a large skillet over medium-high heat. Add 2 tablespoons of olive oil. Let it heat until it shimmers. - Season the ribeye steak: Take 1 pound of ribeye steak and slice it thinly against the grain. In a bowl, mix salt, freshly ground pepper, and 1 teaspoon of garlic powder. Coat the beef evenly with this mixture. - Sauté onions and bell peppers: Add 1 large thinly sliced onion and 1 bell pepper to the hot skillet. Cook for 3-4 minutes. Stir until they soften and smell great. - Combine steak with vegetables: Push the veggies to one side of the skillet. Add the seasoned ribeye to the other side. Cook for 5-7 minutes. Stir it now and then until the beef is browned to your liking. - Melt the provolone cheese: Once the steak is cooked, mix it with the veggies. Place 4 slices of provolone cheese on top. Cover the skillet with a lid for 2 minutes to melt the cheese nicely. - Toasting the hoagie rolls: While the cheese melts, toast 4 fresh hoagie rolls in another skillet or toaster. Aim for a golden and crisp finish for added texture. Now you are ready to build your ultimate cheesesteak sandwich! Follow the [Full Recipe] for complete details. To make a great cheesesteak, start with ribeye steak. - How to slice ribeye against the grain: Look at the meat. The grain shows the direction of the fibers. Slice against the grain. This method makes the meat tender and easy to chew. - Choose the right thickness: Aim for slices about 1/8 inch thick. Thinner slices cook fast and soak up flavors. Getting the right flavor makes your cheesesteak special. - Importance of skillet temperature: Preheat your skillet over medium-high heat. A hot skillet sears the steak. This gives a nice crust and locks in juices. - Tips for achieving desired steak doneness: Cook steak for 5-7 minutes. Stir occasionally to avoid burning. Use a meat thermometer if you want to be precise. Aim for 130°F for medium-rare. Pair your cheesesteak with great sides to enhance the meal. - Best side dishes to pair: Crispy fries are classic. A fresh salad adds crunch and brightness. You can also try onion rings for a fun twist. - Quick condiment ideas: Serve with ketchup or hot sauce for extra flavor. Pickles add a nice crunch, too. Sliced jalapeños give a spicy kick. Follow these tips to elevate your ultimate cheesesteak. For detailed steps, check the Full Recipe. {{image_4}} For a classic cheesesteak, use provolone cheese or Cheez Whiz. Both melt well and add rich flavor. However, if you want to elevate your sandwich, try gourmet cheeses like sharp cheddar or creamy gouda. These options give you a unique twist. You can also add truffle oil or sautéed mushrooms for deeper taste. You can enjoy a cheesesteak without meat. Use portobello mushrooms or seitan as a meat substitute. Both add great texture and flavor. For cheese, try plant-based options like cashew cheese or vegan mozzarella. These substitutes melt nicely and taste amazing. The most famous cheesesteaks come from Philadelphia. They focus on thinly sliced ribeye with cheese on a soft roll. However, other regions have their spins. In Chicago, you might see giardiniera added for a spicy kick. In Texas, barbecue sauces give a sweet and smoky flavor. Each style brings its own unique toppings and spices, showcasing local tastes. For more about making your own cheesesteak, check out the Full Recipe. To keep your cheesesteak fresh, follow these steps: - Store leftovers in the fridge. Let them cool first. - Use airtight containers. Glass or plastic containers work well. - Separate layers with parchment paper. This prevents sogginess. Place your leftover cheesesteak in the fridge. It will stay good for 3 to 4 days. If you have extra filling, store it separately from the rolls. This keeps the bread fresh. Reheat your cheesesteak to bring back its flavor. Here’s how: - Use a skillet. Heat it over medium heat. Add a bit of oil. - Place the sandwich in the skillet. Cover it with a lid. This helps the cheese melt. - Heat for 5-7 minutes. Flip halfway to warm both sides. You can also use the microwave, but be careful. It can make the bread chewy. To keep the taste and texture, the skillet is best. Enjoy your delicious ultimate cheesesteak! For the full recipe, check out the complete instructions. The best cut for a cheesesteak is ribeye. Its marbling gives great flavor and tenderness. You can also use sirloin or flank steak, but ribeye is my top choice. Always slice against the grain for the best bite. This makes it easier to chew and helps keep the flavors locked in. You can skip the cheese and still have a tasty sandwich. Try adding toppings like sautéed mushrooms, avocado, or spicy mustard. Use roasted red peppers for a sweet flavor boost. You can also add fresh herbs, like basil or cilantro, for extra freshness. These alternatives keep your sandwich tasty and fun. To find great cheesesteaks, ask locals for their favorites. Check out food blogs or review sites for tips. Look for places that use fresh ingredients and have a good reputation. You can also explore food festivals or markets. These spots often showcase local chefs who make amazing cheesesteaks. Yes, you can freeze cheesesteak sandwiches! Wrap them tightly in plastic wrap or foil. Place them in an airtight container or freezer bag to prevent freezer burn. They can last up to three months in the freezer. When you're ready to eat, thaw in the fridge and reheat in the oven for the best taste. This guide has covered all you need to make the ultimate cheesesteak sandwich. From selecting the right ribeye steak and cheese to perfecting your cooking technique, you’re now equipped to create a tasty meal. Remember to customize your sandwich with your favorite ingredients and remember storage tips for leftovers. Enjoy exploring different styles and variations. Making a great cheesesteak can be fun and rewarding. Now, you can impress friends and family with your delicious creations. Happy cooking!](https://dailydishlab.com/wp-content/uploads/2025/06/698132e8-5117-44f3-910b-a554f39a5b8a-768x768.webp)