
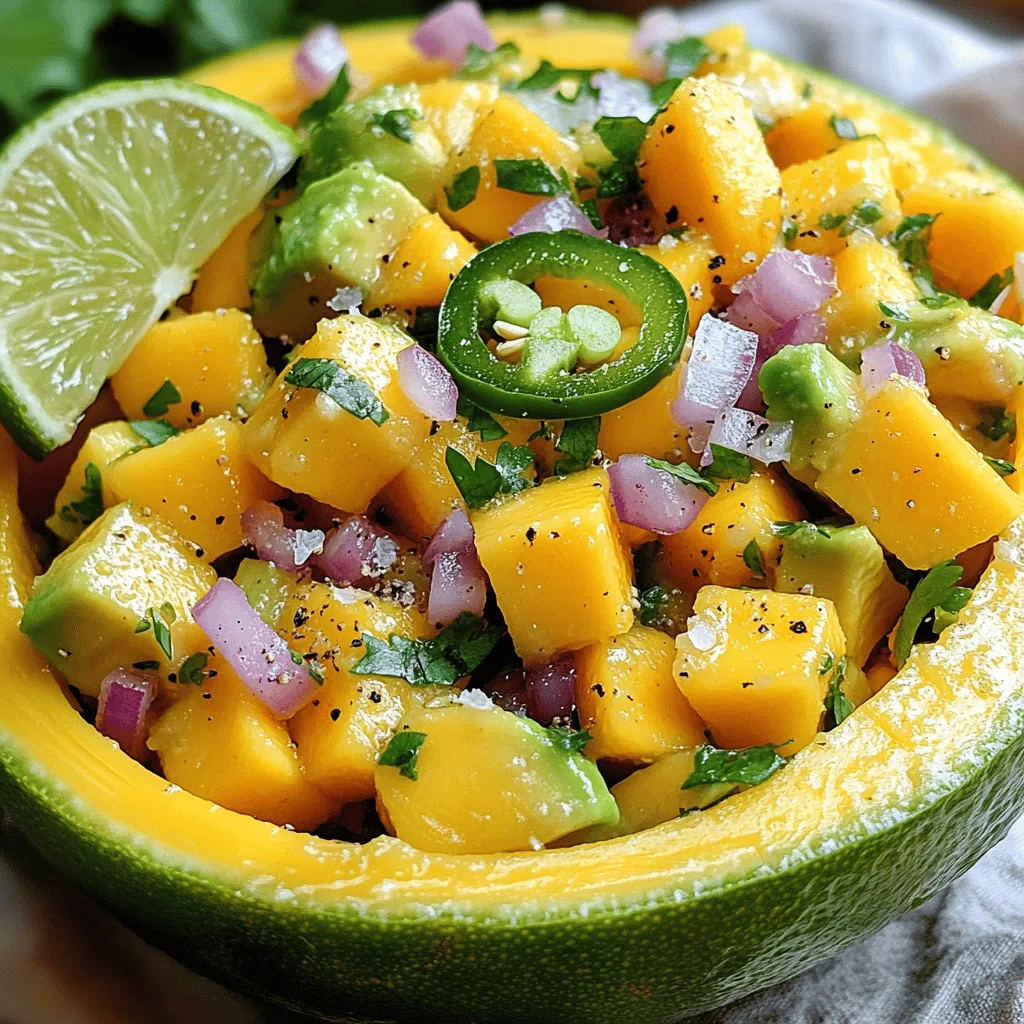
Looking for a fresh and easy recipe that bursts with flavor? Look no further! My Mango Avocado Salsa is the perfect blend of sweet and savory, making it an ideal snack or side dish. You’ll love how simple it is to prepare using just a handful of fresh ingredients. Whether you’re hosting a summer barbecue or just craving something tasty, this salsa will surely impress. Let’s dive into this delightful dish!
Why I Love This Recipe
- Fresh and Flavorful: This salsa combines the sweetness of ripe mangoes with the creamy texture of avocados, creating a delightful mix of flavors.
- Easy to Make: With just a few simple ingredients and minimal prep time, this recipe is perfect for quick gatherings or weeknight dinners.
- Versatile Use: This salsa is not only great as a dip with tortilla chips but also pairs beautifully with grilled meats and fish.
- Health Benefits: Packed with vitamins and healthy fats, this salsa is a nutritious addition to any meal, making it both tasty and good for you.
Ingredients
List of Ingredients
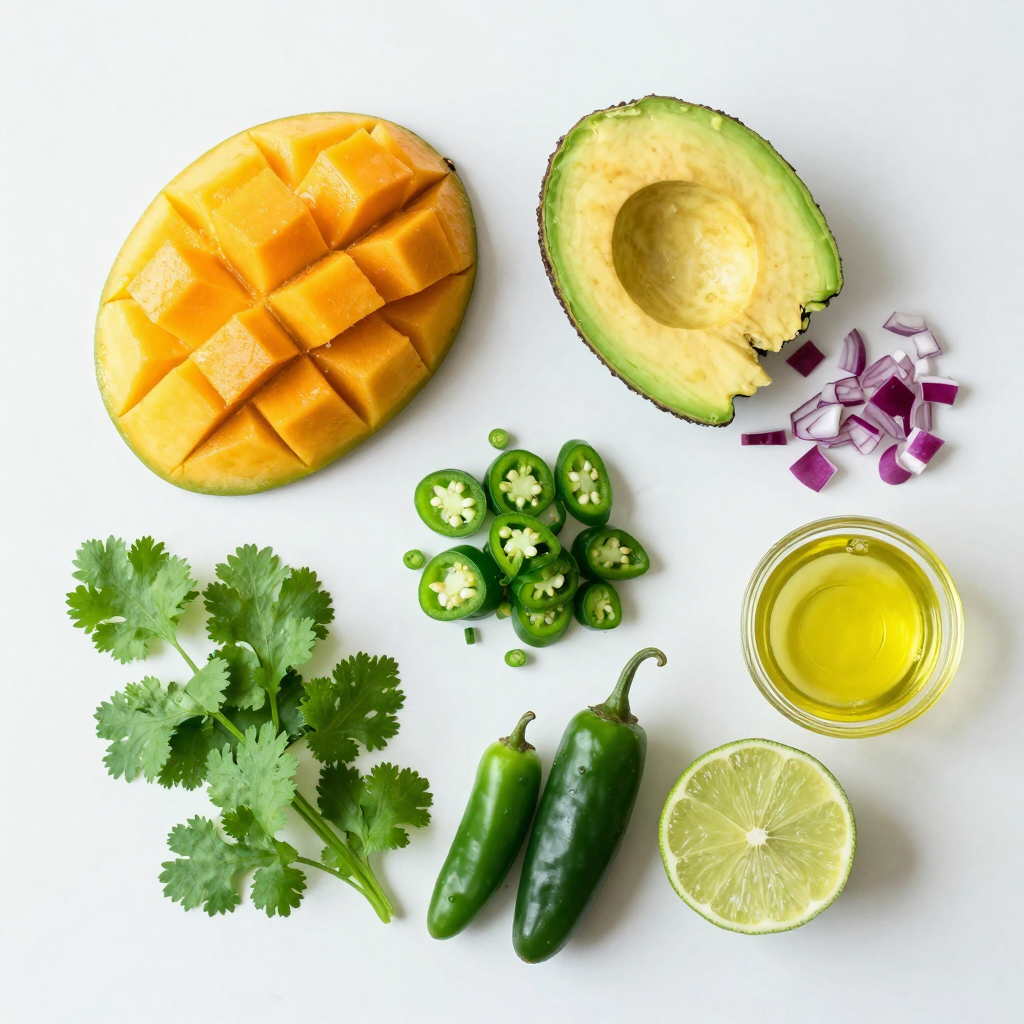
– 2 ripe mangoes, diced
– 2 avocados, diced
– 1 small red onion, finely chopped
– 1 jalapeño, deseeded and minced
– 1/4 cup fresh cilantro, chopped
– Juice of 2 limes
– 1 tablespoon olive oil
– Salt and pepper to taste
– Optional ingredients for extra flavor
Mango avocado salsa needs fresh and ripe ingredients. The mangoes must be sweet and juicy. Choose avocados that yield slightly when you press them. A small red onion adds a nice crunch and mild flavor. Jalapeños give the salsa a bit of heat, but you can adjust this to your taste. Fresh cilantro adds brightness, and lime juice balances the sweetness. Olive oil brings everything together, adding richness.
You can include optional ingredients like diced bell peppers, corn, or even black beans for added texture. The magic of this salsa is in its balance of flavors. Each bite offers a mix of sweet, creamy, and zesty notes. This is why I love this recipe. It’s simple, fresh, and so rewarding to make.
Step-by-Step Instructions
Preparation of Ingredients
To start, you need to dice the mangoes and avocados. First, take a ripe mango, and stand it on its end. Use a sharp knife to slice down along the pit. Do this on both sides. Next, take each half and score the flesh in a grid pattern. Then, use a spoon to scoop out the diced mango.
For the avocado, cut it in half and twist to separate. Remove the pit carefully. Score the flesh like you did with the mango. Use a spoon to scoop it out.
Now, let’s mince the jalapeño. First, slice it in half and remove the seeds for less heat. Then, finely chop the jalapeño into small pieces. Make sure to wash your hands afterward to avoid irritation.
Mixing Your Salsa
Now it’s time to mix your salsa! In a large mixing bowl, combine the diced mangoes and avocados. Then, add the finely chopped red onion and minced jalapeño. Don’t forget the chopped cilantro!
Next, prepare the dressing. In a small bowl, whisk together the lime juice, olive oil, salt, and pepper. Pour this mixture over the fruit and veggies in the large bowl.
To toss the salsa, gently stir with a large spoon. Be careful not to mash the avocado. You want to keep those lovely chunks intact.
Allowing to Sit
Let the salsa sit for about 10 minutes. This step is key! Allowing the salsa to rest helps the flavors mix and blend well. You will notice a big difference in taste after it sits. Enjoy your fresh mango avocado salsa!
Pro Tips
- Choose Ripe Fruits: Ensure your mangoes and avocados are perfectly ripe for the best flavor and texture in your salsa.
- Adjust Spice Level: Modify the amount of jalapeño according to your heat preference. You can also use a milder pepper if desired.
- Let It Marinate: Allow the salsa to sit for at least 10 minutes before serving. This helps the flavors to meld beautifully.
- Presentation Matters: Serve the salsa in a creative way, like in avocado halves or lime shells, to impress your guests!
Tips & Tricks
Flavor Enhancement Tips
To make your Mango Avocado Salsa shine, start with the spice level. You can adjust this by using jalapeño. If you want more heat, add a bit more jalapeño. If you prefer mild flavors, use less. The heat balances well with the sweet mango and creamy avocado.
Using fresh lime juice is key for the best taste. It brightens the salsa and adds zest. Fresh lime juice also helps the flavors mix better. I always squeeze the lime right before I add it. This keeps the juice fresh and lively.
Presentation Suggestions
When it comes to serving, get creative! Try serving the salsa in a hollowed-out lime or avocado half. This not only looks great but also adds extra flavor. It makes your dish pop on the table!
For garnishing, consider using cilantro leaves on top. They add a vibrant touch and enhance the color. A lime wedge on the side is also a lovely addition. These small touches make your salsa look more appealing.
Try these tips to enhance your Mango Avocado Salsa experience.
Variations
Ingredient Swaps
You can change up the ingredients in mango avocado salsa for new flavors. One great swap is using pineapple instead of mango. Pineapple adds a sweet and tangy twist. It works well with the creamy avocado and crunchy onion.
Another fun option is to add corn or black beans. Corn adds a sweet crunch, while black beans bring a hearty texture. Both ingredients make the salsa more filling. Try mixing in one or both for a new taste.
Health-Conscious Options
If you want a lighter version, simply use less oil. You can cut the olive oil by half and still get great flavor. The lime juice gives a nice zing, so you won’t miss the extra oil.
For seasoning, consider low-sodium options. Use fresh herbs or spices to boost flavor without the salt. This makes the salsa healthier, and it still tastes delicious. You can enjoy the full flavor of the salsa without worrying about extra sodium.
Explore these variations to make the salsa your own!
Storage Info
Best Practices for Storing Salsa
To keep mango avocado salsa fresh, store it in the fridge. Place it in an airtight container. It will stay good for about two to three days. If you want to freeze it, you can. However, the texture may change. The avocado can become mushy after thawing. If you choose to freeze it, use a freezer-safe container. Leave some space for expansion. Salsa can last up to three months in the freezer.
Shelf Life
How long can you keep it fresh? If stored properly in the fridge, mango avocado salsa lasts two to three days. If you freeze it, it can last for three months.
Watch for signs of spoilage. If you see brown spots on the avocado, it may be time to toss it. A sour smell or watery liquid on top also means it’s no longer good. Always trust your senses; they guide you well.
FAQs
Common Questions About Mango Avocado Salsa
Can I make this salsa ahead of time?
Yes, you can make mango avocado salsa ahead of time. It stays fresh in the fridge for about a day. However, the avocado may brown a bit. To keep it bright, add lime juice just before serving.
What pairs well with mango avocado salsa?
Mango avocado salsa goes great with grilled chicken, fish tacos, or tortilla chips. You can also use it as a topping for nachos or a fresh side for any meal.
How to keep avocado from browning?
To stop avocado from browning, use lime juice. The acid in lime juice slows down oxidation. You can also cover the salsa tightly with plastic wrap, pressing it against the surface to limit air exposure.
Can I use frozen mangoes for this recipe?
Yes, you can use frozen mangoes. Just thaw them first and drain any excess liquid. Fresh mangoes have a better texture, but frozen can work in a pinch.
Nutritional Information
Overview of health benefits of key ingredients
Mangoes are high in vitamins A and C. They help boost your immune system. Avocados are full of healthy fats and fiber. They support heart health and digestion. Red onions add antioxidants, while cilantro offers anti-inflammatory benefits.
Caloric and nutritional breakdown per serving
Each serving of mango avocado salsa has about 150 calories. It contains:
– Fat: 9g (mostly from avocado)
– Carbohydrates: 20g
– Fiber: 5g
– Protein: 2g
This salsa is not only tasty but also nutritious, making it a great addition to your meals.
Mango avocado salsa is fresh and simple to make. We covered the ingredients and how to prepare them. Mixing your salsa is easy when you follow the steps. Allowing the flavors to meld adds depth. You can enhance taste with tips like fresh lime juice and creative garnishing. Don’t forget to explore variations and storage options. This salsa offers a tasty way to enjoy healthy ingredients. Give it a try, and you will love it!


