Peach Cobbler Waffles Delightful and Easy Recipe

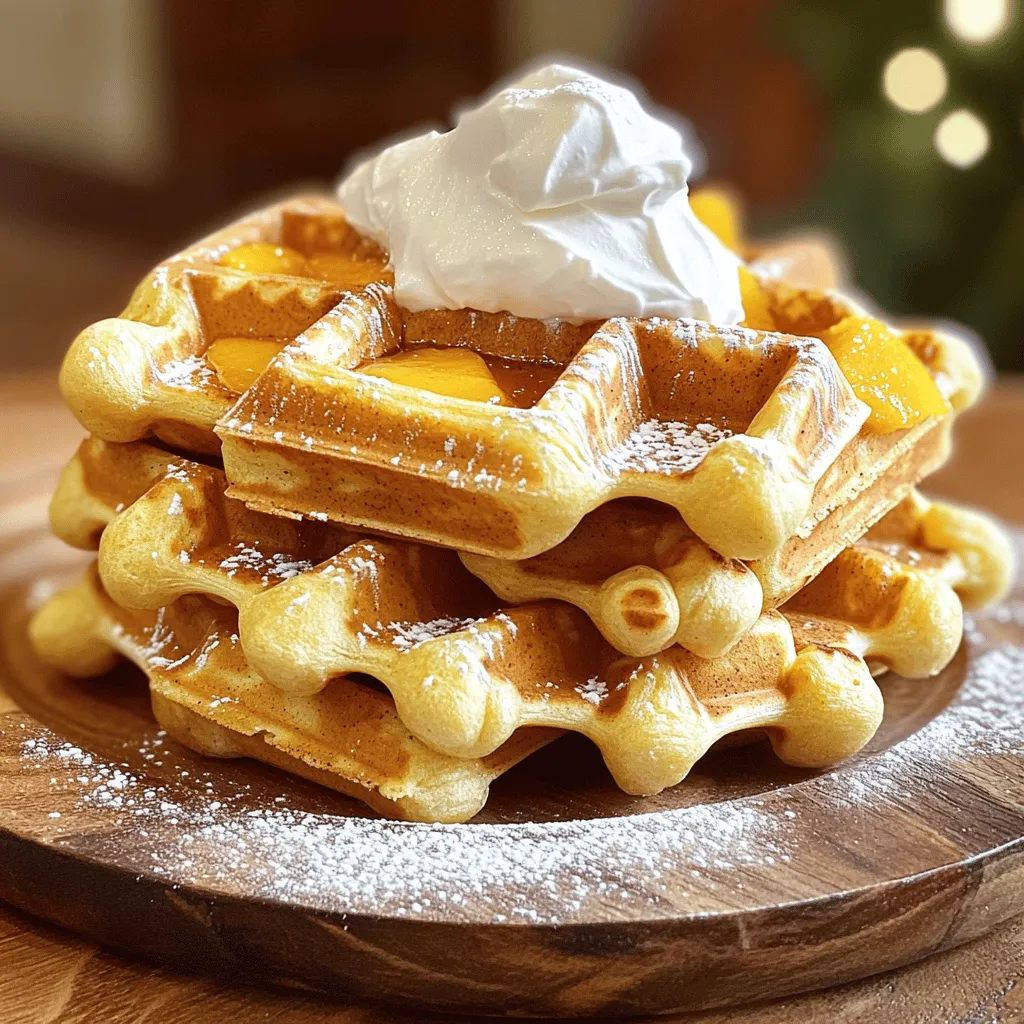
Are you ready to elevate your breakfast game? With my Peach Cobbler Waffles recipe, you can enjoy the sweet joy of peach cobbler, but in a fun, fluffy form! This easy recipe combines juicy peaches and a crunchy topping, making every bite delightful. You’ll need just a few simple ingredients and some basic kitchen tools. Let’s dive into this tasty twist on a classic dish that you and your family will love!
Why I Love This Recipe
- Deliciously Unique Flavor: The combination of fresh peaches, cinnamon, and nutmeg creates a delightful and aromatic experience that elevates traditional waffles to a whole new level.
- Easy to Make: This recipe is simple and quick, requiring just 15 minutes of prep time, making it perfect for a weekday breakfast or a weekend treat.
- Customizable Toppings: Whether you prefer whipped cream, vanilla ice cream, or a drizzle of maple syrup, these waffles can be dressed up to suit your taste.
- Perfect for Sharing: With four servings, these waffles are ideal for sharing with family or friends, making breakfast a special occasion.
Ingredients
Main Ingredients for Peach Cobbler Waffles
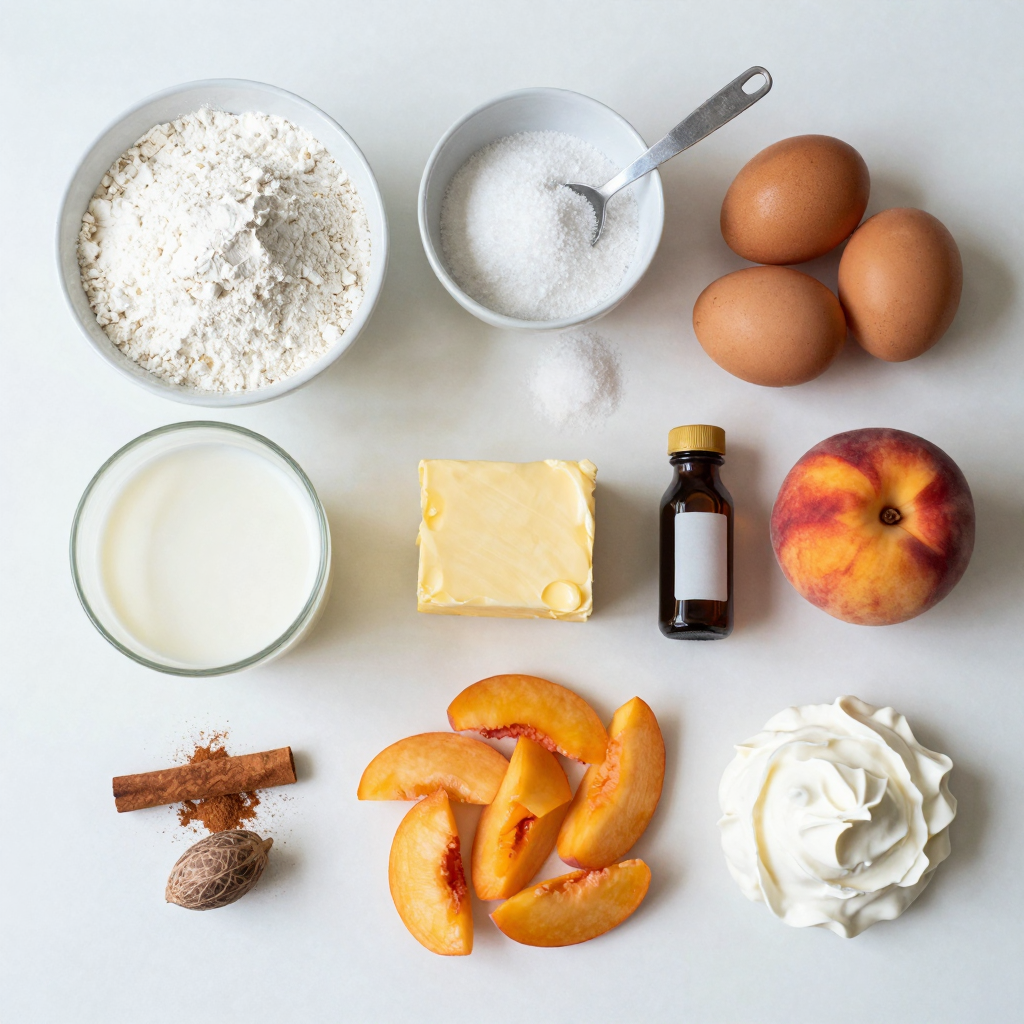
To make delicious peach cobbler waffles, you will need these key ingredients:
- 1 ½ cups all-purpose flour
- 2 tablespoons sugar
- 1 tablespoon baking powder
- ½ teaspoon salt
- 1 cup buttermilk
- 2 large eggs
- ½ cup unsalted butter, melted
- 1 teaspoon vanilla extract
- 2 cups fresh peaches, peeled and diced
- 1 teaspoon cinnamon
- ½ teaspoon nutmeg
These ingredients combine to make a fluffy and flavorful waffle base, filled with sweet peaches.
Optional Toppings
While the waffles are tasty on their own, adding toppings can elevate them. Here are some great options:
- Whipped cream
- Vanilla ice cream
- Maple syrup
- Extra cinnamon or nutmeg
Feel free to mix and match. Each topping adds its own twist to the flavor.
Kitchen Tools Needed
Having the right tools makes cooking easier. For peach cobbler waffles, you will need:
- Waffle iron
- Large mixing bowls
- Whisk
- Measuring cups and spoons
- Spatula
These tools help ensure that your waffles come out perfect and delicious.

Step-by-Step Instructions
Preparation Steps for Making Waffles
To start, gather all your ingredients. You will need flour, sugar, baking powder, salt, buttermilk, eggs, melted butter, vanilla, peaches, cinnamon, and nutmeg.
1. Preheat the Waffle Iron: Turn on your waffle iron to preheat. This helps make crispy waffles.
2. Mix Dry Ingredients: In a large bowl, whisk the flour, sugar, baking powder, and salt. Make sure they blend well.
3. Combine Wet Ingredients: In another bowl, beat the buttermilk, eggs, melted butter, and vanilla. Mix until smooth.
4. Combine Both Mixtures: Pour the wet mix into the dry ingredients. Stir gently until just combined. It’s okay if there are small lumps.
5. Prepare the Peaches: In a small bowl, mix the diced peaches with cinnamon and nutmeg. Fold this peach mix into the batter. Be careful not to break the peaches.
Cooking the Waffles
Now, it’s time to cook!
1. Grease the Waffle Iron: Lightly spray the preheated iron with cooking spray or butter.
2. Add the Batter: Pour about ½ to ¾ cup of batter onto the hot iron. Close the lid.
3. Cook: Follow the manufacturer’s instructions to cook. Usually, it takes about 4-5 minutes. You want them golden brown and crispy.
Serving Suggestions
Once your waffles are cooked, it’s time to enjoy!
- Serve Warm: Carefully take out the waffles and serve them right away.
- Toppings: Add a dollop of whipped cream or a scoop of vanilla ice cream on top.
- Drizzle: Don’t forget to drizzle with maple syrup for extra sweetness.
This recipe is all about bringing joy to your breakfast table.
Pro Tips
- Use Fresh Peaches: The best flavor comes from ripe, fresh peaches. If they’re out of season, consider using frozen peaches that have been thawed and drained.
- Don’t Overmix the Batter: For light and fluffy waffles, mix the wet and dry ingredients just until combined. It’s okay if there are a few lumps; overmixing can make them tough.
- Preheat Your Waffle Iron: Make sure your waffle iron is fully preheated for crispy, golden waffles. This ensures even cooking and prevents sticking.
- Experiment with Toppings: While whipped cream and ice cream are classic, try adding nuts, caramel sauce, or even yogurt for a twist on your peach cobbler waffles!
Tips & Tricks
Achieving the Perfect Waffle Texture
To get the best waffle texture, focus on your batter. Here are some tips:
- Don’t Overmix: Mix the wet and dry ingredients just until combined. A few lumps are okay.
- Rest the Batter: Let the batter sit for about 5-10 minutes. This helps the waffles puff up nicely.
- Preheat the Waffle Iron: Ensure your waffle iron is hot before pouring in the batter. This gives you a crispy outside and soft inside.
Common Mistakes to Avoid
Many people make simple mistakes. Here are some to watch out for:
- Skipping the Peaches: Don’t skip adding spiced peaches. They give flavor and sweetness.
- Not Greasing the Iron: Always lightly grease your waffle iron. This helps with easy removal.
- Using Cold Ingredients: Use room temperature eggs and buttermilk. This helps the batter mix well.
Pairing Ideas for Waffles
Waffles taste great with many toppings. Here are some ideas:
- Whipped Cream: A dollop of whipped cream adds richness.
- Ice Cream: Vanilla ice cream makes it a dessert to remember.
- Maple Syrup: Drizzle warm maple syrup for a sweet finish.
By following these tips and tricks, you can enjoy perfect peach cobbler waffles every time.

Variations
Different Fruit Options
You can switch up the fruit in your waffles. Try using ripe berries, apples, or pears. Each fruit brings its own flavor and sweetness. Blueberries add a nice pop of color and taste. Apples give a crisp texture and warm flavor. You can even mix different fruits together for a fun twist. Just remember to adjust the spices to fit the fruit you choose.
Gluten-Free Adaptations
If you need a gluten-free option, it’s easy to adapt this recipe. Swap out all-purpose flour for a gluten-free blend. Make sure it has a good mix of starches and flours. You can also add a little xanthan gum to help with texture. This will keep your waffles light and fluffy. Check the labels on your baking powder as some may contain gluten.
Adding Spices and Flavors
Don’t be afraid to get creative with spices! Besides cinnamon and nutmeg, you can add ginger or cardamom. These spices can warm up the flavor. You can also try adding a splash of almond or maple extract for extra depth. Each spice or flavor will change the taste and make your waffles unique. Experiment and find your favorite combination!
Storage Info
How to Store Leftover Waffles
To store leftover waffles, let them cool completely. Place them in an airtight container. You can also use a resealable plastic bag for easy storage. Keep them in the fridge for up to three days. This keeps your waffles fresh and ready to enjoy again.
Reheating Instructions
When you want to eat your leftover waffles, you can reheat them easily. The best way is to use a toaster or an oven. For a toaster, pop them in until warm and crispy. If using an oven, preheat it to 350°F (175°C). Place the waffles on a baking sheet and heat for about 10 minutes. This way, they taste just like fresh!
Freezing Waffles for Later Use
If you want to save your waffles for a longer time, freezing is a great option. First, make sure they are completely cool. Then, place a piece of parchment paper between each waffle. This prevents them from sticking together. Wrap them tightly in plastic wrap and put them in a freezer-safe bag. You can freeze them for up to three months. When you’re ready to eat, just reheat as mentioned above. Enjoy your Peach Cobbler Waffles anytime!
FAQs
What type of peaches are best for this recipe?
I recommend using fresh, ripe peaches. Freestone peaches work well, as they are easy to slice. You can also use clingstone peaches, but they are harder to pit. Look for peaches that are firm yet slightly soft to the touch. Their sweetness adds great flavor to the waffles.
Can I make these waffles without buttermilk?
Yes, you can! If you don’t have buttermilk, use regular milk with a splash of vinegar or lemon juice. Let it sit for about five minutes. This trick will give you a similar tangy flavor. You can also use yogurt thinned with a bit of water.
How can I make the waffles ahead of time?
You can make the waffles ahead of time and store them. Let them cool completely, then place them in an airtight container. They can last in the fridge for up to three days. For longer storage, freeze them in a single layer on a baking sheet, then transfer to a freezer bag. To reheat, pop them in a toaster or oven until warm.
Peach cobbler waffles are a tasty treat you can easily make at home. We shared the main ingredients, tools, and step-by-step instructions to help you succeed. You’ll find tips to avoid common mistakes and ways to tweak the recipe to suit your taste. Don’t forget about storage and reheating options for leftovers. With this guide, I hope you feel ready to whip up something delicious. Enjoy your cooking adventure and the sweet reward of your waffles!

Peach Cobbler Waffles
Ingredients
1 ½ cups all-purpose flour
2 tablespoons sugar
1 tablespoon baking powder
½ teaspoon salt
1 cup buttermilk
2 large eggs
½ cup unsalted butter, melted
1 teaspoon vanilla extract
2 cups fresh peaches, peeled and diced
1 teaspoon cinnamon
½ teaspoon nutmeg
Whipped cream or vanilla ice cream for serving (optional)
Instructions
Preheat the Waffle Iron: Turn on your waffle iron to preheat while you prepare the batter.
Mix Dry Ingredients: In a large bowl, whisk together the flour, sugar, baking powder, and salt until well combined.
Combine Wet Ingredients: In a separate bowl, beat together the buttermilk, eggs, melted butter, and vanilla extract until smooth.
Combine Both Mixtures: Pour the wet ingredients into the dry ingredients, stirring gently just until combined. Be careful not to overmix; a few lumps are okay.
Prepare the Peaches: In a small bowl, mix the diced peaches with cinnamon and nutmeg. Gently fold the spiced peaches into the batter, incorporating them without breaking them up too much.
Cook the Waffles: Lightly grease the preheated waffle iron with cooking spray or a bit of butter. Pour the appropriate amount of batter (usually about ½ to ¾ cup, depending on your waffle maker) onto the hot iron. Close the lid and cook according to manufacturer instructions until golden brown and crispy, usually around 4-5 minutes.
Serve: Carefully remove the waffles and serve warm. Top with a dollop of whipped cream or a scoop of vanilla ice cream for extra indulgence. Drizzle with maple syrup if desired.
Prep Time: 15 minutes | Total Time: 30 minutes | Servings: 4

Peach Cobbler Waffles
Ingredients
- 1.5 cups all-purpose flour
- 2 tablespoons sugar
- 1 tablespoon baking powder
- 0.5 teaspoon salt
- 1 cup buttermilk
- 2 large eggs
- 0.5 cup unsalted butter, melted
- 1 teaspoon vanilla extract
- 2 cups fresh peaches, peeled and diced
- 1 teaspoon cinnamon
- 0.5 teaspoon nutmeg
- to taste Whipped cream or vanilla ice cream for serving (optional)
Instructions
- Preheat the Waffle Iron: Turn on your waffle iron to preheat while you prepare the batter.
- Mix Dry Ingredients: In a large bowl, whisk together the flour, sugar, baking powder, and salt until well combined.
- Combine Wet Ingredients: In a separate bowl, beat together the buttermilk, eggs, melted butter, and vanilla extract until smooth.
- Combine Both Mixtures: Pour the wet ingredients into the dry ingredients, stirring gently just until combined. Be careful not to overmix; a few lumps are okay.
- Prepare the Peaches: In a small bowl, mix the diced peaches with cinnamon and nutmeg. Gently fold the spiced peaches into the batter, incorporating them without breaking them up too much.
- Cook the Waffles: Lightly grease the preheated waffle iron with cooking spray or a bit of butter. Pour the appropriate amount of batter (usually about ½ to ¾ cup, depending on your waffle maker) onto the hot iron. Close the lid and cook according to manufacturer instructions until golden brown and crispy, usually around 4-5 minutes.
- Serve: Carefully remove the waffles and serve warm. Top with a dollop of whipped cream or a scoop of vanilla ice cream for extra indulgence. Drizzle with maple syrup if desired.


![- 1 cup rolled oats - 1/2 cup almond butter (or any nut butter of choice) - 1/4 cup honey or maple syrup These key ingredients form the base of your energy bites. Rolled oats provide fiber and texture. Almond butter gives healthy fats and protein. Honey or maple syrup adds natural sweetness. - 1/4 cup mini chocolate chips - 1/4 cup ground flaxseed - 1/4 cup shredded coconut (unsweetened) Mini chocolate chips add a delightful burst of flavor. Ground flaxseed boosts nutrition with omega-3s. Shredded coconut gives a chewy texture and tropical taste. - 1 tsp vanilla extract - 1/2 tsp cinnamon - A pinch of salt Vanilla extract enhances the overall flavor. Cinnamon adds warmth and depth. A pinch of salt balances the sweetness and brings all the flavors together. For the complete guide on making these bites, check out the [Full Recipe]. To start, gather your ingredients. For the dry mix, you need rolled oats, ground flaxseed, shredded coconut, and cinnamon. In a medium bowl, combine these dry ingredients. Mix them well so they blend nicely. Next, let's make the wet mix. In a separate bowl, add almond butter, honey (or maple syrup), vanilla extract, and a pinch of salt. Stir until it becomes smooth and creamy. This step is key for a good flavor. Now, pour the wet mix into the dry mix. Stir until you combine everything. You want all the dry ingredients to be coated with the wet mix. Finally, gently fold in mini chocolate chips. This adds a sweet delight to every bite. Now it’s time to shape your energy bites. Take about one tablespoon of the mixture. Roll it between your hands to form a ball. Make sure they are about the same size for even bites. Repeat this process until you use all the mixture. Place each ball on a parchment-lined baking sheet. This helps them not stick and makes clean-up easy. Keep them spaced out a bit to avoid sticking together. After shaping, place the baking sheet in the fridge. Let the energy bites chill for at least 30 minutes. This helps them firm up and hold their shape. Once chilled, store the bites in an airtight container. Keep them in the fridge for up to one week. Enjoy these tasty snacks whenever you need a quick energy boost, and don’t forget to check out the Full Recipe for more details! To boost the flavor of your energy bites, add spices like nutmeg or ginger. They give a warm kick. You can also try different extracts, like almond or coconut, for a unique taste. If you like it sweeter, adjust the honey or maple syrup. Just add a little at a time to find your perfect sweetness. For a better texture, focus on the consistency of your mixture. If it's too dry, add a touch more nut butter or honey. For crunchier bites, mix in chopped nuts or seeds. If you prefer them chewier, reduce the baking time slightly. This makes them softer and more enjoyable. Use a medium bowl for mixing your ingredients. A spatula works well for combining everything. To store your energy bites, an airtight container is best. It keeps them fresh longer. You can also use parchment paper to prevent sticking when chilling them in the fridge. For the full recipe, check out the [Full Recipe]. {{image_2}} You can easily make these energy bites fit your diet. For gluten-free options, use certified gluten-free oats. This way, you avoid any gluten while still enjoying a tasty snack. If you want vegan alternatives, swap honey for maple syrup. Both options keep the bites sweet and delicious. You can add fun flavors to your energy bites. Try mixing in dried fruits like raisins or cranberries. These add chewiness and natural sweetness. Nuts such as almonds or walnuts also work well. They add crunch and healthy fats. You can also experiment with different types of chocolate. Use dark, milk, or even white chocolate chips. Each type brings its own unique taste. Get creative with nut butters! While almond butter is great, you can try peanut butter or cashew butter. Each brings a different flavor and texture. You can also incorporate protein powder for a boost. This makes the bites even more filling and nutritious. Adjust the wet ingredients slightly if you add protein powder to keep the right texture. Feel free to explore these variations. They can help you make the perfect chocolate chip energy bites just for you. Check out the Full Recipe for the basic mix, then let your imagination lead the way! To keep your chocolate chip energy bites fresh, store them in an airtight container. Glass or plastic containers work well. Place them in the fridge to maintain their texture and taste. They can last up to one week when stored properly. You can freeze energy bites for longer storage. To freeze, place them in a single layer on a baking sheet. Once frozen, transfer them to a freezer-safe bag. This method prevents them from sticking together. When you want to eat them, take out a few bites and let them thaw in the fridge. This process takes about an hour. In the fridge, these bites last about one week. After that, they may lose flavor and texture. Watch for signs of spoilage, like an off smell or changes in color. If you see or smell anything unusual, it's best to toss them. Enjoy your homemade snacks while they’re fresh! Chocolate chip energy bites can last up to one week in the fridge. Store them in an airtight container for the best freshness. If you freeze them, they can last for about three months. Just thaw them in the fridge when you're ready to enjoy. Yes, you can easily substitute ingredients in this recipe. If you don't like almond butter, feel free to use peanut butter or sunflower seed butter. You can swap honey for maple syrup if you prefer a vegan option. The mini chocolate chips can also be replaced with dried fruits or nuts. Absolutely! These energy bites are a great snack for kids. They are tasty, healthy, and easy to make. You can even involve your kids in the preparation. They will love rolling the bites into balls. Just ensure there are no allergies to the ingredients used. Yes, making these energy bites in advance is a smart idea. You can prepare a batch at the start of the week. This way, you have quick snacks ready for busy days. Just store them in the fridge or freeze some for later use. Chocolate chip energy bites offer many nutritional benefits. They contain rolled oats, which provide fiber for digestion. Almond butter adds healthy fats and protein. Flaxseed is rich in omega-3 fatty acids, promoting heart health. Plus, the little bit of chocolate makes them a treat! These chocolate chip energy bites are simple to make and full of good stuff. You can enjoy them as snacks or quick breakfast bites. Let’s dive into what makes these little treats so special. - Rolled oats: They give a hearty base and provide fiber. - Almond butter (or nut butter alternatives): This adds creaminess and healthy fats. - Honey or maple syrup: Sweeteners that bring flavor and stickiness. - Mini chocolate chips: They add sweetness and a fun texture. - Ground flaxseed: This boosts nutrition and adds omega-3s. - Unsweetened shredded coconut: It gives a nice chewiness. - Vanilla extract: This enhances the flavor and warms the bites. - Cinnamon: It adds spice and depth. - Salt: Just a pinch balances all the flavors. In this recipe, we blend all these ingredients to create something delicious. You can find the [Full Recipe] at the start of this article. It only takes about 10 minutes to mix, and then just chill for 30 minutes. You’ll have about 12 bites ready to enjoy! Feel free to switch it up with your favorite nut butter or add different mix-ins. The options are endless! These chocolate chip energy bites are simple to make and full of flavor. We covered key ingredients like oats and nut butter. I shared tips on making them crunchier or chewier, and variations for different diets. Remember to store them in an airtight container for the best taste. You can enjoy these bites anytime you need a quick snack. Making them yourself lets you control the ingredients and flavors. Healthy snacks can be easy and delicious, so try these energy bites today!](https://dailydishlab.com/wp-content/uploads/2025/07/ee6487bc-f560-4f96-a21c-d76d52703957-768x768.webp)


