
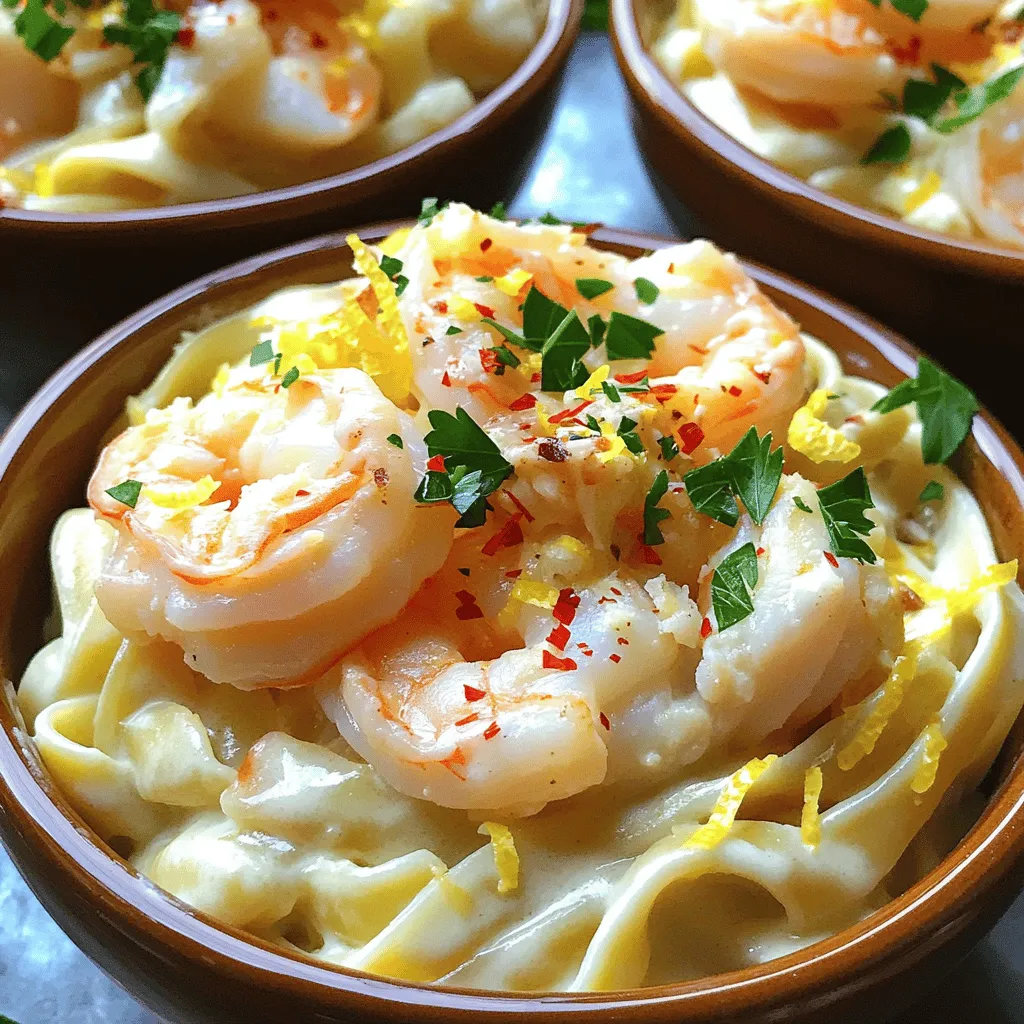
If you’re a seafood lover, get ready for a dish that will thrill your taste buds! In this Seafood Lovers’ Dream Alfredo, rich fettuccine pasta meets a creamy, indulgent sauce that’s loaded with shrimp, scallops, and crab meat. Whether you’re cooking for a special occasion or a cozy night in, this recipe makes it easy to impress. Let’s dive into the fresh ingredients and simple steps to create this seafood delight!
Ingredients
List of Ingredients
– 8 oz fettuccine pasta
– 1 tablespoon extra virgin olive oil
– 1 small onion, finely chopped
– 2 cloves garlic, minced
– 8 oz shrimp, peeled and deveined
– 8 oz sea scallops
– 8 oz lump crab meat
– 1 cup heavy cream
– 1 cup freshly grated Parmesan cheese
– 1 teaspoon fresh lemon zest
– Salt and freshly ground black pepper to taste
– Fresh parsley, finely chopped for garnish
– Optional: pinch of red pepper flakes for a spicy kick
When I create Seafood Lovers’ Dream Alfredo, I focus on the best ingredients. The fettuccine pasta serves as the perfect base for this rich dish. I choose fresh seafood like shrimp, scallops, and crab meat. Each brings its unique flavor and texture.
I start with quality olive oil, onions, and garlic. They add depth to the dish. The creamy sauce needs heavy cream and Parmesan cheese for richness. I finish it off with lemon zest, parsley, salt, and pepper. This blend of flavors makes every bite a delight.
For those who want a kick, I suggest adding red pepper flakes. They balance the creaminess with a bit of spice. This dish is not just a recipe; it’s an experience.
Step-by-Step Instructions
Cooking the Pasta
Start by boiling water in a large pot. Use enough water to cover the pasta. Add a generous pinch of salt to the water. This will help flavor the pasta. Once the water boils, add 8 oz of fettuccine. Cook the pasta for about 8 to 10 minutes. Check for doneness; it should be al dente. When done, drain the pasta, but keep 1/2 cup of the starchy water. You’ll use this later to adjust the sauce.
Sautéing the Aromatics
Next, heat 1 tablespoon of extra virgin olive oil in a large skillet over medium heat. Add 1 small onion, finely chopped. Sauté the onion until it becomes soft and translucent, which takes about 3 to 4 minutes. Now, stir in 2 cloves of minced garlic. Cook the garlic for about 1 minute until you smell its aroma. This will build a strong flavor base for your dish.
Adding Seafood to Skillet
Increase the heat to medium-high. Add 8 oz of shrimp and 8 oz of sea scallops to the skillet. Sauté them for about 3 to 5 minutes. The shrimp should turn pink, and the scallops should become opaque. Now, gently fold in 8 oz of lump crab meat. Be careful not to break it apart. You want to keep the crab meat in nice chunks for a better texture.
Making the Alfredo Sauce
Lower the heat back to medium. Pour in 1 cup of heavy cream. Let it come to a gentle simmer. Gradually stir in 1 cup of freshly grated Parmesan cheese. Keep mixing until the cheese melts and the sauce is smooth. If the sauce gets too thick, add a bit of the reserved pasta water to reach your desired creamy consistency.
Seasoning the Dish
Now it’s time to add some flavor. Mix in 1 teaspoon of fresh lemon zest. This will add brightness to the dish. Season the sauce with salt and freshly ground black pepper. If you like a little heat, add a pinch of red pepper flakes. Stir everything well to blend the flavors nicely.
Combining and Serving
Finally, add the cooked fettuccine directly into the seafood Alfredo sauce. Toss the pasta gently until it is fully coated in the rich sauce. Let it warm together for one more minute. This helps all the flavors meld perfectly. For serving, transfer the Seafood Lovers’ Dream Alfredo onto plates or shallow bowls. Garnish with freshly chopped parsley for a vibrant touch. You can add an extra sprinkle of Parmesan on top, and a lemon wedge on the side to enhance the dish’s look and taste.
Tips & Tricks
Choosing the Right Seafood
Fresh vs. Frozen Options
When making Seafood Lovers’ Dream Alfredo, you can choose between fresh and frozen seafood. Fresh seafood tastes great, but it can be hard to find. Frozen seafood is often just as good. It is usually frozen right after catching, keeping the flavor intact. Always check the label for quality.
Best Types of Seafood for Alfredo
For a rich Alfredo, shrimp, scallops, and crab meat work best. Shrimp adds a sweet taste. Scallops bring a soft, buttery texture. Crab meat gives a lovely crab flavor. You can mix and match seafood based on your taste.
Perfecting Your Alfredo Sauce
Ensuring Creamy Consistency
To get a creamy sauce, use heavy cream and fresh cheese. Heat the cream slowly to avoid burning. Stir the cheese in gradually. If the sauce is too thick, add a bit of pasta water. This keeps it smooth and rich.
Avoiding Clumps of Cheese
Clumpy cheese can ruin your sauce. To prevent this, remember to use room temperature cheese. Grate it finely before adding. Stir the cheese in slowly as the sauce simmers. This helps it melt evenly and stay creamy.
Enhancing Flavor
Use of Fresh Herbs
Fresh herbs can brighten your dish. Chopped parsley adds color and taste. You can also try fresh basil or dill. Just sprinkle them on top before serving. This small step makes a big difference in flavor.
Alternative Seasoning Suggestions
Besides salt and pepper, you can try other seasonings. A pinch of red pepper flakes adds heat. A dash of lemon juice brightens the flavor. Experiment to find what you like best. Seasoning is key to making the dish shine.
{{image_4}}
Variations
Vegetarian Version
If you want a vegetarian twist, you can skip the seafood. Instead, use hearty ingredients like mushrooms, zucchini, and bell peppers.
Substitutes for Seafood
– 8 oz mushrooms, sliced
– 1 cup zucchini, diced
– 1 cup bell peppers, chopped
These veggies add great flavor and texture. They soak up the creamy sauce well and make the dish feel rich.
Suggested Vegetables to Include
Try adding spinach or artichoke hearts for extra taste. These greens brighten the dish and add nutrients.
Gluten-Free Option
For a gluten-free meal, swap the fettuccine with gluten-free pasta. This keeps the dish tasty and safe for everyone.
Gluten-Free Pasta Alternatives
– Brown rice fettuccine
– Quinoa pasta
– Chickpea pasta
These options cook well and hold the sauce nicely.
Adjustments in Cooking Techniques
Follow the same cooking steps, but check the pasta regularly. Gluten-free pasta can cook faster than regular pasta.
Spicy Alfredo Version
Love heat? You can spice up your Seafood Lovers’ Dream Alfredo easily. A little heat adds a new layer of flavor.
Increasing Spice Levels
Add a pinch of cayenne pepper or red pepper flakes. Start small; you can always add more.
Suggestions for Hot Sauces
Try incorporating a splash of your favorite hot sauce. Sriracha or Tabasco works well. Just mix it into the sauce as you stir in the cheese for a nice kick.
These variations make the dish fun and fit for everyone!
Storage Information
Storing Leftovers
To keep your Seafood Lovers’ Dream Alfredo fresh, store it in an airtight container. This helps prevent it from drying out or absorbing other fridge smells. Allow the dish to cool down before sealing.
How long does it last in the fridge? Properly stored, it can last for 3 to 4 days. Always check for any off smells or changes in texture before eating leftovers. If in doubt, throw it out!
Freezing Seafood Alfredo
Freezing this dish can help you save it for later. Use a freezer-safe container to avoid freezer burn. Make sure to leave some space at the top since sauces can expand when frozen.
For best results, freeze it right after cooking. It can last up to 2 months in the freezer. When you’re ready to eat, thaw it overnight in the fridge.
Thawing and reheating instructions? After thawing, heat it gently on the stove over low heat. Add a splash of cream or reserved pasta water to regain its creamy texture. Stir often to avoid burning. Enjoy your gourmet meal again!
FAQs
How long does it take to prepare Seafood Lovers’ Dream Alfredo?
Preparing Seafood Lovers’ Dream Alfredo takes about 15 minutes for prep and 30 minutes to cook. You can have this dish ready in just about 45 minutes. This quick timeframe makes it perfect for a weeknight dinner or a special occasion.
Can I make Seafood Lovers’ Dream Alfredo ahead of time?
Yes, you can prepare some parts in advance. Cook the pasta and seafood separately. Store them in airtight containers in the fridge. When you are ready to eat, simply reheat the seafood and sauce, then toss with the pasta. This keeps everything fresh and tasty.
What can I serve with Seafood Lovers’ Dream Alfredo?
Pair this rich dish with a simple side salad or garlic bread. The fresh crunch of a garden salad complements the creamy pasta. Garlic bread adds a nice touch for sopping up that delicious sauce. You can also serve with steamed vegetables for a healthy balance.
Can I customize the seafood ingredients?
Absolutely! You can swap shrimp for lobster or crab for clams. Feel free to mix in your favorite seafood. Just make sure to adjust cooking times as needed. You can also add veggies like spinach or sun-dried tomatoes for extra flavor.
This blog post covered how to make a delicious Seafood Lovers’ Dream Alfredo. We discussed the ingredients, from fettuccine pasta to your favorite seafood. I shared step-by-step cooking instructions to ensure success. You also learned tips for choosing seafood and perfecting your sauce.
Remember, cooking should be fun. Don’t hesitate to make it your own. Enjoy your meal and impress your friends with this tasty dish. Happy cooking!


