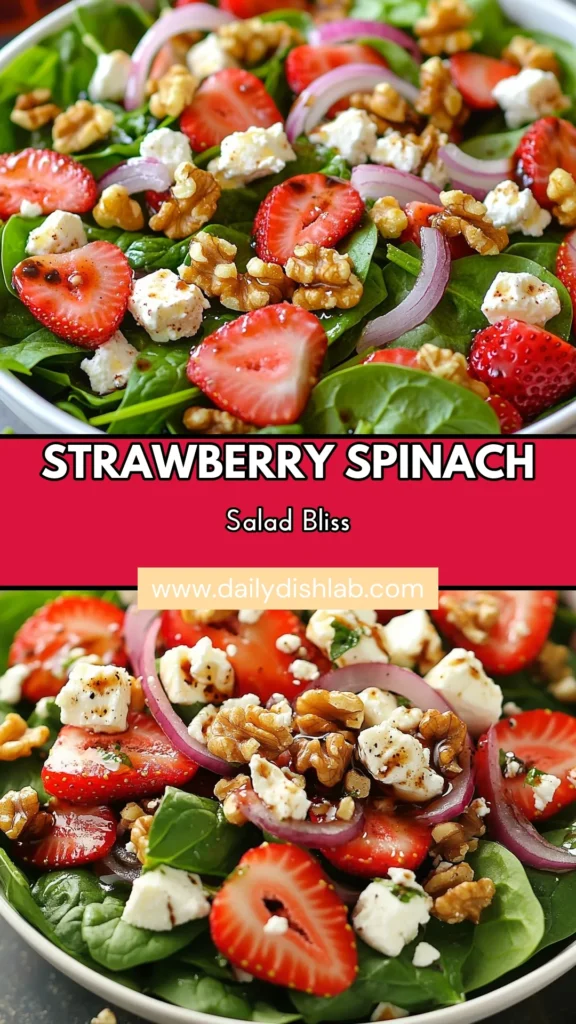
Savory Spinach Strawberry Feta Salad Treat
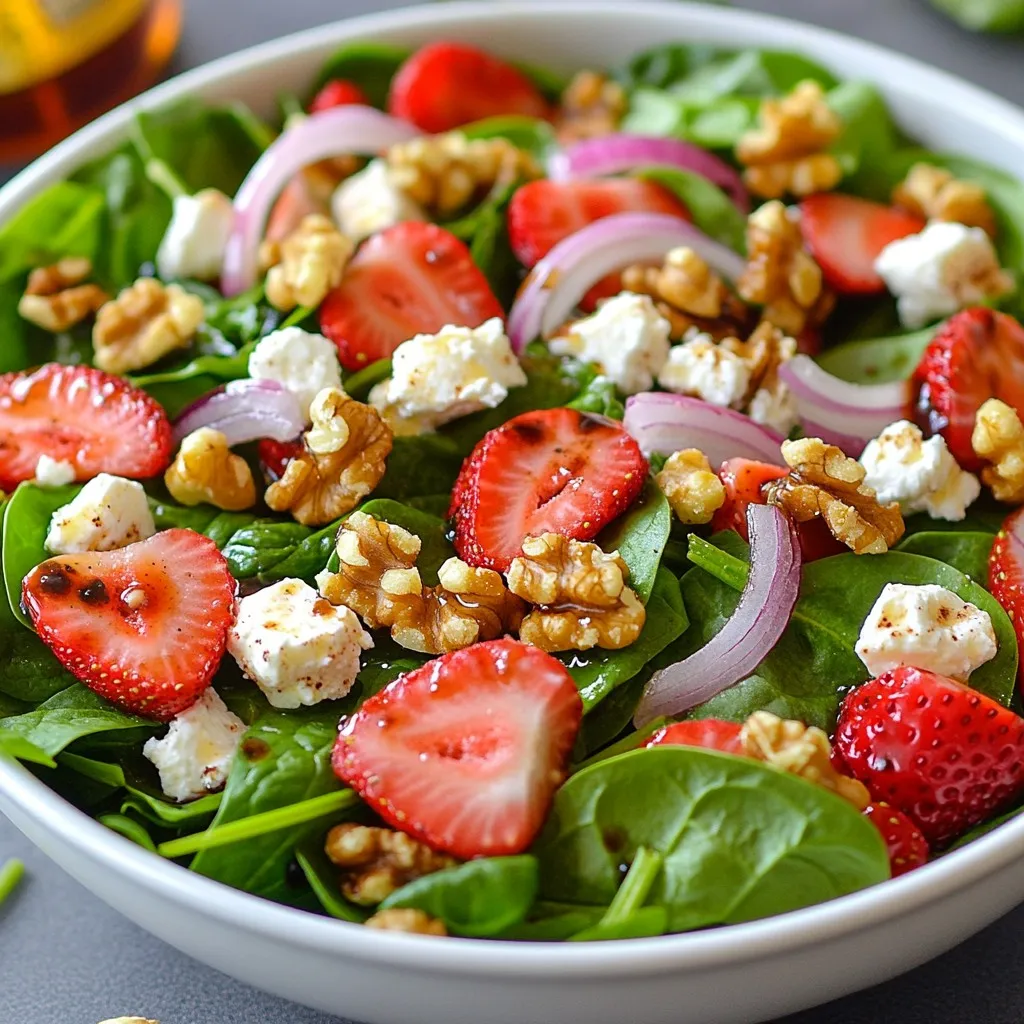
Are you ready for a fresh and tasty treat? This Savory Spinach Strawberry Feta Salad packs a punch of flavor and nutrition. With fresh spinach, sweet strawberries, and creamy feta, it’s a delightful blend of textures and tastes. Plus, it’s simple to make! In this guide, I’ll walk you through the ingredients, steps, and tips to elevate your salad game. Let’s dive in and make something delicious!
Why I Love This Recipe
- Freshness: This salad is packed with fresh ingredients that provide a vibrant and energizing meal.
- Flavor Combination: The sweet strawberries paired with tangy feta create a delightful contrast that excites the palate.
- Quick and Easy: With just 10 minutes of prep time, this recipe is perfect for a quick lunch or dinner.
- Nutrient-Rich: This salad is loaded with vitamins, minerals, and healthy fats, making it a wholesome choice.
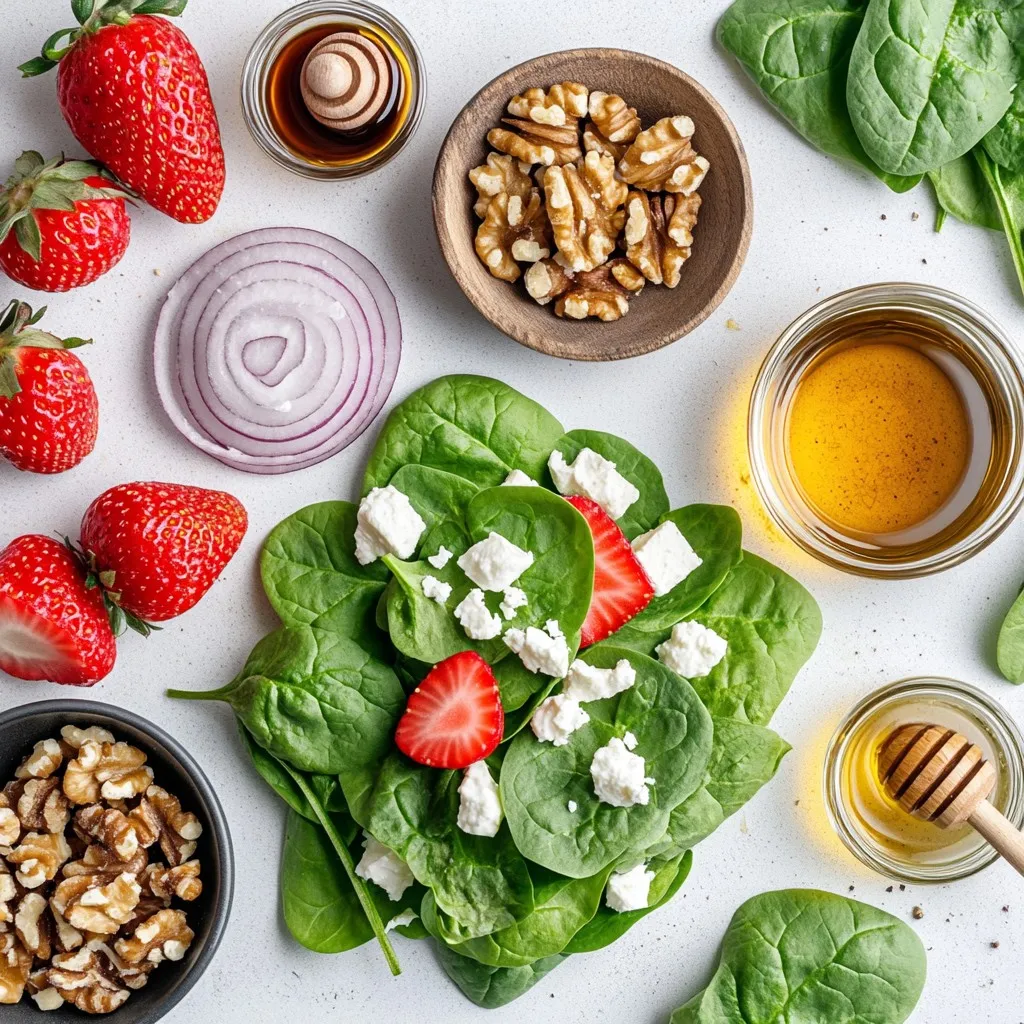
Ingredients
Fresh Produce
- 4 cups fresh baby spinach
- 1 cup strawberries
Dairy & Nuts
- 1/2 cup crumbled feta cheese
- 1/4 cup walnuts
Condiments & Seasoning
- 1/4 cup red onion
- 2 tablespoons balsamic vinegar
- 2 tablespoons olive oil
- 1 teaspoon honey
- Salt and pepper to taste
The key to a great spinach strawberry feta salad starts with fresh produce. You need four cups of fresh baby spinach. This tender green is the base of your salad. It brings a nice texture and taste.
Next, grab a cup of strawberries. They must be hulled and sliced. Their sweet flavor pairs perfectly with the spinach.
For the dairy and nuts, you can’t miss the feta cheese. Half a cup of crumbled feta adds creaminess and a salty kick. The walnuts, about a quarter cup, add crunch and richness.
Now for the condiments and seasoning. You’ll need a quarter cup of red onion, thinly sliced. This adds a zing to the mix.
For the dressing, use two tablespoons of balsamic vinegar and two tablespoons of olive oil. These two will give your salad a wonderful depth of flavor. Don’t forget one teaspoon of honey to balance the acidity.
Finally, season with salt and pepper to taste. This simple yet satisfying mix of ingredients makes your salad burst with flavor. Enjoy the freshness in every bite!
Step-by-Step Instructions
Preparing the Ingredients
Start by rinsing and drying the fresh baby spinach. Make sure you remove any dirt. It should be crisp and clean. Next, hull the strawberries by removing their green tops. Then, slice the strawberries into thin pieces. This makes them easy to mix into the salad.
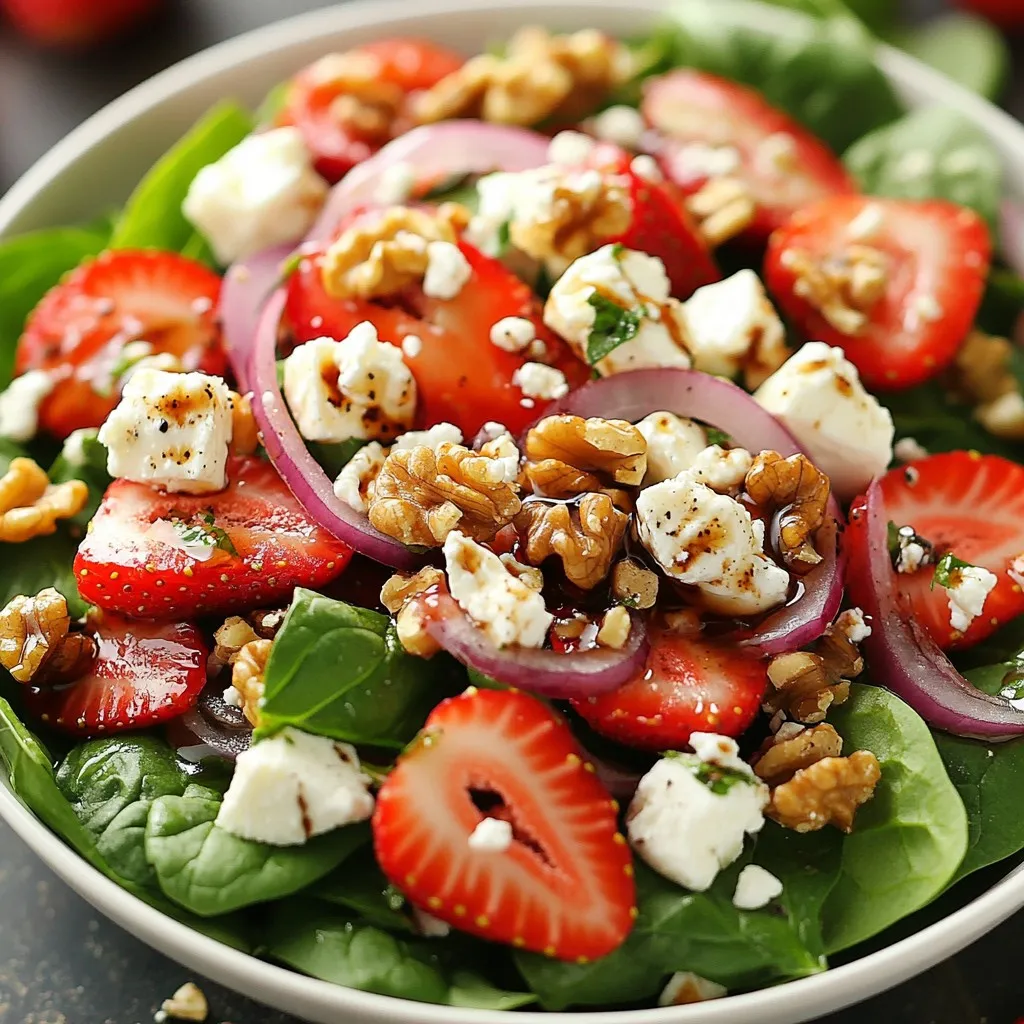
Assembling the Salad
Now, grab a large salad bowl. Layer the rinsed spinach as the base. Then, add the sliced strawberries on top of the spinach. Make sure they are spread out evenly. Next, sprinkle crumbled feta cheese over the strawberries and spinach. This adds a nice creamy texture. After that, add thinly sliced red onion and roughly chopped walnuts. They give extra flavor and crunch.
Making the Dressing
In a small bowl, whisk together the balsamic vinegar and olive oil. Then, add honey, salt, and pepper. Whisk until everything is mixed well. This dressing will bring all the flavors together. Drizzle the dressing over the salad right before serving. This helps keep the spinach fresh. Finally, gently toss the salad with tongs. Make sure all the ingredients are coated with the dressing. Enjoy this bright and tasty salad!
Tips & Tricks
Ensuring Freshness
To keep your salad fresh, add the dressing just before serving. This step prevents the spinach from wilting. Use fresh ingredients for the best flavor. Look for bright green spinach and ripe strawberries. Fresh feta cheese adds a creamy touch. Always check the dates on your produce.
Enhancing Flavor and Texture
You can adjust the salad to suit your taste. If you like more sweetness, add extra honey. Want a bit of heat? Try a pinch of red pepper flakes. For a different crunch, swap walnuts for almonds or pecans. You can also add cucumber slices for extra freshness. Consider adding avocado for creaminess.
Pro Tips
- Fresh Ingredients Matter: Use the freshest spinach and strawberries available for the best flavor and nutrition.
- Customize Your Nuts: Feel free to substitute walnuts with pecans or almonds based on your preference.
- Make It a Meal: To turn this salad into a complete meal, consider adding grilled chicken or chickpeas for protein.
- Keep It Crisp: Dress the salad just before serving to prevent the spinach from wilting and maintain its crisp texture.
Variations
Seasonal Adaptations
You can swap strawberries for other fruits. Blueberries work great in summer. Peaches add a sweet touch in late summer. Each fruit gives the salad a new flavor. Try mixing fruits for a colorful dish. This keeps the salad fresh and fun.
Dietary Modifications
For a vegan salad, skip the feta cheese. Use avocado or chickpeas for creaminess. You can also add a sprinkle of nutritional yeast for a cheesy taste. For gluten-free options, ensure your nuts are certified gluten-free. This way, everyone can enjoy the salad.
Changing the Crunch
If you want a different crunch, switch up the nuts. Almonds or pecans add nice flavors. You can also use seeds like sunflower or pumpkin seeds. They give a tasty twist while adding crunch. Each option helps you customize your salad to your liking.
Storage Info
Leftover Storage
To keep your salad fresh, store leftovers right away. Use an airtight container to seal in flavors. Glass or plastic containers work well. Make sure to separate the dressing if possible. This keeps the spinach crisp and the strawberries juicy. You can store the salad in the fridge for up to two days. Check for any wilting or browning before you eat.
Reheating Guidance
Salad is best served cold, so do not heat it. If you want to refresh it, add a splash of dressing. This helps revive the taste and texture. Toss it gently to mix in the new dressing. Avoid letting the salad sit for too long after adding dressing. This stops the spinach from wilting. Enjoy your salad while it is still bright and fresh!
FAQs
How to make Spinach Strawberry Feta Salad?
To make this salad, start by washing and drying the spinach. Place it in a large bowl. Next, add the sliced strawberries on top of the spinach. Then, sprinkle crumbled feta cheese over the strawberries. After that, add thinly sliced red onion and chopped walnuts for extra flavor. In a small bowl, mix balsamic vinegar, olive oil, honey, salt, and pepper. Pour this dressing over the salad just before serving. Finally, toss the salad gently with tongs to coat all ingredients.
What are some possible variations for this salad?
You can customize this salad in many ways. Here are some ideas:
- Swap strawberries for blueberries or peaches for a different fruit flavor.
- Use goat cheese instead of feta for a creamier texture.
- Add grilled chicken for protein or chickpeas for a vegetarian option.
- Substitute walnuts with pecans or almonds for a different crunch.
- For a spicy kick, add sliced jalapeños or a dash of red pepper flakes.
Can I prepare this salad in advance?
You can prepare some parts of the salad ahead of time. Wash and dry the spinach, then store it in the fridge to keep it fresh. Slice the strawberries and store them in a separate container. However, wait to mix the salad and add the dressing until just before serving. This keeps the spinach crisp and prevents it from wilting. If you have leftovers, store them in an airtight container in the fridge. Enjoy your salad within a day for the best taste!
This blog post covered how to make a fresh and tasty Spinach Strawberry Feta Salad. We looked at the key ingredients, like spinach, strawberries, and feta. I shared simple steps for preparing and assembling the salad. I also provided tips for keeping it fresh and variations to try. Remember, using fresh ingredients makes a big difference. And you can mix it up based on your taste. Enjoy your salad adventure

Spinach Strawberry Feta Delight
Ingredients
- 4 cups fresh baby spinach, rinsed and dried
- 1 cup strawberries, hulled and sliced
- 0.5 cup crumbled feta cheese
- 0.25 cup red onion, thinly sliced
- 0.25 cup walnuts, roughly chopped
- 2 tablespoons balsamic vinegar
- 2 tablespoons olive oil
- 1 teaspoon honey
- to taste salt and pepper
Instructions
- In a large salad bowl, add the fresh baby spinach as the base.
- Top the spinach with the sliced strawberries, ensuring they are evenly distributed.
- Sprinkle the crumbled feta cheese over the strawberries and spinach.
- Add the thinly sliced red onion and chopped walnuts for extra crunch and flavor.
- In a small bowl, whisk together the balsamic vinegar, olive oil, honey, salt, and pepper until well combined.
- Drizzle the dressing over the salad just before serving to keep the spinach fresh.
- Gently toss the salad using tongs to ensure all ingredients are coated with the dressing.
- Serve immediately for the best flavor and texture.


![- 2 large sweet potatoes, peeled and cut into thin fries - 2 tablespoons olive oil - 1 teaspoon paprika - 1 teaspoon garlic powder - ½ teaspoon cayenne pepper (optional for heat) - Salt and pepper to taste - 1 ripe avocado - 2 tablespoons Greek yogurt - 1 tablespoon lime juice - 1 small clove garlic, minced - Fresh cilantro for garnish To make sweet potato fries, you need a few simple items. Start with large sweet potatoes. They bring a nice sweetness and vibrant color. Olive oil helps achieve a crispy texture. Spices like paprika and garlic powder add flavor. If you like heat, cayenne pepper is optional. For the avocado dip, grab a ripe avocado. It should feel soft when you press it gently. Greek yogurt makes the dip creamy and adds protein. Lime juice gives it a zesty kick. A small clove of garlic adds depth to the flavor. Finally, fresh cilantro can brighten your dish. With these ingredients, you can create a tasty snack or side dish. The flavors mix well and complement each other perfectly. If you want to see the complete recipe, check out the Full Recipe section. First, I preheat the oven to 425°F (220°C). This step is key for crispy fries. Next, I line a baking sheet with parchment paper. It helps the fries not stick. Now, I take 2 large sweet potatoes. I peel them and cut them into thin fries. Aim for about 1/4-inch thick. This size ensures even cooking. In a large bowl, I mix the fries with olive oil, paprika, garlic powder, cayenne pepper, salt, and pepper. I toss everything together until the fries are well coated. This blend adds a tasty kick. I spread the fries out in a single layer on the baking sheet. This step keeps them from steaming. I bake the fries for about 25-30 minutes. Halfway through, I flip them for even cooking. They should turn golden and crispy. To achieve optimal crispiness, I avoid overcrowding the baking sheet. If fries touch, they won’t crisp up. While the fries bake, I make the avocado dip. I grab a ripe avocado and mash it in a small bowl. I aim for a smooth texture. Next, I add Greek yogurt, lime juice, minced garlic, salt, and pepper to the mashed avocado. I stir everything until creamy. This dip adds a fresh flavor. For tips, I suggest adjusting the garlic to your liking. You want a balance of flavors that complements the fries. Once the fries are done, I serve them hot with the avocado dip. The combination is simply delightful! For the complete recipe, check out the [Full Recipe]. To get crispy sweet potato fries, you must not overcrowd the baking sheet. When fries sit on top of each other, they steam instead of bake. This makes them soggy, not crispy. Spread them out in a single layer with space in between. Cooking times can vary. Most ovens will take about 25 to 30 minutes at 425°F (220°C). Check them halfway through and flip for even cooking. If your oven runs hot or cold, adjust the time as needed. Adding spices can make your sweet potato fries pop. Try sprinkling on some cinnamon or chili powder for a tasty twist. You can also toss in some fresh herbs like rosemary or thyme. Looking for toppings? Grated parmesan cheese or crumbled feta can add great flavor. A drizzle of balsamic glaze or hot sauce can also elevate the dish. You can prep your sweet potato fries in advance. Cut and season them, then store them in the fridge for up to 24 hours. When ready, bake them straight from the fridge; just add a few extra minutes to the cooking time. For serving, consider a fun presentation. Use a large platter with the fries piled high. Place the avocado dip in a bowl in the center, garnished with fresh cilantro. It makes a great visual and invites everyone to dig in. For the full recipe, check out the link provided. {{image_2}} You can make your sweet potato fries spicy by adding heat. Use chili powder for a smoky kick. You can also try cayenne pepper for a fiery burst. If you prefer a wet heat, drizzle hot sauce on the fries before baking. This will give them a zesty flavor. Mix and match these spices to find your perfect heat level. While the avocado dip is creamy and tasty, you can explore other options. A yogurt-based dip adds a tangy twist and pairs well with fries. Try mixing Greek yogurt with herbs like dill or mint for a fresh taste. Tahini also makes a great dip. It brings a nutty flavor that complements sweet potatoes nicely. Sweet potatoes are not alone! You can mix them with other veggies for a colorful twist. Try adding carrot or zucchini fries to the mix. This not only adds flavor but also boosts nutrition. Cut them into similar sizes to ensure even cooking. This way, you get a rainbow of flavors and textures on your plate. For the full recipe, check out the details above. Enjoy your delicious and fun variations! Sweet potato fries can stay fresh in the fridge for up to three days. To store them, place the fries in an airtight container. This keeps them from getting soggy and helps maintain flavor. Always let the fries cool completely before sealing them. This prevents steam buildup, which can make them mushy. To reheat sweet potato fries and keep them crispy, use an oven or an air fryer. Preheat your oven to 400°F (200°C). Spread the fries on a baking sheet in a single layer. Bake for about 10 minutes or until heated through. If using an air fryer, set it to 350°F (175°C) and cook for about 5-7 minutes. Avoid using a microwave, as it makes fries soft and chewy. To freeze sweet potato fries, first, bake them as you would for the recipe. Allow them to cool completely. Then, spread the fries in a single layer on a baking sheet and freeze for about an hour. Once frozen, transfer the fries to a freezer bag. Seal it tightly, removing as much air as possible. When you want to enjoy them, reheat straight from the freezer. Bake at 425°F (220°C) for 25-30 minutes, flipping halfway through. This method keeps them tasty and crisp. For the full recipe, check out the link provided. Yes, you can use orange sweet potatoes. They are similar to yellow sweet potatoes but have a sweeter flavor. Orange sweet potatoes, like the Beauregard variety, are rich in beta-carotene. This gives them a vibrant color and a slightly different taste. You can use them in the same way as regular sweet potatoes. Just peel them, cut them into fries, and season as usual. To boost the flavor of your fries, try adding extra seasonings. Consider these options: - Cumin for a warm, earthy taste. - Chili powder for a spicy kick. - Dried rosemary for a savory note. - Parmesan cheese for a rich, cheesy flavor. Experiment with combinations to find your perfect mix! If you don’t have Greek yogurt, there are great substitutes for the avocado dip. You can use: - Sour cream for a tangy taste. - Plain yogurt if you want a lighter option. - Cottage cheese for added protein and creaminess. These alternatives will keep your dip creamy and delicious. For the complete recipe on how to make sweet potato fries with avocado dip, visit the [Full Recipe](#). In this post, we explored how to make crispy sweet potato fries and a tasty avocado dip. We discussed key ingredients, step-by-step instructions, helpful tips, and variations to enhance your dish. You can adapt the flavors to your taste by using different spices or dips. Making these fries at home is easy and fun. Remember, proper storage and reheating keep them crispy. Enjoy your cooking adventure with sweet potatoes and make each serving special!](https://dailydishlab.com/wp-content/uploads/2025/07/b71090ff-edcb-4680-b017-d44004cc0ae0-768x768.webp)

![- 1 pound ground beef (or turkey) - 1/2 cup breadcrumbs (plain or seasoned) - 1/4 cup grated Parmesan cheese - 1/4 cup finely chopped onion - 1 egg - 2 cloves garlic, minced The main ingredients for honey garlic slow cooker meatballs are simple yet flavorful. Ground beef or turkey serves as a great base, giving the meatballs a hearty texture. I like to use breadcrumbs to hold everything together while adding a nice crunch. Adding grated Parmesan cheese gives the meatballs a savory kick. Finely chopped onion and minced garlic infuse rich flavors that blend perfectly. Finally, one egg binds all these ingredients and keeps the meatballs moist. - 1/3 cup honey - 1/4 cup soy sauce (or tamari for gluten-free) - 1 tablespoon apple cider vinegar - 1 teaspoon ground ginger - 1/4 teaspoon black pepper For the sauce, honey is the star. Its sweetness balances well with the salty soy sauce. You can use tamari if you want a gluten-free option. A splash of apple cider vinegar adds a tangy note, while ground ginger brings warmth and depth. Just a sprinkle of black pepper rounds out the flavors nicely. - Chopped green onions - Sesame seeds Garnishes can elevate your dish. Chopped green onions add a fresh crunch, while sesame seeds give a nice nutty flavor. You can add these right before serving for a beautiful finish. For the full recipe, refer to [Full Recipe]. - Combine the main ingredients in a bowl. Mix 1 pound of ground beef or turkey, 1/2 cup of breadcrumbs, 1/4 cup of grated Parmesan cheese, 1/4 cup of finely chopped onion, 1 egg, and 2 minced garlic cloves. - Form the mixture into small meatballs, about 1 inch in diameter. Set them aside on a plate. - In a separate bowl, whisk together the sauce ingredients. Mix 1/3 cup of honey, 1/4 cup of soy sauce, 1 tablespoon of apple cider vinegar, 1 teaspoon of ground ginger, and 1/4 teaspoon of black pepper. - Place the meatballs in the slow cooker. Arrange them in a single layer for even cooking. - Pour the honey garlic sauce over the meatballs. Make sure they are well coated. - Cook on low for 4-5 hours or on high for 2-3 hours. Check that the meatballs are cooked through and tender. - After cooking, gently stir the meatballs. Let them soak up the sauce for about 10 minutes before serving. - Garnish with chopped green onions and sesame seeds if you want. Enjoy these tasty bites! For the full recipe, check out the detailed instructions. To make great honey garlic meatballs, start by ensuring even cooking. This means forming your meatballs to the same size. Aim for about one inch in diameter. This way, they cook at the same rate. If you make them too big, they may not cook through. For cooking time, I recommend using low heat for about 4 to 5 hours. If you are short on time, use high heat for 2 to 3 hours. Either way, check the meatballs near the end. They should be tender and fully cooked. You can also use a meat thermometer to check for doneness. The internal temperature should reach 165°F. Honey garlic meatballs shine with simple sides. Serve them with steamed rice, noodles, or even a fresh salad. These pair well with the sweet and savory flavors of the meatballs. For presentation, arrange the meatballs on a large platter. Drizzle extra sauce over them for a glossy look. Sprinkle chopped green onions and sesame seeds on top. This adds color and a fresh crunch. When making meatballs, some issues may pop up. If your meatballs fall apart, it could be too much moisture. Ensure you use the right amount of breadcrumbs. Another common problem is dry meatballs. This can happen if you overcook them. Always check your cooking time and temperature. If they seem dry, serve them with more sauce to help. These tips can guide you through making perfect honey garlic slow cooker meatballs. For the full recipe, check back to the main section. {{image_2}} You can easily switch the meat you use. Ground turkey works well instead of beef. If you want a plant-based option, use lentils or chickpeas. Both are tasty and healthy. When it comes to breadcrumbs, you can use gluten-free options. Look for gluten-free bread or crushed rice crackers. This swap keeps the dish friendly for those with gluten issues. To boost the taste, think about adding spices. A pinch of red pepper flakes gives a nice kick. Fresh herbs like basil or cilantro can add a fresh twist. You can also adjust the sweetness. If you want it less sweet, cut back on the honey. To add saltiness, consider a splash more soy sauce. Each of these changes can make your dish unique. You don’t have to use a slow cooker for this recipe. You can bake the meatballs in the oven. Just preheat it to 400°F. Place the meatballs on a baking sheet. Bake for about 20 minutes until they are golden brown. For stovetop cooking, heat a skillet over medium heat. Brown the meatballs on all sides. Then add the sauce and simmer until cooked through. Each method brings a different texture and flavor to the dish. Remember, you can find the full recipe in the earlier section. To store leftover meatballs, place them in an airtight container. Make sure to cover them well. This keeps the meatballs fresh and tasty. You can store them in the fridge for up to 4 days. If you want to enjoy them later, freezing may be a better choice. For the best results, freeze meatballs in a single layer on a baking sheet. Once they are frozen, place them in a freezer bag. This helps prevent them from sticking together. You can freeze them for up to 3 months. When you're ready to eat, thaw the meatballs in the fridge overnight. Reheat them in the slow cooker or microwave until hot. Preparing ahead is a great way to save time. You can mix and form the meatballs a day in advance. Just store them in the fridge until you're ready to cook. Portioning is also key. Consider making small bags with the right amount for meals. This makes it easy for quick dinners during busy days. For a delightful meal, try the Full Recipe for Honey Garlic Slow Cooker Meatballs. You can tell meatballs are done by checking their internal temperature. Use a meat thermometer. The safe temperature for ground meat is 165°F (74°C). Insert the thermometer into the center of a meatball. If it reads 165°F, they are ready to eat. If not, cook them a bit longer. Yes, you can prepare honey garlic meatballs in advance. Mix the meatball ingredients and form them into balls. Place them in the fridge for up to 24 hours before cooking. You can also freeze them for later. Just thaw them in the fridge overnight before cooking. This saves time on busy days. Definitely! You can swap ground beef for turkey or a plant-based option. For gluten-free diets, use gluten-free breadcrumbs and tamari instead of soy sauce. If you prefer less sugar, reduce the amount of honey or use a sugar-free substitute. There are many options to fit your needs. Honey garlic meatballs pair well with various side dishes. Here are some great options: - Steamed rice or quinoa - Roasted vegetables - Noodles, like rice or soba - A fresh green salad - Mashed potatoes These sides complement the sweet and savory flavors of the meatballs. Enjoy mixing and matching to find your favorite combination! For the complete recipe, check the Full Recipe section. This blog post covered how to make juicy honey garlic meatballs. We explored the main ingredients, including ground beef and Parmesan cheese. Then, we discussed the sauce, which combines honey and soy sauce, and provided cooking tips. Plus, we shared variations and storage tips for leftovers. Whether you follow the recipe or make your own tweaks, you can enjoy delicious meatballs. Now, it's your turn to try this easy dish and share it with your loved ones!](https://dailydishlab.com/wp-content/uploads/2025/07/f340aba1-8a32-460a-95c5-e4b0f40aca57-768x768.webp)